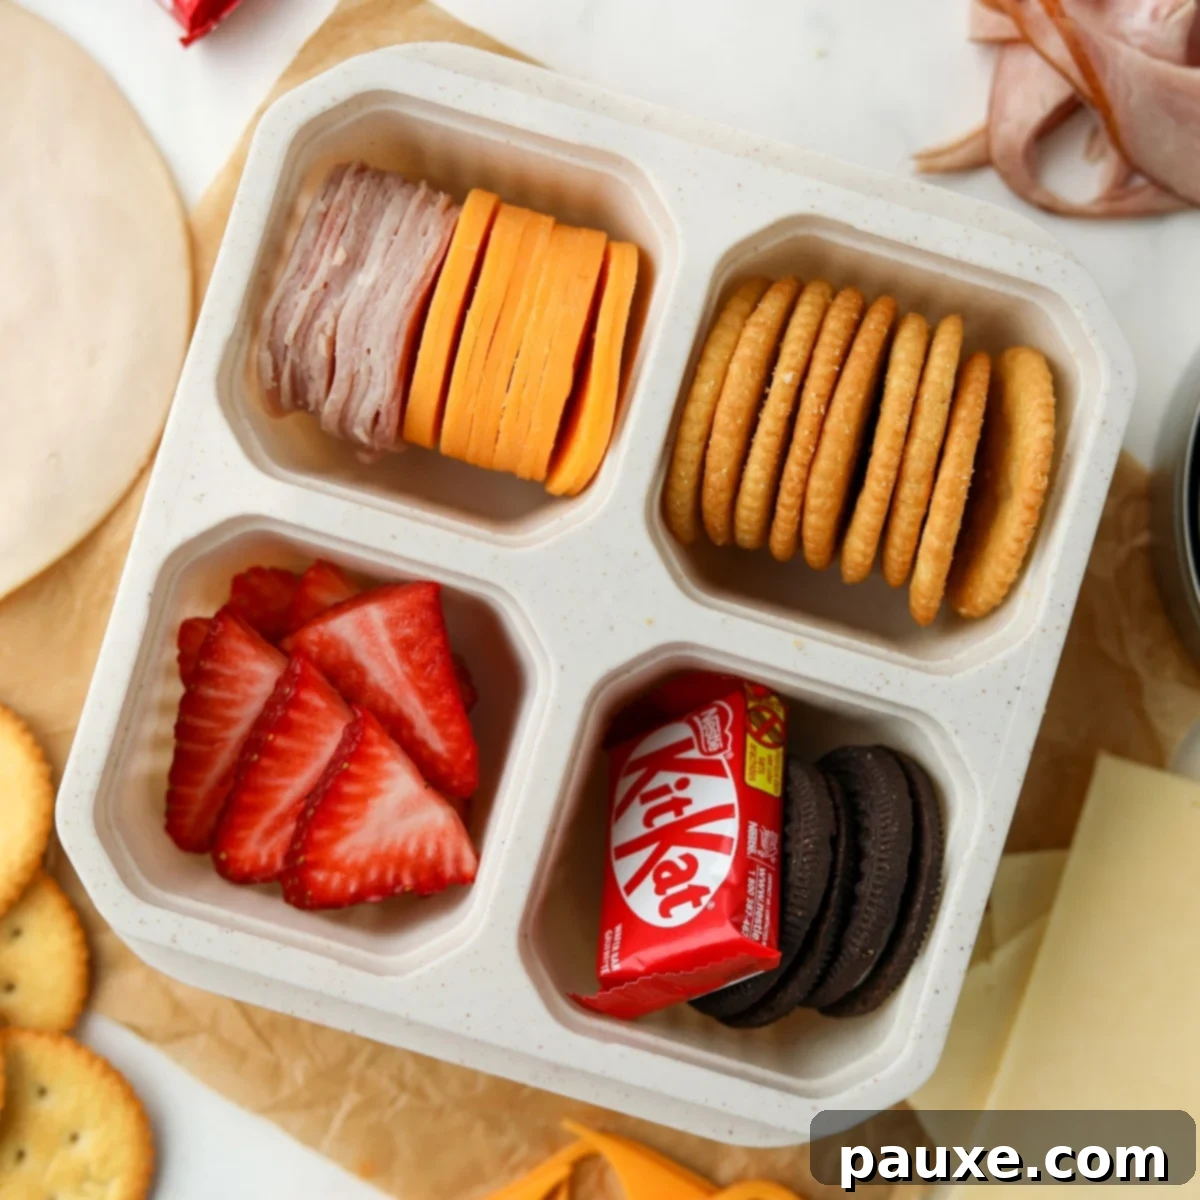
Ultimate Guide to Homemade Lunchables: Fun, Easy, and Budget-Friendly Meal Prep
Gone are the days when convenient, grab-and-go lunches meant reaching for expensive, pre-packaged options. This comprehensive guide to making homemade Lunchables covers not only all the beloved classic flavors but also introduces a sophisticated “Adult” version that will impress even the most discerning palates. Whether you’re craving the simple joy of cheese and crackers, the zesty delight of mini pizzas, the crunch of nachos, or a more elegant charcuterie-inspired selection, these DIY creations offer a fantastic solution for efficient meal prep, ensuring you have delicious, ready-to-eat options throughout your busy week.
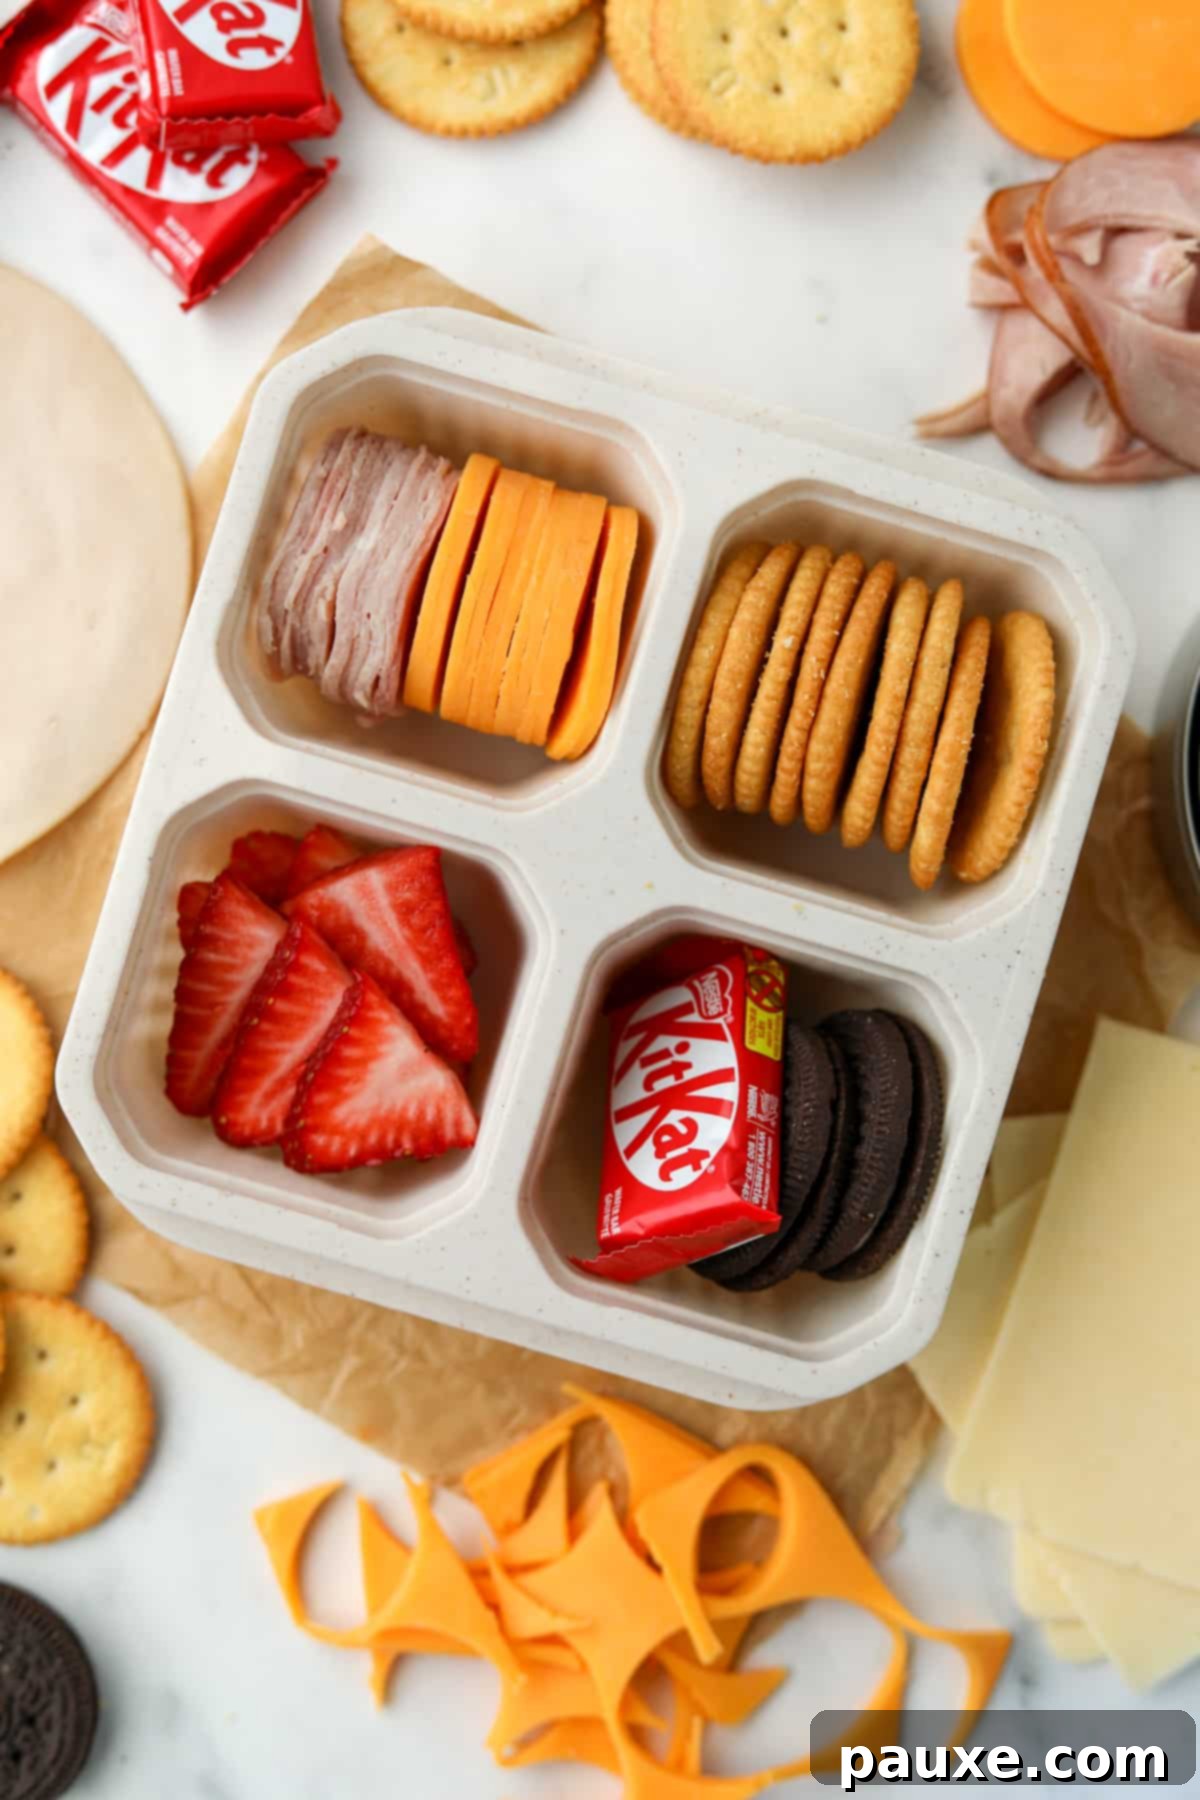
Like many who appreciate both convenience and quality, you’ve likely wondered if there’s a better way to enjoy the classic Lunchable concept without constantly buying them from the store. While store-bought versions are undoubtedly handy for road trips, school lunches, or quick snacks, their cost can quickly add up, and the ingredient quality isn’t always optimal. That’s why embarking on a journey to create your own DIY Lunchables is a game-changer.
My own experiments led to a delightful discovery: not only are homemade Lunchables incredibly easy to assemble, but they actually taste infinitely better! By choosing your preferred type of crackers (we highly recommend savory Ritz or gourmet Raincoast Crisps for an elevated touch), you unlock an easy lunch idea that’s perfect for make-ahead meal preparation. You’ll have complete control over the freshness and quality of every component, transforming a simple snack into a satisfying and wholesome meal.
To replicate the iconic look and maximize convenience, I invested in 4-section reusable containers from Amazon. However, the beauty of homemade lies in its adaptability. You can effortlessly assemble these culinary kits in any sectioned lunch container or bento box you already own, making them an accessible option for everyone.
Why You Should Embrace Homemade Lunchables: Unbeatable Benefits for Every Lifestyle
Opting to make your own Lunchables isn’t just a fun kitchen project; it’s a smart lifestyle choice that offers numerous advantages:
- Significant Cost Savings: This is perhaps one of the most compelling reasons. The price per serving for a homemade Lunchable is substantially lower than its store-bought counterpart. You buy ingredients in bulk, reduce packaging waste, and avoid the premium charged for pre-assembly, putting more money back in your pocket over time.
- Superior Taste and Quality Control: When you craft your own, you become the executive chef. This means you have the power to select premium ingredients, from high-quality deli meats and artisanal cheeses to fresh fruits and your favorite crackers. The result? A noticeable improvement in flavor and texture, turning a basic lunch into a truly enjoyable experience. You can choose organic, local, or specialized ingredients to elevate the taste even further.
- Endless Customization and Dietary Flexibility: Homemade Lunchables are incredibly versatile. Whether you’re accommodating a gluten-free diet, managing food allergies, avoiding specific ingredients, or simply catering to picky eaters, you have full control. Want to create a sophisticated “adult lunchable” with gourmet cheeses and charcuterie? Easily done! Need a vegetarian or vegan option? Absolutely possible. The possibilities are truly limitless, making them suitable for everyone in the family, from toddlers to teenagers and adults.
- Healthier Choices: Store-bought Lunchables often contain preservatives, artificial flavors, and high levels of sodium. By making your own, you can choose leaner meats, whole-grain crackers, fresh produce, and healthier sweet treats, ensuring a more nutritious and balanced meal. You know exactly what’s going into your body, making it easier to maintain a healthy diet.
Essential Ingredients and Equipment for Your DIY Lunchable Adventure
The specific items you’ll need will vary depending on the exciting type of Lunchable you’re crafting:
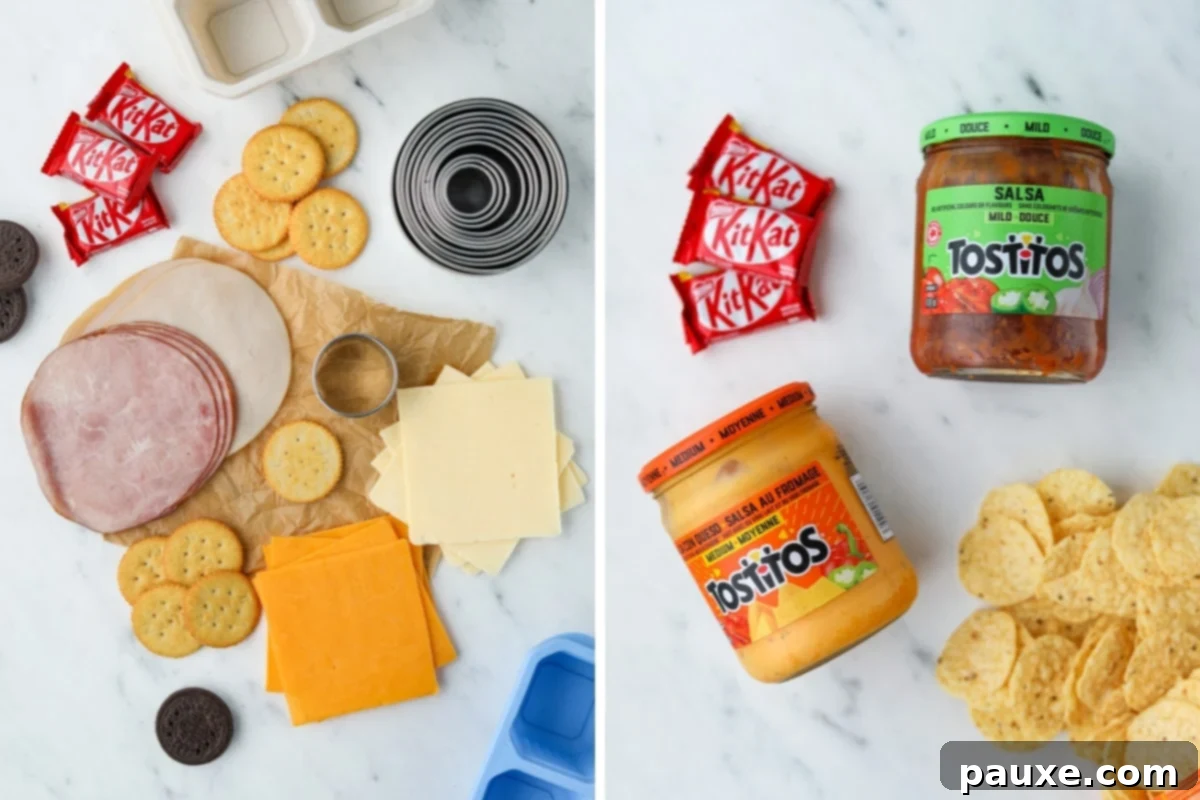
Classic “Cheese and Crackers” Lunchable:
- High-quality sliced deli meat (turkey, ham, chicken, pepperoni)
- Your favorite sliced cheese (cheddar, provolone, havarti, colby jack)
- Crisp crackers (Ritz, Club, butter crackers, or whole-wheat options)
- A delightful sweet treat (mini chocolate bar, small cookie, fruit snacks)
- Optional: Fresh fruit slices or berries for added nutrition and color.
Homemade Nacho Lunchables:
- Crunchy tortilla chip rounds (smaller rounds fit better in compartments)
- Creamy queso dip (store-bought or homemade)
- Fresh salsa (mild, medium, or spicy, to taste)
- A sweet treat of choice (optional, to balance the savory flavors)
- Optional: Sliced black olives, jalapeños, or a dollop of sour cream/Greek yogurt.
DIY Pizza Lunchables:
- Sturdy, wide crackers (such as water crackers or pita crisps) or mini pita breads
- Flavorful pizza sauce (marinara or pre-made pizza sauce)
- Shredded cheese (mozzarella, Italian blend, or provolone)
- A small sweet treat to complete the meal
- Optional: Mini pepperoni, cooked sausage crumbles, or diced bell peppers.
“Adult” Charcuterie-Style Lunchables:
- Gourmet crackers (Raincoast Crisps, artisanal flatbreads, or seeded crackers)
- Selection of charcuterie-style meats (salami, prosciutto, capicola, smoked turkey)
- Assorted sliced cheeses (brie, goat cheese, sharp cheddar, aged gouda)
- Mixed nuts, dried fruits, fresh berries, or olives for a sophisticated touch
- Optional: A small portion of honey, fig jam, or a gourmet spread.
Recommended Equipment for Seamless Assembly
Having the right tools can make your Lunchable assembly even quicker and more enjoyable:
- Reusable Lunch Containers: Look for durable 3 or 4-section containers. These are key for keeping ingredients separate and fresh, preventing sogginess and flavor transfer.
- Circular Cutter Set: An invaluable tool for perfectly sized meat and cheese rounds. Alternatively, sharp kitchen scissors and a parchment paper template work wonderfully.
How to Craft Your Own Delightful Homemade Lunchables
Assembling these convenient lunchboxes is surprisingly simple and can be a fun activity to involve the whole family. Let’s start with the timeless classic:
For the Classic “Cheese and Crackers” Style:
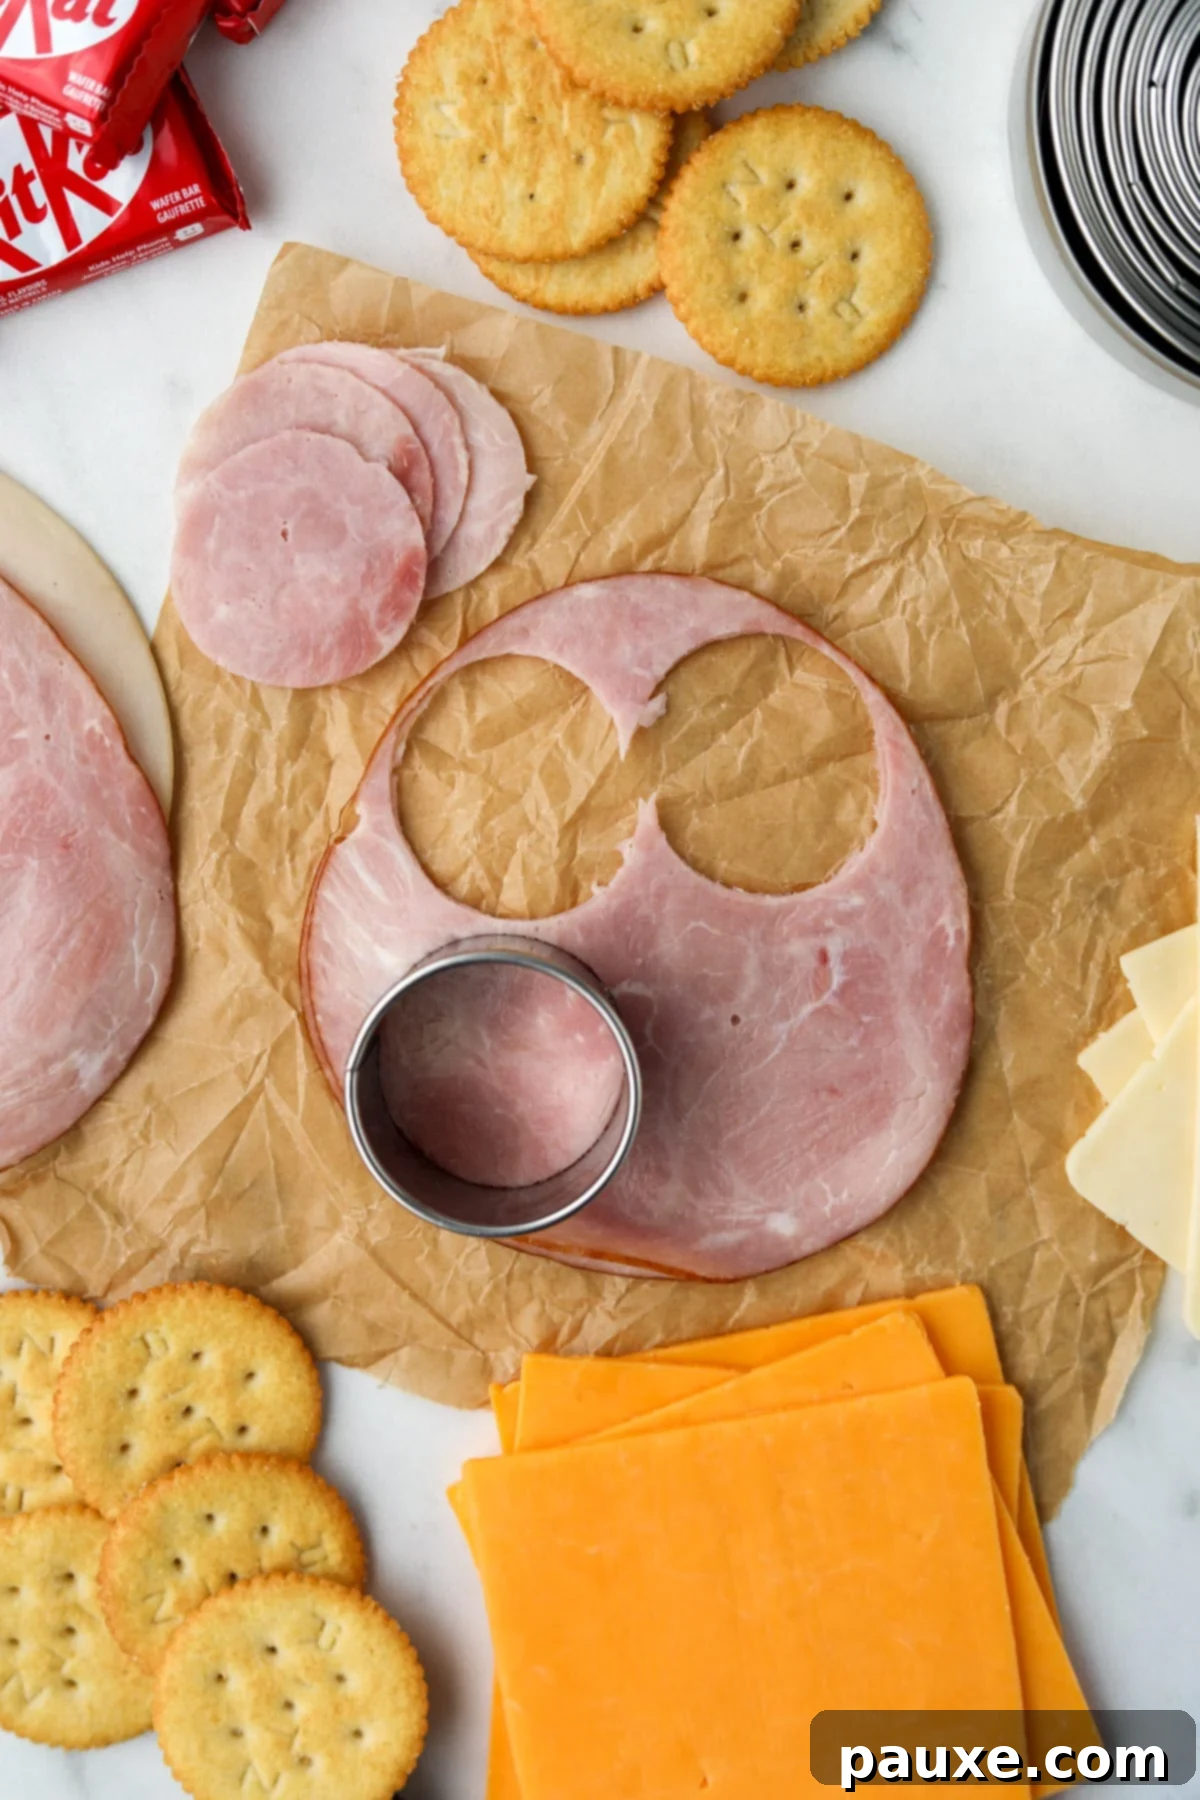
- Step One: Master the Meat Preparation (if applicable)
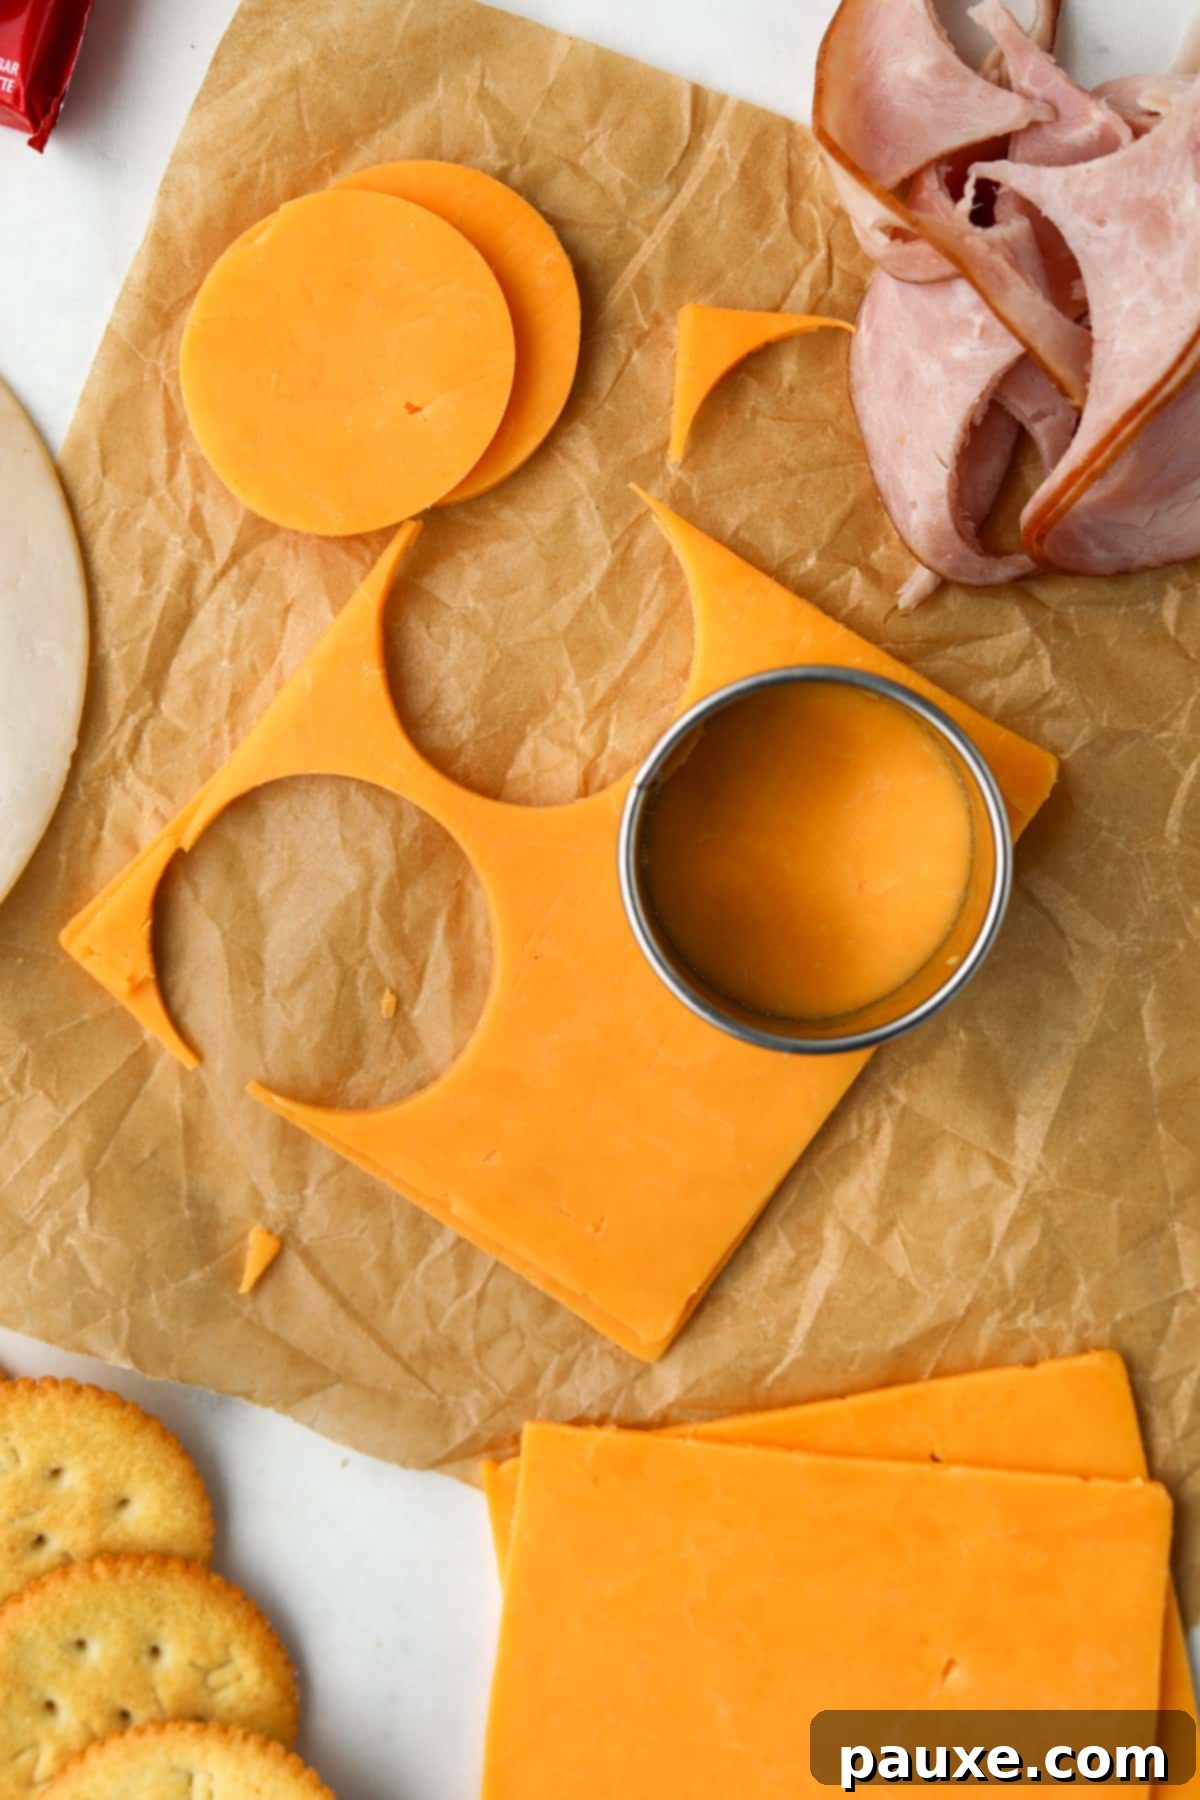
- Begin by selecting a circular cutter that closely matches the size of the crackers you intend to use. Consistency in size ensures a neat and appealing presentation.
- Lay out your chosen deli meat slices (ham, turkey, etc.). Use the round cutter to punch out as many circles as possible from each slice, minimizing waste.
- Repeat this process until you’ve achieved the desired number of meat rounds for your Lunchables.
- No Circular Cutters? No Problem! Simply create a small, circular template using parchment paper. Place this template over your deli meat slices and carefully cut around it with clean kitchen scissors to achieve perfect rounds.
- Step Two: Perfect the Cheese Preparation.
- Utilize the very same circular cutter you used for the deli meat. This guarantees uniform sizes for your cheese and meat, making for a cohesive and easy-to-eat Lunchable.
- Cut out the necessary number of cheese rounds from your sliced cheese.
- As with the meat, if you don’t have a circular cutter, the parchment paper template and kitchen scissors method works perfectly here too.
What to Do with Leftover Meat and Cheese Scraps?
Don’t let those delicious scraps go to waste! They are perfect for an immediate snack, or you can chop them up and incorporate them into a vibrant chopped salad (my Italian Sub Salad is a fantastic option!), a hearty pasta salad, or even use them as a topping for baked potatoes or omelets. Zero waste, maximum flavor!
Effortless Assembly of Your Lunch Containers
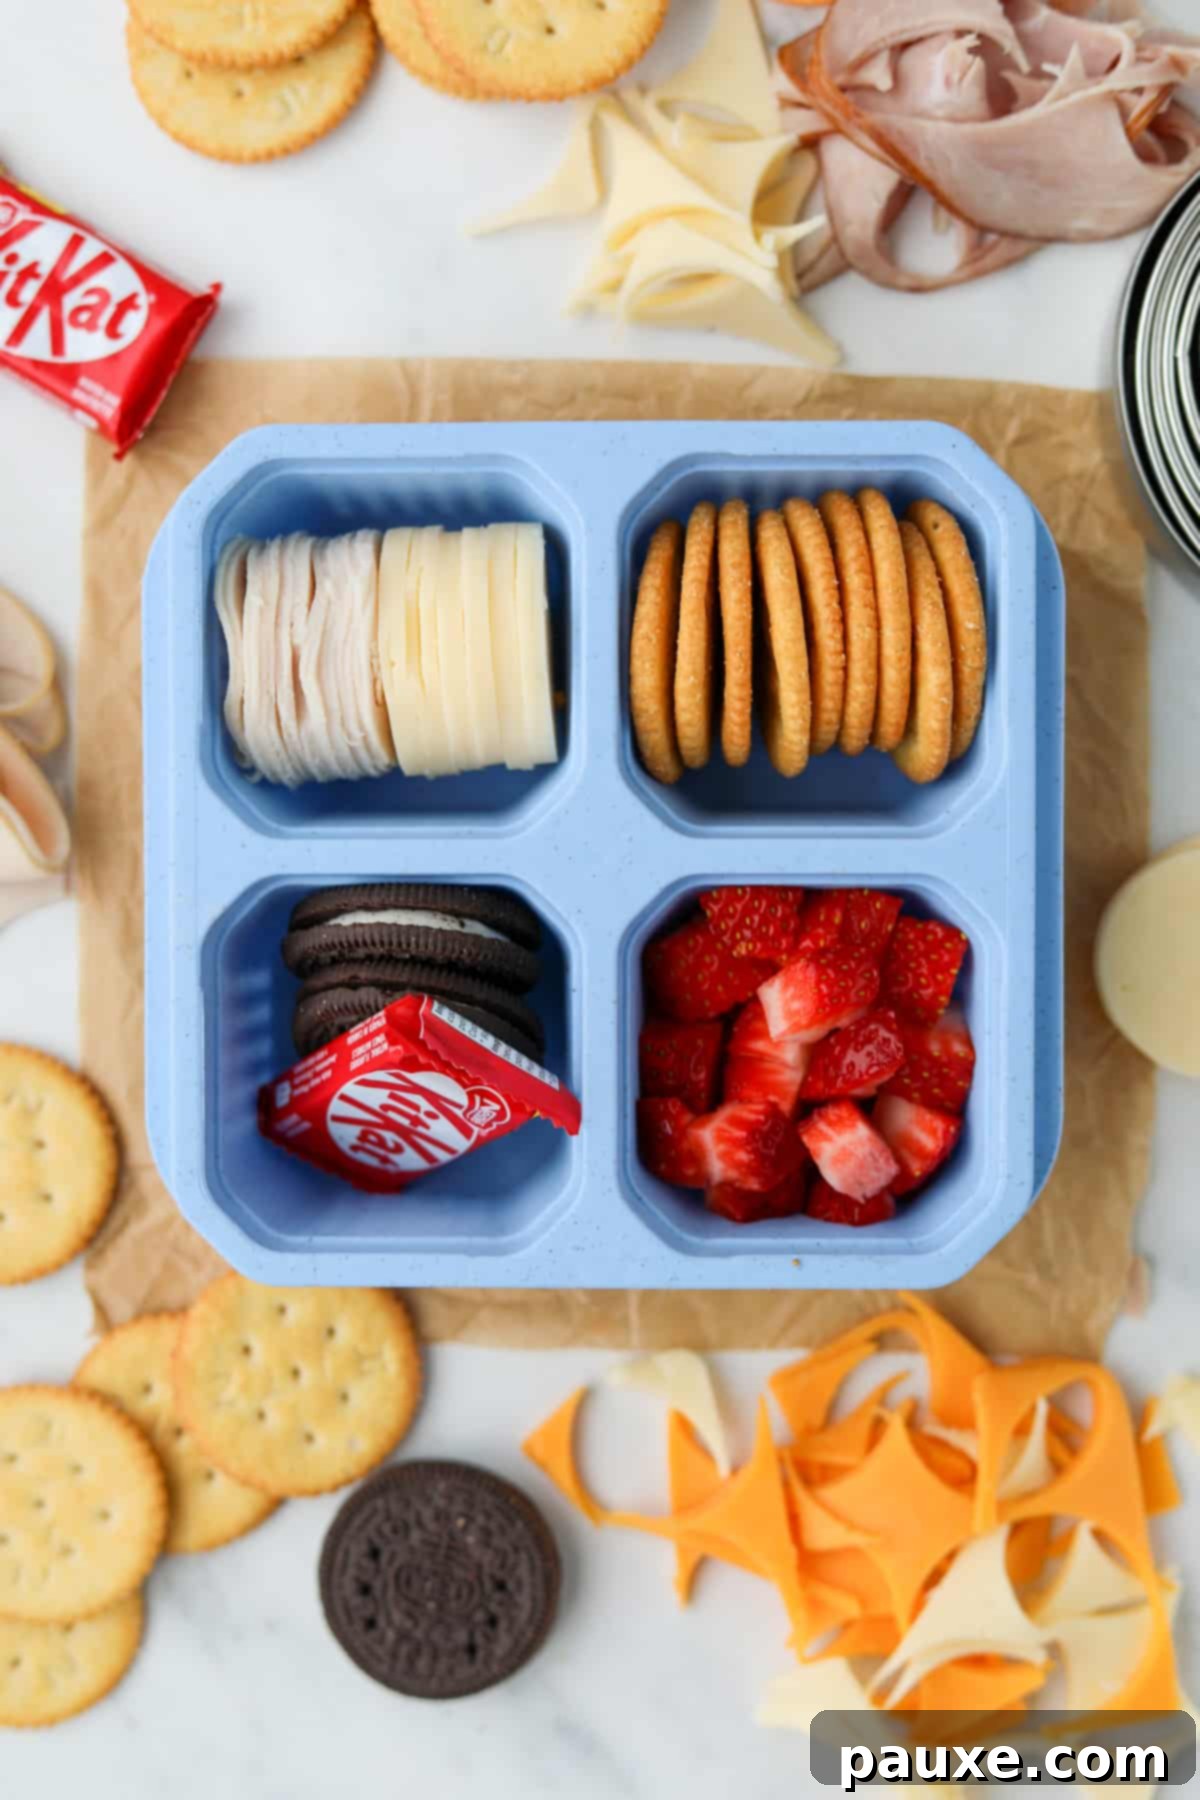
- Step Three: Thoughtful Container Assembly.
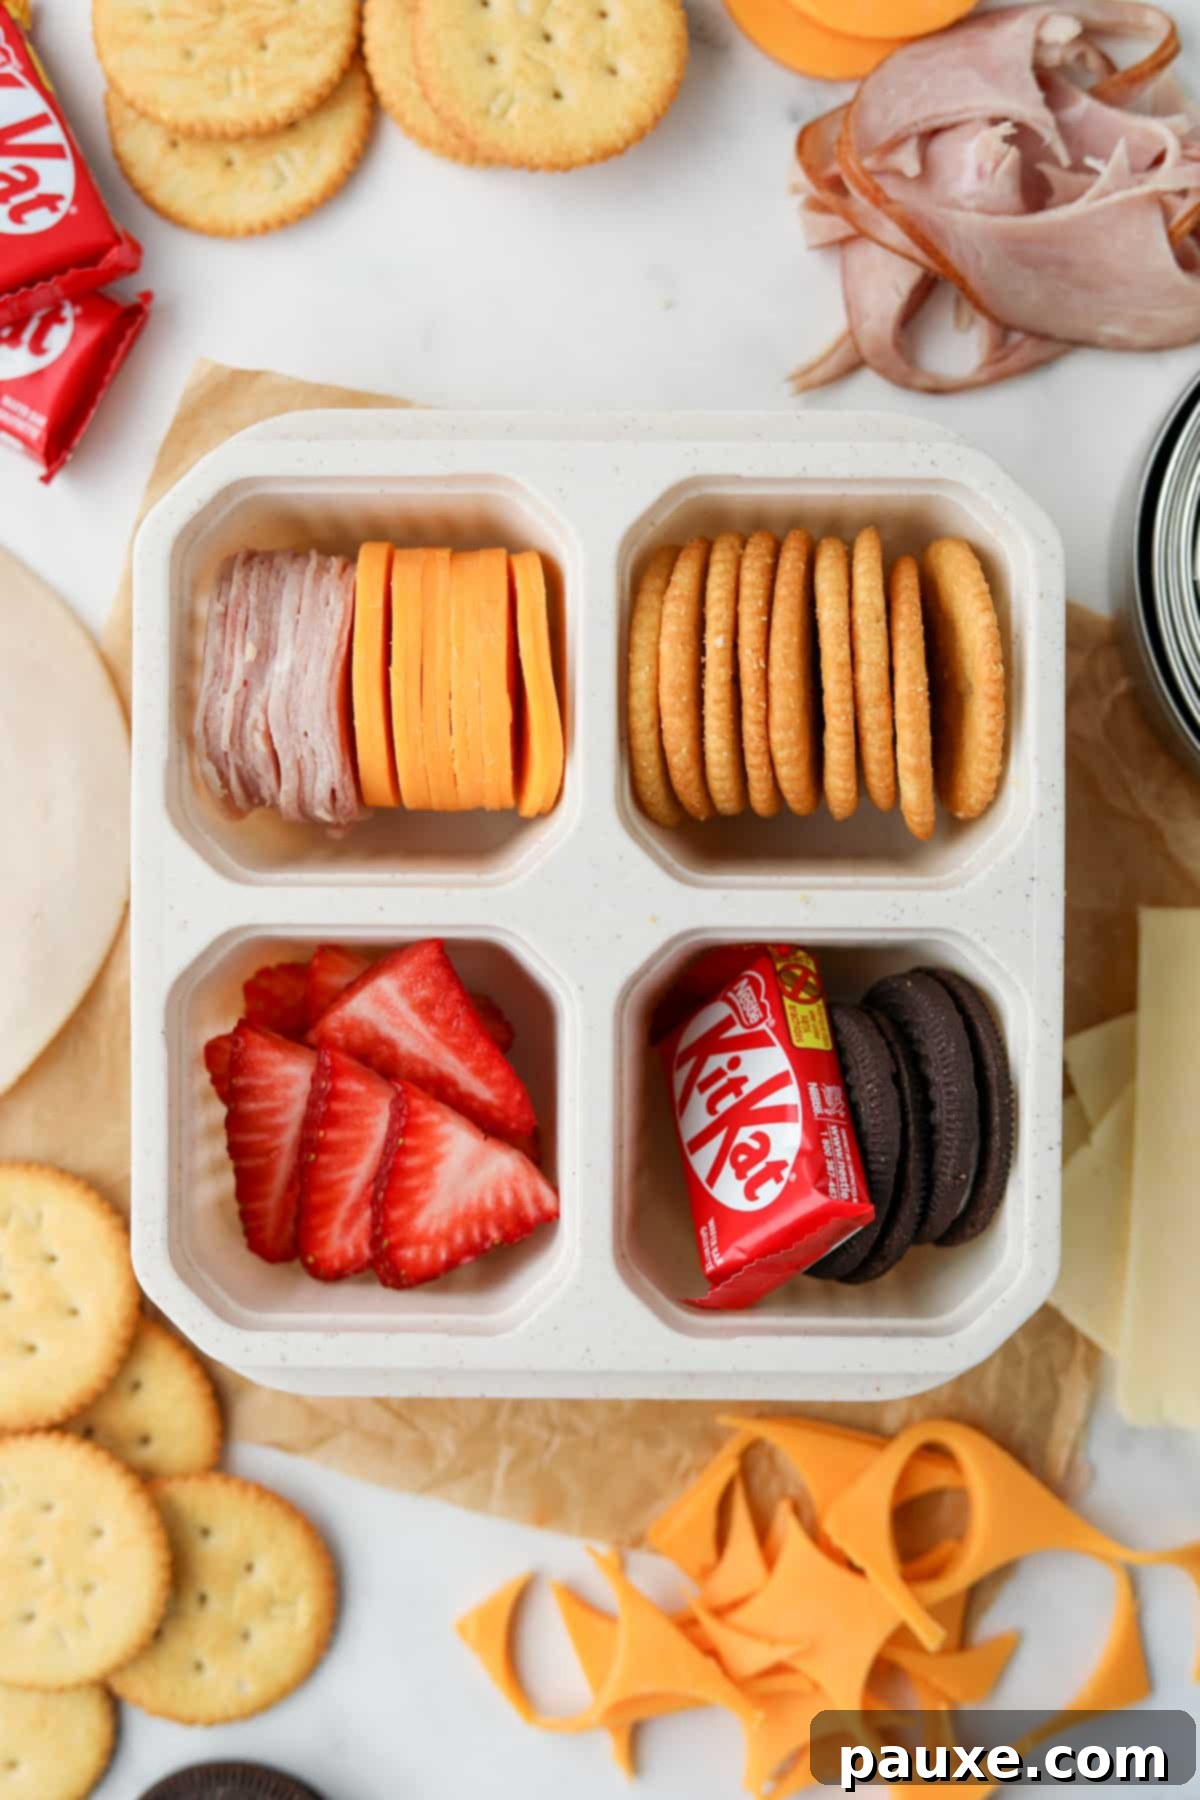
- Once your meat and cheese rounds are ready, neatly stack them and place them into one of the designated sections of your reusable lunch container.
- In a separate section, add your chosen crackers.
- For the third section (and possibly a fourth, if available), include fresh fruit (like grapes, berries, or apple slices) or the sweet treats of your choice. A balanced Lunchable often combines savory, sweet, and fresh elements.
Top tip for an authentic touch: To perfectly mimic the beloved store-bought versions, we always suggest adding a few small cookies and/or a delightful mini chocolate bar to one of the sections. It’s a small detail that adds big smiles!
Explore All the Exciting Varieties of Homemade Lunchables!
The fun doesn’t stop at just cheese and crackers! You can effortlessly recreate popular flavors like pizza and nachos right in your own kitchen. The key is having the right ingredients and a sectioned lunch container to keep everything organized and fresh until lunchtime.
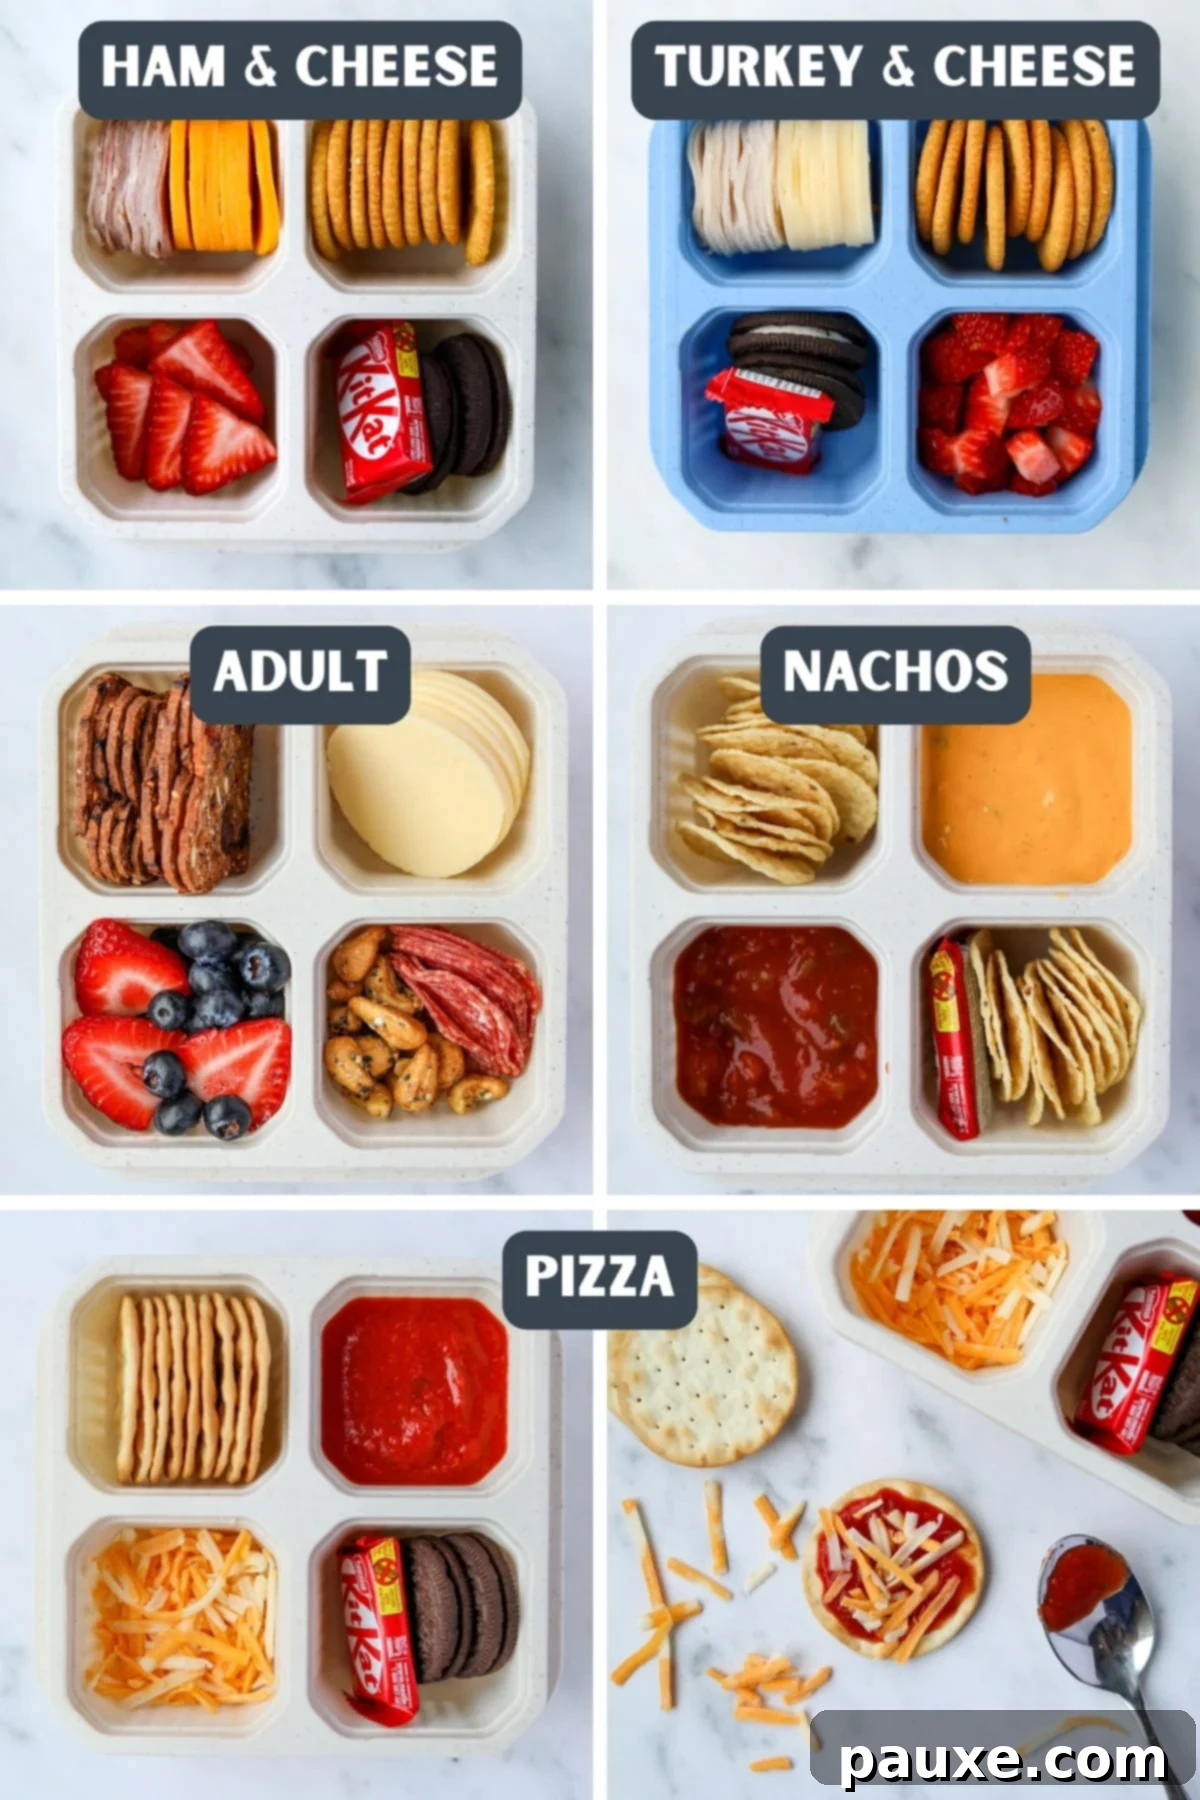
- The Timeless Classic: Cheese and Crackers. This fan-favorite is simple yet satisfying. Assemble neatly cut meat and cheese rounds, a generous portion of your favorite crackers, and finish with a small sweet treat for a perfectly balanced meal. Consider adding a small side of pickles or olives for an extra zing.
- Elevated “Adult” Lunchables for Sophisticated Palates. Move beyond kid-friendly fare and embrace a gourmet experience. Think elegant charcuterie-style meats (like thin-sliced prosciutto or flavorful salami), a selection of fine cheeses (brie, goat cheese, or sharp aged cheddar), a handful of mixed nuts, and a medley of fresh or dried fruits. Gourmet crackers like Raincoast Crisps paired with everything cashews offer a truly delightful combination. This is perfect for a sophisticated desk lunch or a light picnic.
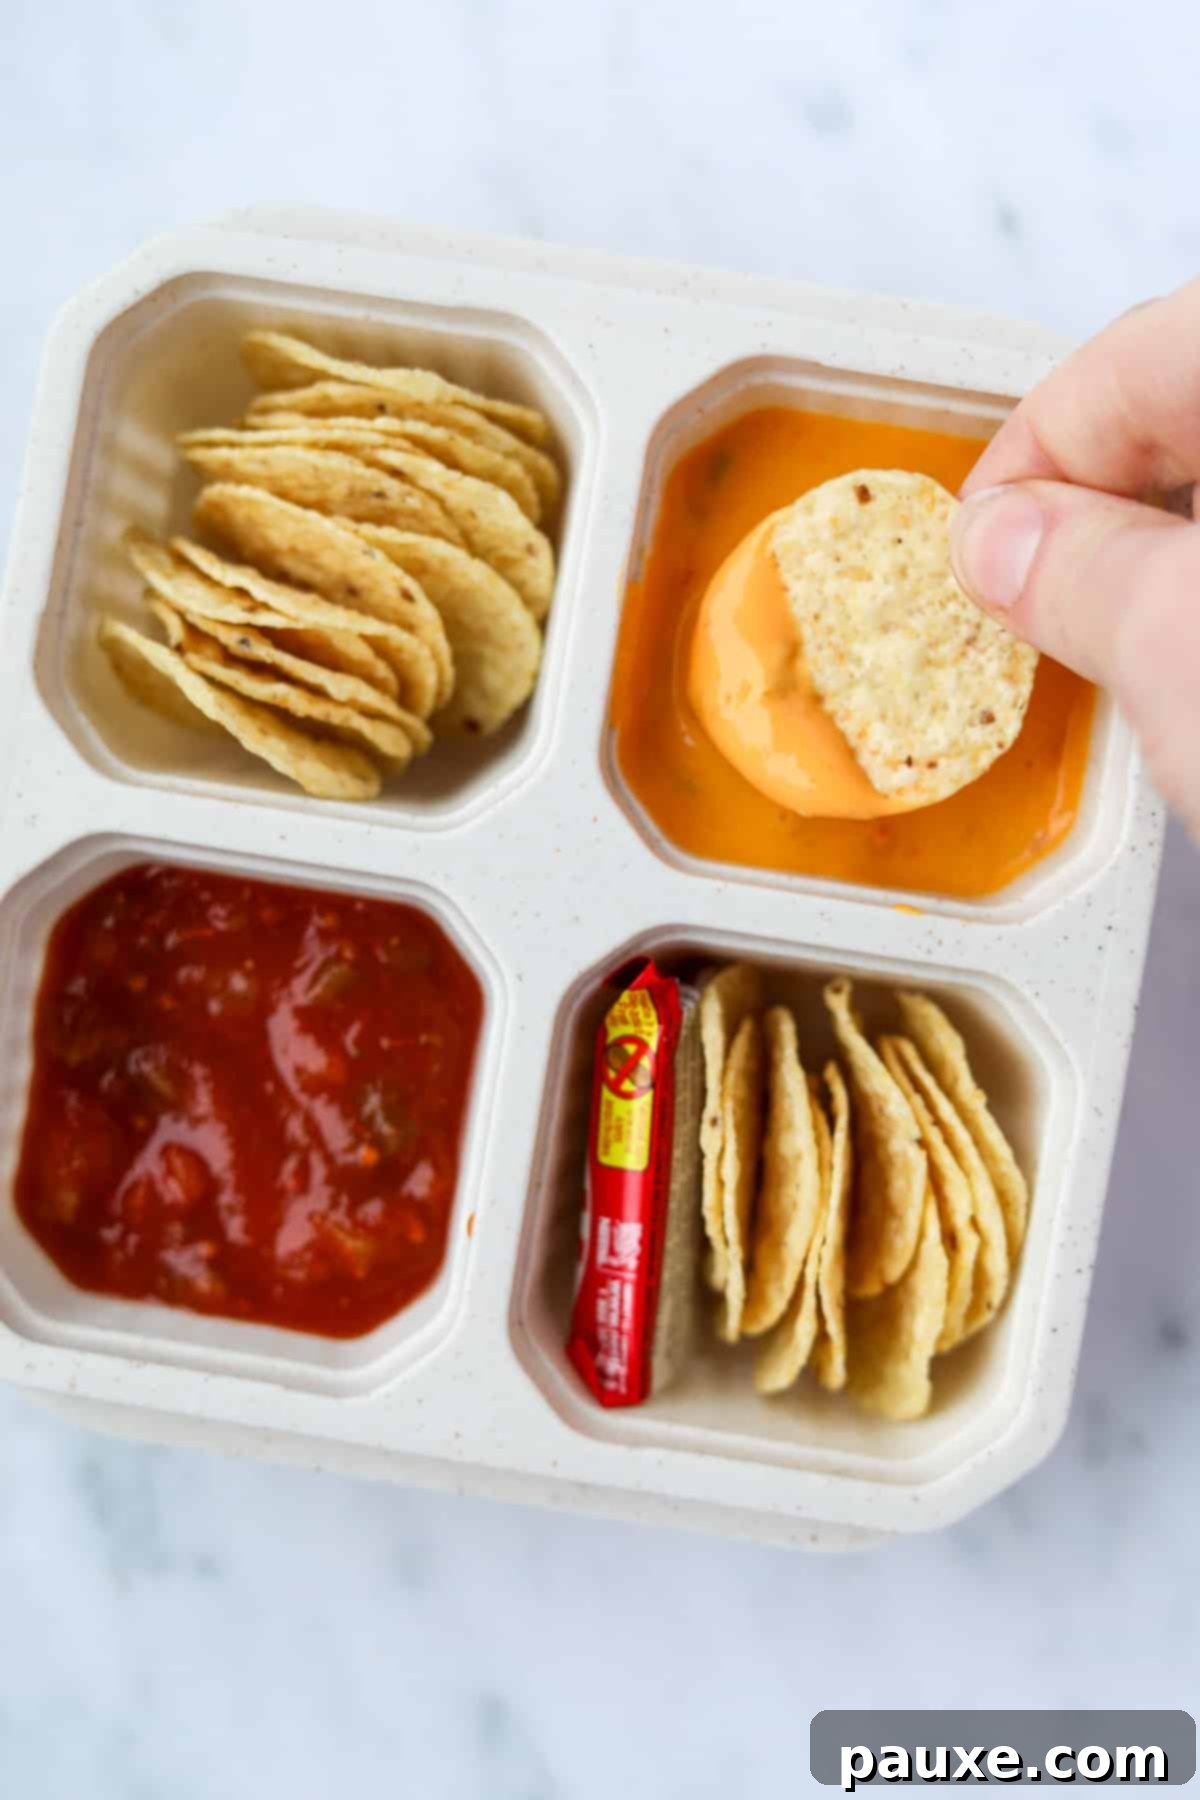
- Zesty Homemade Nacho Lunchables. Recreate the fun of nachos in a portable format! Fill one section with creamy jarred queso, another with vibrant salsa, and dedicate two sections to crunchy, round tortilla chips. For an extra touch, you can include a tiny container of jalapeños or black olives. Just remember to keep the wet ingredients separate until ready to dip!
- Personalized Pizza Lunchables. Get creative with mini pizzas! Start with sturdy crackers (such as water crackers) that fit well into your container sections, or use small mini pitas as a base. Add a dollop of rich pizza sauce to one section, a generous amount of shredded cheese to another, and any additional toppings like mini pepperoni or cooked sausage crumbles to a third. A sweet treat in the final section completes this fun and interactive lunch.
Optimizing Your Prep: Make-Ahead and Storage Tips for Freshness
To ensure your homemade Lunchables stay fresh, delicious, and safe to eat throughout the week, follow these expert tips:
- Batch Prep for 2-3 Days at a Time: While it might be tempting to make a full week’s worth, homemade Lunchables are at their peak freshness when consumed within a few days of preparation. For optimal taste and safety, we recommend preparing batches for 2-3 days. If you need more later in the week, it’s easy enough to whip up another batch mid-week. This prevents ingredients from drying out or becoming less appealing.
- The Indispensable Role of Sectioned Containers: These specialized containers are your best friend for successful meal prepping. They are crucial for maintaining the integrity of different food types. By keeping “wet” ingredients – like deli meats, salsa, pizza sauce, or fresh fruit – completely separate from “crispy” items, you prevent sogginess and ensure everything retains its intended texture until it’s time to eat.
- Store Crackers and Chips at Room Temperature: A common mistake is refrigerating all components together. Ingredients typically stored at room temperature, such as crackers and tortilla chips, tend to lose their desirable crunch and can become stale or rubbery when exposed to the cold, moist environment of a refrigerator. For the absolute best results and to preserve their crispness, add your crackers and chips to the container just before packing it for lunch on the day of consumption. However, if convenience is paramount, it’s perfectly acceptable to pack them ahead of time – just manage your expectations for peak crispness.
- Airtight Seals are Key: Always ensure your containers have tightly sealing lids. This helps to lock in freshness, prevent air exposure (which can lead to food spoilage), and avoid any unwanted leaks in your lunch bag.
- Prioritize Food Safety: When preparing and storing, always follow good food safety practices. Wash your hands thoroughly, use clean utensils, and ensure perishable ingredients are kept refrigerated at appropriate temperatures.
More Creative & Easy School Lunch Ideas: Expand Your Meal Prep Repertoire!
If you’re looking to diversify your lunchbox options beyond homemade Lunchables, here are some other fantastic and easy-to-make ideas that are perfect for school or work:
- Homemade Uncrustables
- Protein Cookie Dough Balls
- Greek Yogurt Protein Dip
- Rice Krispie Treats
If you’ve enjoyed this detailed guide to Homemade Lunchables, please consider sharing your feedback by leaving a comment below! We love hearing about your creations. You can also tag us on Instagram @dashfordinner to share your photos and inspire others.
Homemade Lunchables Recipe
This easy recipe for homemade lunchables covers all the most popular flavors. Perfect for kids, school lunches, and adults too!
Course: Lunch, Snacks
Cuisine: American
Prep Time: 15 minutes
Total Time: 15 minutes
Author: Dorothy Bigelow
Equipment
- Lunch containers (3 or 4 sections recommended)
- Circular cutter set (or parchment paper and kitchen scissors*)
Ingredients
Classic Cheese and Cracker Style:
- Cheese slices (cheddar, provolone, havarti, etc.)
- Deli meat (ham, turkey, etc.)
- Crackers (we recommend Ritz for a classic taste)
- Sweet treats (mini chocolate bars, small cookies, etc.)
- Sliced fruit or berries (optional, for added freshness)
Homemade Nacho Lunchables:
- Tortilla chips (round chips are ideal for containers)
- Queso (store-bought or homemade)
- Salsa (mild, medium, or spicy)
- Sweet treats (optional: mini chocolate bars, cookies, fruit, etc.)
Homemade Pizza Lunchables:
- Sturdy crackers (like water crackers, or use mini pitas for a softer base)
- Pizza sauce (your favorite brand)
- Shredded cheese (mozzarella or an Italian blend)
- Mini pepperoni (optional, for classic pizza flavor)
- Sweet treats (optional: mini chocolate bars, cookies, fruit, etc.)
“Adult” Charcuterie-Style Lunchables:
- Salami or other charcuterie meats of choice (prosciutto, capicola)
- Sliced cheese (provolone, havarti, goat cheese, brie, etc.)
- Fruit and nut crackers (we recommend Raincoast Crisps, or other fancy crackers)
- Deluxe mixed nuts (optional, for a satisfying crunch)
- Sliced fruit or berries (optional, for a fresh element)
Instructions
For Classic Cheese and Crackers:
- Cut the meat and cheese into circles: Using a circular cutter set (or a parchment paper template and kitchen scissors*), choose a size that fits your crackers. Use this cutter to create uniform circles from both the cheese slices and deli meat. The leftover scraps can be enjoyed as a snack or used in other recipes like a chopped salad.
- Assemble your container: In one section of your reusable container, neatly stack the cheese and meat circles. Place the crackers in a second section. In a third section, add a small sweet treat (such as a mini chocolate bar or cookies). If your container has a fourth section, fill it with fresh fruit or another snack of your choice.
For Homemade Nacho Lunchables:
- Add the queso and salsa: Fill one section of your container approximately ¾ of the way with queso. In another section, add the salsa, also filling it about ¾ of the way. This leaves room for dipping without spills.
- Add the tortilla chips: Carefully stack the tortilla rounds into one or two of the remaining sections. You can also wedge a small sweet treat, like a mini chocolate bar or cookie, alongside the chips if desired.
For Homemade Pizza Lunchables:
- Stack your sturdy crackers (like water crackers; ensure they fit your container sections) or mini pitas in one compartment of the container.
- Add the pizza sauce to another section, filling it no more than ¾ of the way to prevent spillage.
- Place the shredded cheese into a third section of the container.
- Fill the final section with your favorite sweet treats (cookies, mini chocolate bars, fresh fruit, etc.) to complete your pizza meal.
For “Adult” Charcuterie-Style Lunchables:
- Slice the meat and cheese: Use circular cutters (or scissors*) to slice your chosen charcuterie meats and cheeses into small, elegant rounds or shapes.
- Assemble the container: Stack the prepared meat and cheese slices and place them into one section. Add the fancy crackers to another section. Fill a third section with mixed nuts, and the fourth section with fresh fruit or berries for a complete and sophisticated lunch.
Notes
- Storage: Place the assembled Lunchable boxes directly into the refrigerator. They are best enjoyed within 2-3 days of preparation. For optimal crispness, it is recommended to add crackers and chips on the day of serving, as refrigeration can cause them to become less crisp.
- Meat and cheese scraps: These flavorful remnants are too good to waste! Enjoy them as a quick snack, or chop them up and incorporate them into a delicious chopped salad (like the Italian sub salad for a hearty meal!) or a refreshing pasta salad.
- *Without circular cutters: To create perfectly round shapes without a cutter, simply use parchment paper to trace and cut out a template based on the size of your crackers. Place this template over your meat and cheese slices, and carefully cut around it with clean, sharp kitchen scissors. Remember to thoroughly wash the scissors after use.
Please note that some of my blog posts here at Dash for Dinner may contain affiliate links. If you make a purchase through these links, I will receive a small commission at no additional cost to you. Please see my Disclaimer for more information.
