Effortlessly Divine: The Ultimate 2-Ingredient Dulce de Leche Mousse
Prepare to delight your taste buds with this incredibly easy recipe for Dulce de Leche Mousse. Crafted with just two essential ingredients – rich heavy cream and luscious, thick dulce de leche – this dessert promises a velvety texture and an unforgettable caramel flavor. Forget complicated processes involving egg yolks or cream cheese; this recipe is designed for maximum simplicity and enjoyment, requiring less than 10 minutes of active preparation time. It’s the perfect solution for satisfying a sudden sweet craving or impressing guests with a quick yet elegant treat.
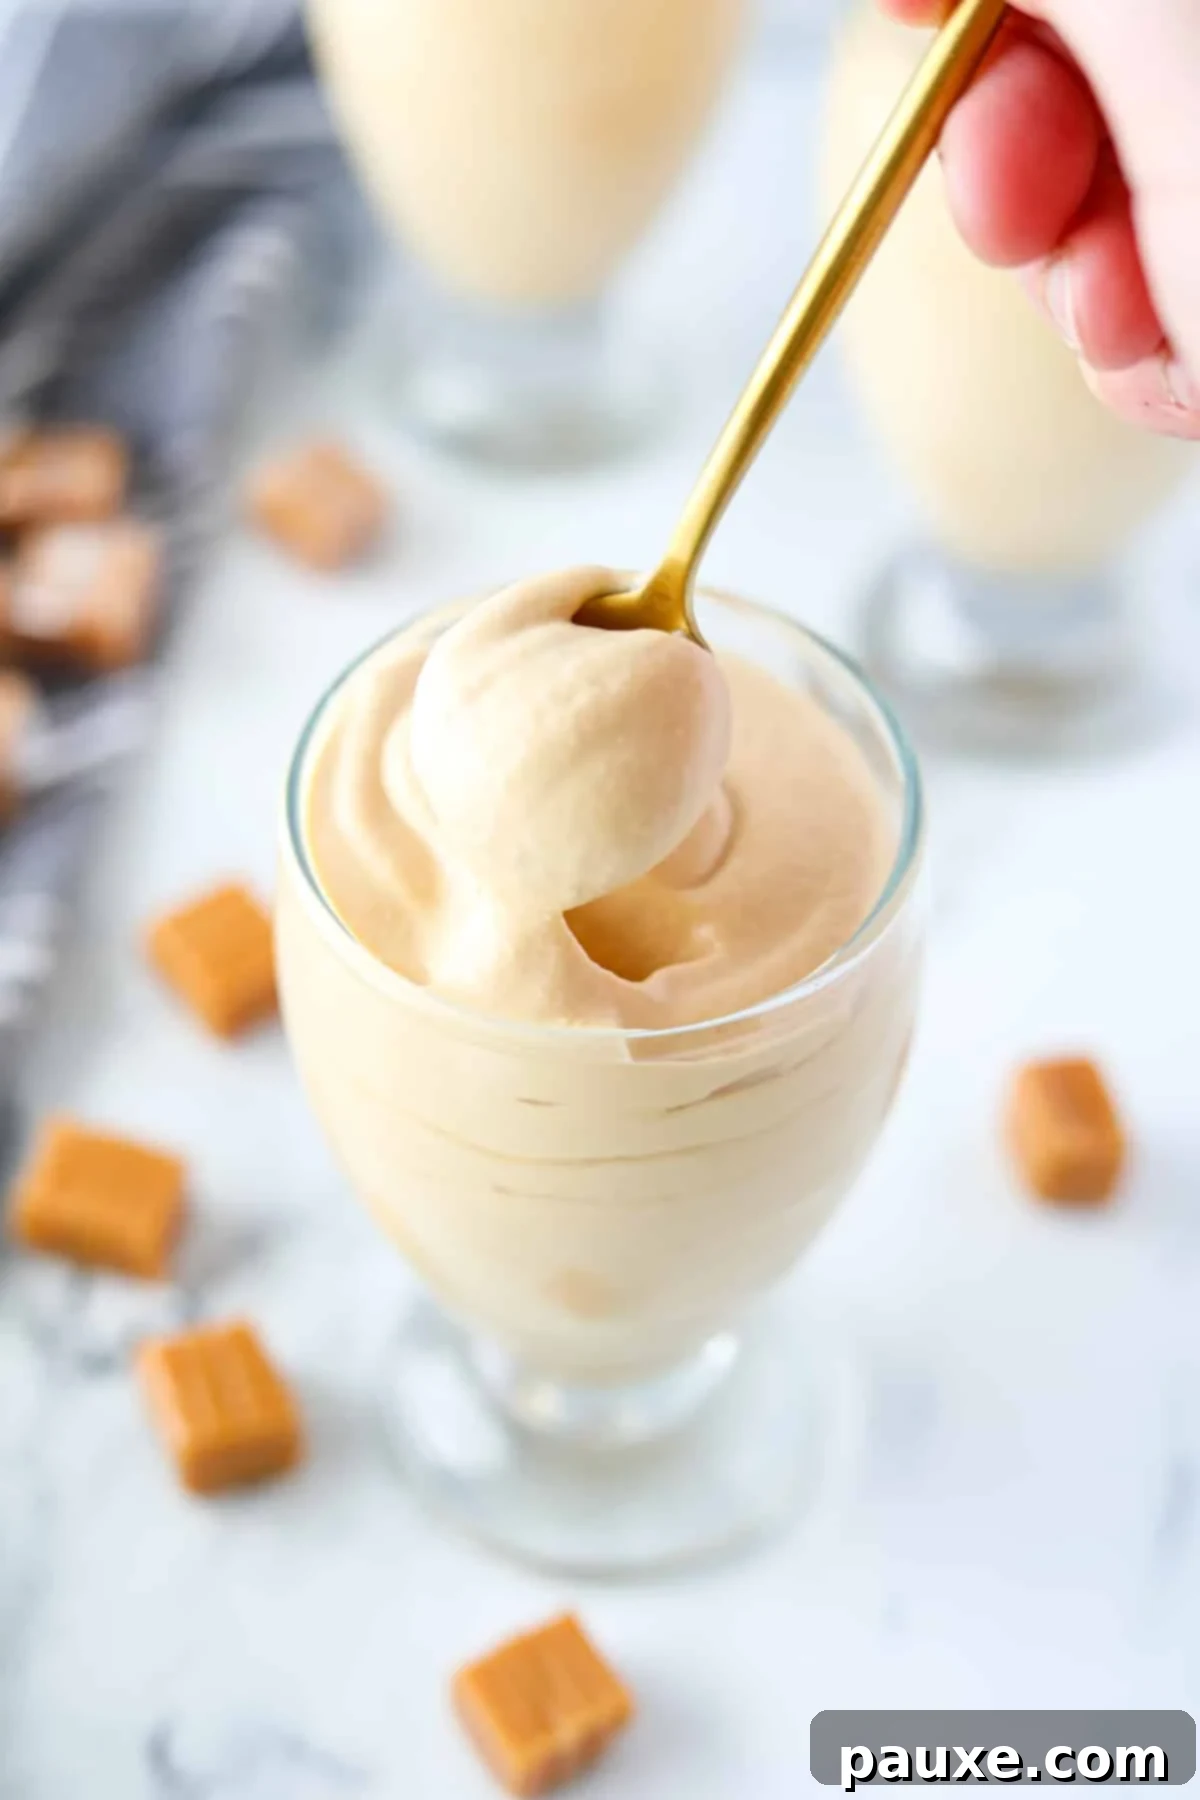
Dulce de leche, a beloved culinary treasure, holds a special place in the hearts of dessert enthusiasts across Latin America and beyond. This caramelized sweetened milk, renowned for its deep, complex flavor and luxurious consistency, is a staple in Argentina, Brazil, Mexico, and has gained immense popularity throughout the United States. Its versatility shines as a delectable filling, a decadent topping, or a signature flavor in countless sweet creations.
For over a decade, dulce de leche has been a cherished ingredient in my kitchen. The moment I successfully crafted a batch of homemade Dulce de Leche Ice Cream, I knew I had to explore its potential further. My next mission: to create a creamy, irresistible dulce de leche mousse that captured all the rich essence of this caramel marvel without the fuss.
My initial attempts involved a traditional mousse base, which often calls for raw eggs. While this method can yield exquisite results, I quickly discovered that the dulce de leche had a tendency to separate, and the entire process was far too time-consuming. As someone who champions quick and easy recipes, this approach simply didn’t align with my culinary philosophy. I needed a simpler, more efficient way to achieve that dreamy mousse texture.
After much deliberation and a bit of creative thinking, I wondered if a “cheater mousse” could be achieved by simply combining whipped cream with dulce de leche. To my absolute delight, the experiment was a resounding success! The result was an airy, perfectly stable, and intensely flavorful mousse that required minimal effort and delivered maximum satisfaction. This simplified method means you can enjoy a gourmet-quality dessert without the need for intricate techniques or extensive waiting times.
Why This Dulce de Leche Mousse Will Become Your New Favorite
This effortless dulce de leche mousse recipe isn’t just easy; it’s a game-changer for anyone who loves rich, creamy desserts but is short on time. Here’s why you’ll fall head over heels for this simple yet sophisticated treat:
- Effortlessly Elegant for Any Occasion: Whether you’re celebrating Cinco de Mayo, hosting an intimate dinner party, or simply craving something sweet after a long day, this mousse is the perfect choice. It presents beautifully and tastes incredibly luxurious, making it ideal for any event where you want to impress without stress. Its delicate texture and rich caramel notes elevate any meal.
- Remarkably Simple Ingredients: This recipe truly lives up to its “two-ingredient” promise, relying solely on high-quality heavy cream and decadent dulce de leche. You won’t need any complex components like Cool Whip, cream cheese, raw eggs, or unflavored gelatin. This minimalist approach ensures both a pure flavor profile and a straightforward preparation process that anyone can master.
- Lightning-Fast Preparation: Say goodbye to lengthy chilling times and intricate baking steps. This dulce de leche mousse is typically ready in under 15 minutes, from start to finish. There’s no need for refrigeration to set, meaning you can whip it up and serve it almost instantly, making it perfect for last-minute dessert emergencies or spontaneous gatherings.
- Incredible Flexibility for Planning Ahead: While it’s delightful served immediately, this mousse also offers excellent make-ahead potential. You can prepare it just before your guests arrive, or if you’re looking to streamline your event planning, it can be made up to 24 hours in advance (especially with the optional stabilizer). This flexibility ensures you can enjoy your time with company, rather than being stuck in the kitchen. Easy truly is the name of the game here!
Seriously, it’s a creamy, dreamy caramel mousse that practically makes itself – what’s not to adore about that?
Mastering Your Dulce de Leche Mousse: Essential Ingredients
Achieving the perfect dulce de leche mousse requires attention to the quality of your few ingredients. Since there are so few components, each one plays a crucial role in the final flavor and texture. Here’s a closer look at what you’ll need and tips for selection:

- Dulce de Leche: This is the star of our show, providing the signature rich, caramelized flavor. I cannot stress enough the importance of selecting a good quality, very thick dulce de leche. Brands like La Lechera are generally acceptable due to their decent consistency, but I would caution against thinner varieties, such as some versions of Eagle Brand, which might not yield the desired mousse-like texture. For a truly luxurious and intensely flavored mousse, seek out a thick, dark-colored artisanal dulce de leche from a local specialty shop. Its robust flavor will shine through beautifully. If store-bought options are limited or you prefer a homemade touch, making your own dulce de leche is also an option, though it adds to the prep time.
- Heavy Cream: Also commonly known as heavy whipping cream or simply whipping cream, this ingredient is fundamental for achieving the airy, thickened, and incredibly silky texture characteristic of a perfect mousse. The key to successful whipping is ensuring your heavy cream is adequately chilled before you begin. Cold cream whips faster and holds its volume much better, preventing a soupy or collapsed mousse. Aim for a fat content of at least 36% for optimal results.
- Cornstarch (Optional, but Recommended for Stability): In the UK, this is often referred to as corn flour. While not strictly necessary for immediate consumption, cornstarch acts as an excellent thickening and stabilizing agent for your dulce de leche mousse. If you plan on preparing the mousse in advance, or if you anticipate having leftovers that you wish to store, incorporating cornstarch is highly recommended. It helps to prevent separation and maintain the mousse’s delightful consistency over time, ensuring it stays perfect for up to 24 hours in the refrigerator.
Essential Equipment for a Seamless Mousse Experience
While this recipe is simple, having the right tools on hand can make the process even smoother and more enjoyable. These pieces of equipment will help you achieve the perfect texture with minimal effort:
- Electric Mixer: Attempting to whip heavy cream by hand can be an arduous task, requiring significant time and arm strength. To save yourself effort and ensure consistent results, I highly recommend using an electric hand mixer or a stand mixer fitted with a whisk attachment. These tools will quickly and efficiently incorporate air into your cream and dulce de leche, leading to a perfectly fluffy mousse.
- Large Mixing Bowl: If you’re using an electric hand mixer, a spacious mixing bowl is crucial. You’ll need ample room to whip the heavy cream and dulce de leche together without spills or splashing. A large bowl also allows for better air circulation, which aids in achieving the desired volume and consistency. For a stand mixer, simply use the bowl that comes with the appliance.
- Piping Bag (Optional, for Elegant Presentation): A pastry bag with a wide piping tip can transform your mousse presentation, allowing you to pipe beautiful swirls into your dessert cups for a professional finish. If you don’t own a pastry bag, don’t fret! A sturdy plastic storage bag (like a Ziploc) with one corner snipped off makes an excellent improvised piping bag. Alternatively, you can simply spoon the mousse carefully into your chosen serving vessels for a more rustic, equally delicious look.
- Dessert Cups or Ramekins: The presentation of your mousse can significantly enhance the dining experience. While I personally favor taller dessert cups that showcase the mousse’s layers and texture, ramekins, small bowls, or even small glass jars work wonderfully. Choose something that complements your serving style and allows for individual portions.
How to Craft Your Dreamy Dulce de Leche Mousse: Step-by-Step Guide
This delightful dulce de leche mousse recipe is a testament to culinary simplicity, coming together with just a few basic ingredients in less than 10 minutes. You’ll adore its airy texture, profound caramel flavor, and sheer elegance that belies its easy preparation. Let’s create something truly special!
Step One: Prepare Your Chilled Cream. Begin by pouring the thoroughly chilled heavy cream into a large mixing bowl. If you are using a stand mixer, use its designated bowl and attach the whisk. For an electric hand mixer, ensure your bowl is large enough to prevent splattering as the cream whips. Chilling your bowl beforehand can also aid in achieving a stiffer whip faster.
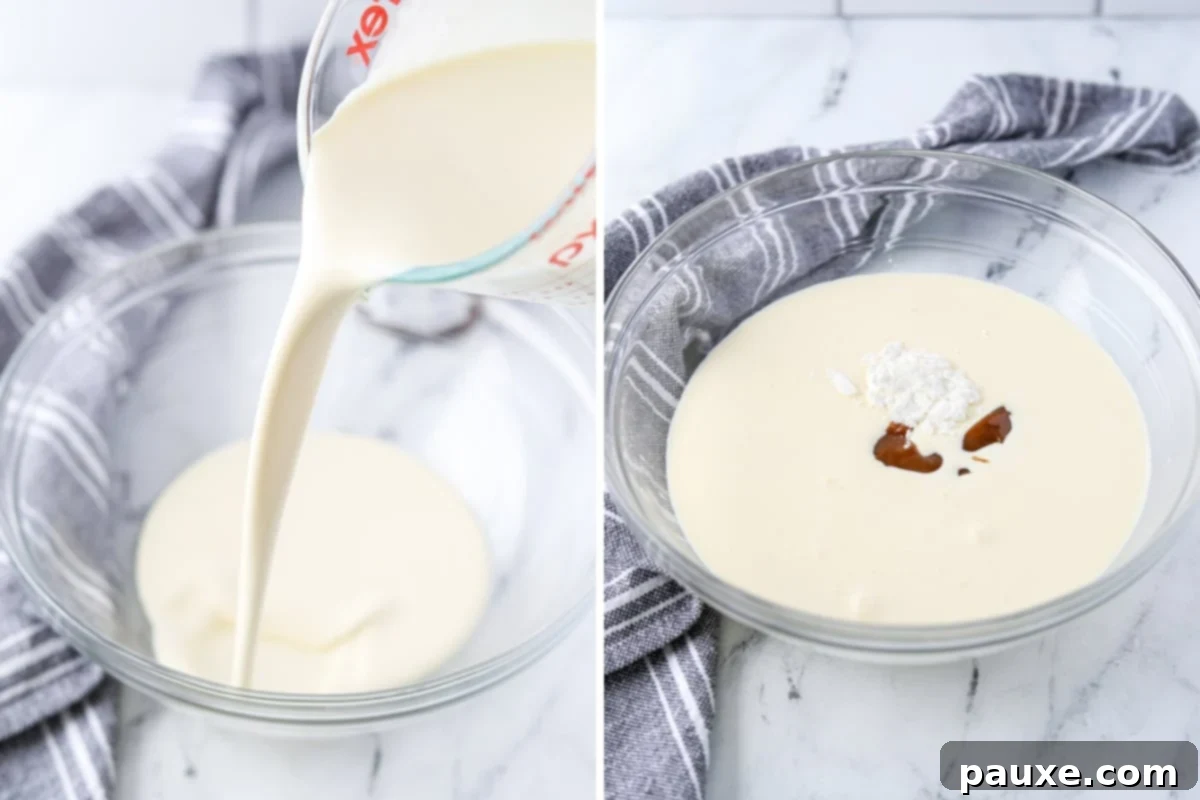
Step Two: Combine Key Ingredients. Add 1 cup of your chosen thick dulce de leche to the bowl with the heavy cream. If you intend to store the mousse or prepare it ahead of time, now is the moment to also add 1 teaspoon of cornstarch. The cornstarch acts as a crucial stabilizer, preventing separation and maintaining the mousse’s luxurious texture over time. Ensure all ingredients are cold for optimal whipping.
The Magic of Mixing: Whipping to Perfection
Step Three: Whip to Soft Peaks. Using your electric mixer (handheld or stand mixer), begin mixing the ingredients together on medium-high speed. Continue to beat until the mixture is completely combined, thickens considerably, and forms soft peaks. This usually takes about 3-5 minutes, but keep an eye on the consistency. When you lift the whisk, a soft peak should form that holds its shape for a moment before gently folding back. Be careful not to overmix, as this can turn the cream grainy.
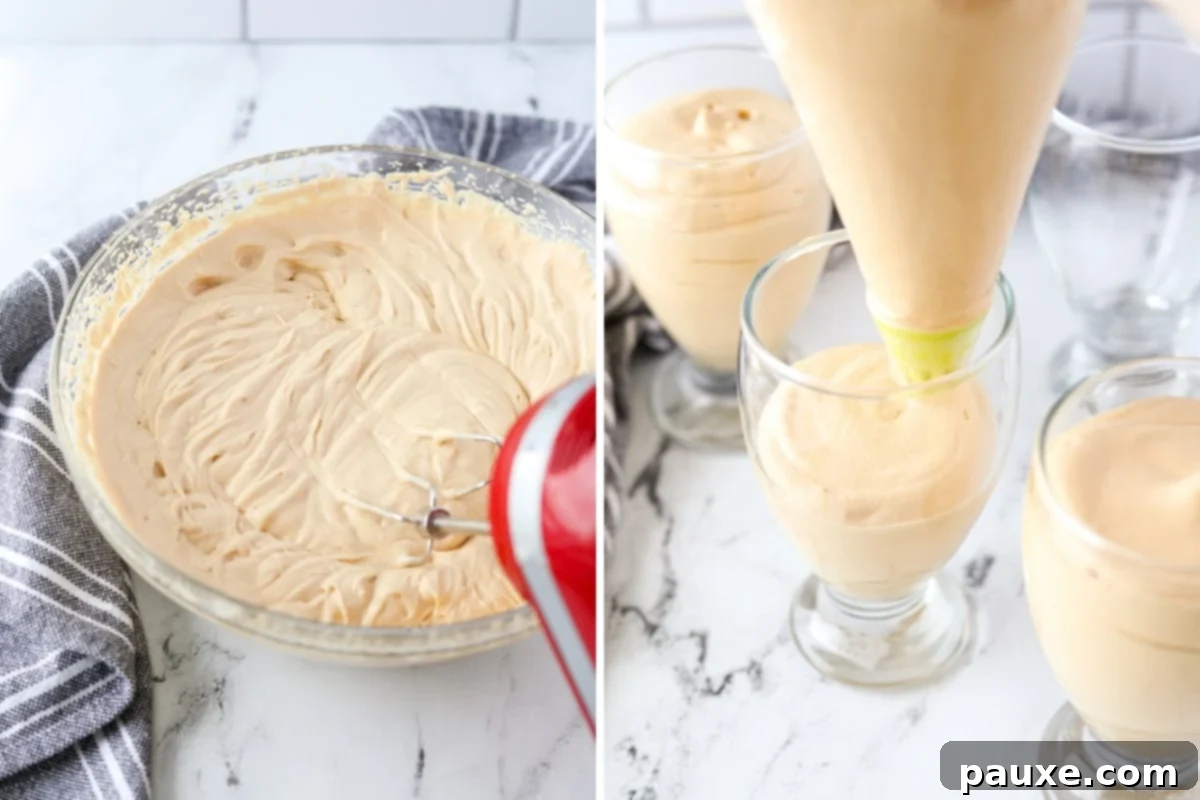
Step Four: Elegant Presentation. Once your dulce de leche mousse has achieved the desired consistency, carefully transfer the thickened mixture into a pastry bag using a rubber spatula. Gently pipe the mousse into your chosen dessert cups, ramekins, or small bowls. If you don’t have a pastry bag, simply use a spoon to scoop and carefully smooth the mousse into the containers. The result will be equally delicious, just perhaps with a less structured look.
Step Five: Garnish and Serve. For an added touch of elegance and flavor, you can top each mousse cup with a delicate drizzle of extra dulce de leche, a light dusting of powdered sugar, or even a sprinkle of finely chopped nuts or chocolate shavings. Alternatively, the mousse is perfectly delightful served plain, allowing its rich caramel flavor to take center stage. Serve immediately for the freshest taste, or chill for a slightly firmer texture.
This mousse can be stored in the refrigerator for up to 24 hours before serving, provided you included the cornstarch stabilizer. Beyond that, the texture may begin to change.
Hint: No pastry bag? No problem! An excellent makeshift piping bag can be created from a large plastic storage bag, such as a Ziploc. Simply snip a small corner off the bottom of the bag after filling it with mousse. Voila! An instant, disposable piping bag ready for elegant dessert piping.
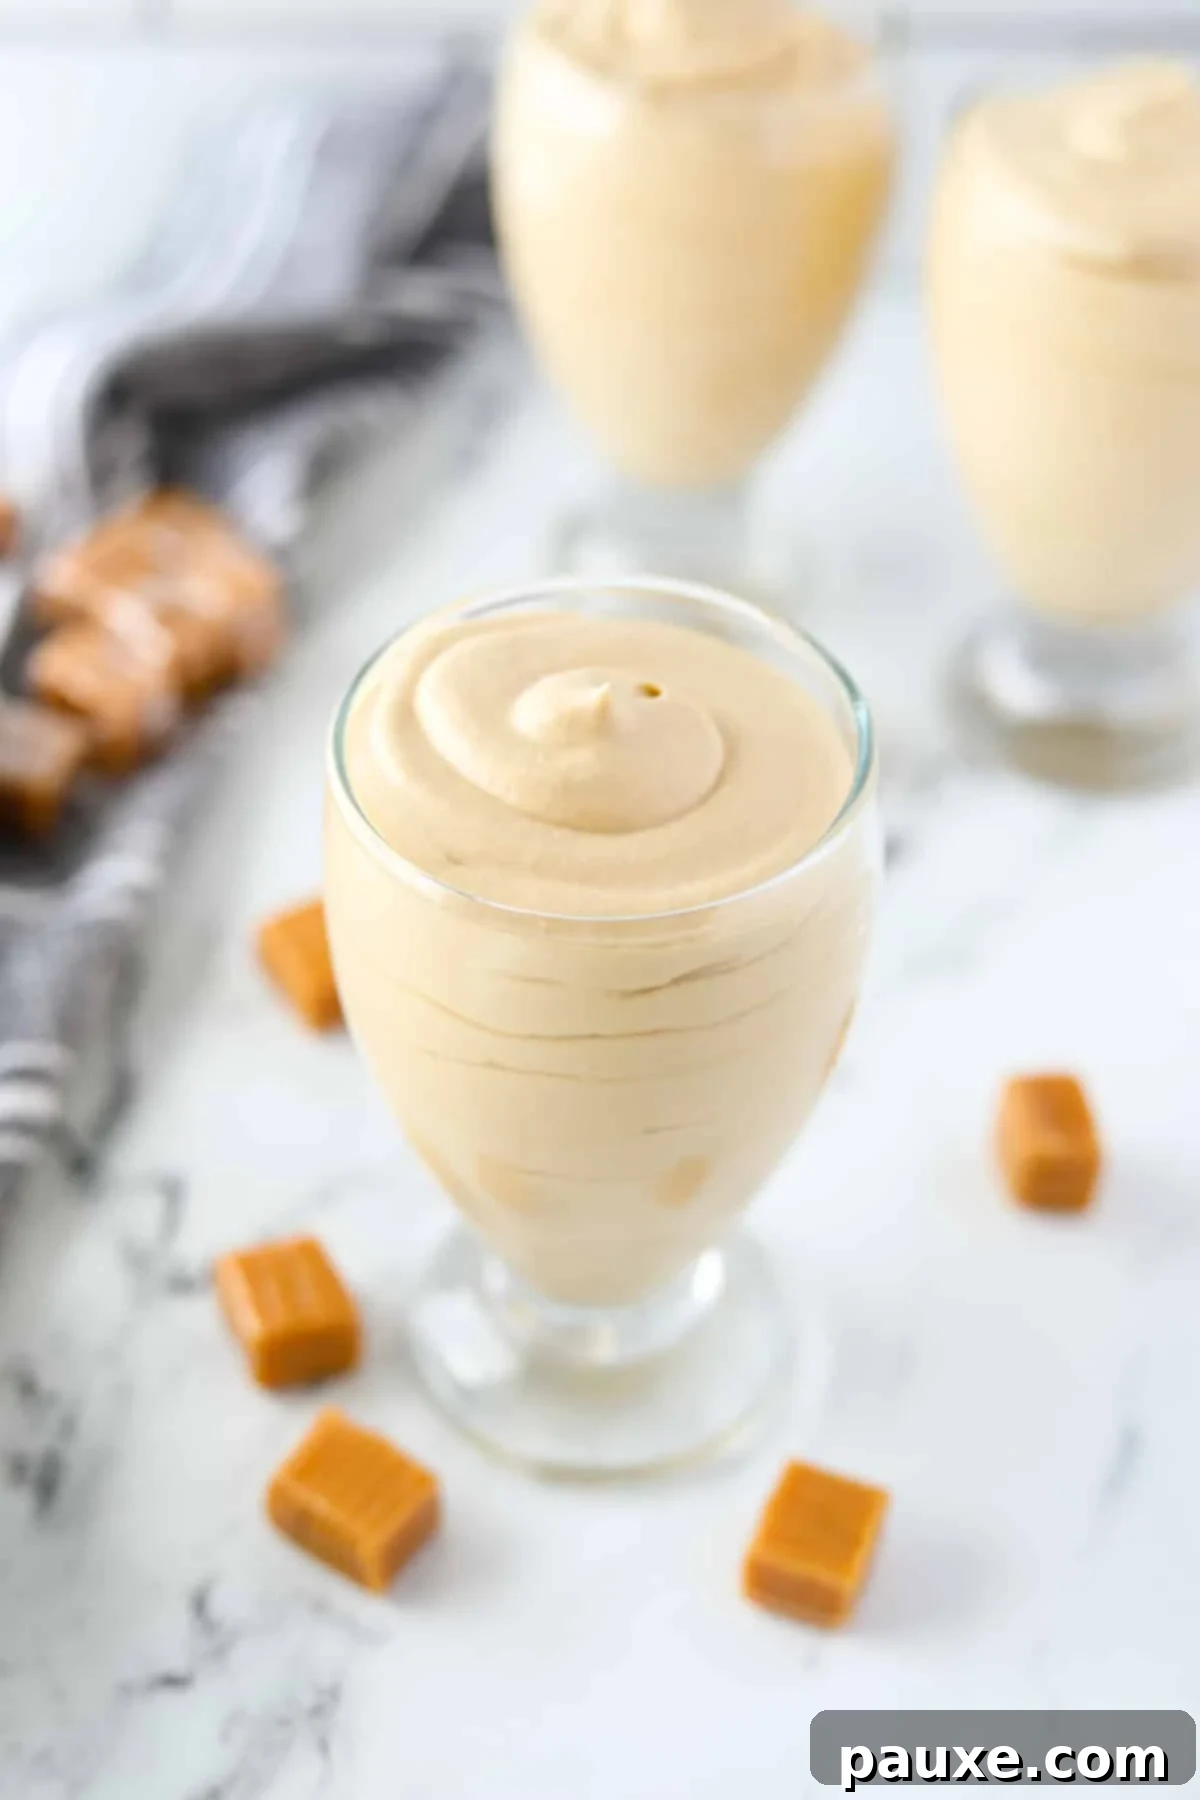
Maximizing Freshness: Storing Your Delicious Dulce de Leche Mousse
This easy dulce de leche mousse is a fantastic make-ahead dessert, but understanding proper storage is key to maintaining its exquisite texture and flavor. Leftovers, if stored correctly, can remain delightful for up to 3 days, with the absolute best results enjoyed within the first 24 hours of preparation.
The secret to extended freshness and stability lies in the optional (but highly recommended) addition of cornstarch during preparation. Cornstarch acts as a powerful stabilizer for the whipped cream, helping it retain its airy volume and preventing it from “weeping” or separating. If you anticipate having leftover mousse or prefer to prepare it well in advance, definitely incorporate that teaspoon of cornstarch.
If you opted to skip the cornstarch, it’s best to consume any dulce de leche mousse within 6-12 hours of making it. While it will still be safe to eat after this period, you might notice the whipped cream beginning to lose its structure, leading to a thinner consistency and potential separation of the mixture. The delicate airiness will gradually diminish, affecting the overall experience.
To store your mousse effectively, wrap individual jars or containers tightly with plastic wrap, ensuring an airtight seal. Alternatively, transfer any remaining mousse to an airtight container. This will protect it from absorbing refrigerator odors and help maintain its fresh taste and texture until you’re ready to enjoy another spoonful.
Choosing the Best Dulce de Leche: Quality Matters
When embarking on this simple yet sensational dulce de leche mousse recipe, remember that the quality of your dulce de leche is paramount. As one of only two main ingredients (three if you include the cornstarch stabilizer), its flavor and consistency will directly dictate the success and deliciousness of your finished mousse.
I highly recommend investing in a thick, authentic, high-quality dulce de leche. The depth of flavor and rich caramel notes from a premium product will truly elevate your mousse from good to extraordinary. Explore local specialty food stores or international markets, where you’re likely to find artisanal brands that offer superior taste and texture. If these aren’t readily available, the widely accessible La Lechera brand is a decent supermarket option, often thick enough to work well in this recipe.
However, steer clear of very thin or runny dulce de leche varieties, as they can prevent the mousse from setting properly and result in a less satisfying texture. If you’re passionate about homemade flavors or simply can’t find a suitable store-bought option, consider making your own! Lynn from Fresh April Flours has an excellent resource detailing a comparison of methods for making your own Dulce de Leche. This can be a rewarding project that ensures the highest quality and freshest flavor for your mousse.

Expert Tips for a Flawless Dulce de Leche Mousse
Even with a simple recipe, a few insider tips can make all the difference, ensuring your dulce de leche mousse turns out perfectly every single time. Follow these expert recommendations for the best results:
- Embrace the Chill Factor: Since heavy whipping cream is the foundational ingredient for the mousse’s structure, temperature is critically important. Heavy cream whips best when it is very cold. Always ensure your cream is thoroughly chilled before you begin. For an extra edge, consider chilling your mixing bowl and whisk attachment in the freezer for 10-15 minutes prior to whipping. Bonus points if you can also chill your dulce de leche in advance; colder ingredients incorporate more smoothly and achieve the desired consistency faster.
- Understanding Soft Peaks: If you’ve ever made homemade whipped cream, you’re likely familiar with the terms “soft peaks” and “stiff peaks.” For this particular dulce de leche mousse recipe, our goal is to achieve soft peaks. Due to the weight and density of the dulce de leche, you will typically be unable to reach the very stiff or firm peaks often associated with plain whipped cream, and that is perfectly fine. When you lift the whisk attachment out of the mousse mixture, a small, gentle peak should form that holds its shape for a moment before gracefully collapsing or shrinking back slightly. This indicates a light, airy, yet stable consistency—exactly what we’re looking for.
- The Power of the Mixer: While the idea of whipping cream by hand might sound romantic, in reality, it requires immense effort and time. Most home cooks simply don’t have the stamina for it! I wholeheartedly recommend using either a robust electric hand mixer or a stand mixer equipped with a whisk attachment. These tools dramatically cut down on preparation time and eliminate the need for strenuous “elbow grease,” making the process enjoyable and ensuring consistent, lump-free results.
- Don’t Overmix: While whipping is essential, overmixing can be detrimental. Once soft peaks are achieved, stop mixing immediately. Over-whipping can cause the cream to become grainy or even turn into butter, which will ruin the mousse’s delicate texture.
- Taste and Adjust: Before serving, always give your mousse a quick taste. If you desire a slightly more intense caramel flavor, you can gently fold in a tablespoon or two of additional dulce de leche. However, be mindful not to add too much, as it can thin out the mousse.

Delicious Variations: Get Creative with Your Mousse!
While the classic dulce de leche mousse is undeniably divine, this versatile base recipe lends itself beautifully to exciting flavor variations. Don’t be afraid to experiment and discover your next favorite easy dessert!
- Peanut Butter Mousse: If you’re a fan of the classic peanut butter and caramel combination, this variation is a must-try. Although I haven’t personally tested this specific adaptation with this recipe, based on the naturally thick and creamy consistency of most peanut butter, I anticipate it would work exceptionally well when used in place of the dulce de leche. Ensure you use a smooth, full-fat peanut butter for the best texture and flavor. The nutty notes would provide a wonderful contrast to the sweet cream.
- Cookie Butter Mousse: For a uniquely spiced and comforting flavor, consider transforming this into a cookie butter mousse. Similar to peanut butter, Biscoff cookie butter (or any brand of speculoos spread) has a wonderfully thick and spreadable consistency that should integrate seamlessly with the heavy cream. This variation would introduce delightful notes of cinnamon, ginger, and other warm spices, creating a truly irresistible dessert.
- Nutella Mousse: I have actually tested this variation by substituting Nutella for the dulce de leche, and the results were absolutely delicious, though I noted it yielded a slightly thinner consistency than the original. The rich hazelnut-chocolate flavor was a huge hit! To achieve a thicker result, I believe chilling the Nutella thoroughly beforehand would be beneficial, as colder ingredients tend to whip up with more volume. I plan to re-test this variation with pre-chilled Nutella and will be sure to update this post with my findings and precise recommendations.
- Chocolate Caramel Mousse: For the ultimate indulgence, consider swirling in a touch of melted and cooled dark chocolate along with your dulce de leche. This would create a luscious chocolate caramel fusion, perfect for chocoholics.
- Coffee Caramel Mousse: A hint of espresso powder or a tablespoon of strong, cooled coffee extract can elevate the caramel flavor, adding a sophisticated depth.
Recipe FAQ’s: Your Questions Answered
Dulce de leche offers a wonderfully unique flavor profile that is often described as a milky, sweet caramel. While it shares some similarities with traditional caramel, the key difference lies in its preparation: dulce de leche is made by slowly cooking sweetened milk until it caramelizes, whereas traditional caramel is made from caramelized sugar. This milk base gives dulce de leche a distinct creaminess and less of a buttery taste, resulting in a thick, rich, and incredibly smooth sauce that stands on its own as a truly unique dessert component. It’s often likened to a sweet, milky fudge or a softer, richer toffee.
No, it is generally not recommended to substitute dulce de leche for sweetened condensed milk or vice-versa in recipes. Although they both contain milk and sugar, their properties and flavor profiles are quite different. Sweetened condensed milk is much thinner in consistency and has a simpler, plain sweet taste, lacking the deep, complex caramelized flavor and thick texture of dulce de leche. Using condensed milk where dulce de leche is specified would significantly alter the taste, texture, and overall outcome of the original recipe, leading to a much thinner and less flavorful result.
Unopened jars or cans of dulce de leche can typically be stored at cool room temperature in a pantry or cupboard. However, once the package has been opened, it should always be moved to the refrigerator to maintain its freshness and prevent spoilage. It’s crucial to check the product’s packaging for specific storage instructions and recommended “best by” dates, as storage guidelines can vary slightly between brands and homemade versions. Generally, an opened jar will last several weeks in the fridge when properly sealed.
If your mousse isn’t thickening as desired, ensure all your ingredients (especially the heavy cream) were thoroughly chilled. Cold ingredients whip better. You can try adding another 1/2 teaspoon of cornstarch and whipping again on medium-high speed for another minute or two. If it’s still too thin, it might be due to overmixing or insufficient chilling. Sometimes, a short stint in the freezer (15-20 minutes) can help it firm up for serving.
While this specific recipe relies on dairy heavy cream and traditional dulce de leche, you can explore vegan alternatives. Look for plant-based heavy whipping creams (like coconut cream, chilled and whipped, or specific vegan whipping creams) and vegan dulce de leche alternatives (often made from coconut milk or other plant-based milks). The texture and flavor might differ slightly, but it’s possible to create a delicious dairy-free version with careful ingredient selection.

More Easy Dessert Recipes to Satisfy Your Sweet Tooth
If you loved the simplicity and deliciousness of this Dulce de Leche Mousse, you’re in for a treat! Explore these other fuss-free dessert recipes that are perfect for any occasion:
- Homemade Dulce de Leche Ice Cream: A creamy, dreamy ice cream packed with rich caramel flavor.
- Lazy Cheesecake Salad: A light, fruity, and incredibly easy dessert that tastes like cheesecake without the baking.
- No Bake Peanut Butter Bars: Rich, chocolatey, and utterly satisfying bars that require no oven time.
- Berry Cheesecake Salad: A vibrant and refreshing dessert featuring fresh berries and a creamy cheesecake base.
- Chocolate Wafer Icebox Cake (Zebra Cake): Layers of chocolate wafers and whipped cream create a stunning no-bake classic.
If you’ve whipped up and fallen in love with this easy Dulce de Leche Mousse recipe, please consider leaving a 5-star review in the recipe card below or dropping a comment! Your feedback truly helps. You can also share your delightful creations by tagging me on Instagram @dashfordinner. I’d love to see your beautiful desserts!

Easy Dulce de Leche Mousse
Print Recipe
Pin Recipe
Equipment
- Stand mixer or hand mixer
- Piping bag optional
Ingredients
- 1 cup dulce de leche thick
- 1 cup heavy cream chilled
- 1 teaspoon cornstarch (optional, for stability)
Instructions
- Into the bowl of a stand mixer fitted with the whisk attachment (or a large bowl with a hand mixer), pour the thoroughly chilled heavy cream, then add the dulce de leche, and the cornstarch (if you are using it for stabilization).
- Beat all ingredients together on medium-high to high speed until they are thoroughly combined, the mixture has thickened considerably, and soft peaks begin to form. This process typically takes about 3-5 minutes, depending on your mixer and the chill of your ingredients.
- The final mixture should create soft peaks that hold their shape before gently receding. If the mixture is not thick enough, continue to mix for another minute or two, or add an additional 1/2 teaspoon of cornstarch and whip again briefly.
- Carefully transfer the thickened dulce de leche mousse to a pastry bag, then pipe the mixture elegantly into individual dessert cups. Alternatively, if you prefer, gently spoon the mousse into the cups or individual ramekins.
- Finish by topping with an additional drizzle of dulce de leche, a light dusting of powdered sugar, or a sprinkle of your favorite garnish, if desired. The mousse is also delicious left plain.
- Serve your delightful mousse immediately to enjoy its fresh, airy texture, or make it ahead of time and chill for up to 1 day before serving (this is especially recommended if cornstarch was used).
Notes
Chilling: For the absolute best results and quickest whipping time, it is imperative that your heavy cream is very cold. If possible, chilling your dulce de leche as well will aid in achieving a thicker, more stable mixture more quickly. Don’t underestimate the power of cold ingredients!
Cornstarch: The cornstarch acts as a crucial stabilizer in this recipe, helping to prevent the mousse from weeping or separating, thus ensuring it stores beautifully in the refrigerator. It also contributes to a slightly firmer, more consistent texture. If you plan on serving and consuming the dulce de leche mousse immediately after preparation, you may omit it. However, if you intend to prepare it in advance or store it for any length of time, I highly recommend including it for best results.
Nutrition
Please note that some of my blog posts here at Dash for Dinner may contain affiliate links. If you make a purchase through these links, I will get a small commission at no additional cost to you. Please see my Disclaimer for more information.
