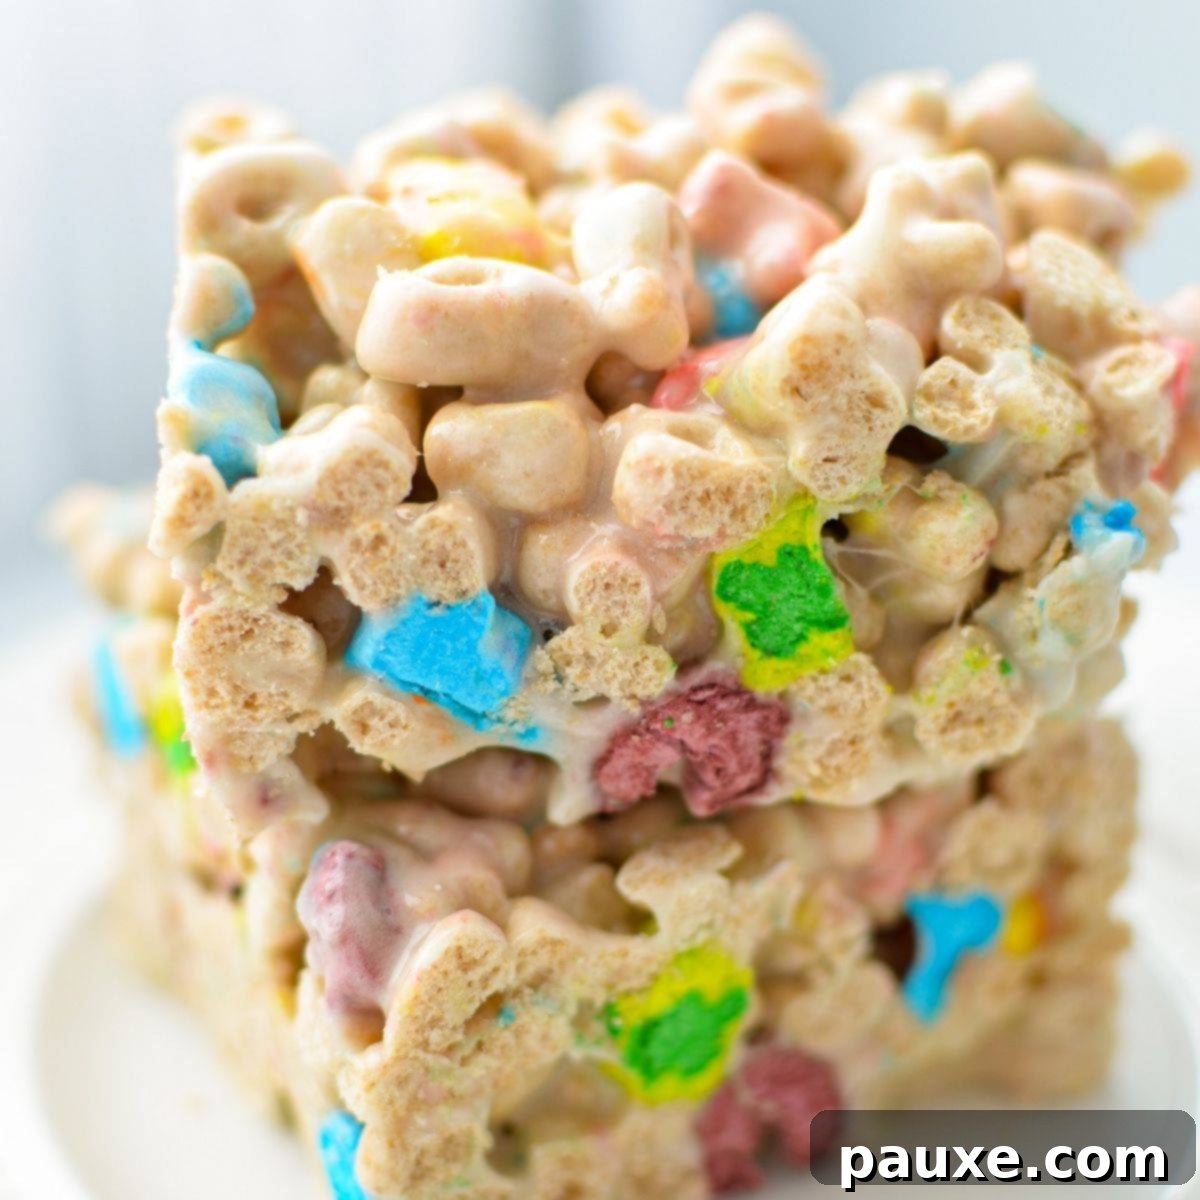
Unlock the secret to a truly magical, stress-free dessert with these incredibly easy no-bake Lucky Charms Treats! Imagine a confection so simple, it requires just four pantry-friendly ingredients and comes together in mere minutes. Perfect for whipping up as a delightful lunchbox surprise, a crowd-pleasing family dessert, or an irresistibly festive treat that brings a touch of Irish luck to any St. Patrick’s Day celebration.
Beyond the vibrant colors and whimsical marshmallows, these treats offer an unmatched combination of convenience and deliciousness. They are the ideal solution when you crave something sweet but are short on time, or when you simply prefer to keep the oven off. Get ready to charm everyone with these wonderfully gooey, delightfully chewy, and effortlessly fun cereal bars!

Why You’ll Fall in Love with These Lucky Charms Treats
As a devoted fan of no-bake desserts, I’m thrilled to share a recipe that perfectly embodies my love for quick and delightful sweet treats. While I enjoy the challenge of multi-step baking projects, there’s an undeniable charm to desserts that come together with minimal effort and maximum flavor. These Lucky Charms marshmallow treats perfectly fit the bill, offering a magical experience from start to finish. Here’s why they’re destined to become a staple in your recipe collection:
- Effortlessly Simple: With just 4 ingredients and a lightning-fast prep time of under 10 minutes, these treats are perfect for even the busiest schedules. They eliminate the need for complicated techniques or extensive kitchen cleanup.
- No-Bake Perfection: Forget preheating ovens or waiting for things to cool. This no-bake recipe is a lifesaver, especially during warm weather or when you need a speedy dessert. It’s also a fantastic option for young chefs eager to help in the kitchen.
- Kid-Friendly & Fun: The vibrant colors and playful marshmallow shapes of Lucky Charms cereal make these treats an instant hit with children. They’re a wonderful addition to school lunchboxes, playdates, or any occasion that calls for a touch of whimsy.
- Versatile for Any Occasion: While they shine brightly as a festive St. Patrick’s Day dessert, these cereal bars are truly adaptable. Serve them at birthday parties, family gatherings, potlucks, or simply as an everyday snack when that sweet craving hits. They’re a fantastic way to embrace your inner leprechaun any time of year!
- Excellent Shelf Life: These delightful bars store beautifully for up to a week in the refrigerator, making them an ideal make-ahead dessert. Plus, they can be frozen for even longer enjoyment, ensuring you always have a sweet treat on hand.
Essential Ingredients for Your Magical Cereal Bars
Creating these irresistible Lucky Charms Treats requires only a handful of common ingredients, each playing a crucial role in achieving that perfectly gooey, chewy texture and delicious flavor. Quality ingredients make a noticeable difference, so choose wisely!

- Lucky Charms Cereal: The star of our show! You’ll need one regular-sized box, typically around 11.5 oz or 300g. If you have a larger family-sized box, aim for approximately 9 cups of cereal. The iconic oat pieces combined with those beloved colorful marshmallows are what give these treats their unique charm and whimsical appeal.
- Mini Marshmallows: These are the magical binder that holds everything together. A large 16 oz bag is perfect, yielding about 9½-10 cups (or 454 grams) of mini marshmallows. Mini marshmallows are preferred over their larger counterparts because they melt more quickly and evenly, ensuring a smoother, more consistent marshmallow coating throughout your cereal mixture. Always use fresh marshmallows for the best gooey texture; stale ones can result in dry, crumbly treats.
- Butter: I personally favor using salted butter in this recipe. The subtle saltiness provides a wonderful contrast and balances the intense sweetness of the marshmallows and cereal, elevating the overall flavor profile. However, if your regular brand of salted butter is particularly salty, or if you prefer to control the salt content, unsalted butter with a few pinches of added salt works just as well. The butter contributes to the rich flavor and helps create that perfectly pliable, non-sticky mixture.
- Vanilla Extract: Don’t underestimate the power of a good vanilla extract! Adding a splash of pure vanilla to your marshmallow mixture infuses these cereal bars with a warm, subtle, and incredibly inviting aroma and flavor. It’s a small addition that makes a significant difference, giving these easy treats a true homemade and gourmet flair.
Essential Tools & Equipment
Minimal tools are needed for this straightforward recipe, making cleanup just as easy as preparation!
- Very Large Mixing Bowl or Saucepan: Whether you opt for the microwave or stovetop method, you’ll need a generously sized vessel to comfortably mix all the ingredients. For microwave preparation, ensure it’s microwave-safe glass or ceramic. For the stovetop, a large saucepan or stockpot will be necessary.
- Silicone Spatula: This is your best friend when dealing with sticky ingredients like melted marshmallows. A sturdy silicone spatula allows you to effortlessly stir, fold, and scrape the mixture without excessive sticking, making the process much smoother. I highly recommend investing in a good quality one, like this versatile option, which comes in various sizes.
- Baking Pans: You’ll need two 8×8 inch baking pans, or one standard 9×13 inch baking pan. These are for shaping and setting your treats.
- Parchment Paper: Crucial for easy removal and cleanup, preventing the sticky mixture from adhering to the pan.
Crafting Your Magical Lucky Charms Treats: A Step-by-Step Guide
Making these no-bake Lucky Charms Treats is an absolute breeze. Follow these simple instructions for a delightful dessert every time!
Step 1: Prepare Your Pan
First, lightly grease your chosen baking pan(s) – either one 9×13 inch pan or two 8×8 inch pans – with butter or non-stick spray. Then, line the pan(s) with two sheets of parchment paper, overlapping them to create “handles” on all sides. This simple trick will make removing the set treats incredibly easy and mess-free.
Step 2: Melt Marshmallows and Butter (Microwave Method)
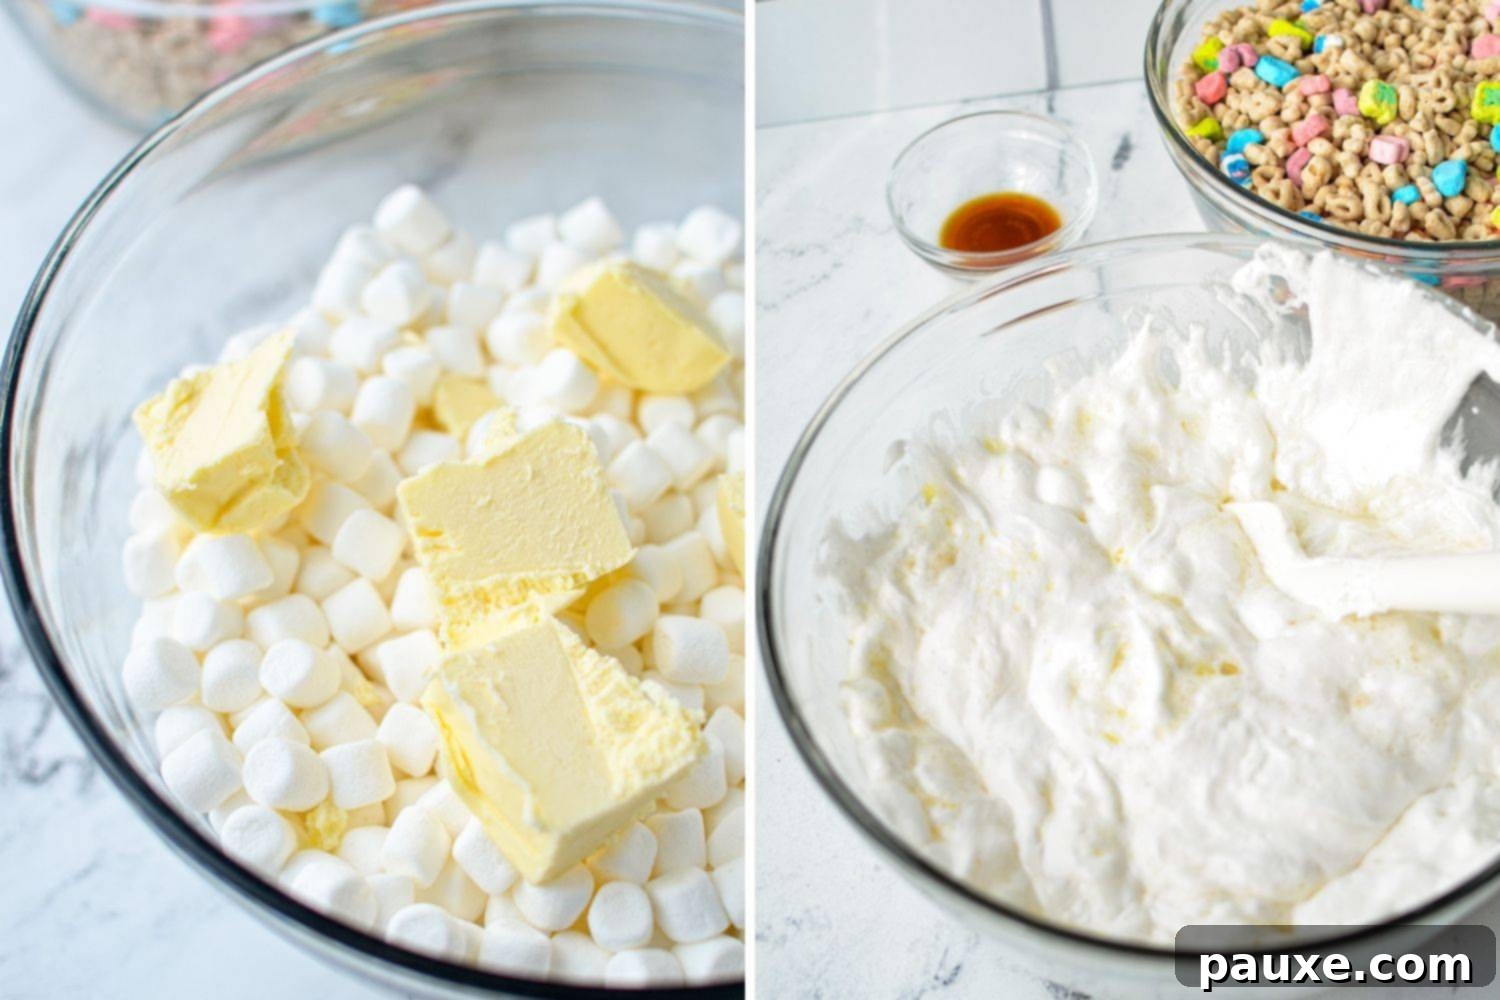
Begin by adding all your mini marshmallows into a very large glass or microwave-safe bowl. Cube or slice the butter into smaller pieces and scatter them over the marshmallows. Heat the bowl in the microwave on high power for 3 minutes. Be sure to pause at the 2-minute mark to stir the mixture, then continue heating for the remaining minute. This ensures even melting and prevents scorching.
Once the marshmallows and butter have fully melted and become a smooth, cohesive mixture, carefully remove the bowl from the microwave. If any small lumps remain, stir vigorously until completely smooth.
Note: For detailed stovetop instructions, please refer to the dedicated section further down the post.
Step 3: Add Vanilla Extract
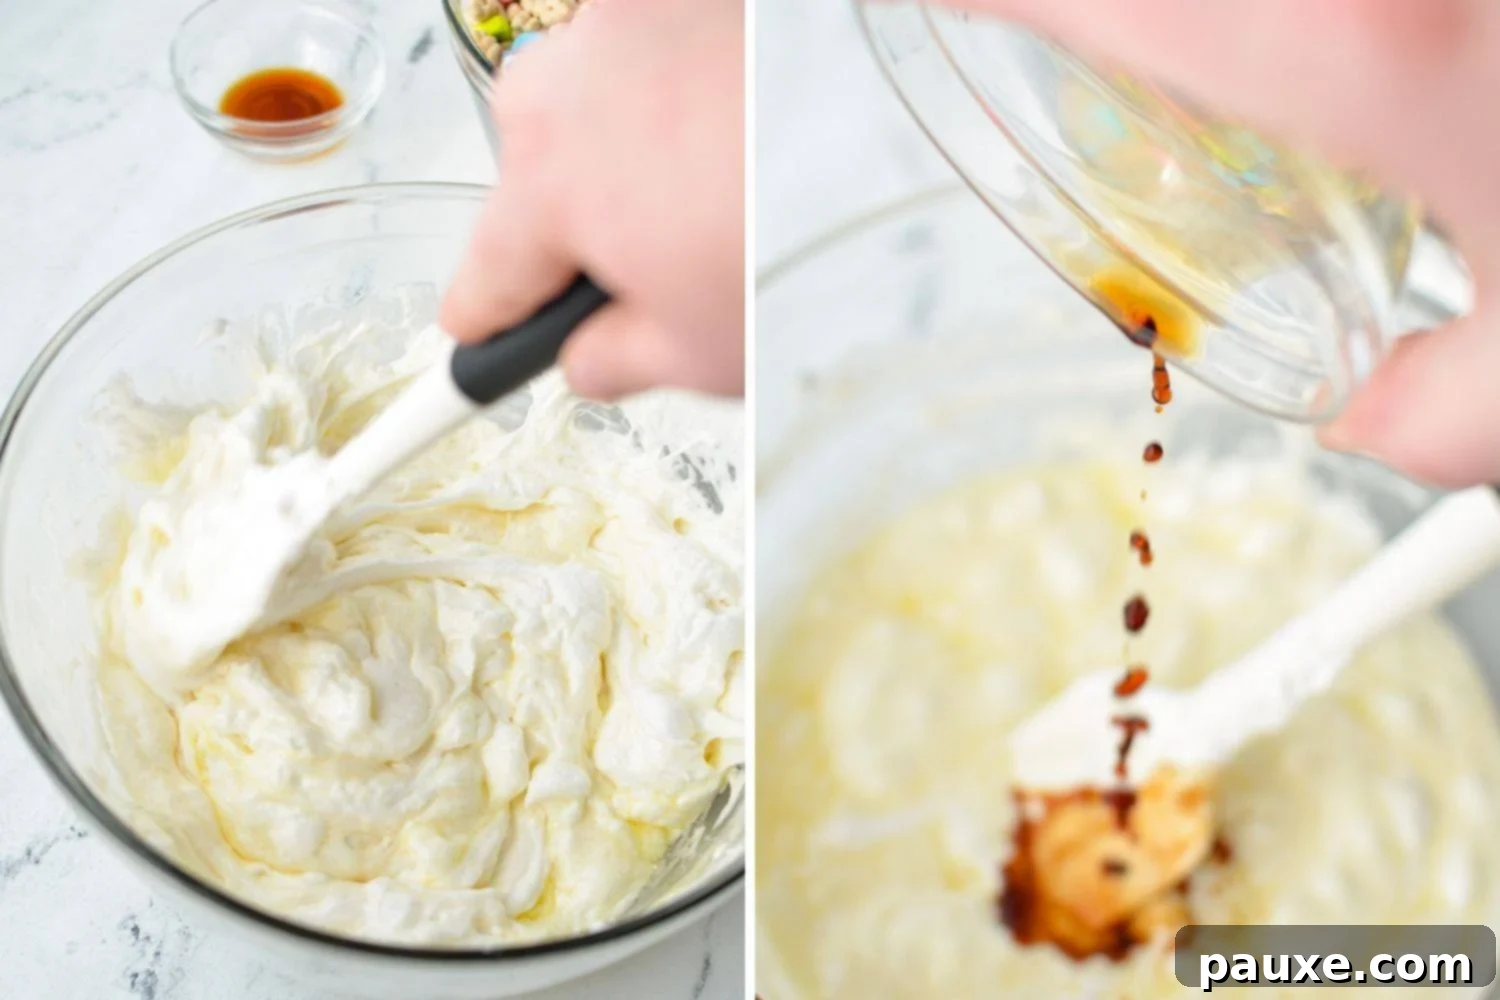
Once your marshmallow-butter mixture is silky smooth, it’s time to add the secret ingredient for that extra homemade touch. Stir in the vanilla extract until it is thoroughly incorporated. The vanilla will infuse the treats with a lovely, aromatic depth of flavor that complements the sweet cereal perfectly.
Step 4: Fold in the Lucky Charms Cereal

Now for the fun part! Add the entire quantity of Lucky Charms cereal to your bowl of melted marshmallow goodness. Using your silicone spatula, gently fold the cereal into the sticky mixture. Work quickly but carefully, ensuring that every single oat piece and colorful marshmallow is coated evenly with the sweet, gooey binder. Avoid crushing the cereal as you mix; we want to preserve its texture and delightful crunch.
Step 5: Press into Pans and Chill
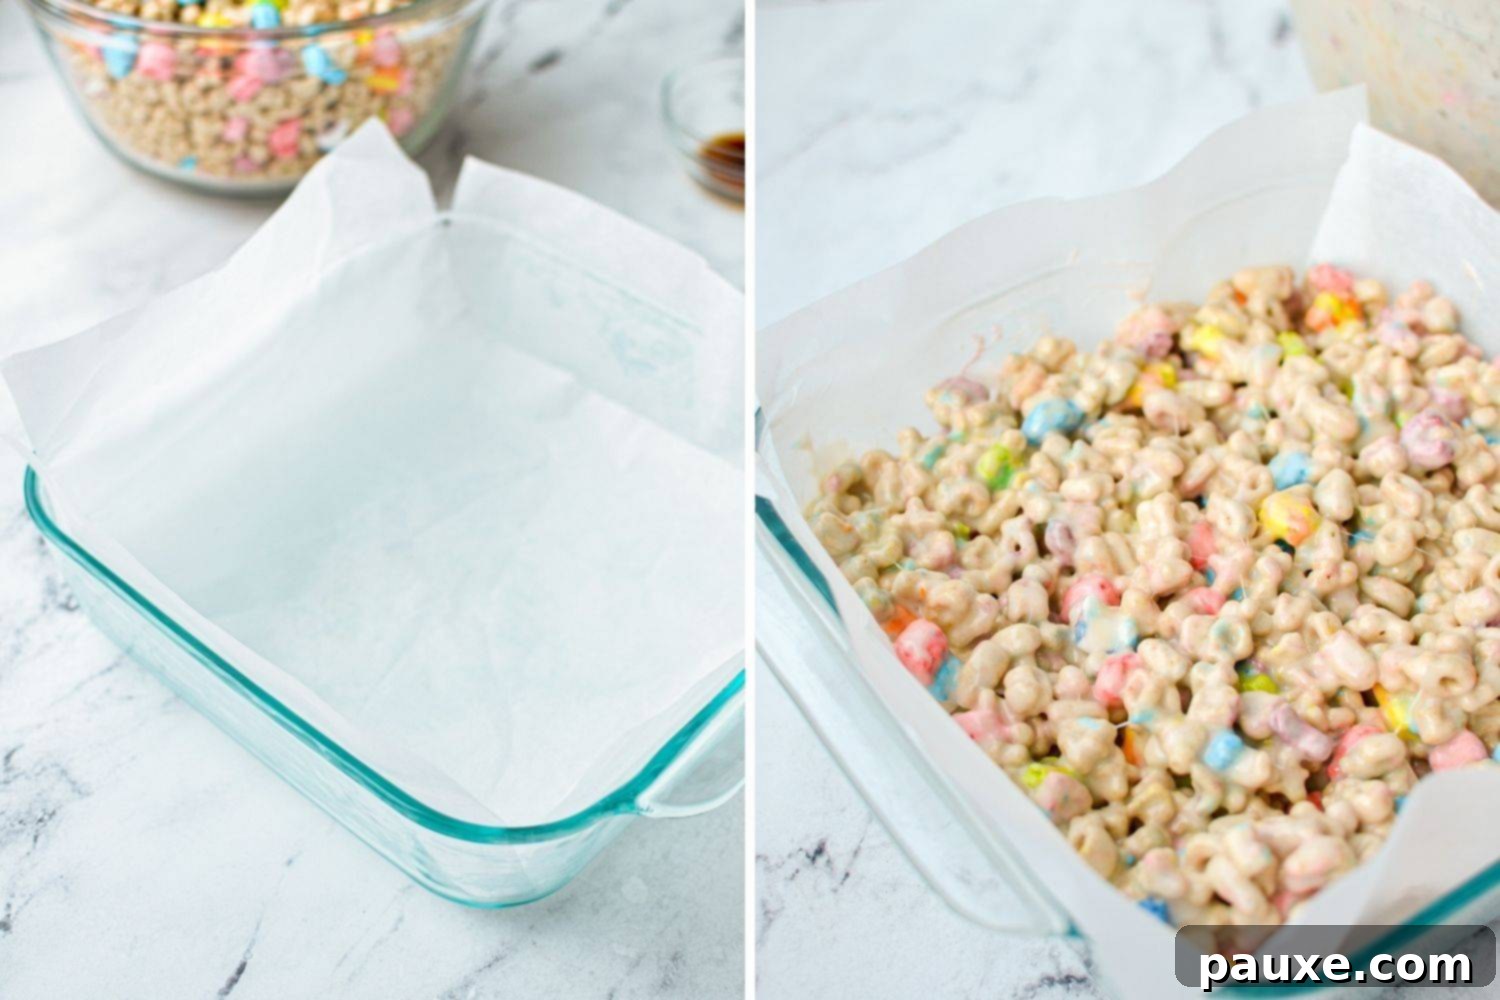
Transfer the coated Lucky Charms mixture to your prepared baking pan(s). Using your buttered silicone spatula or a piece of buttered parchment paper (to prevent sticking), gently spread the mixture out evenly into the pan. This step is crucial: be careful not to pack the mixture down or press too hard! Over-packing will result in dense, hard, and slightly dry treats. Our goal is soft, gooey, and delightfully chewy bars. A light, even press is all that’s needed.
Step 6: Chilling and Slicing
Once the mixture is evenly spread in your baking pan(s), allow the treats to set. You have two options: either let them sit at room temperature for 2-3 hours, or for a quicker set, place them in the refrigerator for 1-2 hours. Chilling helps them firm up perfectly for slicing.
After the bars have fully set, use the parchment paper “handles” to lift the entire slab out of the pan. Place it on a cutting board and slice into your desired square or rectangular shapes. Serve immediately and enjoy the magically delicious results, or store them for later!
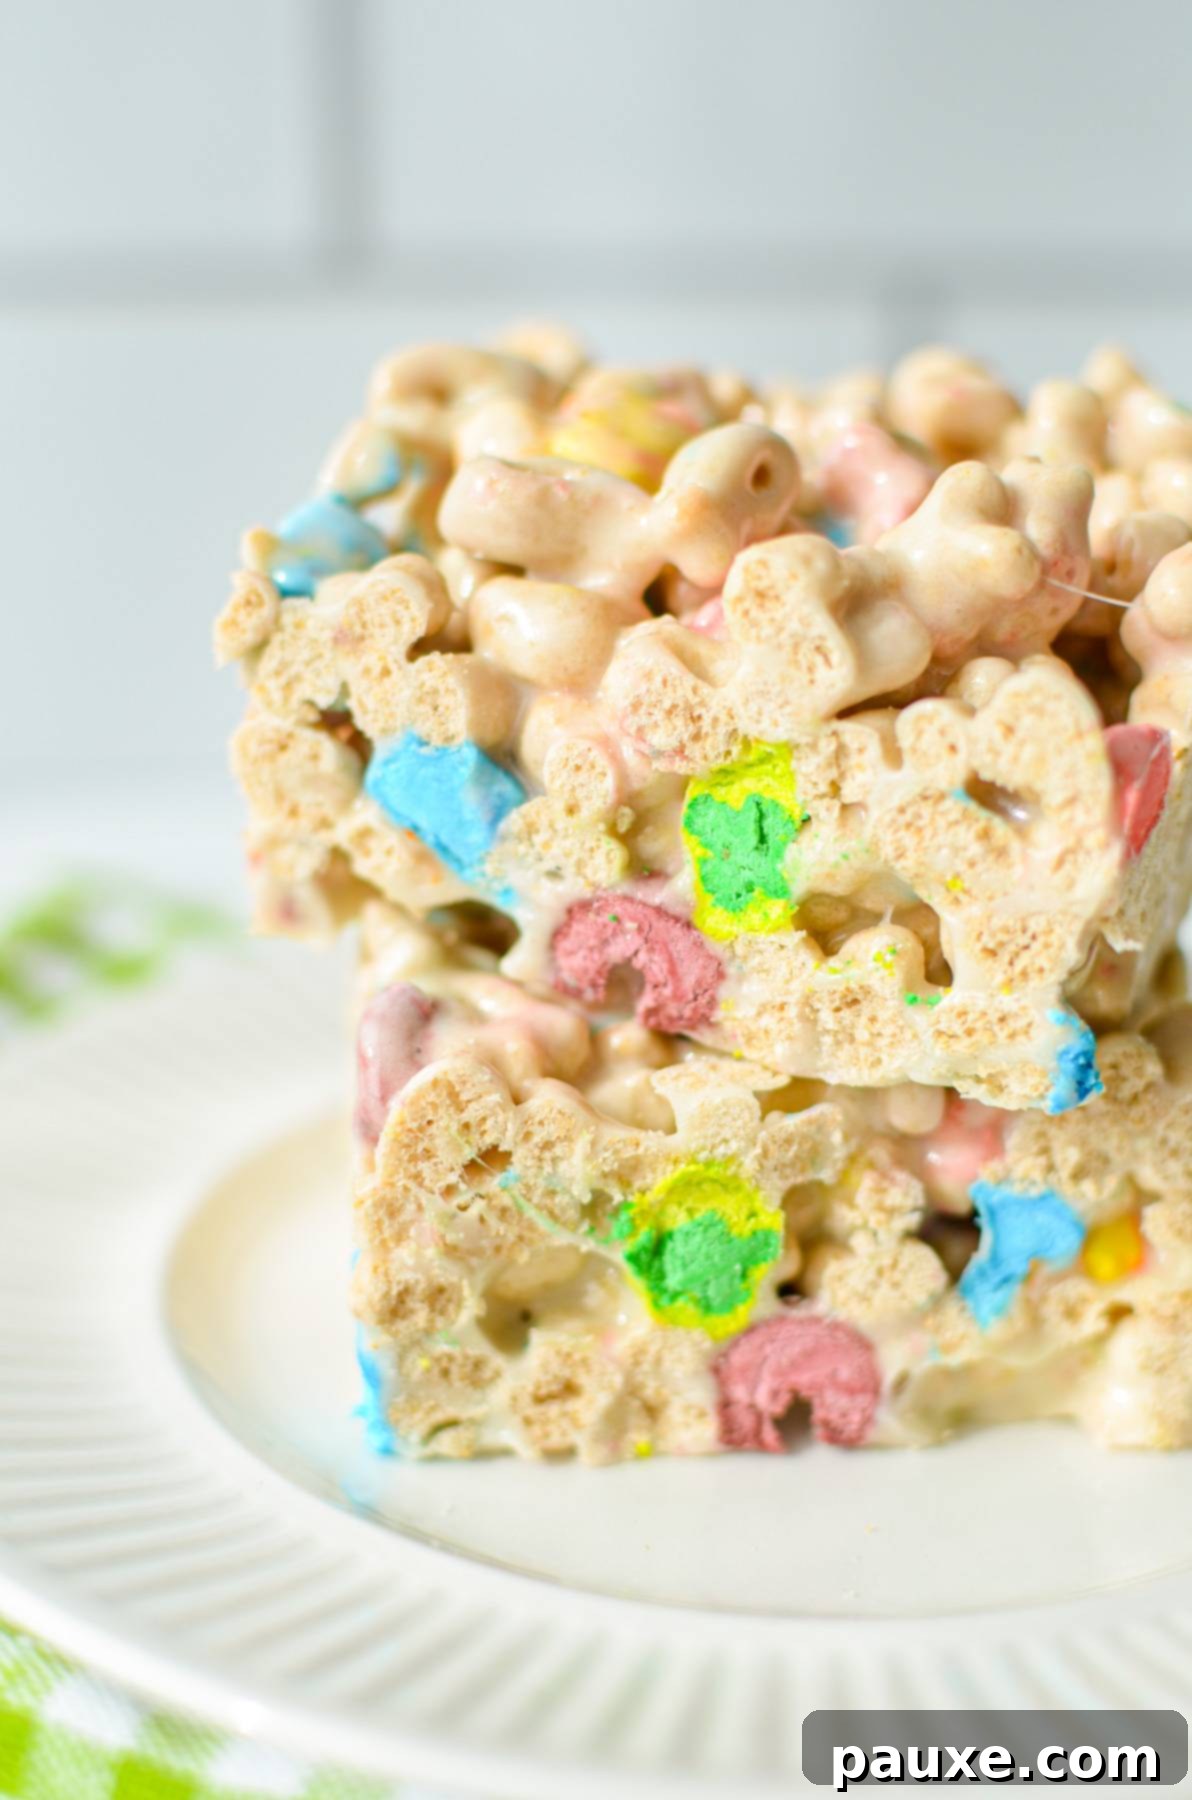
Pro Tips for Perfectly Gooey Lucky Charms Treats
Achieving the ideal texture for these marshmallow cereal bars is key to their deliciousness. Here are a few expert tips to ensure your Lucky Charms Treats are always soft, gooey, and absolutely irresistible:
- Don’t Overcook the Marshmallows: Whether using a microwave or stovetop, resist the urge to over-melt the marshmallows. Overheated marshmallows can become tough and brittle once cooled, leading to hard treats. Melt them just until smooth and combined.
- Gently Press, Don’t Pack: This is perhaps the most important tip! When spreading the mixture into your prepared pan, use a very light touch. Pressing too firmly will compress the air out of the marshmallows and cereal, resulting in dense, brick-like bars. We want that delightful, airy chewiness.
- Use Fresh Marshmallows: Old or stale marshmallows tend to dry out and don’t melt as smoothly, which can affect the final texture of your treats. Always reach for a fresh bag for the best results.
- Butter Everything: A little butter goes a long way in preventing stickiness. Lightly butter your spatula, hands (if you dare to touch the warm mixture!), and even the parchment paper you use to press the mixture. This will make handling much easier.
- Chill to Perfection: While room temperature setting works, a stint in the refrigerator for an hour or two helps the treats firm up beautifully, making them easier to slice cleanly and ensuring they hold their shape.
Creative Variations & Additions
While these classic Lucky Charms Treats are perfect as they are, there are many ways to customize them and add your own creative flair. Here are some ideas to make them even more special:
- Chocolate Drizzle: For an extra layer of indulgence, melt some white, milk, or dark chocolate and drizzle it over the cooled and set treats. You can even use colorful candy melts to match the Lucky Charms marshmallows!
- Extra Sprinkles: Why not double down on the fun? Before the treats fully set, sprinkle some extra festive sprinkles on top, especially for St. Patrick’s Day or birthdays.
- Different Cereals: While Lucky Charms are the star here, don’t be afraid to experiment with other colorful or sugary cereals if you’re looking for different flavor profiles. Fruity Pebbles or Cinnamon Toast Crunch could be fun alternatives.
- Food Coloring: For an extra pop of color, especially for themed parties, add a few drops of green food coloring (or any color!) to the melted marshmallow mixture before adding the cereal.
- Marshmallow Swirl: For an even more intense marshmallow experience, gently fold in an extra half cup of mini marshmallows just before transferring the mixture to the pan. They will slightly melt and create beautiful pockets of gooeyness.
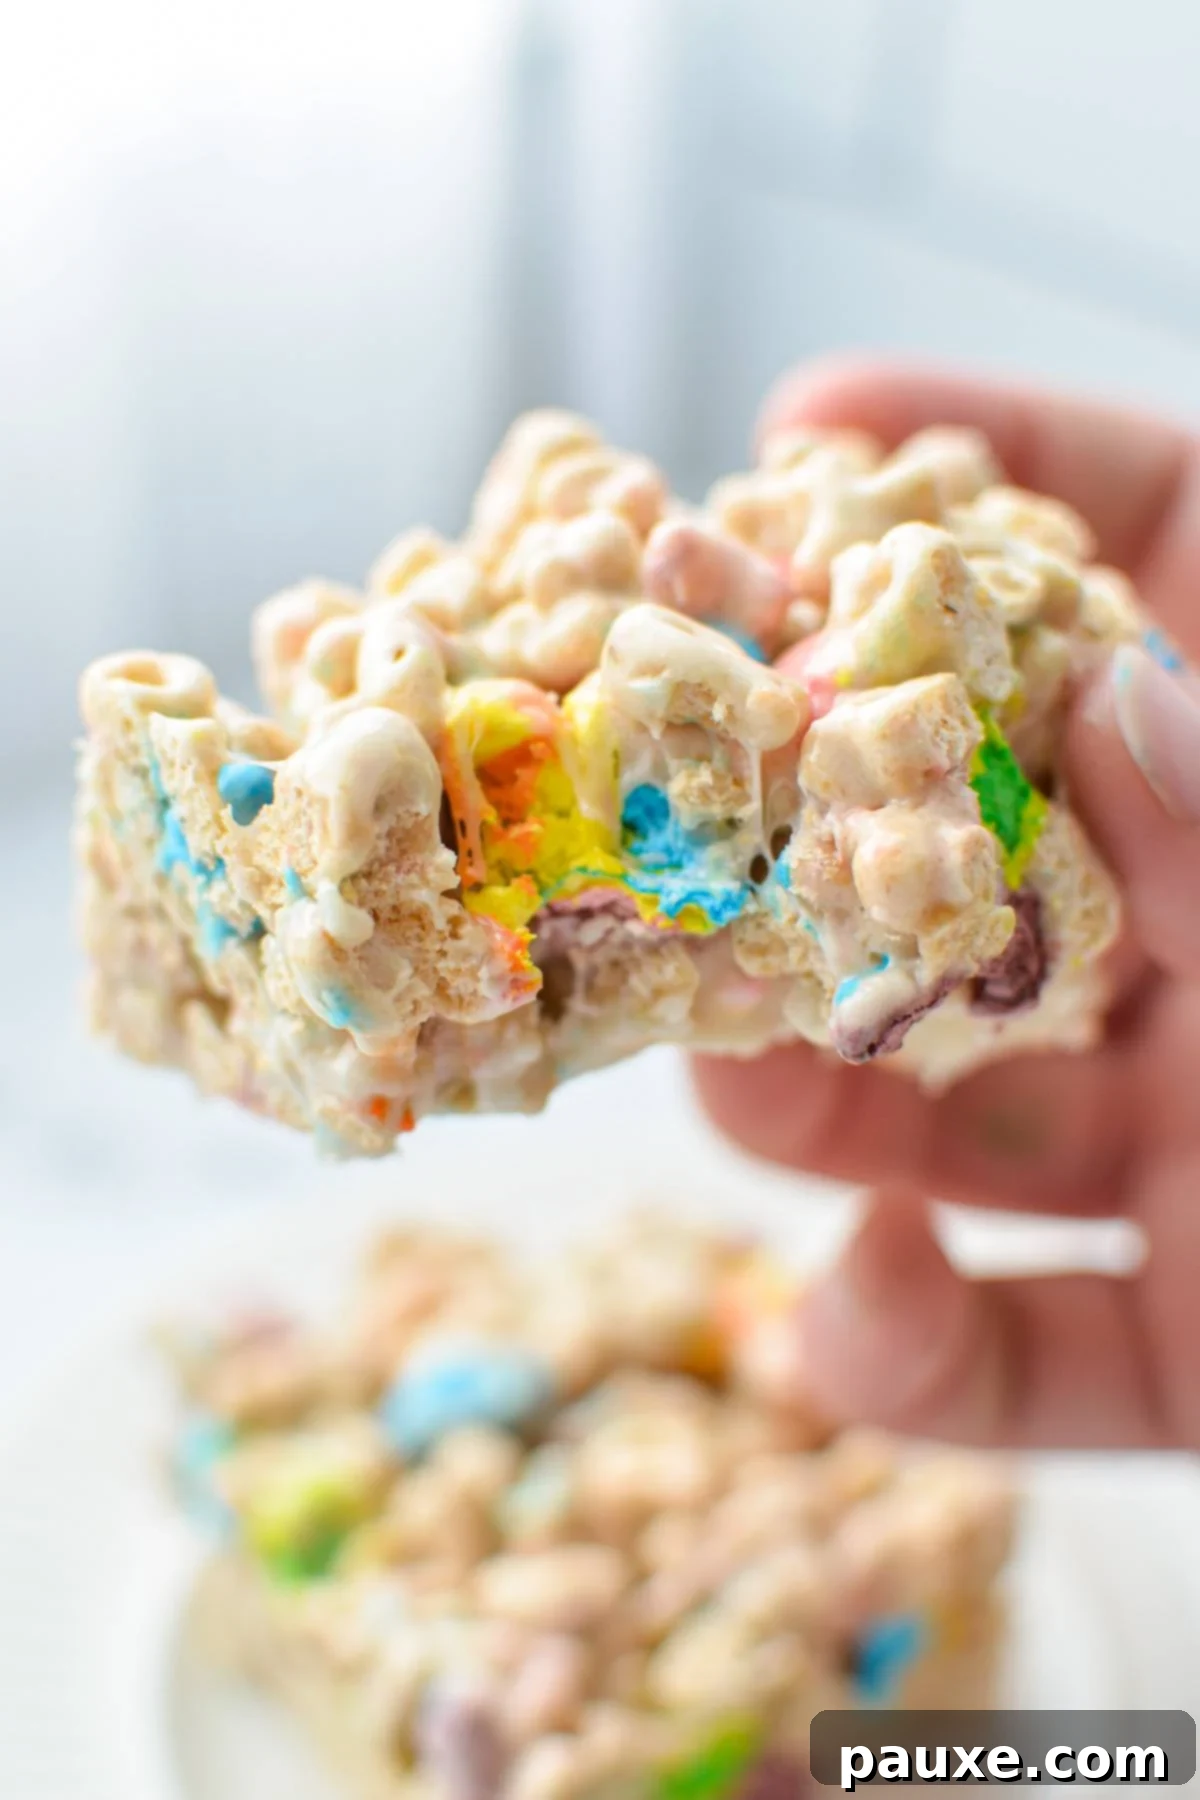
Storing Your Magical Treats
One of the many benefits of these Lucky Charms Treats is how well they store, allowing you to enjoy them for days after preparation. Proper storage ensures they remain fresh, soft, and delicious.
- Countertop Storage: Once your treats have completely cooled down and been sliced into bars, transfer them to an airtight storage container. They can be kept at room temperature for up to 3 days. To prevent them from sticking together, you can place a piece of parchment paper between layers.
- Refrigerator Storage: For an extended shelf life, store the treats in an airtight container in the refrigerator for up to 1 week. Note that refrigerating them might make them slightly firmer; simply let them come to room temperature for 10-15 minutes before serving for a softer chew.
Freezer Storage for Longer Enjoyment
If you wish to prepare these treats well in advance or have leftovers, freezing is an excellent option to extend their freshness for several months.
To freeze, wrap each individual treat tightly in plastic wrap. This prevents freezer burn and keeps them fresh. Then, place the individually wrapped bars into a labeled freezer-safe bag or airtight container. They can be frozen for up to 3 months. When you’re ready to enjoy them, simply remove a bar from the freezer and let it thaw at room temperature for about 30 minutes to an hour, or until soft enough to eat.
Stovetop Method: An Alternative to the Microwave
Not everyone owns a microwave or prefers to use one for cooking. If you’re someone who prefers the traditional stovetop method, rest assured that these Lucky Charms Treats can be made just as easily on your hob. Here are the step-by-step instructions for a stovetop preparation:
- In a very large saucepan or stockpot, melt the butter over low heat. It’s important to use low heat to prevent the butter from browning or burning, which could affect the flavor of your treats.
- Once the butter is completely melted, add all the mini marshmallows to the saucepan. Continue to stir constantly with your silicone spatula until the marshmallows are fully melted and form a smooth, gooey mixture. Constant stirring ensures even melting and prevents sticking to the bottom of the pot.
- As soon as the marshmallow mixture is smooth and free of lumps, remove the saucepan from the heat. Immediately stir in the vanilla extract until it is well combined.
- Add the Lucky Charms cereal to the melted marshmallow mixture in the saucepan. Gently fold the cereal into the sticky base using your silicone spatula, making sure every piece is thoroughly coated. Be gentle to avoid crushing the cereal.
- Transfer the entire cereal mixture to your prepared baking dish(es), as described in Step 5 of the main instructions. Spread it out evenly and press gently.
- Allow the treats to cool and set according to the chilling instructions. Then slice, serve, and enjoy!
Frequently Asked Questions (FAQs)
Here are some common questions about making Lucky Charms Treats:
- Can I use large marshmallows instead of mini marshmallows? Yes, you can. However, large marshmallows will take longer to melt evenly. Cut them into smaller pieces to speed up the melting process and ensure a smooth mixture.
- Why are my Lucky Charms Treats hard? The most common reasons for hard treats are over-melting the marshmallows (which makes them brittle) or pressing the mixture too firmly into the pan. Ensure you melt the marshmallows just until smooth and use a very light touch when pressing. Using fresh marshmallows also helps.
- Can I add food coloring? Absolutely! For extra festive fun, you can add a few drops of green (or any color) food coloring to the melted marshmallow mixture before adding the cereal. Stir it in thoroughly for an even hue.
- Are these treats gluten-free? Lucky Charms cereal contains whole grain oats, which are naturally gluten-free, but may be processed on shared equipment with wheat. Always check the cereal packaging for current allergen information and certifications if gluten-free is a strict requirement.
- How long do these treats last? When stored properly in an airtight container, they last up to 3 days at room temperature, up to 1 week in the refrigerator, or up to 3 months in the freezer.
More Easy No-Bake Desserts You’ll Love
If you’re a fan of quick, delicious, and oven-free sweet treats, explore some of my other favorite no-bake recipes. They’re perfect for satisfying your sweet tooth without the hassle!
- No-Bake Peanut Butter Bars
- No-Bake Nutella Pie
- Butterscotch Haystacks
- No-Bake Chocolate Chip Cheesecake
- No-Bake Pumpkin Cheesecake Bars
Recipe Card: Lucky Charms Treats
Here’s a concise overview of the recipe for your convenience, including ingredients, step-by-step instructions, and nutritional information.
Lucky Charms Treats
This recipe for Lucky Charms Treats is incredibly simple to make, requiring just 4 ingredients! Perfect for any time of year, and an absolute delight for St. Patrick’s Day for a little festive fun.
Rating: 5 out of 5 stars from 1 vote
Course: Desserts
Cuisine: American
Prep Time: 5 minutes
Cooling time: 1 hour
Total Time: 1 hour 5 minutes
Servings: 15 Treats
Calories: 230kcal
Author: Dorothy Bigelow
Ingredients
- 10 cups mini marshmallows (10 ounce bag)
- ½ cup butter
- 9 cups Lucky Charms cereal
- ½ teaspoon vanilla extract
Instructions
- Grease one 9″ x 13″ baking dish (or two 8″ x 8″ pans) with butter, and line it with two sheets of parchment paper cut to size, overlapping each other to provide “handles” on all sides of the baking dish.
- Add your marshmallows to a very large microwave safe bowl.
- Cube your butter and place it on top of the marshmallows.
- Heat the bowl of marshmallows in the microwave on high power for 3 minutes, stirring at the 2 minute mark.
- Stir well to combine the marshmallows and butter, and then stir in the vanilla extract.
- Add the cereal to the melted marshmallow mixture, and gently fold it in with a silicone spatula.
- Gently transfer your Lucky Charms mixture to the prepared baking dish, and spread it out evenly. Be sure to not pack them in too tightly, as you don’t want your treats to be dense.
- Allow to cool at room temperature for several hours, OR in the fridge for 1-2 hours.
- Once your treats are set, slice them into squares/bars. Serve and enjoy!
Did you try this recipe?Tag me at @dashfordinner and share your photos!
Notes
- Stovetop Instructions: Melt the butter in a very large saucepan or stock pot over low heat. Once the butter is melted, add the marshmallows and stir constantly until melted. Once the marshmallows are completely melted and smooth, remove from the heat and stir in the vanilla. Add in the cereal, and fold it in gently. Transfer to the prepared baking dishes as described in the recipe.
- Storage: Once your treats are cut into bars, keep them in an airtight container at room temperature for up to 3 days, OR in the fridge for up to 1 week.
- Freezing: If you would like to freeze your treats, you can do so by wrapping each treat individually in plastic wrap, then placing in a labeled freezer bag. Freeze for up to 3 months.
Nutrition
Serving: 1 Treat | Calories: 230kcal | Carbohydrates: 41g | Protein: 2g | Fat: 7g | Saturated Fat: 4g | Polyunsaturated Fat: 1g | Monounsaturated Fat: 2g | Trans Fat: 0.3g | Cholesterol: 16mg | Sodium: 208mg | Potassium: 50mg | Fiber: 1g | Sugar: 25g | Vitamin A: 776IU | Vitamin C: 6mg | Calcium: 93mg | Iron: 5mg
Please note that some of my blog posts here at Dash for Dinner may contain affiliate links. If you make a purchase through these links, I will get a small commission at no additional cost to you. Please see my Disclaimer for more information.
