Step back in time to the era of neon colors, mixtapes, and incredibly simple yet delicious comfort food. This recipe for English Muffin Pizzas is more than just a meal; it’s a delightful trip down memory lane, straight into the heart of 90s nostalgia. It’s the ultimate easy meal idea, perfectly suited for a speedy lunch, a satisfying dinner, or even a hearty snack. Loved by even the pickiest eaters and incredibly versatile, these mini pizzas are ready in less than 20 minutes, making them an ideal choice for busy households looking for a quick and flavorful fix.

- Why You’ll Love This Recipe
- Ingredients
- Equipment
- How to Make English Muffin Pizzas in the Oven
- Storing and Reheating
- Make Ahead and Freeze
- Toaster Oven Instructions
- Air Fryer Instructions
- Variations
- Recipe FAQ’s
- More Easy Meal Ideas
- Recipe Card
Growing up in the 90s, quick and easy dinners were a staple in many households, and my family was no exception. While we had our share of fun meals (who remembers Cornflake chicken?), nothing quite captured our hearts and appetites like English Muffin Pizzas. This wasn’t just a simple dish; it was a canvas for culinary creativity, albeit a very small one, and a guaranteed crowd-pleaser for children and parents alike.
The beauty of this quick and easy recipe lies in its utter simplicity. With just a few basic ingredients – English muffin halves, a dollop of pizza sauce, and a generous sprinkle of cheese – you could transform ordinary pantry items into a delicious, satisfying meal. Parents loved it because it meant minimal fuss and maximum satisfaction, with virtually no complaints from even the most particular eaters. It truly was the perfect solution for busy weeknights.
Even today, with all the culinary advancements, I still turn to this classic recipe for my own family. When a pizza craving hits, but we don’t want the hassle of ordering takeout or the time commitment of making a homemade crust from scratch, English Muffin Pizzas come to the rescue. They also make an excellent quick lunch for those hectic work-from-home days or a substantial after-school snack. What’s more, they can be made ahead and frozen, offering ultimate convenience for future meals. This isn’t just a recipe; it’s a testament to simple, delicious food that stands the test of time.
Why You’ll Love This Recipe:
- Effortlessly Easy & Picky-Eater Approved: This English muffin pizza recipe is the definition of an easy meal idea. It requires minimal cooking skills and comes together with simple, familiar flavors that kids adore. The individual nature of these mini pizzas also allows everyone to customize their toppings, ensuring even the pickiest eaters find something to love. No more battles over dinner!
- Made with Basic, Accessible Ingredients: Forget complicated shopping lists. You’ll likely have most of the ingredients on hand, making this a spontaneous and budget-friendly option. It’s an easy recipe made with basic ingredients, proving that you don’t need gourmet components to create something truly delicious.
- Endless Customization & Topping Creativity: While classic pepperoni and cheese are unbeatable, these mini pizzas are a fantastic canvas for your culinary imagination. You can easily get creative with your favorite pizza toppings, from mini pepperonis and vibrant bell peppers to red onion, mushrooms, black olives, or even crumbled cooked sausage. It’s a fun way to experiment with different flavor combinations.
- Versatile for Any Meal or Snack: Whether you need a quick lunch or dinner, or just an easy snack to tide you over, these fit the bill perfectly. You can quickly whip up just one or two English muffin halves for a solo treat, or make a whole batch for the family. Plus, with simple variations for the air fryer or toaster oven, you can choose the cooking method that best suits your schedule and equipment.
Ingredients
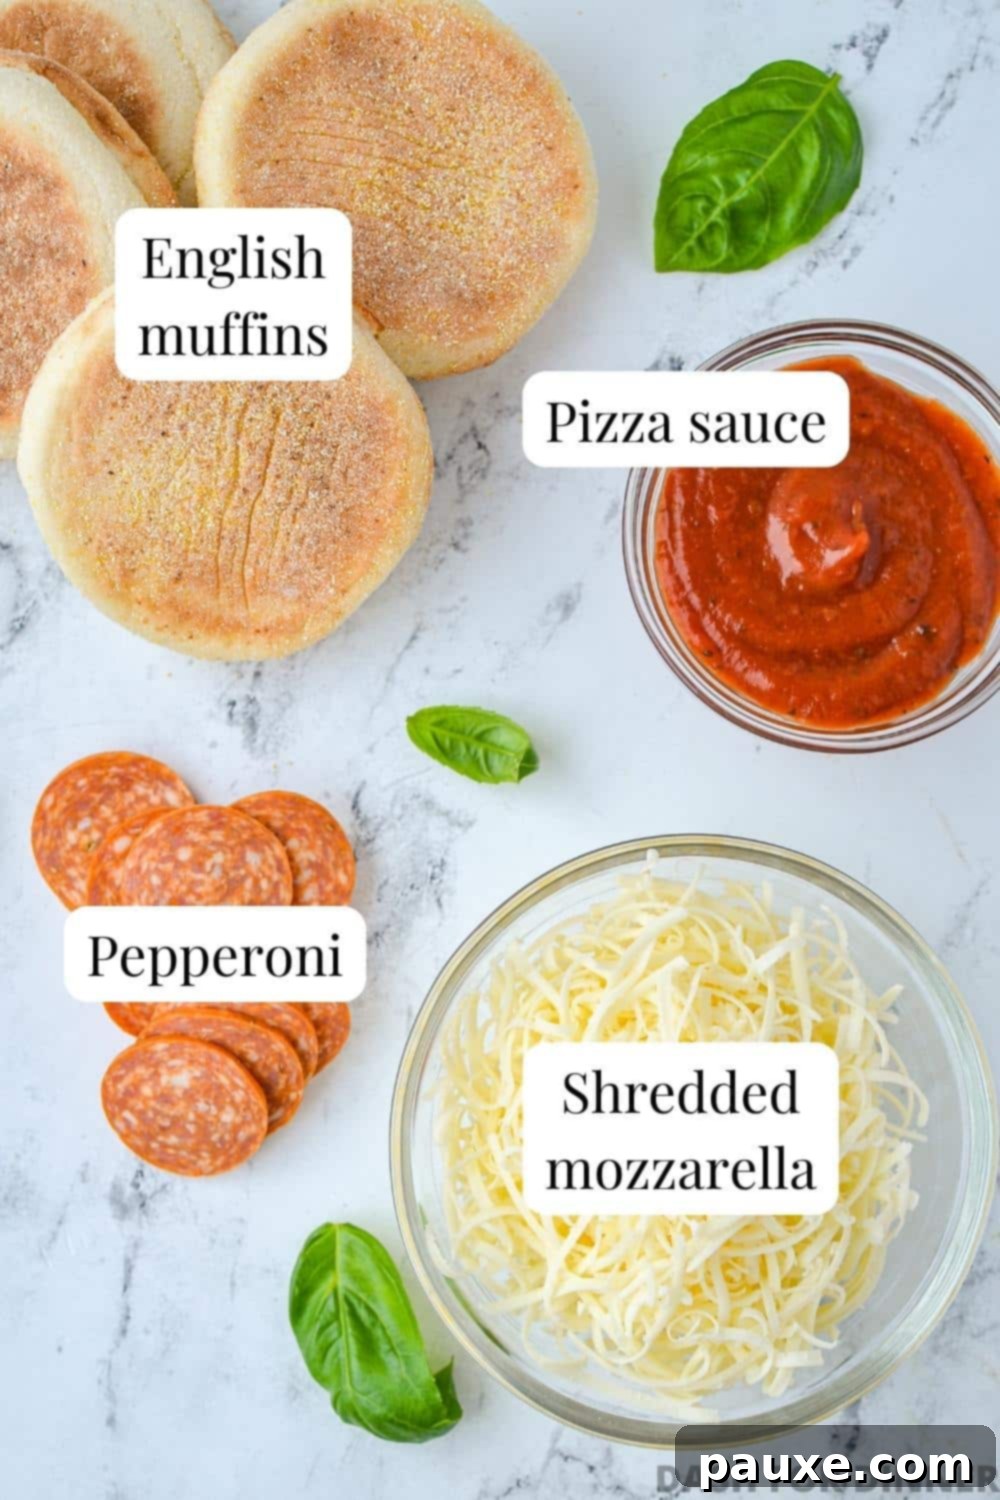
- English Muffins: The foundation of our mini pizzas! You’ll split them into English muffin halves for this recipe, transforming each half into a delightful individual pizza base. Don’t hesitate to use your preferred style of English muffin, whether it’s classic white, hearty whole wheat, or even sprouted grain for a healthier twist. The nooks and crannies are perfect for holding all that cheesy goodness.
- Pizza Sauce: A good quality pizza sauce is key to great flavor. Canned or jarred pizza sauce works wonderfully and is convenient, but if you have homemade pizza sauce on hand, that’s even better! For a quick homemade alternative, simply combine some plain tomato sauce with a few dried herbs like oregano, basil, and a pinch of garlic powder to create a flavorful base. You can find excellent recipes for easy homemade pizza sauce online.
- Mozzarella Cheese: For that perfect melty, gooey pizza experience, shredded mozzarella cheese is a must. While pre-shredded cheese is convenient, I often recommend shredding your own block of mozzarella. It melts more smoothly and often has a better texture, as pre-shredded varieties sometimes contain anti-caking agents. However, pre-shredded will work perfectly fine for speed and ease. For an extra flavor dimension, consider using a blend of mozzarella and provolone, or even a touch of cheddar cheese if you prefer a sharper taste.
- Pepperoni (optional): A classic for a reason! I typically use regular sliced pepperoni, but feel free to opt for mini pepperonis for better coverage on the smaller surface area, or a spicier cup-and-char variety. You could also experiment with other chopped cured meats like salami, prosciutto, or even pre-cooked bacon bits for a different flavor profile.
- Toppings: Don’t let the small surface area of these mini pizzas limit your imagination! While it’s important to keep your toppings diced small to ensure they cook evenly and stay put, the possibilities are vast. Beyond pepperoni, consider finely diced bell peppers (any color!), thinly sliced mushrooms, a sprinkle of red onion, black olives, or even a few small pieces of cooked ham. My personal favorite way to elevate these is to sprinkle on fresh basil leaves as soon as they come out of the oven – the warmth brings out their aromatic sweetness.
Equipment
- Baking Sheet (Sheet Pan): You can use any style of baking sheet or sheet pan you have on hand. For making a batch of 6 individual English muffin pizzas, a quarter sheet pan is often the perfect size, preventing overcrowding. If you plan on doubling the recipe or serving a larger crowd, a half sheet pan will give you ample space. Lining your baking sheet with parchment paper is highly recommended for easy cleanup and to prevent sticking.
- Optional: Small Spreader or Butter Knife: Useful for evenly spreading the pizza sauce onto the English muffin halves.
- Optional: Cheese Grater: If you opt for block mozzarella, a box grater makes quick work of shredding the cheese.
How to Make English Muffin Pizzas in the Oven
While English muffin pizzas are incredibly adaptable to various cooking appliances like air fryers and toaster ovens, the most traditional and commonly used method for achieving perfectly baked mini pizzas is the conventional oven. I’ve provided detailed instructions for other methods later in this post, but we’ll start with the reliable oven method to ensure that classic, bubbly cheese, and slightly crispy crust.
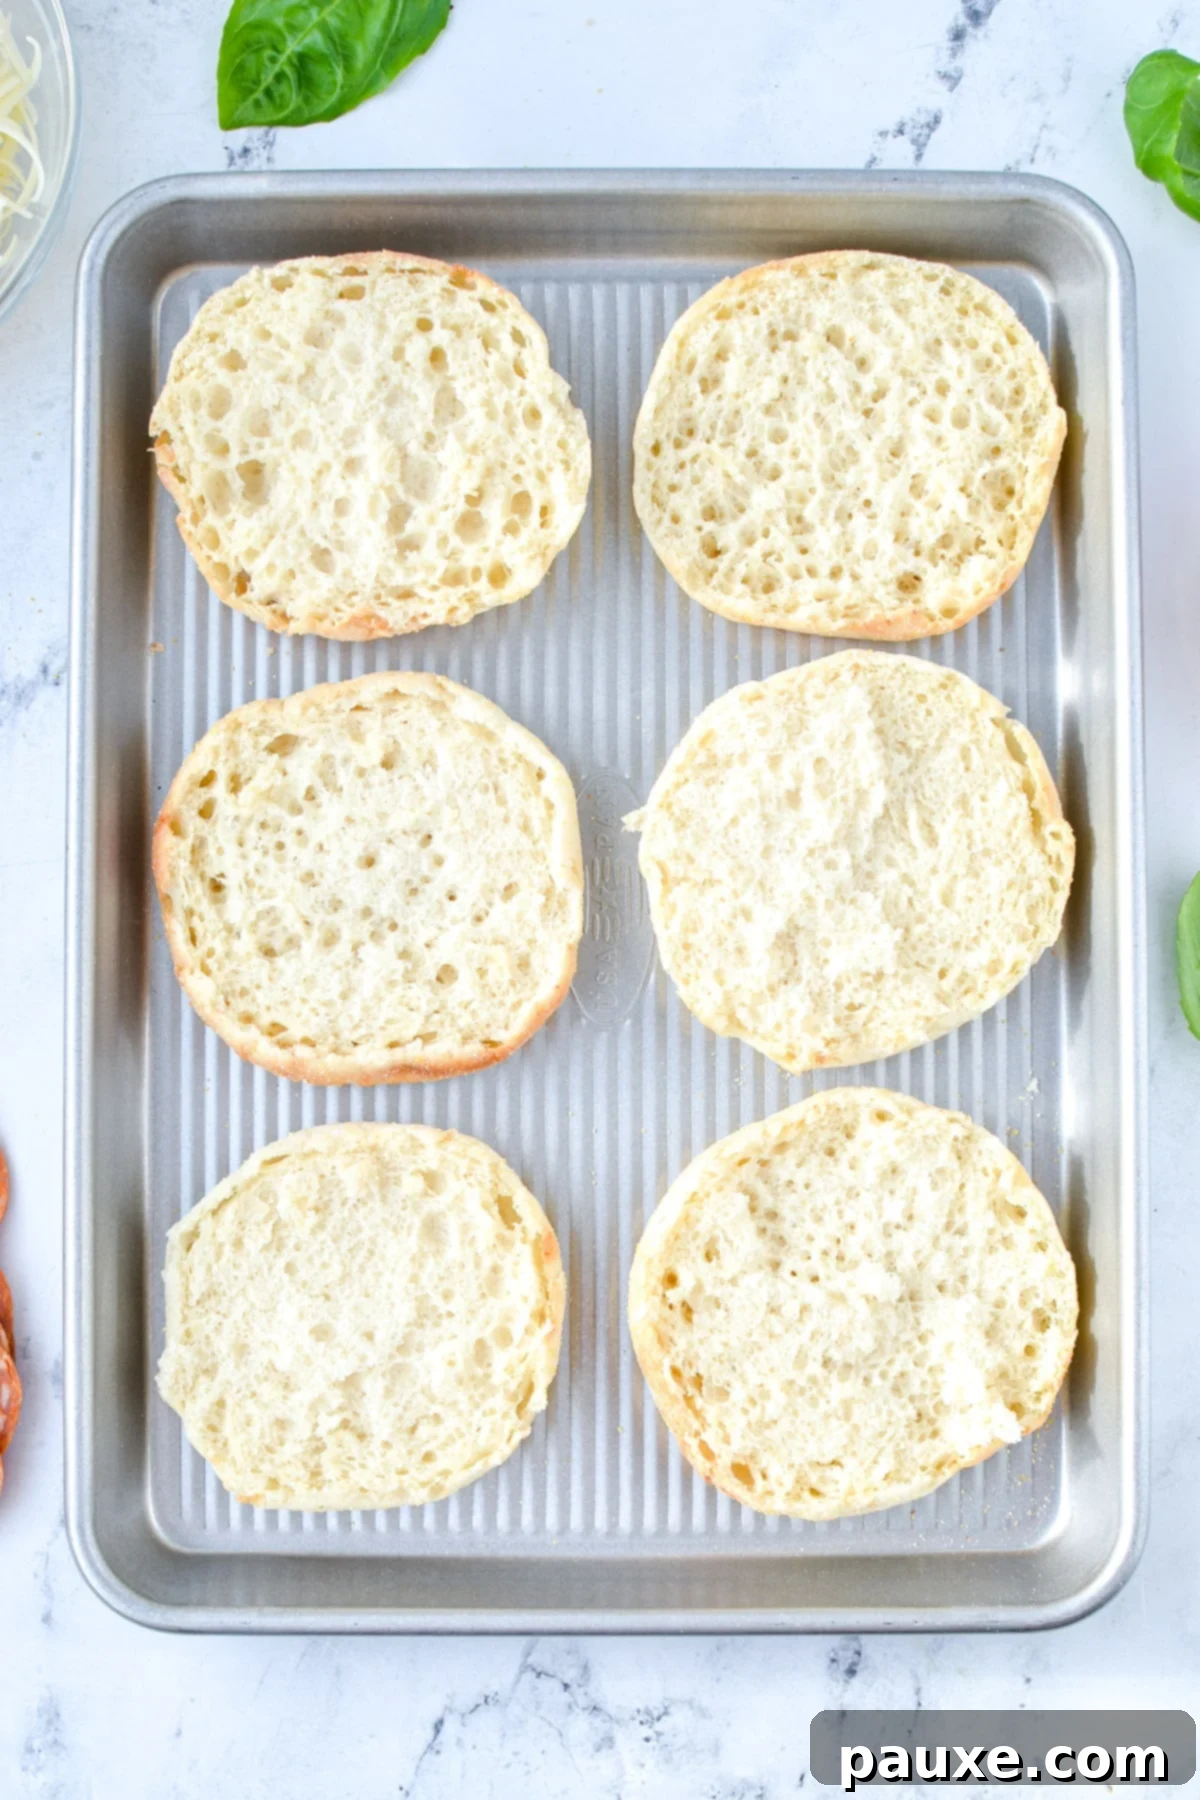
Prepping the English Muffins: The Toasting Advantage
This initial step might seem optional, but trust me, it’s a game-changer and highly recommended for the best English Muffin Pizza experience! Back in the 90s, when this beloved comfort food gained popularity, the common practice was to simply slather on the sauce and toppings and bake immediately. While undeniably quick, this approach often led to a slightly soggy English muffin base, as the sauce would seep into the bread. Nobody wants a soggy pizza!
The secret to preventing this unappetizing sogginess and achieving a crisp, stable base is to first toast the English muffin halves in the oven for about 5 minutes. This brief pre-bake helps to dry out and crisp up the bread, creating a barrier that prevents the sauce from soaking in. Instead, the sauce rests beautifully on top, ensuring your pizza maintains its delightful texture from the first bite to the last. To do this, simply preheat your oven to 425ºF (218ºC), place the split English muffin halves cut-side up on a baking sheet, and bake for 5 minutes. Remove them from the oven, and they’ll be perfectly prepped and ready for assembly.
Assembling the English Muffin Pizzas
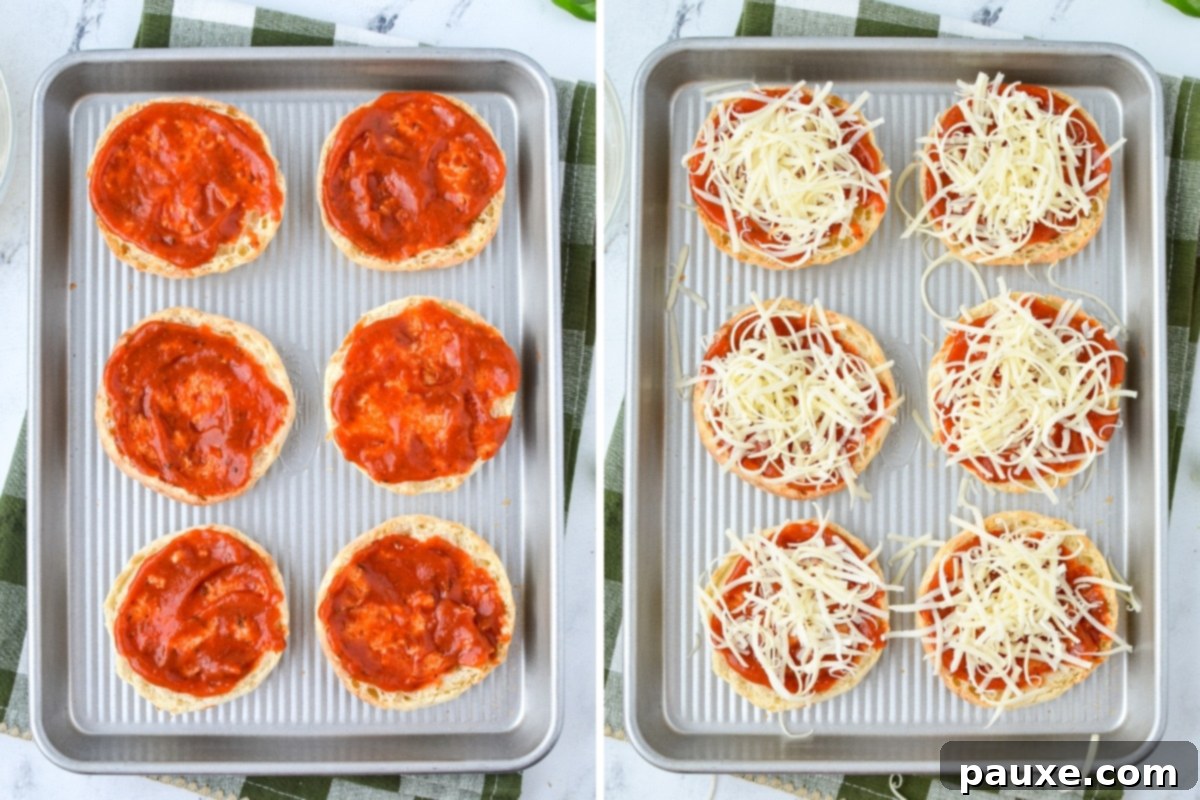
Once your English muffins are perfectly toasted, it’s time for the fun part: assembly! Each English muffin half becomes its own mini pizza. Start by spreading a generous, heaping tablespoon of your chosen pizza sauce evenly over the cut surface of each muffin half. Don’t overload it, as too much sauce can still lead to a soft base, even with pre-toasting.
Next, the cheese! Top each muffin half with approximately ¼ cup of shredded mozzarella cheese. Ensure the cheese covers the sauce from edge to edge to create a protective layer and a delicious crust.
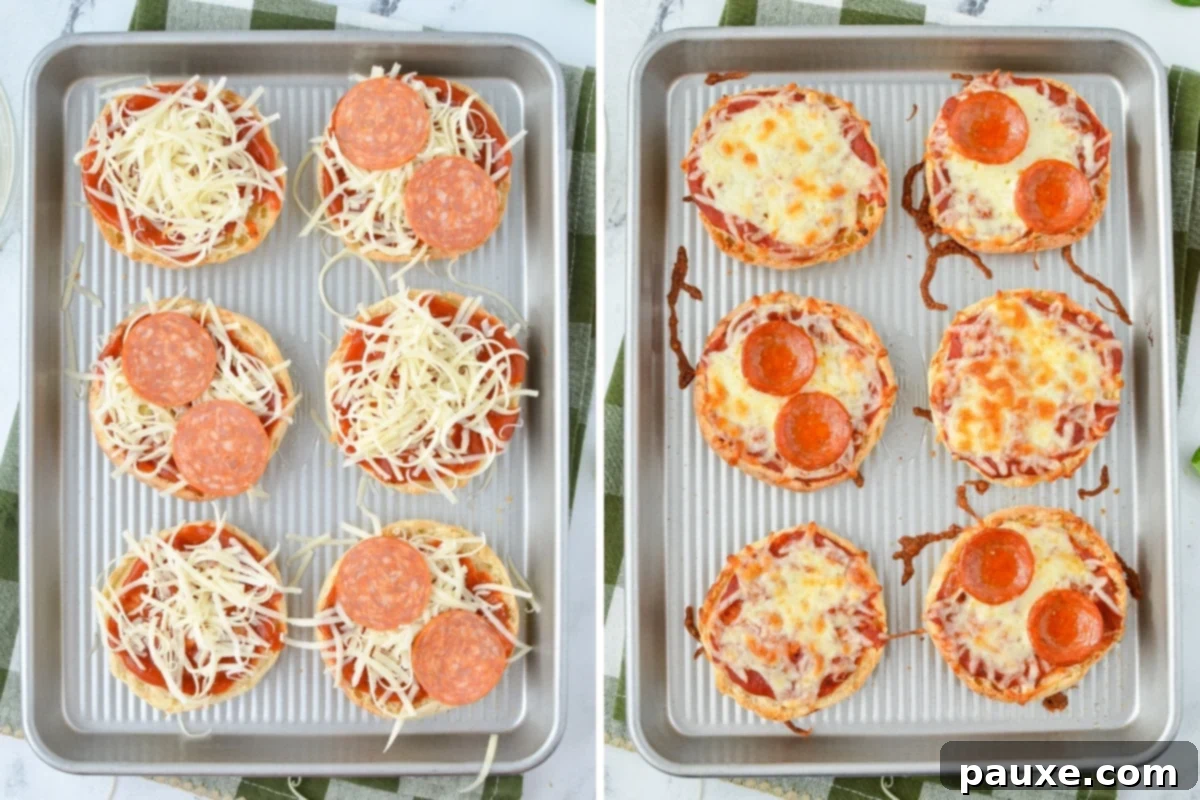
Finally, add your desired toppings. For classic pepperoni pizzas, place 2 regular-sized slices or 5-6 mini pepperonis on each. I often like to make a mixed batch, preparing about half with pepperoni and leaving the others for simple cheese pizzas or adding a variety of finely diced vegetables like bell pepper, mushrooms, or black olives. Remember to keep toppings small and not too plentiful to ensure even cooking and prevent them from sliding off.
Baking English Muffin Pizza to Perfection
With your mini pizzas beautifully assembled, they’re ready for their final transformation in the oven. Carefully slide the baking sheet back into your preheated oven. You’ll want to bake them for about 8-10 minutes. If you skipped the crucial pre-toasting step, you might need to extend the baking time slightly, to 10-15 minutes, to ensure the English muffin base is cooked through and not doughy.
The key indicators for readiness are when the cheese is fully melted, bubbling, and just starting to turn golden brown around the edges. For an irresistibly golden, extra bubbly, and slightly crispy cheese top, consider placing the pizzas under the broiler for about 1 minute at the very end. Keep a close eye on them during broiling, as cheese can go from perfectly golden to burnt in a matter of seconds. Ensure your baking sheet is broiler-safe before attempting this step.
Cooling and Serving Your Mini Pizzas
Once your English muffin pizzas emerge from the oven, hot, bubbly, and fragrant, they’re nearly ready to enjoy. For an extra touch of gourmet flavor and a vibrant splash of color, I highly recommend garnishing each mini pizza with a sprinkle of chopped fresh basil. The warmth of the pizza will coax out the basil’s sweet, peppery aroma, creating a truly delightful finish.

While the temptation to dig in immediately is strong, allow the English muffin pizzas to cool for about 5 minutes on the baking sheet before transferring them to plates and serving. This cooling period allows the cheese to set slightly, preventing it from sliding off and making them easier (and safer!) to handle. These mini pizzas are fantastic on their own, but they also pair perfectly with fresh, crunchy veggies and a creamy ranch dip. For a more substantial meal, serve them alongside a crisp, healthy salad, perhaps even something unique like my recipe for Swedish Pizza Salad. Enjoy your nostalgic bite!

Storing and Reheating English Muffin Pizzas
One of the many benefits of English Muffin Pizzas is their excellent shelf life and ease of reheating, making them perfect for meal prep or quick leftovers. Proper storage ensures they retain their flavor and texture for future enjoyment.
Storing: To store any leftover English Muffin Pizzas, first allow them to cool completely to room temperature. This is crucial to prevent condensation, which can make the muffins soggy. Once cooled, arrange them in a single layer in an airtight container or wrap them individually in plastic wrap before placing them in a container. Stored properly in the fridge, they will stay fresh and delicious for up to 5 days. For best results, place a piece of parchment paper between layers if stacking to prevent sticking.
Reheating: Reviving these mini pizzas is quick and easy. For a fast reheat, pop them into the microwave for 1-2 minutes, or until heated through and the cheese is melted. For a crispier texture reminiscent of freshly baked, reheat them in a toaster oven for 2-4 minutes, or in an air fryer set to 350ºF (175ºC) for about 2-4 minutes, keeping an eye on them to prevent burning. The air fryer or toaster oven methods will bring back a lovely crispness to the English muffin base and a bubbly top to the cheese.
Make Ahead and Freeze for Future Meals
English Muffin Pizzas are incredibly freezer-friendly, making them an excellent option for meal prepping and having quick, homemade meals on standby. This is perfect for busy weeknights or when unexpected cravings strike.
Freezing: To prepare them for freezing, begin by toasting your English muffins in the oven for about 5 minutes, as described in the main recipe. This crucial step helps prevent sogginess once thawed and reheated. Allow the toasted muffin halves to cool completely. Once cool, spread each half with pizza sauce, then sprinkle with cheese and your desired toppings like pepperoni. Arrange the assembled (but unbaked) pizzas in a single layer on a sheet pan. Place the sheet pan in the freezer and let them freeze until completely solid – this individual quick freezing (IQF) method prevents them from sticking together. Once solid, transfer the frozen mini pizzas to an airtight freezer bag or container, label it with the date, and keep them in the freezer for up to 2 months. This method ensures they are grab-and-go ready.
Cooking from frozen: When you’re ready to enjoy a frozen English Muffin Pizza, there’s no need to thaw! Preheat your oven to 400ºF (200ºC). Place the frozen English muffin pizzas directly onto a baking sheet (lined with parchment paper for easy cleanup). Bake for 12-15 minutes, or until the cheese is beautifully melted and bubbly, and the muffin base is heated through and slightly crispy. Cooking from frozen might take a few extra minutes compared to fresh, but the convenience is well worth it.

Toaster Oven Instructions
For those times you’re making a smaller batch or want to save on energy, using a toaster oven is an excellent alternative to a conventional oven. This method is incredibly efficient and produces equally delicious results for your mini pizzas.
- Preheat your toaster oven to 400 degrees F (200ºC). Allow it to preheat for about 3-4 minutes to ensure it reaches the correct temperature.
- Place the English muffin halves on a small toaster oven baking sheet. Toast them for 4-5 minutes to achieve that crucial crisp base and prevent sogginess.
- Carefully remove the sheet from the toaster oven. Top each muffin half with pizza sauce, a generous layer of shredded cheese, and your chosen toppings.
- Return the pizzas to the toaster oven. Cook for 8-14 minutes, or until the cheese is bubbly and melted, and the pizzas are heated through. Cooking times can vary based on your toaster oven model, so keep an eye on them.
- Allow them to cool for 5 minutes before serving to let the cheese set and prevent burns.
Air Fryer Instructions
The air fryer is another fantastic tool for making English Muffin Pizzas, offering a speedier cook time and an incredibly crispy crust. I’ve previously detailed a super easy way to make air fryer English muffin pizzas in another recipe, but here’s the general idea to get you started quickly.
- Preheat your air fryer basket to 350ºF (175ºC) for at least 3 minutes, or according to your manufacturer’s specific instructions. This ensures even cooking from the start.
- Place 3 English muffin halves on a cutting board or plate. Spread each half with 1 heaping tablespoon of pizza sauce and then sprinkle with about ¼ cup of shredded cheese.
- Carefully transfer the assembled muffin halves into the preheated air fryer basket. Be mindful not to overcrowd the basket to allow for proper air circulation.
- Cook for 4-6 minutes, or until the cheese is melted and bubbling.
- Remove them from the air fryer and add any desired toppings like pepperoni, diced veggies, or fresh basil. Note that lighter toppings might fly around a bit depending on your air fryer model and air circulation, so consider adding them towards the end of cooking or securing them with melted cheese.
- Cook for an additional 1-3 minutes, or until the pepperoni is crispy on the edges and other toppings are warmed through.
- Remove the pizzas from the air fryer and allow them to cool for 5 minutes before serving to prevent burns and let the cheese set.

Variations to Explore
The beauty of English Muffin Pizzas lies in their adaptability. You can easily modify them to suit different tastes, dietary preferences, or simply to use up what you have in the fridge. Here are some ideas to inspire your next batch:
Whole Wheat or Sprouted English Muffins: For a more wholesome option, swap out regular white English muffins for whole wheat or sprouted grain varieties. This is a fantastic way to incorporate more fiber and nutrients into your meal, all while still enjoying one of the most beloved and delicious comfort foods from the 1990s. The slightly nuttier flavor of whole wheat also adds an interesting dimension.
Creative Toppings Galore: This is where you can truly let your imagination run wild! Feel free to use your favorite pizza toppings to add flavor, color, and crunch to these mini pizzas. Just remember the golden rule: chop the pieces small so they cook evenly and stay put on the limited surface area. Consider options like:
- Meats: Crumbled cooked bacon, finely diced cooked chicken, chopped ham, cooked sausage.
- Vegetables: Sautéed mushrooms, finely diced bell peppers (red, green, yellow), thinly sliced red onion, black olives, spinach (wilt it first!), corn.
- Cheeses: Beyond mozzarella, try a sprinkle of sharp cheddar, tangy feta, creamy goat cheese, or a bold provolone for different flavor profiles.
- Sweet & Savory: Dare to try pineapple bits with ham for a Hawaiian-inspired mini pizza!
Sauce Substitutions: If you find yourself without traditional pizza sauce, don’t despair! These mini pizzas are incredibly forgiving. You can easily use spaghetti sauce or marinara sauce as a delicious alternative. For a white pizza variation, skip the red sauce and use a base of olive oil, minced garlic, and ricotta cheese. Or, for a BBQ chicken pizza, spread a thin layer of your favorite barbecue sauce before adding cooked chicken and cheese.
Breakfast Pizza: Transform these into a morning treat! Use a light spread of scrambled egg as the base, then top with shredded cheddar cheese, cooked crumbled sausage or bacon, and a sprinkle of chives.
Recipe FAQ’s
To freeze English muffin pizzas, first toast the split English muffins in the oven for about 5 minutes and let them cool completely. Then, top them with sauce, cheese, pepperoni, and any other desired toppings. Place the assembled pizzas in a single layer on a sheet pan and freeze until completely solid. Once frozen, transfer them to an airtight freezer bag or container, label with the date, and store for up to 2 months. You can bake them directly from frozen.
For a convenient lunch, wrap cooled mini pizzas individually in a layer of parchment paper. This prevents the toppings and cheese from sticking to other items in the lunch box and makes them easy to grab. They can be reheated in the parchment paper (if microwave-safe) or eaten cold for a quick and easy packed lunch. Include a small side salad or some fresh fruit for a balanced meal.
The most effective way to prevent English muffin pizzas from getting soggy is to pre-toast the English muffin halves before adding the sauce and toppings. Toast them in the oven for about 5 minutes until lightly golden and crisp. This creates a barrier that prevents the sauce from seeping into the bread, which is the primary cause of sogginess. Another tip is not to overload the pizzas with too much sauce.
Absolutely! While English muffins are traditional, you can certainly experiment with other bread bases. Options like bagels (bagel bites!), pita bread, slices of thick-cut bread (for pizza toast), or even tortillas can work well. Adjust baking times as needed, as thinner breads will cook faster. Pre-toasting is still recommended for most bread types to prevent sogginess.
There are several ways to boost the nutritional value of your English muffin pizzas. Use whole wheat or sprouted English muffins for added fiber. Load up on finely diced vegetables like bell peppers, spinach, mushrooms, and onions. Opt for low-fat mozzarella or a blend with reduced-fat cheese. Choose lean protein toppings like cooked chicken breast or turkey pepperoni instead of traditional pepperoni. You can also make your own simple tomato sauce to control sodium content.
More Easy Meal Ideas
- Sheet Pan Smoked Sausage and Peppers
- Air Fryer Chicken Fajitas
- One Pan Creamy Garlic Chicken
- Slow Cooker Queso Chicken Tacos
- Creamy Mushroom Chicken

English Muffin Pizzas
★
★
★
★
Equipment
- Quarter sheet pan
Ingredients
- 3 English muffins split
- ½ cup pizza sauce
- 1 ½ cups shredded mozzarella cheese
- 12 slices pepperoni optional
- Chopped fresh basil optional
Instructions
- Preheat the oven to 425ºF (218ºC).
- Place the halved English muffins on a sheet pan lined with parchment paper.
- Add the English muffins to the preheated oven and toast them for 5 minutes.
- Remove the pan from the oven and spread each of the English muffin halves with a heaping tablespoon of pizza sauce.
- Sprinkle ¼ cup of shredded mozzarella cheese on each of the halves, then top with 2 slices of pepperoni each (or other preferred toppings).
- Place in the oven and bake for 8-10 minutes, or until the cheese is melted and bubbly and the crust is golden.
- Remove from the oven and garnish with freshly chopped basil, if desired.
- Allow to cool for 5 minutes, then serve and enjoy!
Notes
Air Fryer: Preheat the air fryer basket to 350ºF (175ºC) for at least 3 minutes. Top each halved English muffin with 1 heaping tablespoon of pizza sauce and about ¼ cup of shredded cheese. Place them into the air fryer basket and cook for 4-6 minutes. Remove and add any desired toppings, then cook for an additional 1-3 minutes, or until crispy.
Toaster Oven: Preheat the toaster oven to 400ºF (200ºC), and toast English muffin halves for 4-5 minutes. Top with cheese, sauce, and toppings. Cook for 8-14 minutes, or until bubbly and warmed through.
Nutrition
Please note that some of my blog posts here at Dash for Dinner may contain affiliate links. If you make a purchase through these links, I will get a small commission at no additional cost to you. Please see my Disclaimer for more information.
