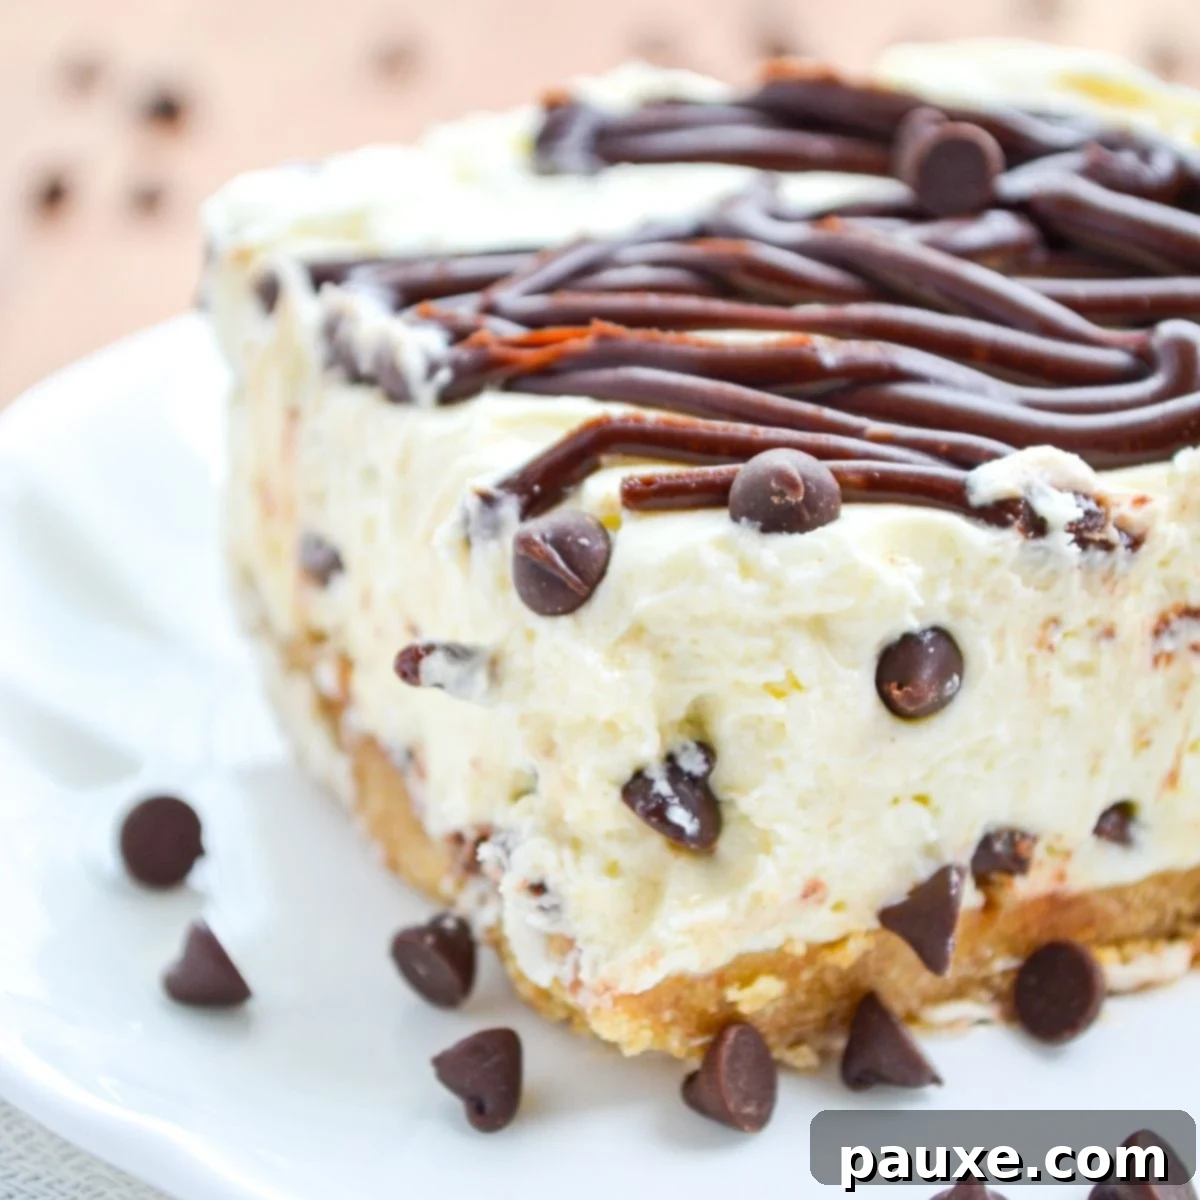
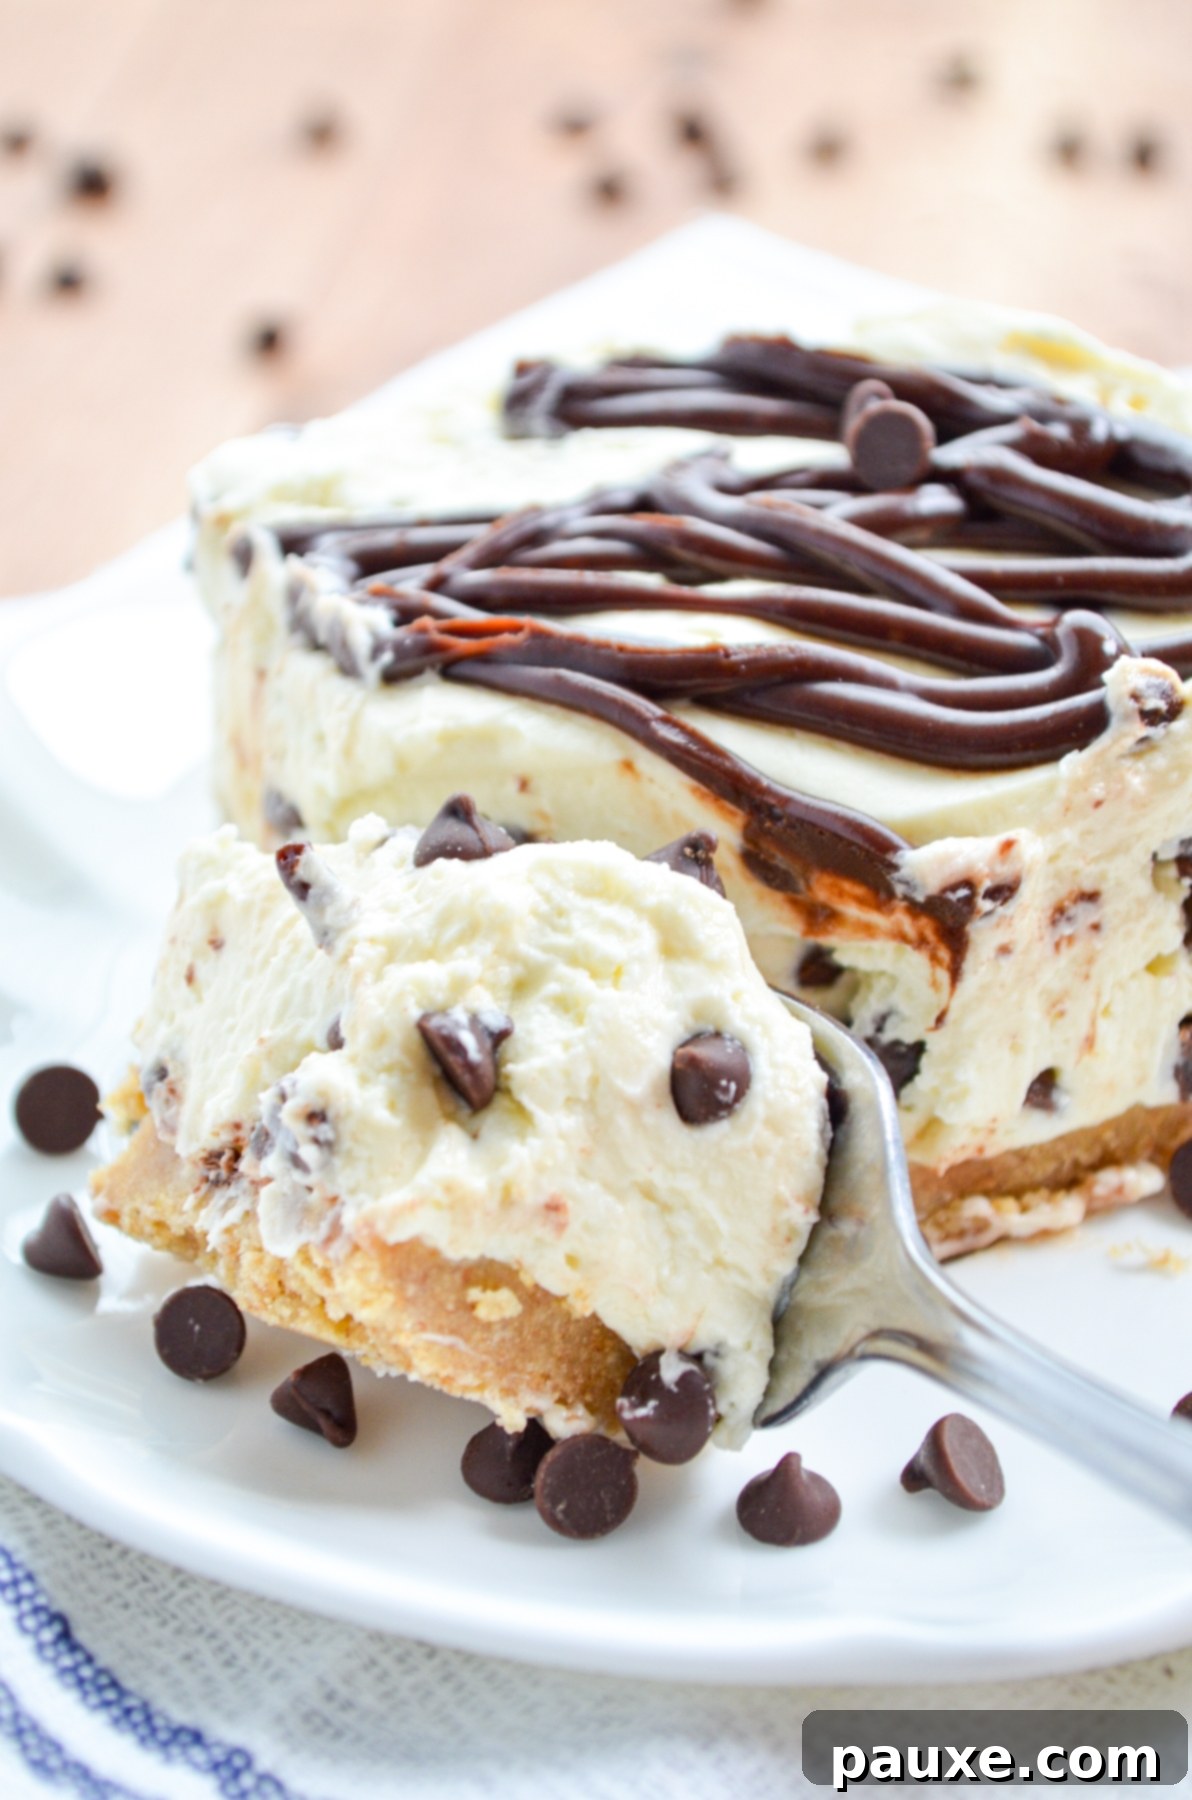
Decadent No-Bake Chocolate Chip Cheesecake: Your Ultimate Oven-Free Dessert
Craving a rich, creamy, and undeniably decadent dessert without ever turning on your oven? Look no further! This No-Bake Chocolate Chip Cheesecake is the answer to your sweet tooth dreams, offering an incredibly easy recipe that delivers a show-stopping dessert perfect for any occasion. Whether it’s the peak of summer, a busy holiday, or just a Tuesday evening when you need a little indulgence, this recipe guarantees a delightful treat that keeps your kitchen cool and your taste buds happy. Forget complicated baking steps and lengthy cooling times; this hassle-free cheesecake comes together quickly and chills to perfection, making it a reliable favorite you’ll want to make again and again.
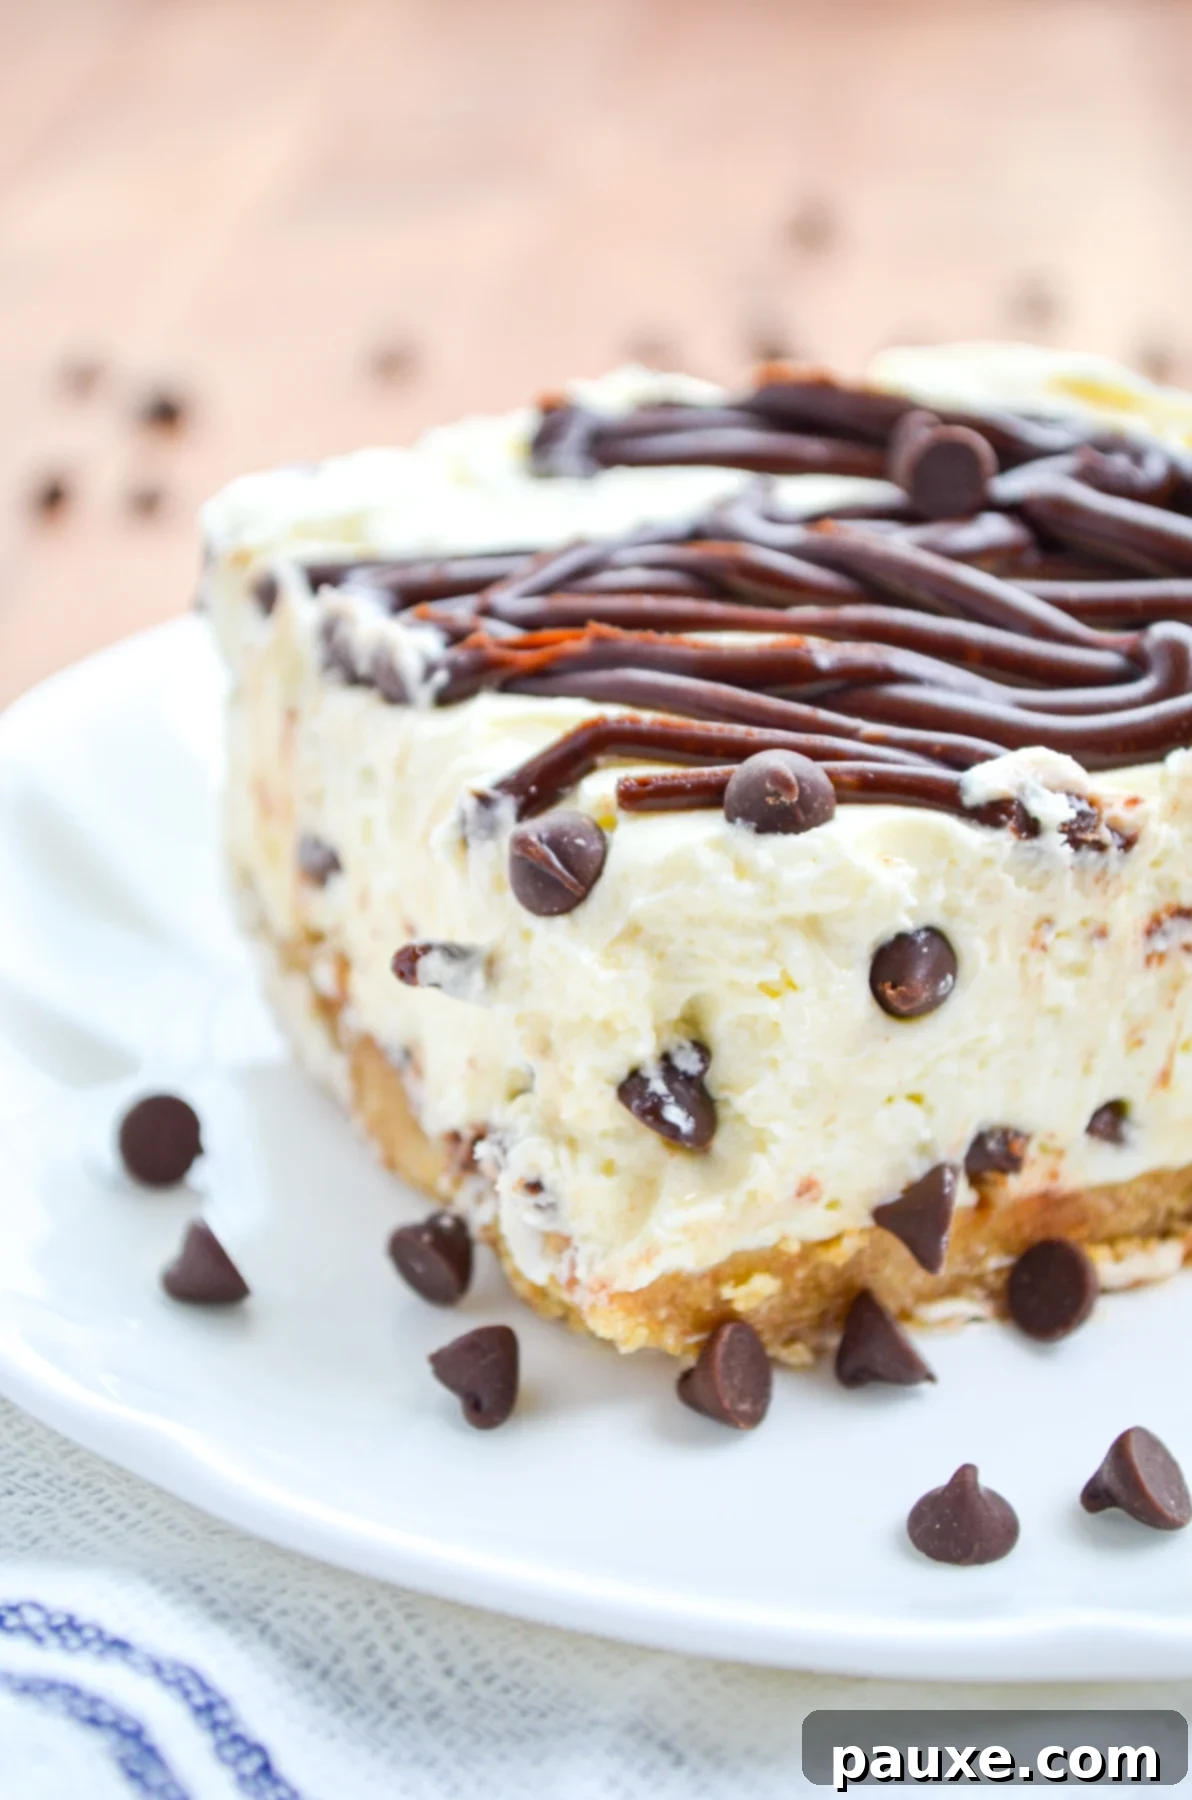
The Appeal of No-Bake Desserts: Keeping Your Kitchen Cool
For many, the thought of baking during warmer months is enough to break a sweat. In areas with temperate climates, air conditioning isn’t always a standard household amenity. This often means finding clever ways to stay cool when the temperatures rise. One of the most effective strategies? Avoiding the oven at all costs! That’s precisely why no-bake desserts have become a culinary lifesaver, transforming warm kitchens into cool havens of sweet creation. This blog is dedicated to sharing easy, oven-free recipes, from convenient Air Fryer meals to hearty Instant Pot and Slow Cooker dishes. But amidst all the savory, there’s always room for a delightful, chilled dessert, and that’s where our magnificent No-Bake Chocolate Chip Cheesecake truly shines.
This particular no-bake cheesecake recipe has earned its place as a cherished family favorite in our home. Its simplicity and incredible flavor make it a go-to for summer entertaining, backyard BBQs, potlucks, or simply as an everyday indulgence. The minimal effort required means you can whip up this creamy confection even on the busiest “dog days” of summer. Throughout this post, you’ll discover a variety of exciting variations to customize this cheesecake to your liking, alongside helpful substitution ideas to accommodate various dietary needs. We’re confident you’ll adore this cheesecake as much as we do, and we encourage you to share your experience by leaving a review and comment!
Essential Ingredients for Your Perfect No-Bake Cheesecake
Crafting this luscious No-Bake Chocolate Chip Cheesecake requires a few key ingredients, each playing a crucial role in achieving its signature creamy texture and rich flavor. The beauty lies in the simplicity and accessibility of these components, most of which you likely already have on hand or can easily find at any grocery store. Let’s dive into what you’ll need to create this amazing dessert.
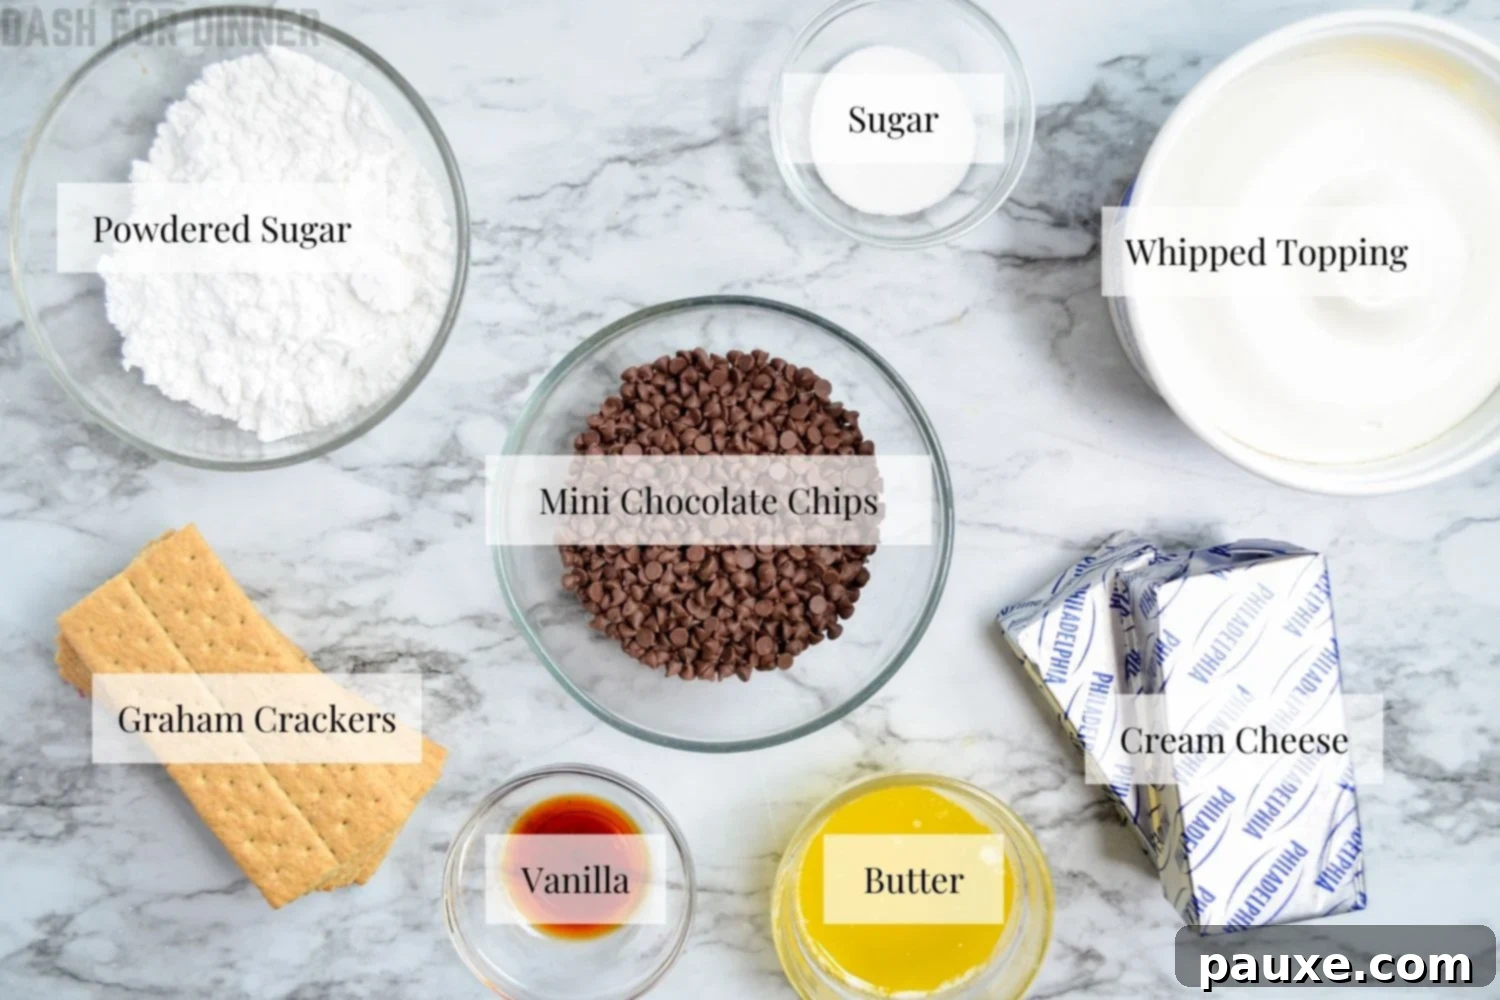
For the Homemade Graham Cracker Crust: The Foundation of Flavor
A great cheesecake starts with a fantastic crust. This no-bake graham cracker crust provides a buttery, slightly sweet, and perfectly crumbly base that complements the creamy filling beautifully. It’s incredibly easy to make and, true to its name, requires no baking!
- Graham Crackers: One sleeve of graham crackers, which typically amounts to about 9 full-size sheets, is ideal. If you prefer to use pre-crushed graham cracker crumbs, you’ll need approximately 1 cup. For a gluten-free option, simply opt for gluten-free graham crackers.
- Granulated Sugar: A small amount of granulated sugar is added to the crust mixture. This touch of sweetness enhances the natural flavor of the graham crackers and helps create a perfectly balanced base for your cheesecake.
- Melted Butter: We recommend using salted butter for the crust as it adds a wonderful depth of flavor and a hint of savoriness that perfectly contrasts the sweet filling. If your butter is particularly salty or you prefer less salt, unsalted butter with a pinch or two of added salt will work just as well. The butter binds the crumbs together, ensuring a firm, delicious crust.
The Irresistible Chocolate Chip Cheesecake Filling: Creamy Perfection
The heart of this dessert is its velvety-smooth, rich, and utterly delightful cheesecake filling, studded with miniature chocolate chips. Achieving the perfect texture is all about using the right ingredients and ensuring they are at the correct temperature.
- Cream Cheese: This is the star of the show! It’s absolutely crucial that your cream cheese is fully softened to room temperature. Cold cream cheese will result in a lumpy filling that won’t achieve the desired smooth consistency. For best results, use full-fat, brick-style cream cheese. Spreadable cream cheese from a tub has a different density and moisture content, which will prevent your cheesecake from setting properly. If you’re short on time, you can follow methods for quick softening, but natural room-temperature softening is always preferred.
- Thawed Whipped Topping: Found in the freezer section of your grocery store, brands like “Cool Whip” or any generic equivalent work perfectly. Like the cream cheese, ensure it is completely thawed before incorporating it into the mixture. Simply set it out on the counter at the same time you take out your cream cheese, and it should be ready when you are. This ingredient adds a light, airy texture and helps stabilize the cheesecake without the need for baking.
- Powdered Sugar: Also known as confectioners’ sugar or icing sugar, powdered sugar is essential for a smooth, creamy filling. Its fine texture dissolves instantly, preventing any grainy mouthfeel that granulated sugar might leave behind. Do not substitute this ingredient with granulated sugar, as it will significantly alter the texture of your cheesecake.
- Vanilla Extract: A touch of pure vanilla extract elevates the overall flavor profile, adding a classic, warm note that beautifully complements the chocolate and cream cheese.
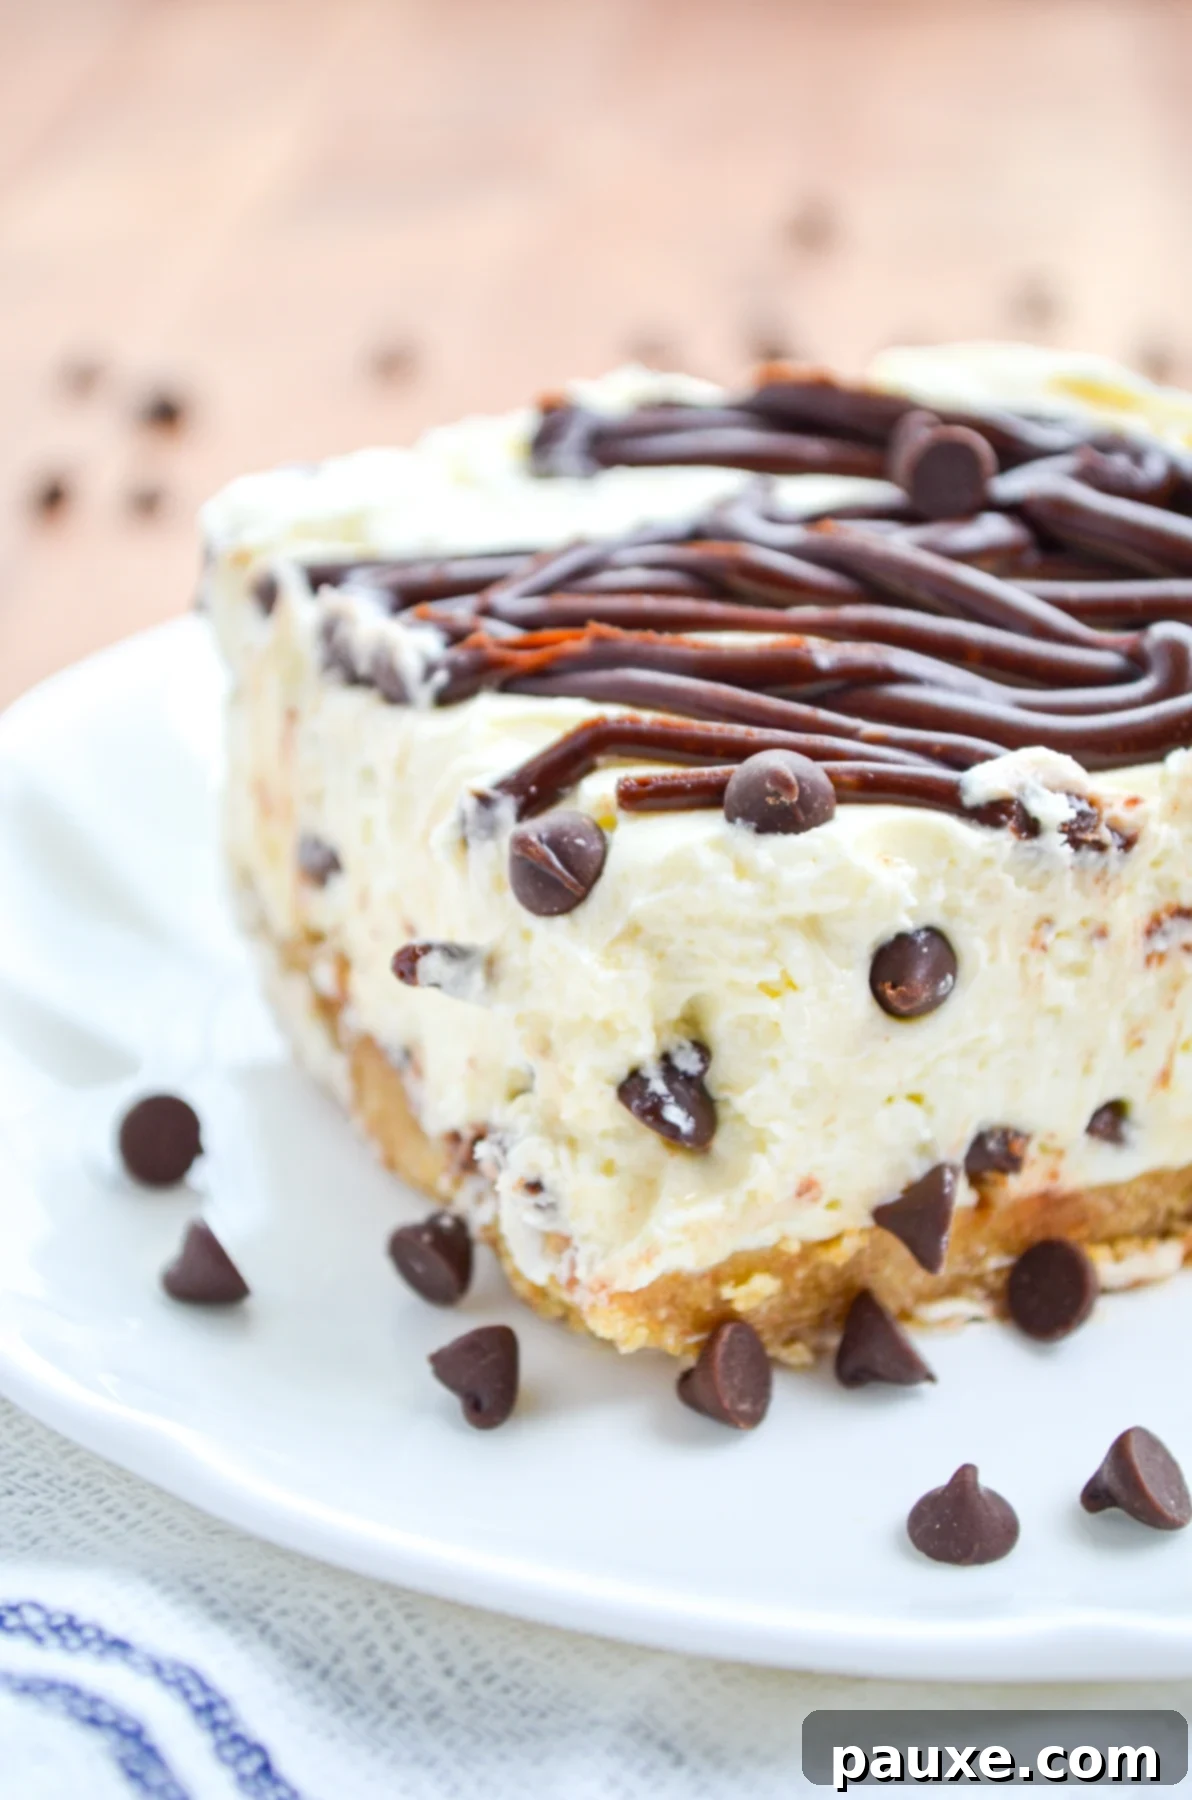
- Mini Chocolate Chips: While regular-sized chocolate chips can be used, mini chocolate chips are highly recommended for this recipe. Their smaller size ensures they are more evenly distributed throughout the cheesecake filling, guaranteeing that every single bite is packed with delightful chocolatey goodness. Larger chips tend to clump together, leading to uneven distribution.
Optional Chocolate Ganache Topping: A Touch of Elegance
For those who love an extra layer of chocolatey indulgence, a simple homemade ganache drizzle adds a beautiful finish and an extra burst of flavor. It’s entirely optional but highly recommended for a truly decadent presentation.
- Chocolate Chips: For the ganache, about ⅓ cup of regular chocolate chips works wonderfully. If you only have mini chocolate chips on hand, you can use ⅓ cup plus 1 tablespoon to achieve a similar chocolate intensity.
- Heavy Cream: Just 2 tablespoons of heavy cream are all you need to create a rich, pourable ganache. This simple ingredient, when heated and combined with chocolate, transforms into a smooth, glossy topping.
Step-by-Step Instructions: Creating Your No-Bake Chocolate Chip Cheesecake
Get ready to assemble your masterpiece! This no-bake cheesecake comes together in just a few simple steps, ensuring a delicious outcome with minimal effort. The key to success lies in proper ingredient preparation and adequate chilling time. Follow these instructions carefully for a perfectly set, mouth-watering dessert.
Crafting the Perfect No-Bake Graham Cracker Crust
Unlike many traditional cheesecake crusts, this one requires no oven time, saving you from heating up your kitchen. The secret to its firm, delicious base is proper packing and sufficient chilling. This means you get a crisp, buttery crust without the fuss of baking.
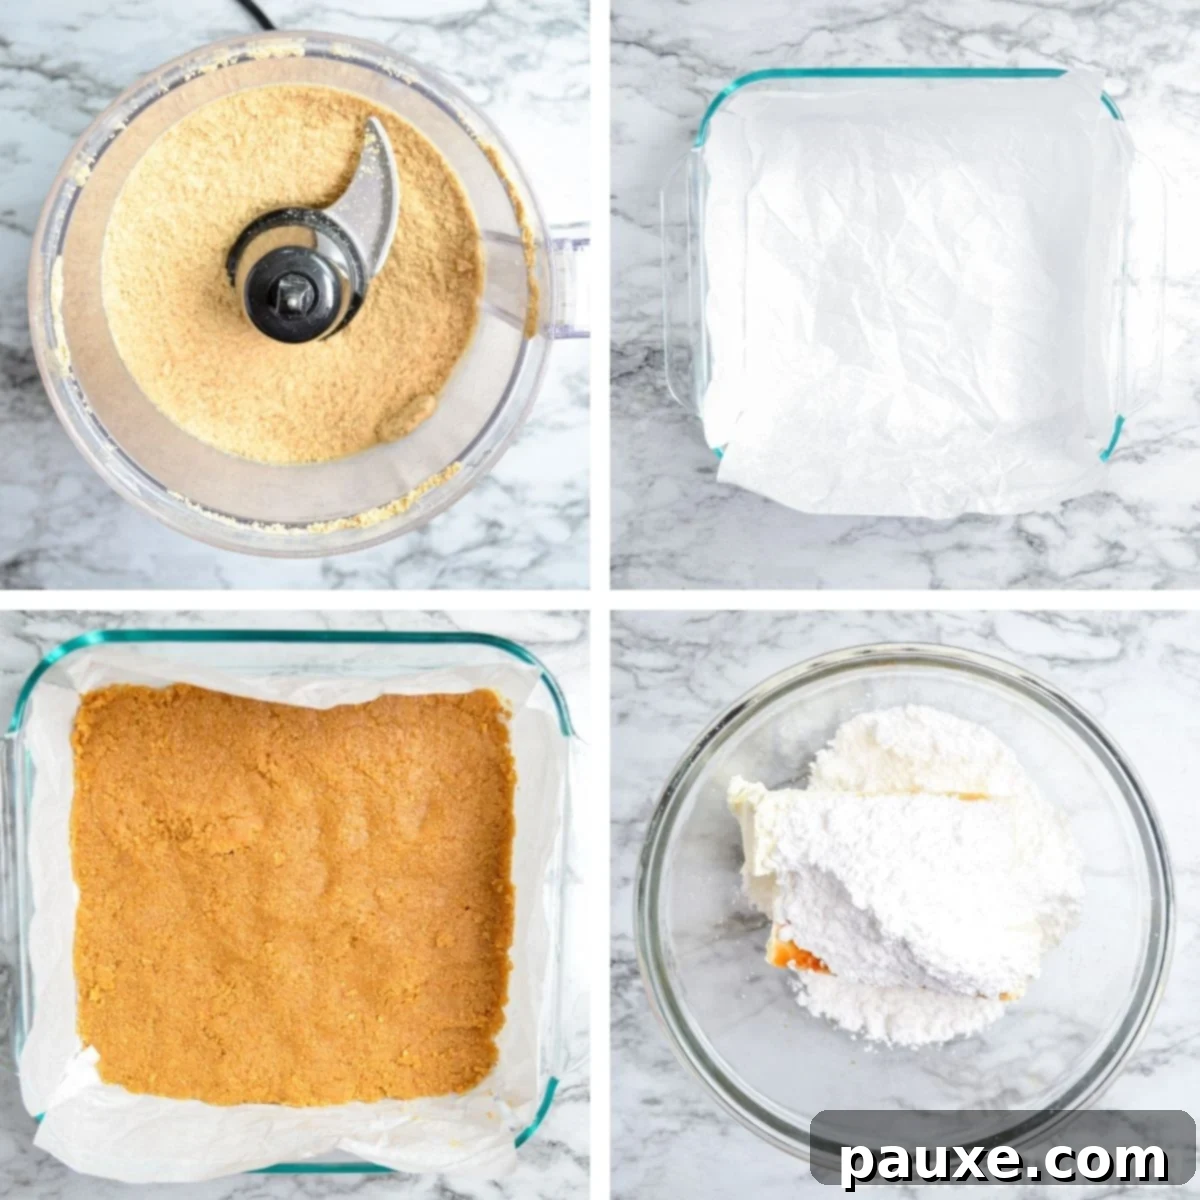
- Prepare the Graham Cracker Crumbs: Begin by adding 9 sheets of graham crackers (typically one full sleeve) along with 1 tablespoon of granulated sugar to the bowl of a food processor. Pulse the mixture until the graham crackers are finely broken down into uniform crumbs. If you don’t have a food processor, you can place the crackers in a large zip-top bag and crush them with a rolling pin until fine.
- Combine with Butter: Transfer the prepared graham cracker and sugar crumbs into a medium-sized mixing bowl. Pour in ½ cup of melted salted butter. Stir the mixture thoroughly with a rubber spatula until all the crumbs are evenly moistened and resemble wet sand. Every crumb should be coated in butter to ensure a cohesive crust.
- Line Your Baking Dish: Line an 8×8-inch glass baking dish (a Pyrex brand dish works perfectly) with two overlapping sheets of parchment paper. Trim the parchment paper to fit the dish, allowing some overhang on the sides. This thoughtful step is crucial for easy removal and serving of your finished cheesecake.
- Press the Crust: Gently but firmly press the moistened graham cracker mixture into the bottom of the lined baking dish. Use your fingers or the back of the rubber spatula to spread it evenly and pack it down tightly. The goal is a compact, uniform layer with no loose crumbs. The firmer you press, the better your crust will hold together.
- Chill the Crust: Place the baking dish containing the crust into the refrigerator to chill for at least 10 minutes. This short chilling period helps the butter solidify, setting the crust and preparing it for the creamy filling.
Preparing the Velvety Cheesecake Filling
Now for the luscious, creamy heart of your dessert! This filling comes together quickly with the help of a mixer, ensuring a smooth and airy texture.
- Cream the Base Ingredients: In a large mixing bowl, combine the softened brick-style cream cheese, 1 cup of powdered sugar, and 1 teaspoon of vanilla extract. Using either a hand mixer or a stand mixer fitted with the paddle attachment, beat the ingredients on medium speed until the mixture is completely smooth and creamy. Make sure to scrape down the sides of the bowl periodically to ensure everything is fully incorporated and there are no lumps of cream cheese. Beat again for a moment to ensure maximum creaminess.
- Fold in Whipped Topping: Add the entire container of thawed whipped topping to the cream cheese mixture. Using a rubber spatula, gently fold the whipped topping into the cream cheese mixture. Use a light touch to maintain the airy consistency of the whipped topping. Continue folding until the mixture is uniform, light, and perfectly smooth.
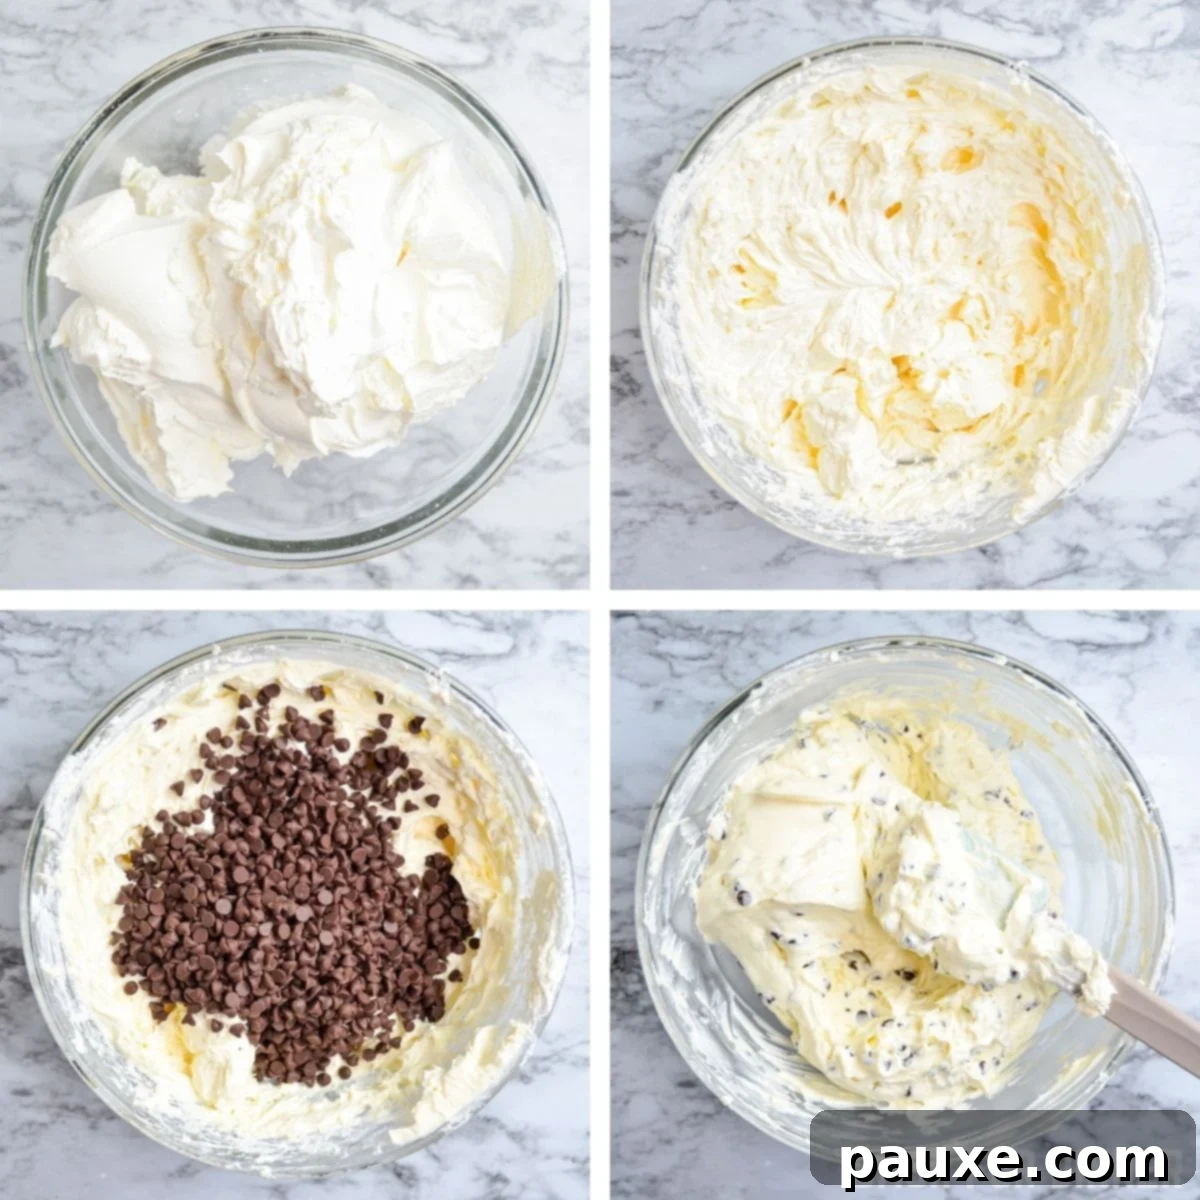
- Add Mini Chocolate Chips: Gently fold 1 cup of mini chocolate chips into the cheesecake filling using your rubber spatula. Mix just until they are evenly distributed throughout the mixture. Avoid overmixing, as this can deflate the whipped topping.
- Assemble the Cheesecake: Retrieve your chilled graham cracker crust from the refrigerator. Carefully spoon the prepared cheesecake filling over the crust. Use your rubber spatula to spread the filling out evenly across the entire surface, creating a smooth and beautiful top layer.
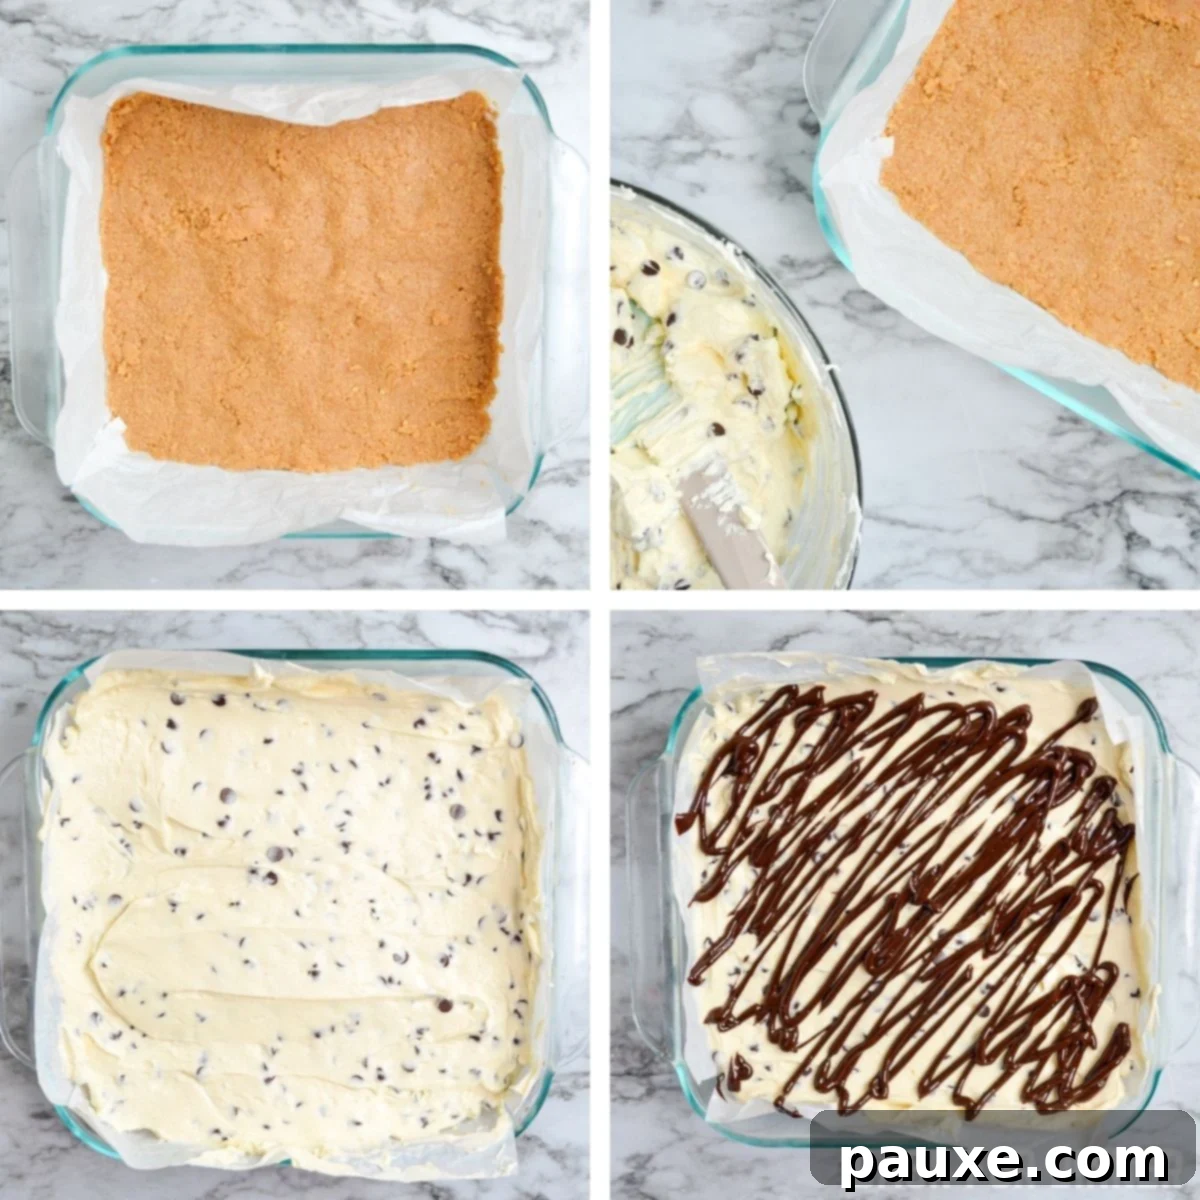
- Initial Chill: If you plan to add the chocolate ganache topping, place the cheesecake back into the fridge for about 5-10 minutes while you prepare the ganache. If you’re skipping the ganache, cover the cheesecake tightly with plastic wrap and chill it for at least 4 hours, or ideally overnight, before slicing and serving. Proper chilling is essential for the cheesecake to set firmly.
Adding the Luxurious Chocolate Ganache (Optional)
A glossy chocolate ganache drizzle adds a touch of elegance and an extra layer of rich flavor to your no-bake cheesecake. This easy, two-ingredient topping is quick to prepare and makes a big visual and taste impact.
- Prepare the Ganache Ingredients: Place ⅓ cup of regular chocolate chips into a small, heatproof glass bowl. If using mini chocolate chips, use ⅓ cup plus 1 tablespoon.
- Heat the Cream: In a small saucepan, gently heat 2 tablespoons of heavy cream over medium-high heat until it is very warm but not yet boiling. Alternatively, you can heat the cream in the microwave in 5-second intervals until hot.
- Combine and Rest: Pour the hot heavy cream directly over the chocolate chips in the bowl, ensuring the chips are completely submerged. Allow the mixture to sit undisturbed for 2-3 minutes. This allows the heat from the cream to begin melting the chocolate.
- Stir to Smoothness: After resting, stir the chocolate and cream mixture vigorously with a spoon or whisk until it transforms into a smooth, shiny ganache. If a few chocolate chips remain unmelted, you can gently heat the bowl in the microwave for additional 5-second intervals, stirring after each, until perfectly smooth. A double boiler method on the stovetop can also be used for a more controlled melting process.
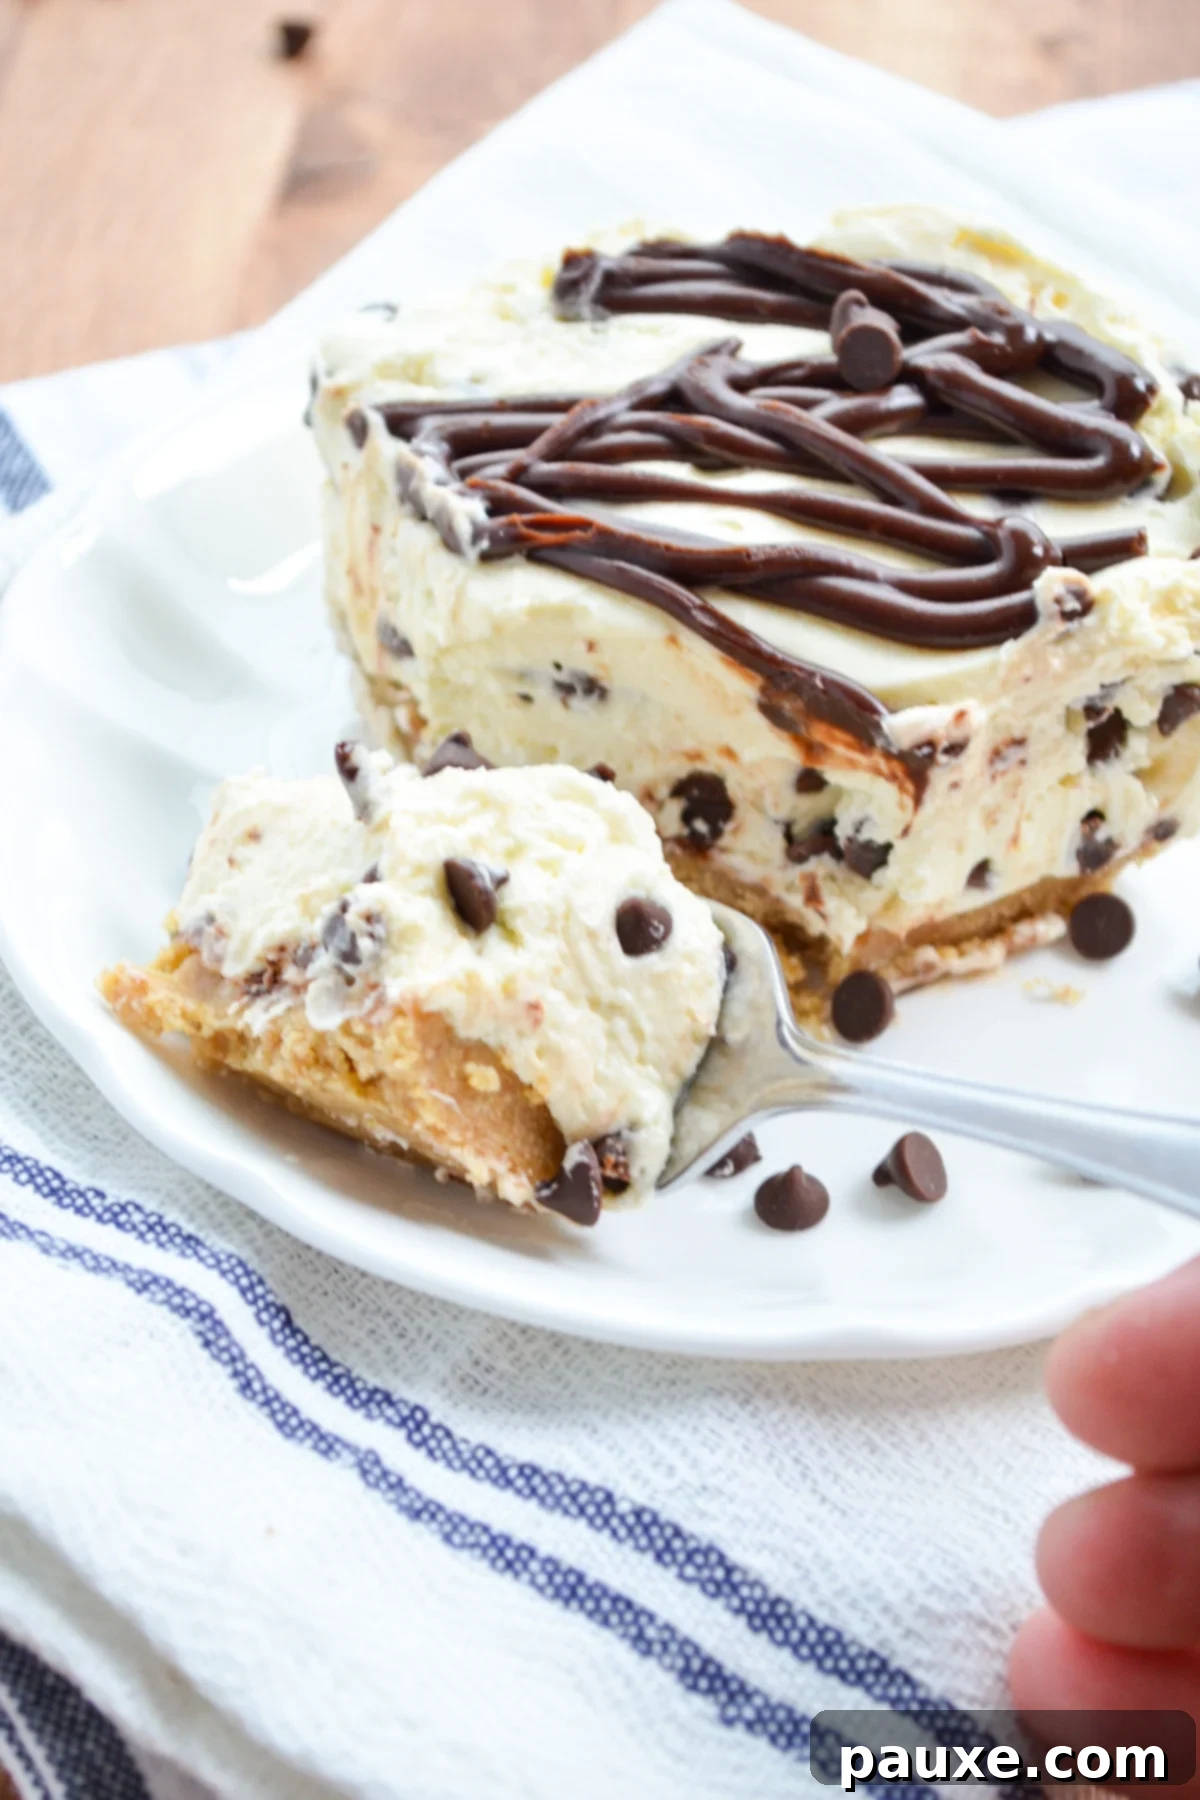
- Drizzle the Ganache: Once the ganache has cooled slightly but is still pourable, transfer it into a piping bag or a freezer bag with a small corner snipped off. Drizzle the ganache artistically over the surface of your chilled cheesecake. For a simpler approach, you can use the back of a spoon to create rustic swirls or a more even spread.
- Final Chill: Once your desired ganache pattern is complete, cover the cheesecake tightly with plastic wrap. Return it to the refrigerator and chill for a minimum of 4 hours to allow the ganache to set and the cheesecake to firm up completely before serving. The longer it chills, the better the slices will hold their shape.
Smart Substitutions for Dietary Needs
This No-Bake Chocolate Chip Cheesecake recipe is incredibly versatile and can be adapted to fit various dietary preferences without sacrificing flavor or texture. Here are some smart substitutions to consider:
- For a Lighter Version: If you’re looking to reduce the calorie count, consider swapping regular full-fat cream cheese for its light or reduced-fat counterpart. Additionally, using a sugar-free or light frozen whipped topping can make a noticeable difference. Opting to skip the chocolate ganache topping altogether will also significantly lower the total calories per serving, resulting in a still delicious, yet lighter dessert.
- For Sugar-Free, Keto, or Low-Carb Diets: Achieving a keto-friendly no-bake cheesecake is definitely possible! Begin by selecting a sugar-free frozen whipped topping or making your own homemade stabilized whipped cream using a sugar substitute. Replace the powdered sugar with a keto-friendly, cup-for-cup powdered sweetener, such as Swerve Confectioners sweetener. For the crust, you’ll need to use a specialized recipe for a keto graham cracker crust, often made with almond flour and sugar-free sweeteners. Finally, ensure all chocolate chips used are sugar-free, like those from Lily’s Brand.
- For a Gluten-Free Cheesecake: Making this cheesecake gluten-free is straightforward. The primary adjustment involves using certified gluten-free graham crackers for the crust. Beyond that, it’s essential to verify that all other ingredients you choose, such as cream cheese, whipped topping, and chocolate chips, are clearly labeled as “Gluten-Free” to avoid any cross-contamination. Most chocolate chips are naturally gluten-free, but it’s always wise to double-check the packaging.
Exciting Variations to Elevate Your Cheesecake
This No-Bake Chocolate Chip Cheesecake is a fantastic base for creativity! Feel free to experiment with different flavors and toppings to create a personalized dessert experience. Here are some popular variations:
- Chocolate Chunk Cheesecake: For a more robust chocolate experience, substitute the mini chocolate chips with 1 cup of roughly chopped larger chocolate chunks. This provides bigger bursts of rich chocolate throughout the creamy filling.
- Cookies and Cream Dream: Transform your cheesecake into a cookies and cream delight by replacing the mini chocolate chips with coarsely chopped Oreo cookies. The crunchy cookie pieces add a wonderful texture and classic flavor. You can choose to omit the chocolate ganache or keep it for an extra chocolate layer.
- Fruity Pie Cheesecake: For a vibrant, fruit-infused dessert, omit both the chocolate chips and the ganache. Instead, top the plain cheesecake filling with a small can of your favorite fruit pie filling. Strawberry, cherry, and raspberry are perennial favorites that add a lovely tang and bright color.
- Fresh Berry Bliss: Skip the chocolate chips and ganache to highlight the natural sweetness and slight tartness of fresh fruits. Adorn the top of your chilled plain cheesecake with a medley of cleaned and trimmed fresh berries. Strawberries, raspberries, blueberries, and blackberries not only add gorgeous color but also tend to hold their shape beautifully when sliced.
- Chocolate Covered Strawberry Cheesecake: Combine two beloved desserts into one! Omit the chocolate chips from the filling. Once the cheesecake has set, arrange fresh, thinly sliced strawberries on top, then generously drizzle with the homemade chocolate ganache for a decadent chocolate-covered strawberry effect.
- No-Bake Chocolate Chip Cheesecake Pie: For a different presentation, prepare this recipe in a deep-dish pie plate instead of an 8×8-inch baking dish. This makes for a classic pie shape that’s perfect for slicing and serving at gatherings.
Frequently Asked Questions About No-Bake Cheesecakes
Absolutely! No-bake cheesecakes freeze wonderfully. Once your cheesecake is completely cooled and firm, wrap it tightly in a layer of plastic wrap. Then, cover it with a layer of aluminum foil to prevent freezer burn and label it with the date. It can be frozen for up to one month. When you’re ready to enjoy it, ensure you thaw it completely in the refrigerator before slicing and serving. This usually takes several hours or overnight.
The most common reasons for a runny no-bake cheesecake are incorrect ingredients or insufficient chilling time. Always ensure you’re using full-fat, brick-style cream cheese. Cream cheese sold in tubs or whipped versions have a different consistency and will not set properly, resulting in a soupy texture. Secondly, chilling is critical! A minimum of 4 hours is recommended, but for the best, firmest results, aim to chill your cheesecake overnight. Ensure your whipped topping was also completely thawed but still cold when folded in.
The primary difference lies in the preparation and ingredients. Traditional cheesecakes are baked in an oven, often in a water bath, and typically rely on eggs as a binding and setting agent. This gives them a dense, rich, custard-like texture. No-bake cheesecakes, on the other hand, do not contain eggs and are set through refrigeration. They often use ingredients like whipped cream, whipped topping (like Cool Whip), gelatin, or additional cream cheese to achieve a lighter, yet still creamy and stable texture.
To prevent a runny no-bake cheesecake, focus on these critical points: 1) Use the correct type of cream cheese – only brick-style, full-fat cream cheese will provide the necessary density. Avoid tub or whipped cream cheese. 2) Allow ample chilling time. Four hours is the minimum, but overnight is always best for a perfectly set cheesecake. 3) Ensure all ingredients, particularly the cream cheese and whipped topping, are at the correct temperature (softened cream cheese, thawed whipped topping). 4) Double-check your measurements. Accidentally adding too much liquid or insufficient stabilizers (like whipped topping or cream cheese) can throw off the balance and prevent setting.
Discover More Delightful No-Bake Desserts
If you’ve fallen in love with the ease and deliciousness of this No-Bake Chocolate Chip Cheesecake, you’ll be thrilled to explore other fantastic oven-free treats. Perfect for keeping your kitchen cool or when you need a quick dessert, these recipes are sure to become new favorites:
- Lazy Cheesecake Salad: A light, fruity, and creamy dessert salad that’s unbelievably simple to assemble.
- No Bake Peanut Butter Bars: Rich, gooey, and packed with peanut butter flavor, these bars are a classic crowd-pleaser.
- Butterscotch Haystacks: A fun, crunchy, and irresistibly sweet treat made with just a few ingredients.
- Berry Cheesecake Salad: A patriotic and refreshing dessert, bursting with fresh berries and creamy goodness.
- No Bake Pumpkin Cheesecake Bars: Enjoy the flavors of fall without turning on the oven, perfect for seasonal celebrations.
No Bake Chocolate Chip Cheesecake
No oven needed for this delicious, creamy, and decadent No Bake Chocolate Chip Cheesecake! An easy-to-make dessert perfect for summer or any time you want a hassle-free treat. Highly rated by many!
Average Rating: 4.71 from 24 votes
Print Recipe | Pin Recipe
Course: Desserts
Cuisine: American
Prep Time: 20 minutes
Additional Chill Time: 4 hours
Total Time: 4 hours 20 minutes
Servings: 9 Servings
Calories: 301 kcal
Author: Dorothy Bigelow
Ingredients
Graham Cracker Crust
- 1 sleeve of graham crackers (about 9 full sheets)
- 1 tablespoon granulated sugar
- ½ cup melted salted butter
Chocolate Chip Cheesecake Filling
- 2 (8oz) bricks cream cheese, softened
- 1 cup powdered sugar
- 1 teaspoon vanilla extract
- 1 (12oz) container frozen whipped topping, thawed
- 1 cup mini chocolate chips
Chocolate Ganache Topping (optional)
- ⅓ cup regular chocolate chips (or ⅓ cup + 1 tablespoon mini chocolate chips)
- 2 tablespoons heavy cream
Instructions
- Add the graham crackers and granulated sugar to the bowl of a food processor. Pulse until the crackers are broken down and have become fine crumbs.
- Transfer the crumb mixture to a medium-sized bowl. Pour in the melted butter and stir well with a rubber spatula until combined and all the graham crumbs are moistened.
- Line an 8×8-inch glass baking dish with two pieces of parchment paper, trimmed to fit and overlap each other, allowing for easy removal.
- Press the graham cracker crumb mixture into the lined pan, firmly but gently. Ensure it is evenly distributed and packed down without any loose crumbs.
- Place the baking dish in the fridge for 10 minutes to chill while you prepare the cheesecake filling.
- In a large bowl, combine the softened cream cheese, vanilla extract, and powdered sugar. Use a hand mixer or stand mixer to beat the mixture until it is smooth and creamy. Scrape down the sides of the bowl and beat again to ensure no lumps remain.
- Add the thawed whipped topping to the bowl, and gently fold it into the cream cheese mixture using a rubber spatula until thoroughly combined and uniform.
- Fold in the mini chocolate chips until they are evenly distributed throughout the cheesecake filling.
- Remove the chilled graham cracker crust from the fridge and spread the cheesecake filling evenly on top of the crust. Smooth the surface with your rubber spatula. If you are preparing the chocolate ganache, return the cheesecake to the fridge for 5 minutes. If not, cover the cheesecake tightly with plastic wrap and chill for at least 4 hours before serving.
- For the chocolate ganache: Add the chocolate chips to a small heatproof bowl. Heat the heavy cream in a small saucepan or microwave until very hot but not boiling. Pour the hot cream over the chocolate chips, ensuring they are completely covered.
- Allow the chocolate and heavy cream to rest for 2-3 minutes. Then, stir well to combine until you achieve a smooth, glossy ganache. If the chocolate isn’t fully melted, microwave in 5-second intervals, stirring between each, or use a double boiler on the stovetop until smooth.
- Once the ganache has cooled slightly but is still warm and pourable, transfer it to a piping bag or a freezer bag with the tip cut off. You can also use the back of a spoon to spread it if you’re not aiming for a fancy drizzle.
- Drizzle or pipe the ganache over the surface of the cheesecake until it has been used up completely.
- After applying the ganache, cover the cheesecake tightly with plastic wrap and return it to the fridge to chill for at least 4 hours before slicing and serving. For best results, chill overnight.
Video Tutorial
Did you try this recipe? Tag us at @dashfordinner and share your delicious photos!
Notes
For the Ganache:
If you don’t have regular chocolate chips on hand, you can use mini chocolate chips. Instead of ⅓ of a cup, use ⅓ cup + 1 tablespoon of mini chocolate chips. The amount of heavy cream remains the same.
If your chocolate does not melt fully after pouring the heavy cream on top and resting, you can move it to a heatproof bowl and microwave for a few seconds at a time, stirring during each interval. You can also use a double boiler on the stovetop, just until the ganache comes together.
Nutrition Information
- Serving: 1/9 of prepared recipe
- Calories: 301 kcal
- Carbohydrates: 32g
- Protein: 2g
- Fat: 21g
- Saturated Fat: 13g
- Polyunsaturated Fat: 7g
- Cholesterol: 34mg
- Sodium: 103mg
- Fiber: 2g
- Sugar: 28g
Please note that some of my blog posts here at Dash for Dinner may contain affiliate links. If you make a purchase through these links, I will get a small commission at no additional cost to you. Please see my Disclaimer for more information.
