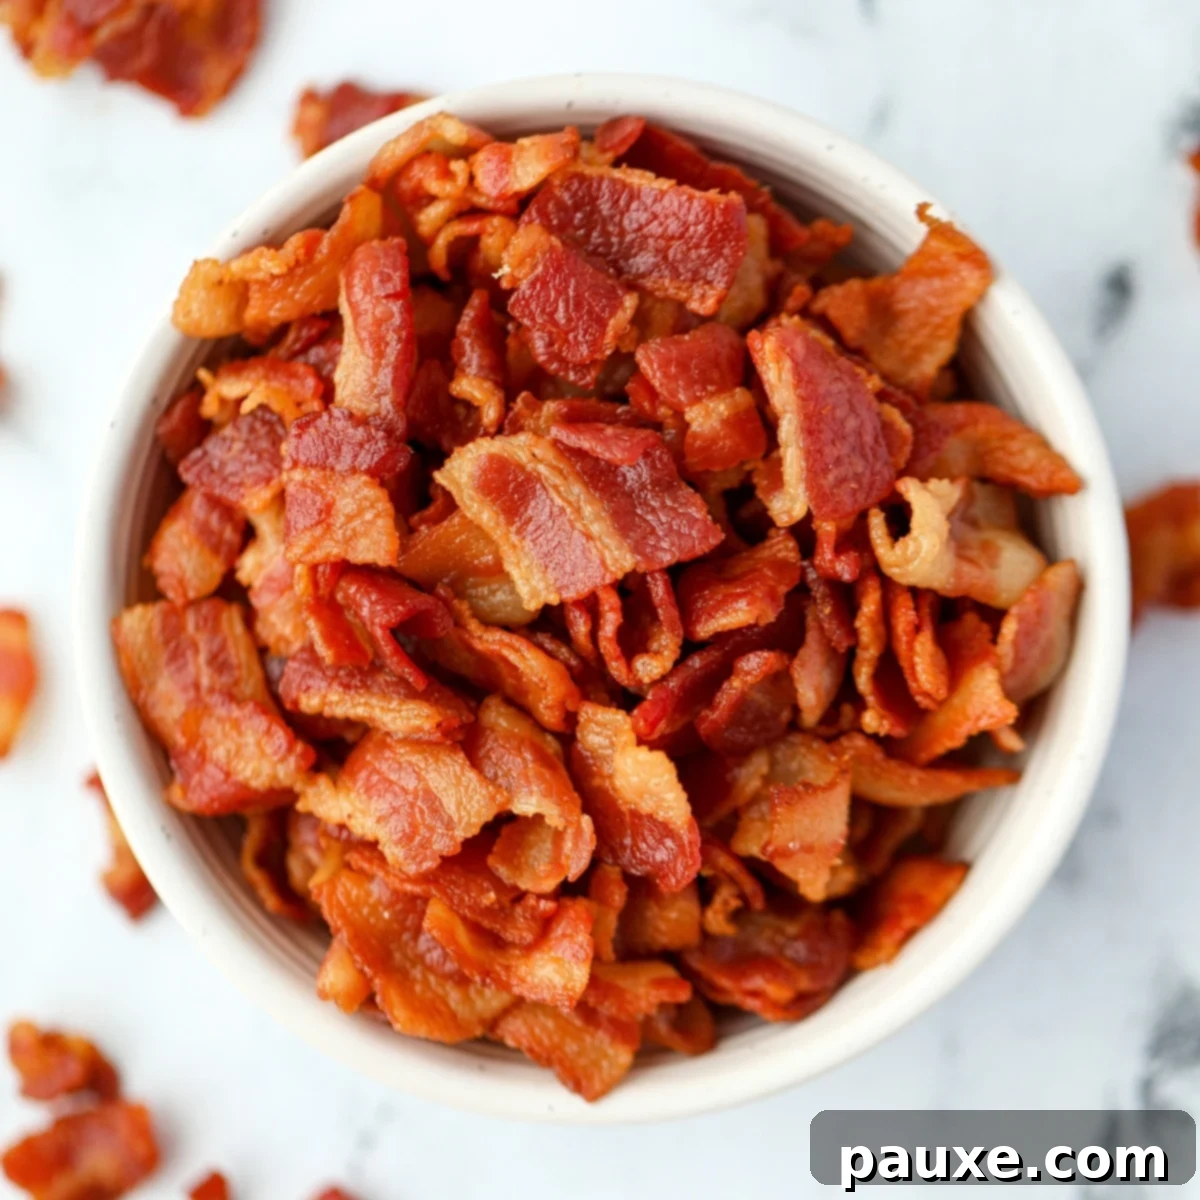
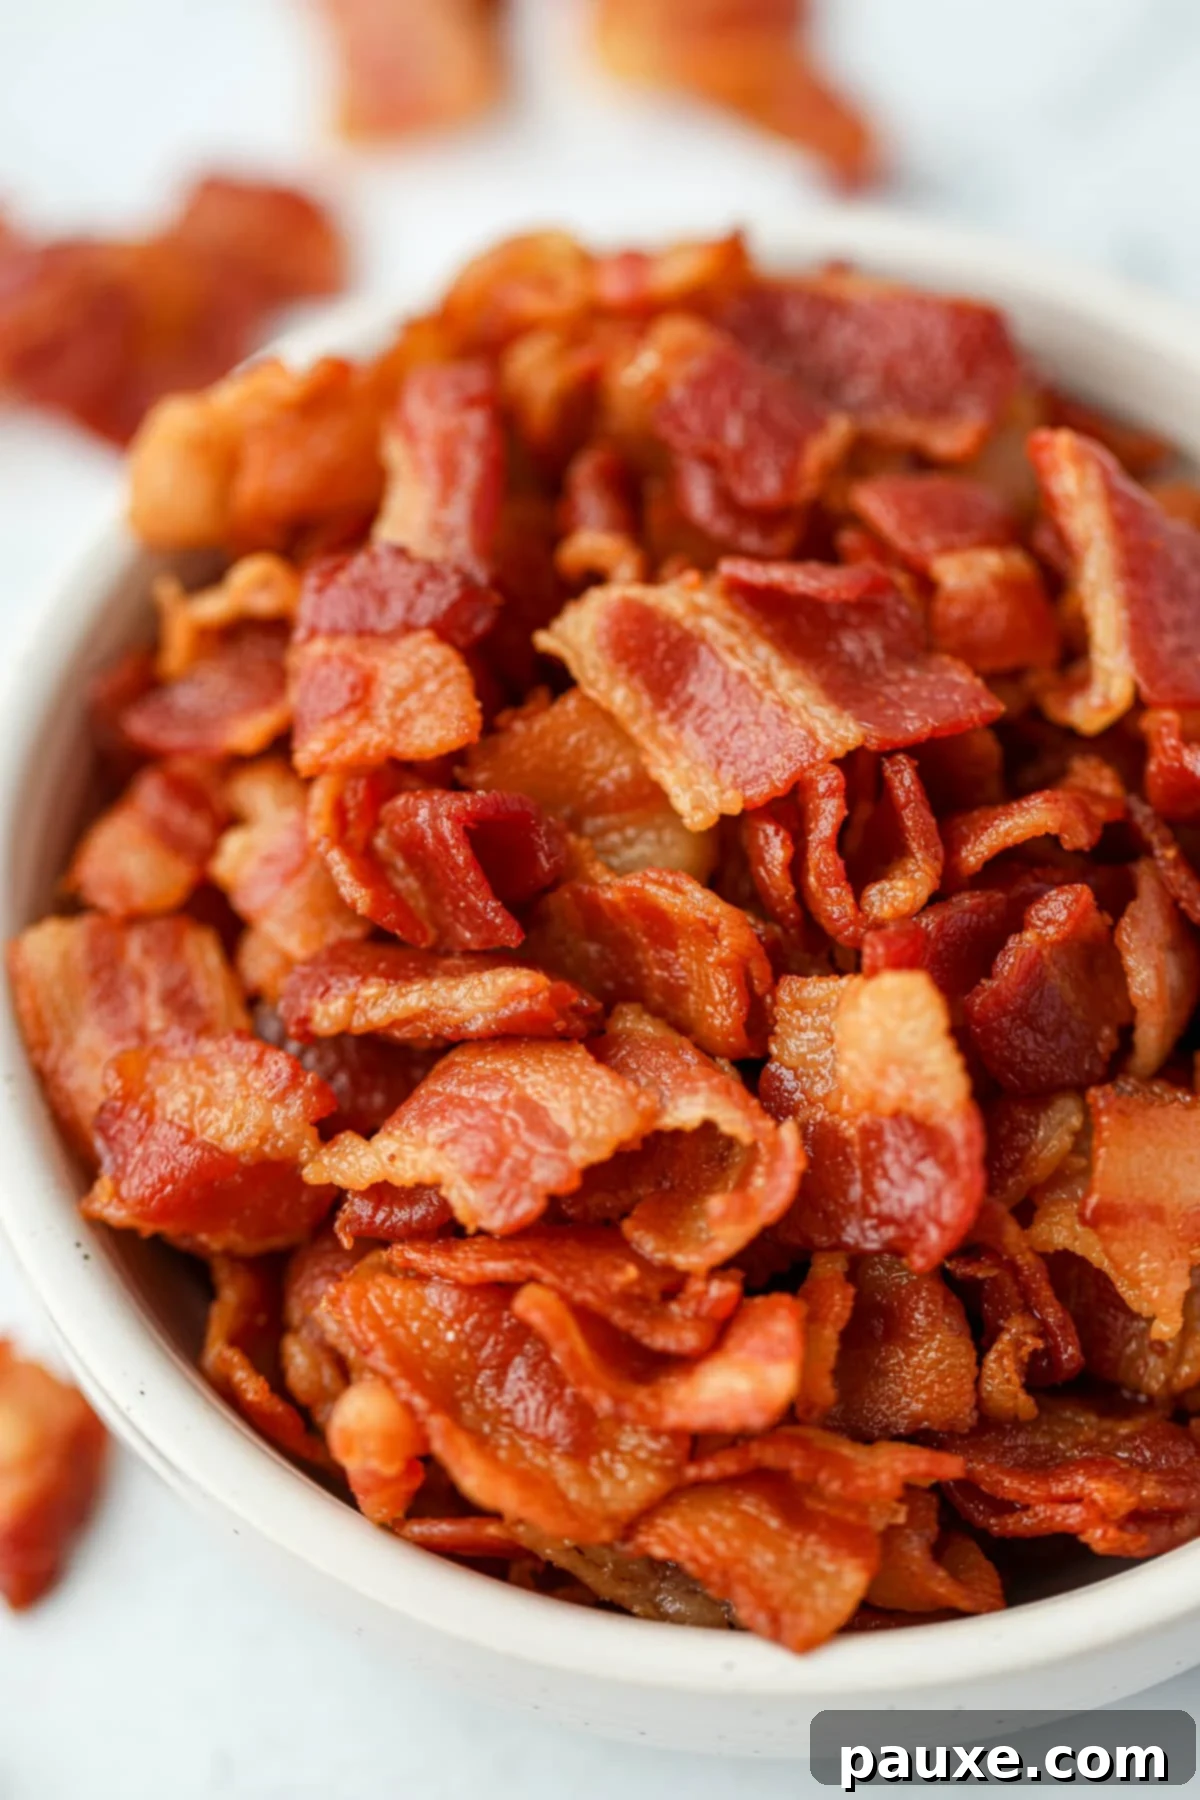
Unlock the secret to creating **perfectly crispy, crunchy, and intensely flavorful bacon bits** right in your own kitchen. Say goodbye to expensive store-bought versions and learn how to master this essential home-cooking skill. Not only will you save money, but you can also prepare a large batch and **freeze homemade bacon bits** for future culinary adventures!
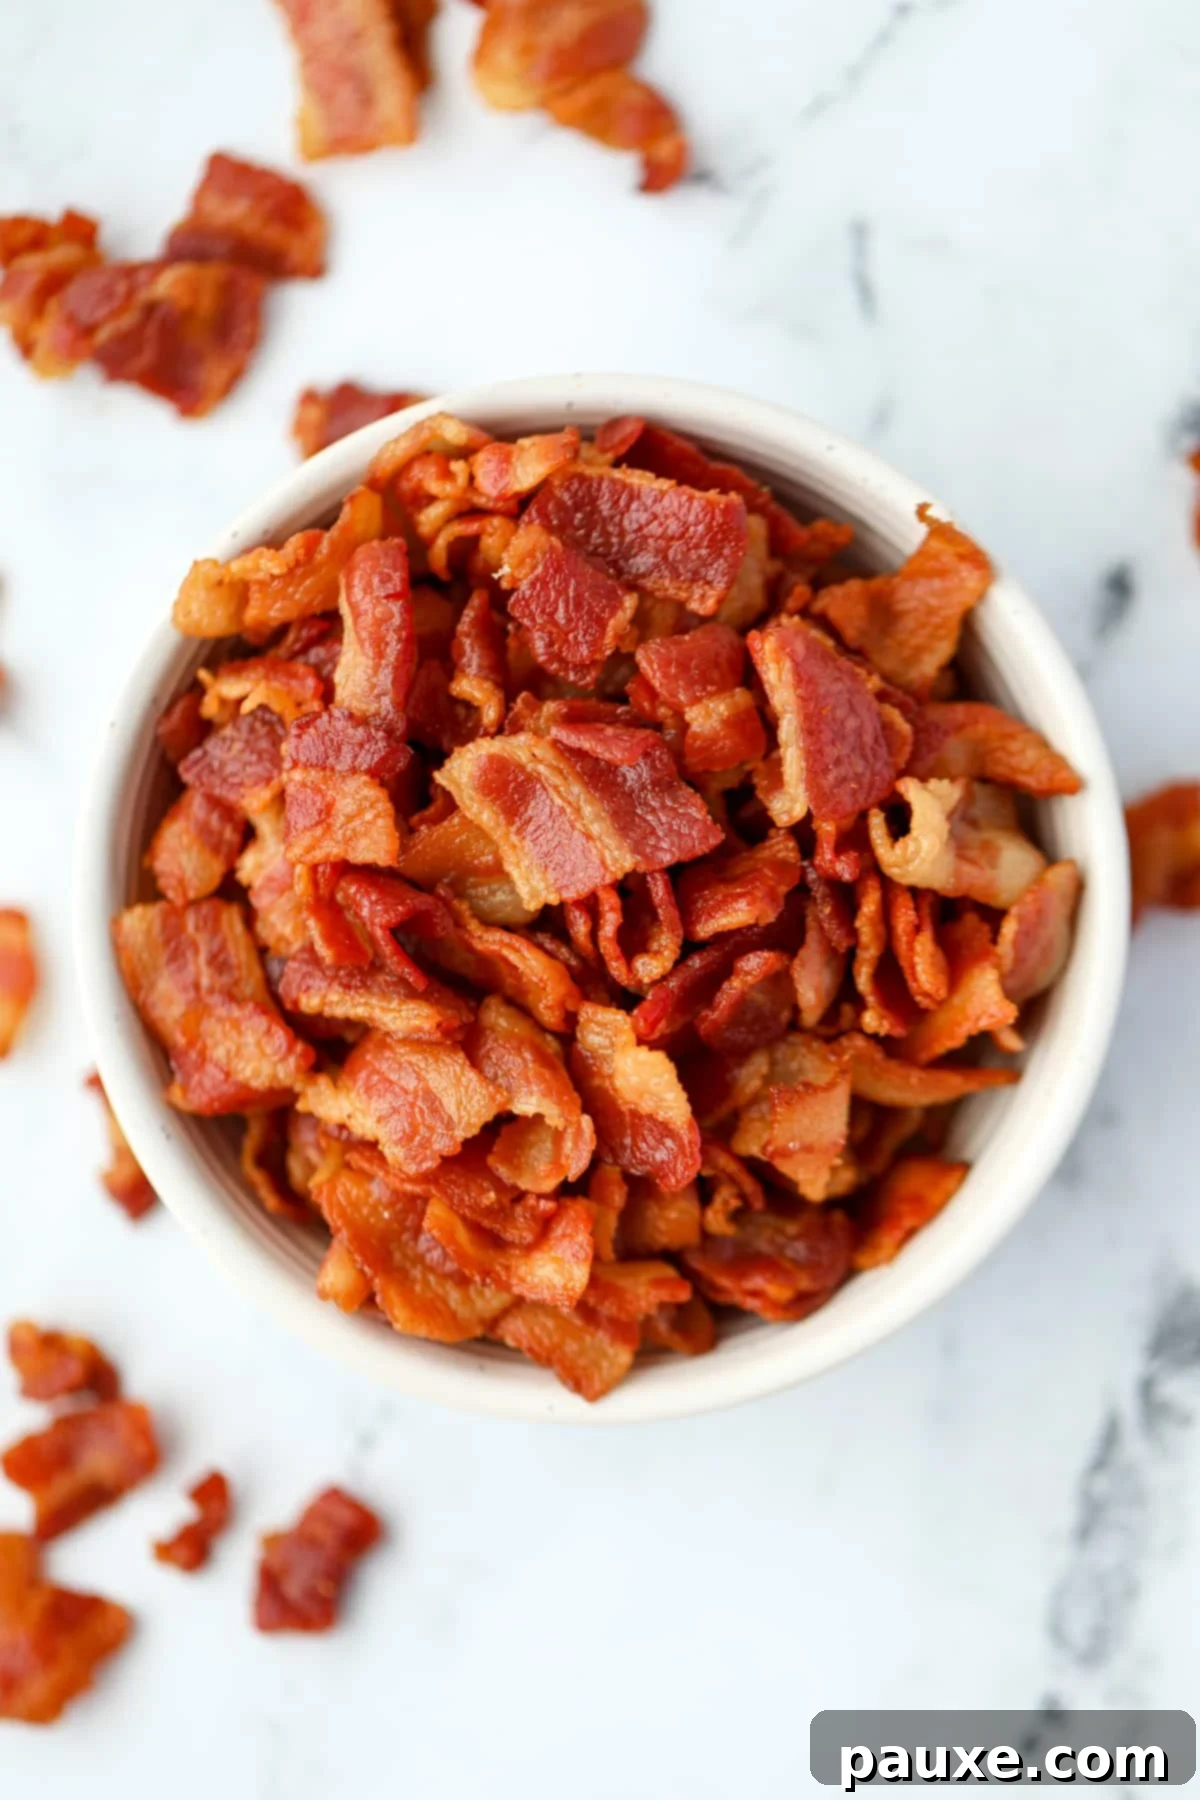
For any aspiring home cook, one of the most impactful secrets to elevating everyday meals is to **_always prepare your own bacon bits_** from scratch. The difference between freshly cooked, meticulously prepared bacon bits and their pre-cooked, often stale, store-bought counterparts is simply incomparable.
Homemade bacon bits introduce an unparalleled texture and a burst of savory, smoky flavor, transforming a wide array of dishes. Imagine the perfect crunch complementing your favorite casseroles, enriching the creaminess of baked potatoes, adding depth to dips, or becoming the star topping on vibrant salads, and countless other culinary creations. Their versatility makes them a must-have ingredient in any kitchen.
For years, my method involved cooking whole bacon slices first, then laboriously chopping them into smaller pieces. However, through trial and error, I made a pivotal discovery: **the absolute best results for bacon bits are consistently achieved when the bacon is chopped *before* it’s cooked to crisp perfection.** This technique ensures uniform size, superior crispiness, and a more delightful texture in every single bite.
Continue reading to unveil the **_ultimate method_** for crafting the finest homemade bacon bits. This approach guarantees consistency in size, flavor, and that irresistible crunch you crave. Once you try this, you’ll never go back to any other way – prepare to fall in love with your own perfectly made bacon bits!
Why Choose Homemade Bacon Bits? Unlocking Superior Flavor and Value
While pre-packaged bacon bits offer convenience, making your own at home provides significant advantages that elevate both your cooking and your budget. Here’s why homemade always wins:
- Cost-Effective: Store-bought bacon bits are surprisingly expensive when compared to purchasing a pack of fresh bacon. By making your own, you’re investing in quality and **saving a substantial amount of money** in the long run, especially if bacon bits are a staple in your cooking.
- Unmatched Crispiness: Since these are prepared fresh, just minutes before you plan to use them (or to store them), they achieve an **extraordinary level of crispiness**. This delivers a truly satisfying crunch that simply cannot be replicated by commercially processed, shelf-stable alternatives.
- Superior Flavor Profile: Nothing beats the rich, smoky, and intensely savory taste of freshly cooked bacon. Homemade bits retain all the authentic, robust flavors of bacon that haven’t been subjected to treatments for extended shelf life. The difference in taste is remarkable and will elevate any dish.
- Effortlessly Freezer-Friendly: One of the best perks of making your own is the ability to prepare a generous batch. You can easily portion and freeze your homemade bacon bits, ensuring you **always have a supply on hand** for those spontaneous culinary cravings or recipe needs. This saves time during busy weeknights and guarantees quality.
Essential Ingredients for Perfect Bacon Bits
Creating delicious bacon bits requires just one star ingredient. The beauty of this recipe lies in its simplicity and the incredible flavor it yields.

- Bacon: The foundation of our recipe! You can use any variety of bacon you prefer. Whether you opt for regular cut, **thick-cut bacon** (which often yields meatier bits), or even experiment with gourmet flavored bacons like maple, applewood, or cracked pepper – the method remains the same and the results will be delightful. The fat content is key here, as it renders down to create those crispy morsels.
Smart Budget-Friendly Tip: To maximize your savings, consider asking your local butcher for **bacon ends and pieces**. These are often sold at a significantly lower price than sliced bacon but deliver the same fantastic flavor and texture for your bits.
Tools and Equipment for Success
Gathering the right tools beforehand makes the bacon bit-making process smooth and efficient. You likely already own most of these kitchen essentials:
- Large Skillet or Dutch Oven: A **heavy-bottomed large skillet** is perfectly adequate. However, a **Dutch oven** is highly recommended if you have one. Its high sides are excellent for containing grease splatter, making cleanup much easier and preventing mess on your stovetop.
- Sharp Knife: Essential for precise and safe slicing of the raw bacon. A well-sharpened chef’s knife or utility knife will make quick work of the task.
- Wooden Spoon or Heat-Resistant Spatula: For stirring the bacon as it cooks, ensuring even crisping and preventing sticking.
- Paper Towel or Brown Paper Bag: Crucial for draining excess grease from the cooked bacon bits, which helps them achieve maximum crispiness.
- Slotted Spoon (Optional but Recommended): A slotted spoon is ideal for easily scooping out the crispy bacon bits from the hot grease while leaving the rendered fat behind.
Mastering Homemade Bacon Bits: A Step-by-Step Guide
Follow these detailed steps to achieve consistently perfect, crisp, and flavorful bacon bits every time.
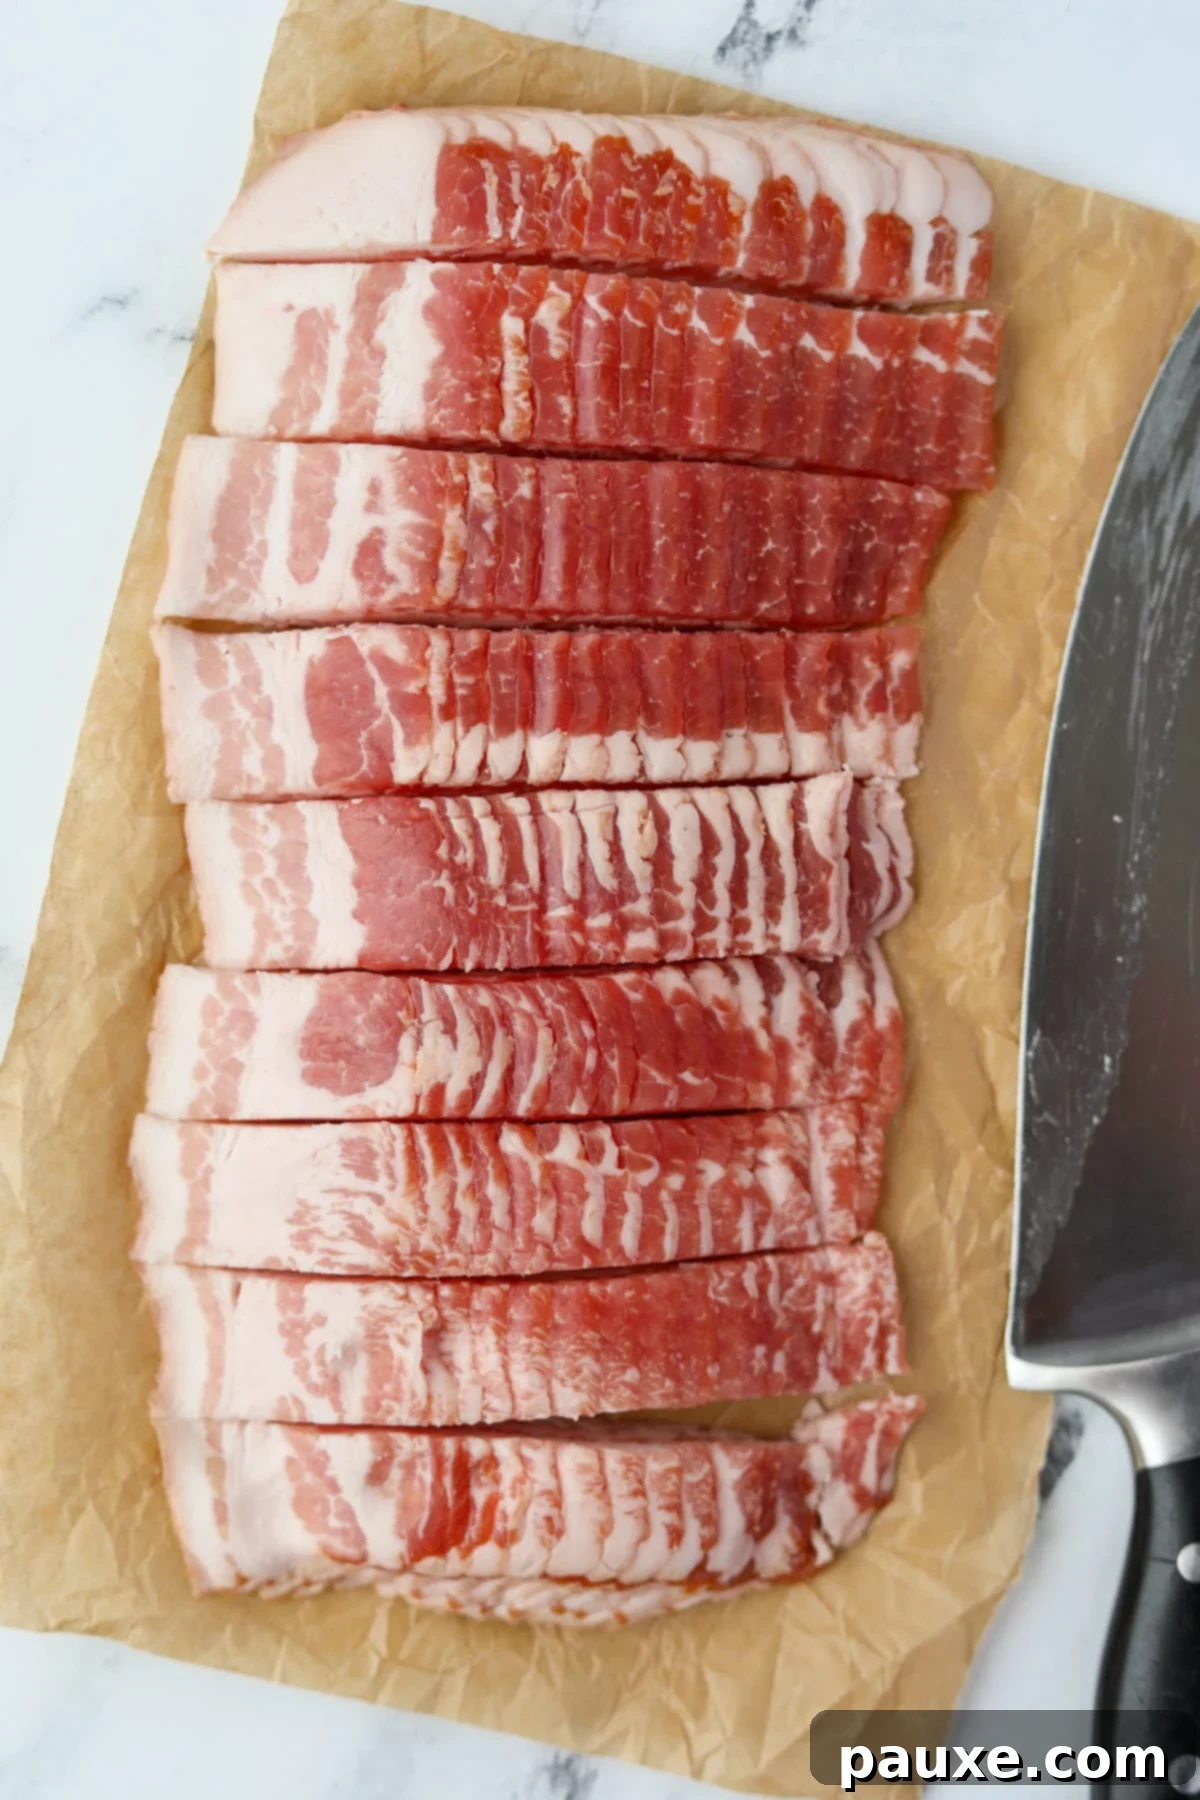
- Prepare the Bacon: Begin by keeping the bacon slices aligned exactly as they were packaged. Using your sharp knife, **slice the entire stack of bacon vertically into strips approximately ½ to ¾ inch wide**. Don’t worry about absolute precision; consistency is more important here than exact measurements.
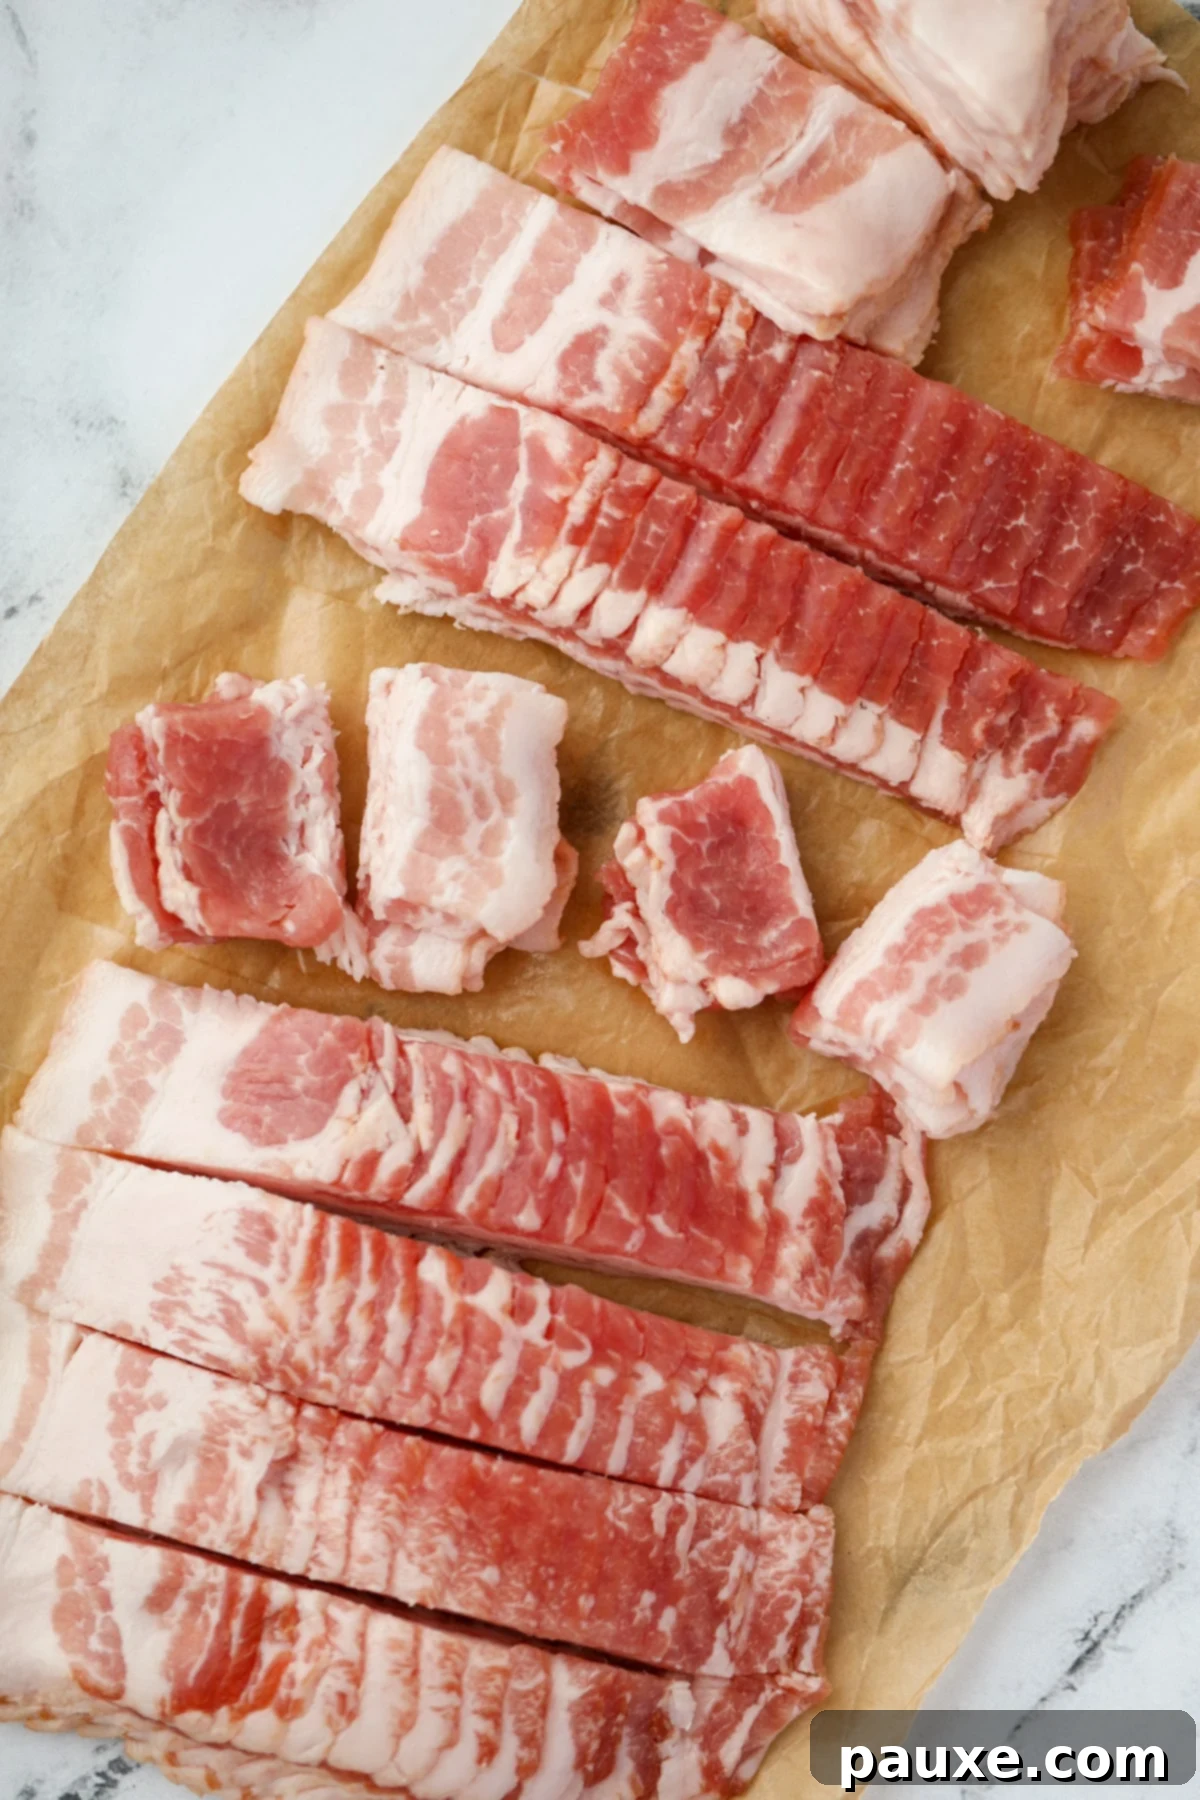
- Dice into Bits: Now, take the ½-¾ inch rectangular strips you just cut and **stack a few of them together**. Slice this stack horizontally in half or into thirds, depending on the desired size, to create **small, rough square or irregular-shaped bacon bits**. The goal is small, uniform pieces that will cook evenly and crisp up beautifully. Aim for pieces generally less than 1 inch on any side.
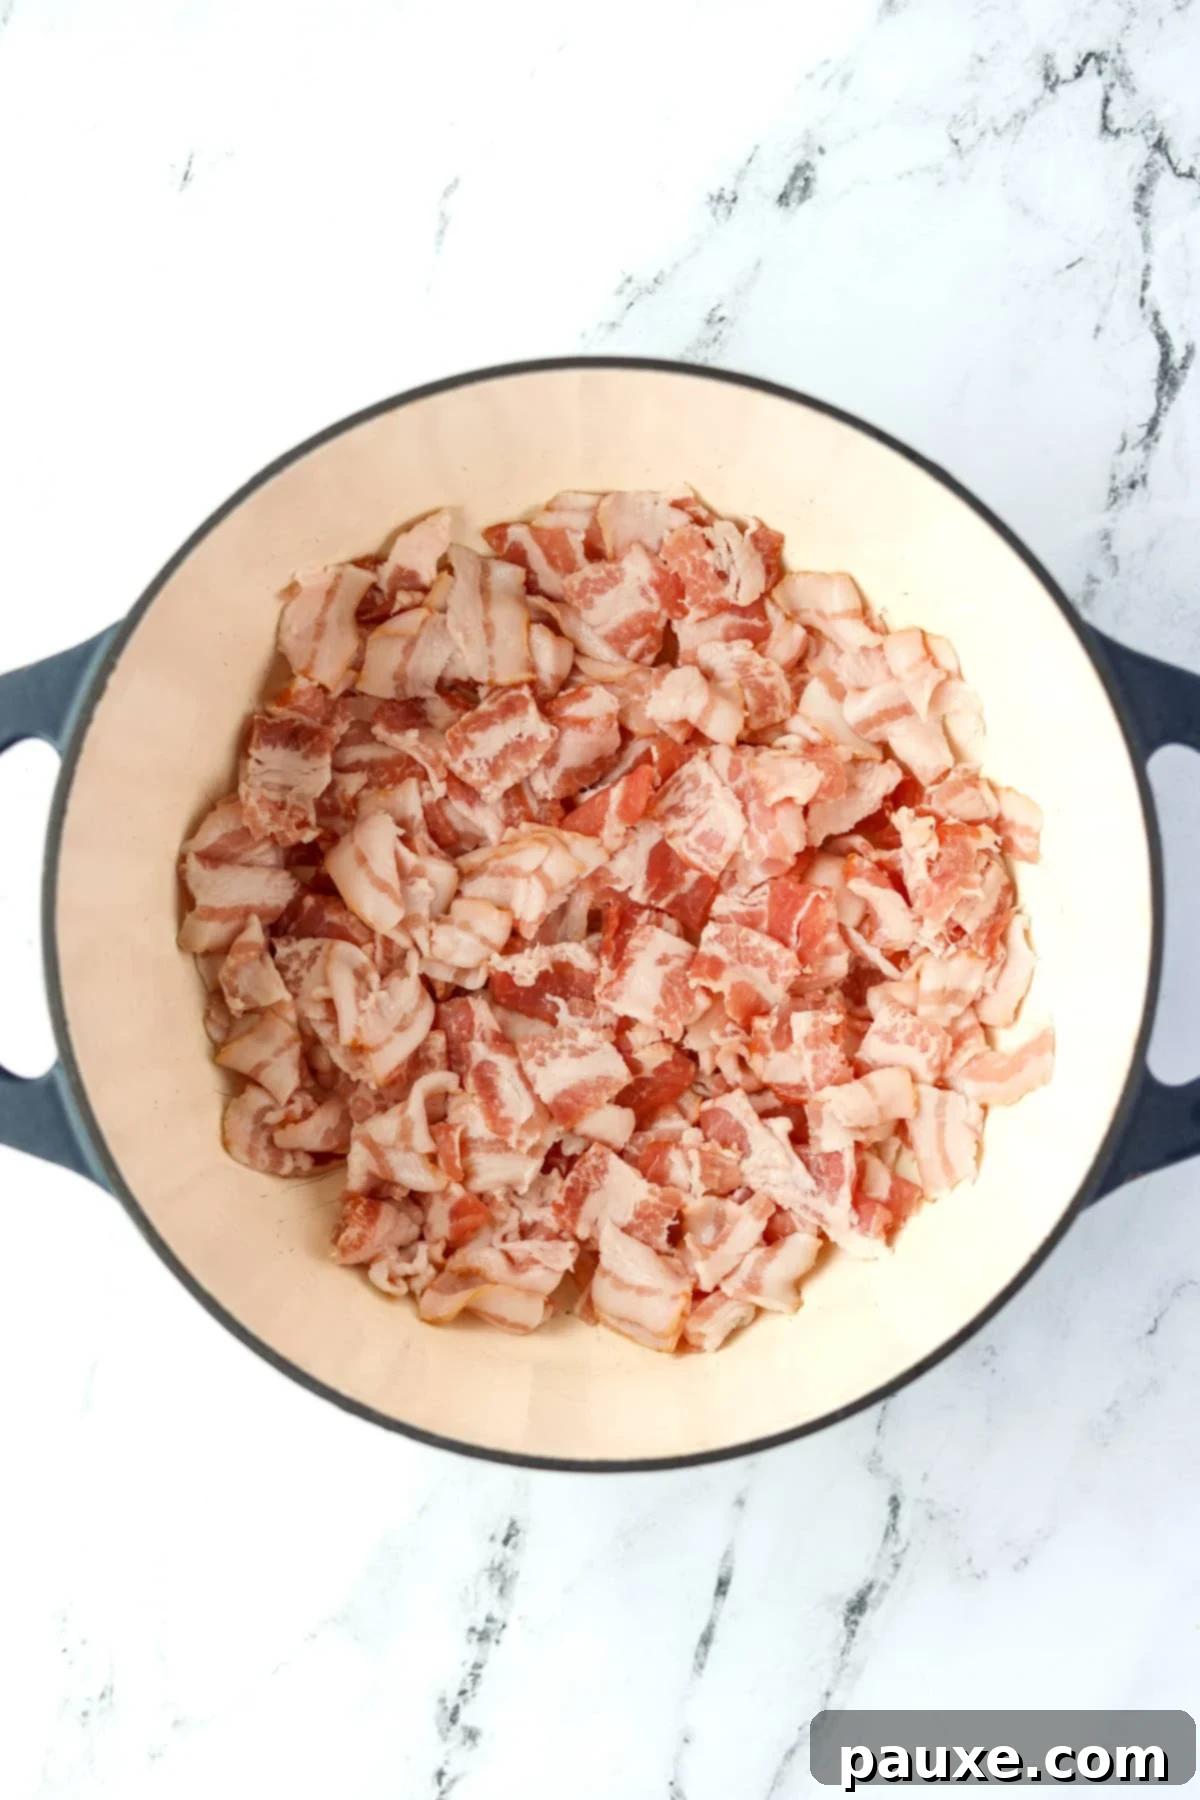
- Preheat Your Pan: Place your chosen Dutch oven or large, high-sided skillet over **medium heat**. Allow it to preheat for about 2-4 minutes, or until you can feel a distinct warmth radiating when you hold your hand a few inches above the surface. This ensures an even cooking start.
- Add and Separate Bacon: Carefully **add the chopped bacon pieces** to the hot pan. Immediately begin to stir them with your wooden spoon or spatula, gently breaking apart any pieces that might be sticking together. While they will naturally separate as they cook, a quick initial stir aids in more consistent cooking.

- Cook to Perfection: Continue to cook the bacon, stirring frequently, until the pieces reach your desired level of crispiness. As the bacon cooks, its fat will render, and the pieces will gradually shrink and become golden brown and crisp. It’s common for some pieces to cook faster than others, especially if your heat isn’t perfectly even. Don’t hesitate to **remove individual pieces or small batches with a slotted spoon** as they become crisp, setting them aside before the rest are ready.
Top Tip for Even Crispiness: **Frequent stirring** is your best friend here! Agitating the bacon pieces regularly promotes uniform cooking and coloring, significantly increasing the likelihood that all your bacon bits will be perfectly crisp at the same time.
The Final Touch: Draining for Ultimate Crispiness
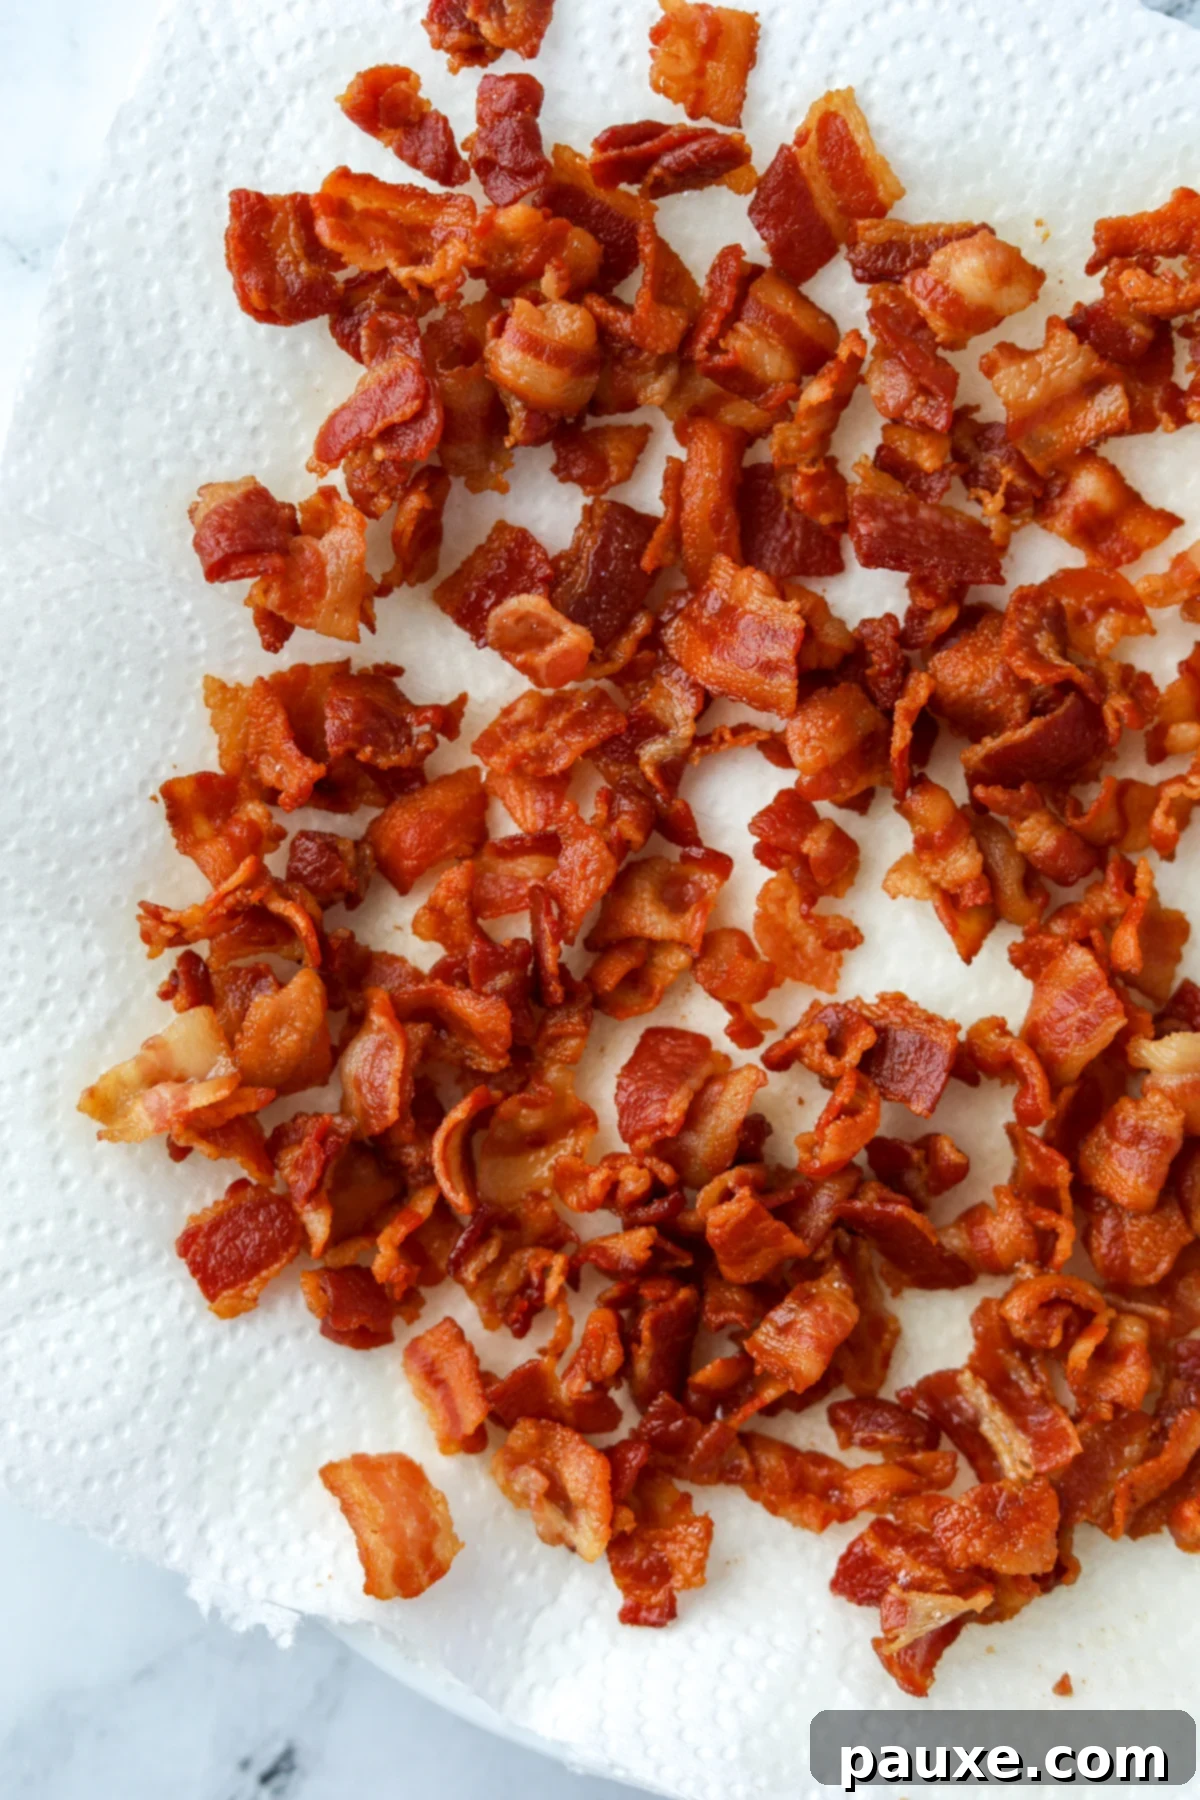
- Prepare for Draining: While your bacon is cooking, line a plate or tray with **several layers of paper towel** or even a clean brown paper bag. This absorbent surface is essential for removing excess grease.
- Drain Excess Grease: Once the bacon bits are perfectly crisp, use a slotted spoon (or your wooden spoon) to **carefully transfer them from the pan** to the prepared paper towels. Allow them to sit and **drain any remaining grease** for several minutes. You’ll observe the paper towels absorbing the fat, which is key to achieving that satisfying, dry crispness.
- Cool and Serve: As the bacon cools and drains, it will continue to crisp up and become firm. After a few minutes, your homemade bacon bits will be wonderfully crunchy and **ready to be enjoyed immediately** or stored for later use!
Delicious Ways to Utilize Your Homemade Bacon Bits
Now that you’ve mastered the art of making your own bacon bits, the culinary possibilities are endless! Their savory crunch can elevate almost any dish. Here are some popular and creative ways to incorporate them:
- Salads: A classic pairing! Sprinkle generously over green salads, pasta salads, or hearty potato salads. They are an absolute game-changer in creamy concoctions like my Amish broccoli salad, adding a vital textural contrast.
- Dips: Elevate your favorite party dips, especially creamy ones like spinach dip, onion dip, or a hearty loaded baked potato dip. They add a burst of flavor and a welcome crunch.
- Casseroles: Stir them into the mix or use them as a delightful crunchy topping for mac and cheese, green bean casserole, or any savory baked dish.
- Soups: A fantastic garnish for creamy soups, chowders, or chili. Think loaded baked potato soup, creamy tomato soup, or split pea soup for an extra layer of richness.
- Mashed Potatoes: Fold them into your mashed potatoes for a flavorful surprise, or sprinkle them on top as a garnish with chives and sour cream.
- Roasted Potatoes: Add them during the last few minutes of roasting, or sprinkle over a finished dish. They pair exceptionally well with recipes like my ranch roasted potatoes!
- Baked Potatoes: The ultimate topping for a classic baked potato, alongside sour cream, cheese, and chives.
- Appetizers: Incorporate them into stuffed mushrooms, deviled eggs, or mini quiches for an irresistible smoky note.
- Garnish or Topping: Use them as a versatile garnish for scrambled eggs, avocado toast, bruschetta, or even savory pancakes.
Storing and Freezing Homemade Bacon Bits for Future Use
Proper storage is essential to keep your homemade bacon bits fresh, crispy, and ready whenever inspiration strikes. Here’s how to ensure they last:
- Cool Completely Before Storing: This is a crucial step! Always ensure your bacon bits have **cooled down completely to room temperature** before placing them into any storage container. Storing them while warm will create condensation, leading to soggy bacon.
- Airtight Storage: Transfer the cooled bacon bits to an **airtight container or a heavy-duty freezer bag**. This protects them from air exposure, which can lead to staleness.
- Refrigeration: When stored in an airtight container in the refrigerator, homemade bacon bits will remain fresh and crispy for **up to 3 days**. While some people might extend this slightly, freezing is recommended for longer preservation to maintain optimal quality.
- Re-crisping Bacon Bits: If your bacon bits lose some of their crispness in storage, don’t fret! You can easily revive them:
- Heat them gently in a **dry skillet** over medium-low heat until crisp again.
- Alternatively, a quick burst in an **air fryer** (350°F / 175°C for 2-3 minutes) or even a few seconds in the **microwave** (though this can sometimes make them chewy) can do the trick.
- Always **drain warmed bacon on fresh paper towels** and allow it to cool for 2-3 minutes before serving. This draining and cooling process is vital for restoring and maintaining crispiness.
- Freezing for Long-Term Storage: For extended freshness, freezing is an excellent option. Allow the cooked bacon bits to cool entirely, then transfer them to a freezer bag. **Label the bag with the date** and remove as much excess air as possible before sealing. Frozen bacon bits can be stored for **up to 3 months**. You can re-crisp them directly from frozen using the methods above.

Expert Tips for Unforgettable Bacon Bits
Achieving truly exceptional homemade bacon bits often comes down to a few key techniques. These expert tips will ensure your results are consistently perfect:
- Always Slice Bacon *Before* Cooking: This is arguably the most critical game-changer. My personal breakthrough came when I realized the dramatic improvement in texture and uniformity when **raw bacon is sliced into small pieces prior to cooking**. Attempting to crumble cooked bacon typically results in irregular “bacon flakes” rather than the desirable, distinct “bits” you’re aiming for. Pre-slicing ensures each piece cooks evenly and crisps up beautifully.
- Cook in Batches for Large Quantities: If you’re preparing a smaller amount of bacon bits (e.g., 4-6 slices), it’s relatively easy to ensure everything cooks evenly in one go. However, when making a **large batch**, it’s much more effective to **work in smaller quantities, typically 8-12 slices at a time**. Overcrowding the pan lowers the temperature and steams the bacon instead of frying it, leading to less crispy results. Patience here pays off!
- Don’t Discard That Bacon Grease: The rendered bacon fat is a culinary goldmine! Instead of throwing it away, **save the flavorful bacon grease**. Line a funnel with a coffee filter (or several layers of paper towel) and place it over a heat-safe glass jar. Carefully pour the warm bacon grease through the filter; the filter will capture any leftover bacon debris, leaving you with pure, clarified bacon fat. Store it in the refrigerator for future use. This liquid gold is fantastic for sautéing your favorite greens, adding depth to vegetable dishes, browning chicken or beef, or even enhancing cornbread.
Frequently Asked Questions About Homemade Bacon Bits
The simplest and most effective method for homemade bacon bits involves slicing raw bacon into ½” to ¾” pieces. Cook these small pieces over medium heat in a large skillet or Dutch oven, stirring frequently, until they reach your desired level of crispness. Once cooked, remove the crispy bacon bits with a slotted spoon and allow them to drain on a paper towel-lined plate to remove excess grease and promote maximum crunch. This method ensures consistent results with minimal effort.
Using a food processor to chop raw bacon is generally not recommended. It’s challenging to achieve consistent sizes, and the rapid blades often create a mushy paste rather than distinct bits. If you possess a very sharp, high-quality food chopper, you might achieve acceptable results, but for the best consistency and texture, manually dicing the bacon with a sharp knife is highly advised. This allows you to control the size and shape of each piece, ensuring optimal crispiness.
For superior bacon bits, it is unequivocally recommended to **slice raw bacon before cooking**. This technique yields bits that are uniform in size, resulting in a more consistent and satisfying crunch throughout. The bits also more closely resemble the appealing texture of store-bought versions. In contrast, attempting to chop or crumble cooked bacon often results in larger, flatter, and less uniformly crispy pieces that simply don’t deliver the same delightful experience.
Explore More Ways to Cook Bacon:
Bacon is a versatile ingredient, and there are many ways to achieve different textures and flavors. If you’re a bacon enthusiast, be sure to check out these other fantastic cooking methods:
- Crispy Oven Baked Bacon: A hands-off method for perfectly flat, crispy strips.
- Air Fryer Bacon: Quick, convenient, and incredibly crispy with minimal mess.
- Instant Pot Bacon: An unexpected but effective way to cook bacon, particularly useful for larger batches.
- Sweet & Spicy Candied Bacon: A delightful blend of sweet and savory, perfect for snacking or dessert toppings.
- Million Dollar Bacon: A gourmet, irresistible candied bacon often flavored with brown sugar and cayenne.
- Billionaire’s Bacon: An even richer, more luxurious version of candied bacon, often featuring pecans or other gourmet additions.
Favorite Recipes That Showcase Bacon Bits:
Once you have a fresh batch of homemade bacon bits, put them to good use in these incredibly popular and delicious recipes:
- Broccoli Salad
- Loaded Baked Potato Soup
- Loaded Baked Potato Dip
- Bacon and Gruyere Egg Bites (Starbucks Copycat)
If you thoroughly enjoyed this recipe for homemade bacon bits, please consider letting me know! You can leave a 5-star review in the recipe card below or share your thoughts in the comments section. Don’t forget to tag me on Instagram @dashfordinner when you share your delicious creations!

How to Make Homemade Bacon Bits
Print
Pin
Rate
Equipment
- Dutch oven or a large skillet with high sides for reduced splatter
- Sharp Knife
- Wooden Spoon or Heat-Resistant Spatula
- Paper Towels or Brown Paper Bag
- Slotted Spoon (recommended)
Ingredients
- 8-16 slices bacon regular or thick-cut, for optimal meaty bits
Instructions
- Using a sharp knife, **cut your raw bacon into small, uniform squares, roughly ½-¾” in size**. To do this efficiently, keep the bacon slices lined up as they came in the package and slice them vertically into ½-¾” strips. Then, stack these rectangular strips and slice them horizontally into smaller pieces. The exact shape is less important than achieving consistent, bite-sized pieces, ideally less than 1” on any side, to ensure even cooking and crispiness.

- Gently separate any bacon pieces that are sticking together with your fingers. Don’t worry if a few remain clumped, as they will typically break apart during cooking. However, starting with separated pieces encourages more even crisping.
- Heat your Dutch oven (or a large skillet with high sides to minimize grease splatter) over **medium heat** for approximately 2-4 minutes. The pan should be hot enough to radiate a noticeable warmth when you hold your hand above it.
- Once the pan is properly preheated, **add the chopped bacon pieces**. Immediately begin to stir them gently with a wooden spoon or heat-resistant spatula to break them up and ensure they cook evenly.

- As the bacon begins to cook, its fat will render out, and the pieces will gradually start to crisp up and turn golden brown. Continue to stir occasionally but consistently to promote even cooking and prevent any pieces from burning or sticking.

- Once the bacon bits are crispy and cooked to your liking, **use a slotted spoon to remove them** from the pan. Transfer the cooked bits to a plate or tray lined with several layers of paper towel to drain any excess grease. This is crucial for achieving the perfect crunch.

- Important Note: As more fat renders into the pan, the remaining bacon pieces will cook more quickly. Stay vigilant and watch them carefully to prevent burning. If you notice them cooking too rapidly, reduce the heat slightly. You may need to remove pieces in batches as they finish cooking at different rates.
- Continue removing batches of crispy bacon bits as they reach your desired level of perfection, placing them on fresh paper towels if the initial ones become saturated with grease.
- Allow the bacon bits to cool and drain for 3-5 minutes before using. They will continue to crisp up as they cool down, achieving that irresistible crunch.
- To store any leftovers, transfer the completely cooled bacon bits to an airtight container or a freezer bag. Store them in the refrigerator for up to 3 days, or freeze for longer storage, up to 3 months. For optimal crispness when using stored bits, re-crisp them in a dry skillet over medium heat until a small amount of fat renders (even from frozen). Drain briefly on paper towels and use as desired.
Did you try this recipe?Tag me at @dashfordinner and share your photos!
Notes
Storage: Ensure the bacon bits are completely cool before storing them. Transfer to an airtight container or freezer bag and store in the refrigerator for up to 3 days. For prolonged freshness and crispiness beyond day 3, it’s highly recommended to freeze them.
Freezing: Allow your homemade bacon bits to cool completely to room temperature. Transfer them to a freezer-safe bag, ensuring you label it with the date. Remove as much excess air as possible before sealing and freeze for up to 3 months.
Re-crisping: To restore crispiness to refrigerated or frozen bacon bits, add the desired amount to a preheated dry skillet over medium heat. Cook, stirring occasionally, until a small amount of fat renders and the bits are heated through and crisp again. Transfer the crisped pieces to a paper towel-lined plate to drain (though less fat will render than the first cook), aiding in their final crispiness.
Creative Ways to Use Bacon Bits:
- Enhance various **salads** (such as broccoli salad, Caesar salad, Cobb salad).
- Elevate your favorite **dips** (like my savory loaded baked potato dip).
- Garnish comforting **soups** and chowders for added texture and flavor.
- Perfect as a savory topping for **baked potatoes**.
- Incorporate into numerous **appetizers** for a delightful smoky crunch.
- Mix into scrambled eggs, omelets, or breakfast burritos for a hearty start.
Nutrition Information (Estimated per Serving)
Please note that some of my blog posts here at Dash for Dinner may contain affiliate links. If you make a purchase through these links, I will get a small commission at no additional cost to you. Please see my Disclaimer for more information.
