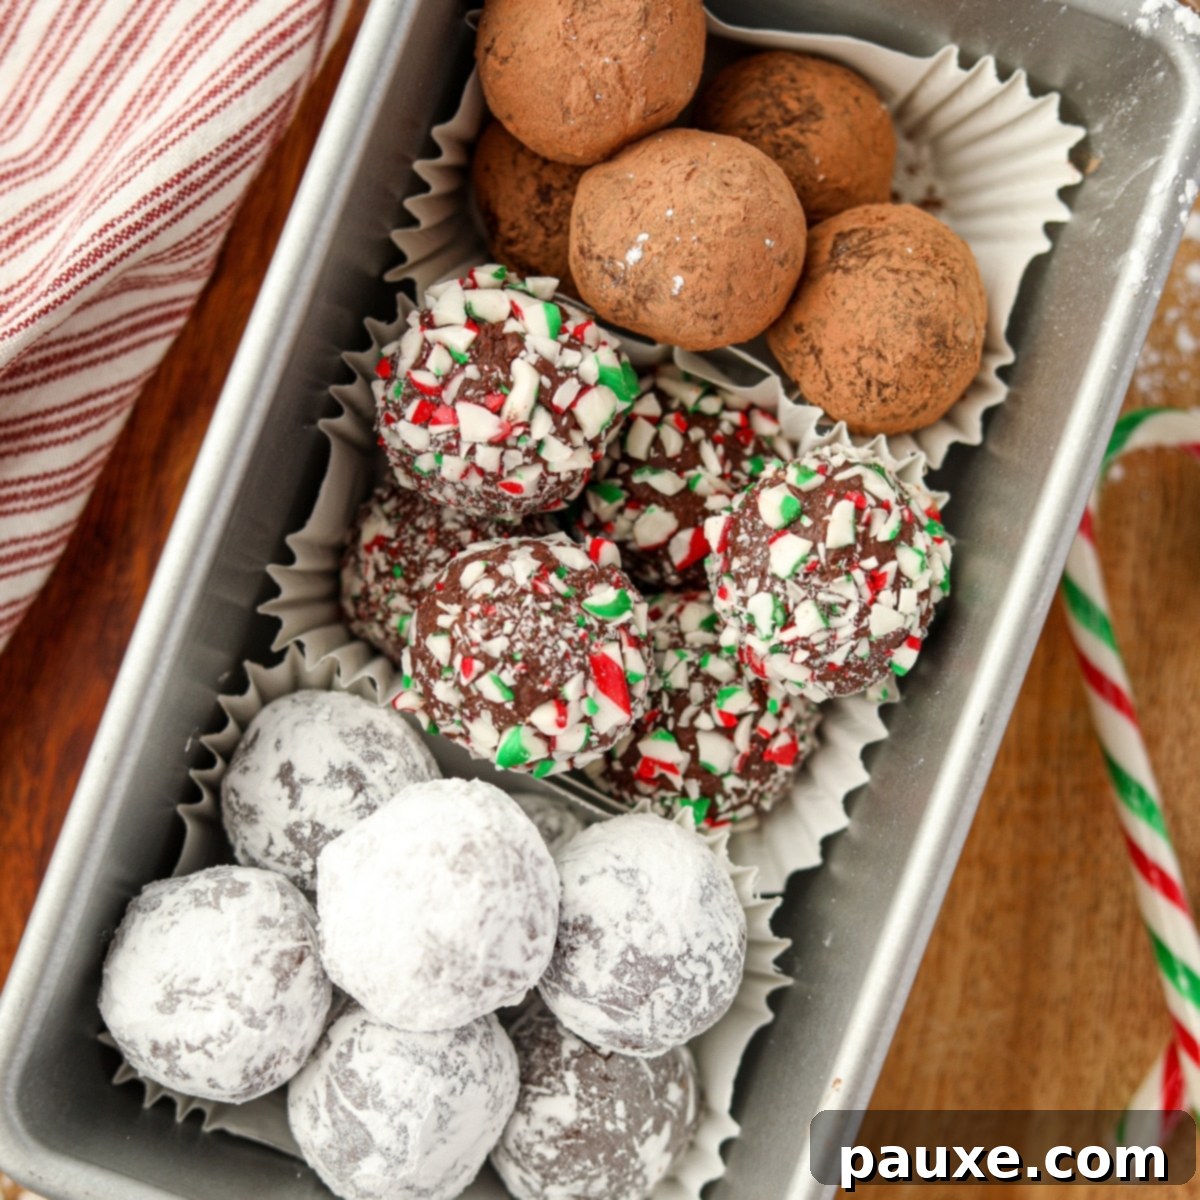
Irresistibly Easy Peppermint Truffles: Your New Favorite Holiday Treat (5 Ingredients!)
Prepare to fall in love with these delightful Peppermint Truffles, a recipe so simple it will quickly become a cherished holiday tradition! Crafted with just 5 essential ingredients, these decadent no-bake confections are perfect for festive gifting, holiday parties, or simply indulging your sweet tooth. The best part? They freeze beautifully, allowing you to enjoy their minty chocolate magic long after the holiday season has passed.
If you’re a fan of rich, flavorful truffles, don’t miss our equally simple recipe for Orange Chocolate Truffles – a citrusy twist on this classic treat!
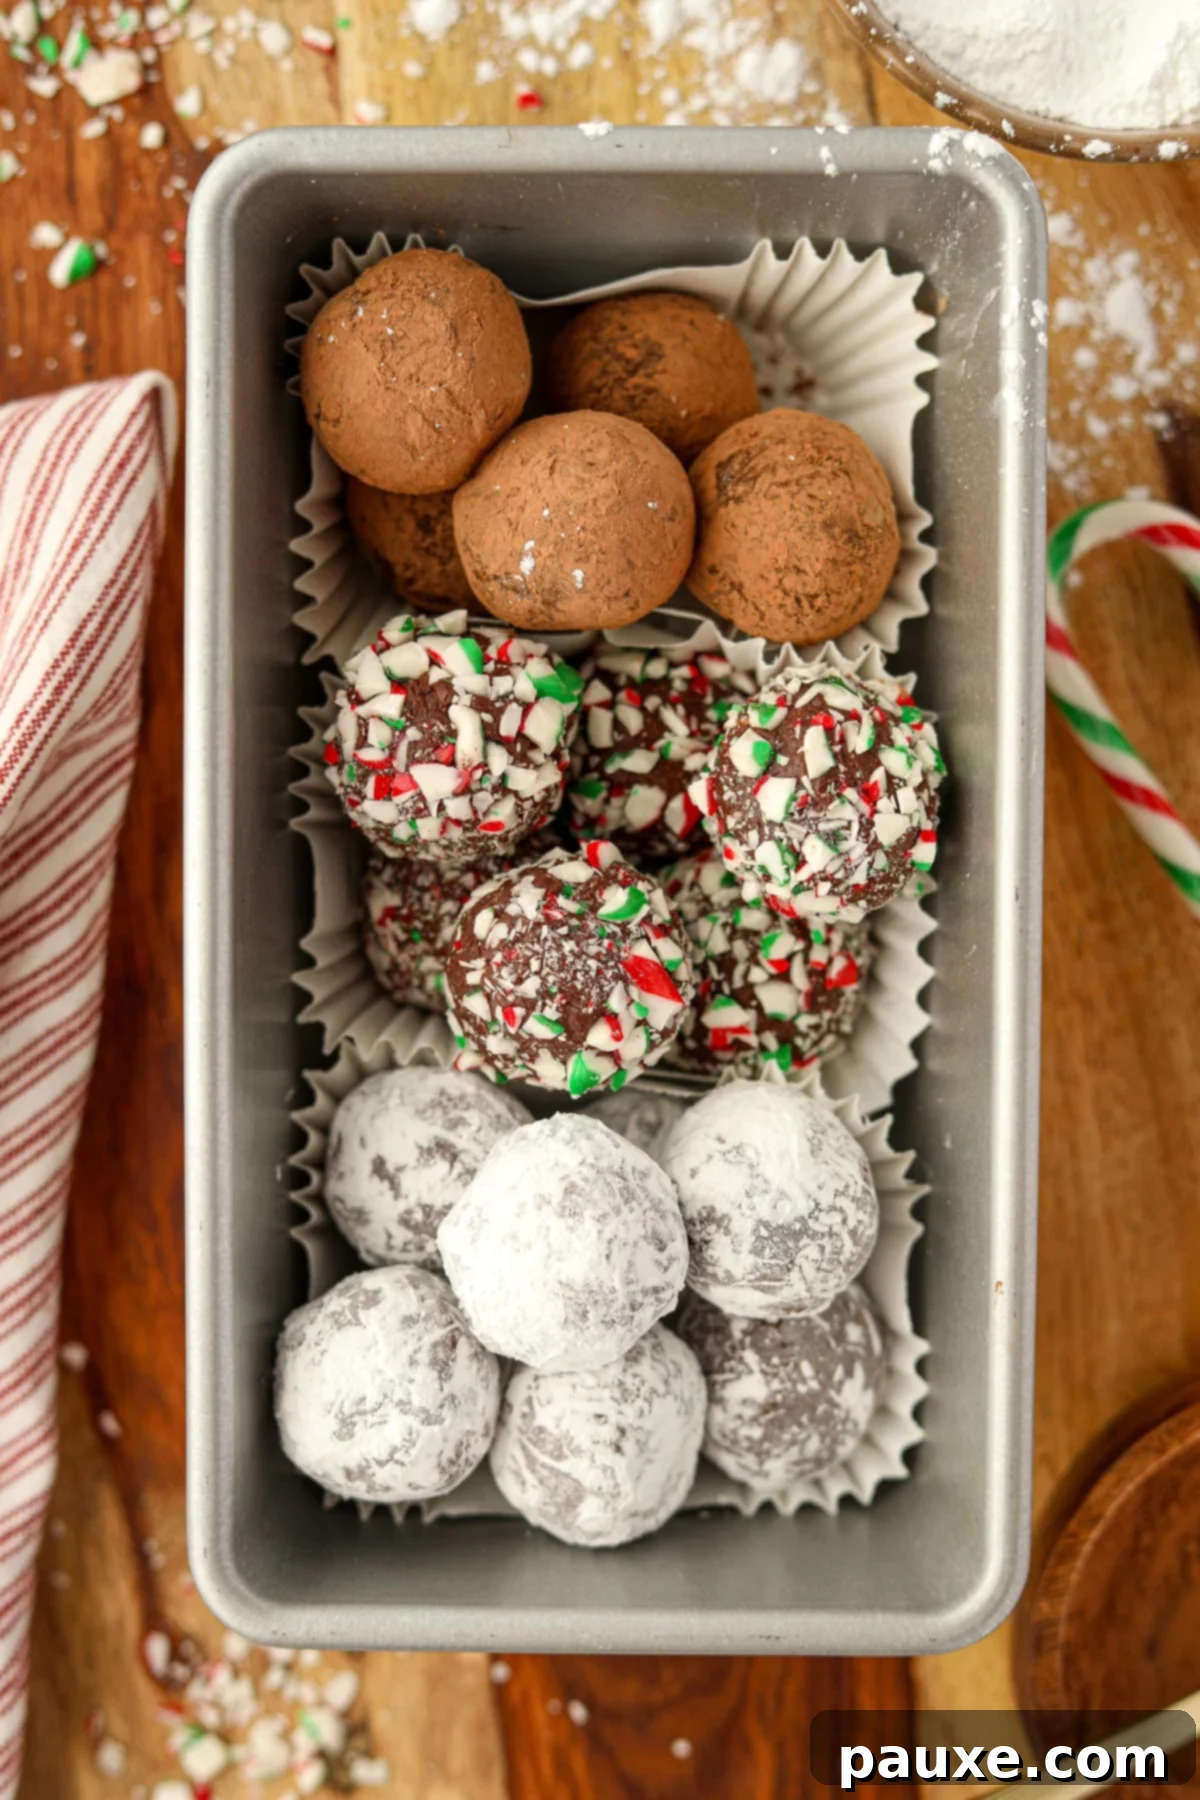
For years, my husband and I eagerly anticipated the holiday season, not just for the festive cheer, but for a very specific reason: his aunt’s legendary peppermint truffles. These homemade delights were a yearly gift, and we savored every single one, making them last as long as humanly possible. The rich, cool mint combined with decadent chocolate was simply a match made in heaven, creating a taste experience we looked forward to more than almost anything else.
When I finally mustered the courage to ask for the recipe, hoping to recreate these magical treats year-round, I was genuinely astonished by its simplicity! The secret, it turned out, was surprisingly straightforward. However, there was one small hurdle: her original recipe called for peppermint chocolate chips, an ingredient that proved elusive even during the peak of the holiday season and virtually impossible to find any other time of year.
Determined to unlock this festive flavor for all seasons, I reverse-engineered the recipe. My solution? Swapping the hard-to-find peppermint chocolate chips for a combination of classic semi-sweet chocolate and a potent dose of peppermint extract. This simple adjustment, along with a few minor tweaks, transformed the recipe, making it accessible to anyone, anywhere, whenever a craving for these incredible truffles strikes. Now, you can enjoy these wonderful treats that have been a beloved part of our family for over a decade, spreading joy and minty freshness to your friends and loved ones too!
Why You’ll Absolutely Adore These Peppermint Truffles
These homemade peppermint truffles aren’t just a dessert; they’re an experience waiting to happen. Here’s why this recipe will quickly become a staple in your kitchen, especially during the festive months:
- Incredibly Simple with Just 5 Ingredients: Yes, you read that right! You only need five basic items, two of which are flavor extracts. This minimal ingredient list means less shopping, less fuss, and more time to enjoy your creations. No complex techniques or exotic ingredients required, making it perfect for even the most novice bakers.
- Effortlessly Easy to Prepare: Whether you prefer the gentle heat of a stovetop or the convenience of a microwave, these truffles come together with remarkable ease. If you can melt chocolate, you possess all the skills necessary to master this recipe. We’ll guide you through each method, ensuring a smooth, successful batch every time.
- The Ultimate Thoughtful Gift: For anyone on your list who cherishes sweet, homemade delights, a batch of these peppermint truffles is a truly special present. Package them beautifully in a decorative cookie tin or a charming jar, and you have an instant, heartfelt gift that speaks volumes. They are perfect for teachers, neighbors, hosts, or as a delightful surprise for family and friends.
- No-Bake Brilliance: Free up your oven for other holiday baking! These truffles require zero baking, making them an ideal recipe when your kitchen is bustling or when you simply want to avoid turning on the oven.
- Customizable Fun: From various chocolate types to an array of decorative coatings, these truffles are a blank canvas for your creativity. Experiment with different textures and flavors to make each batch uniquely yours.
- Perfect for Make-Ahead: Their excellent freezing capability makes them a fantastic option for preparing well in advance of any occasion, reducing stress during busy times.
Essential Ingredients for Decadent Peppermint Truffles
Crafting these heavenly truffles requires only a handful of readily available ingredients. Here’s a detailed look at what you’ll need to create the perfect batch:
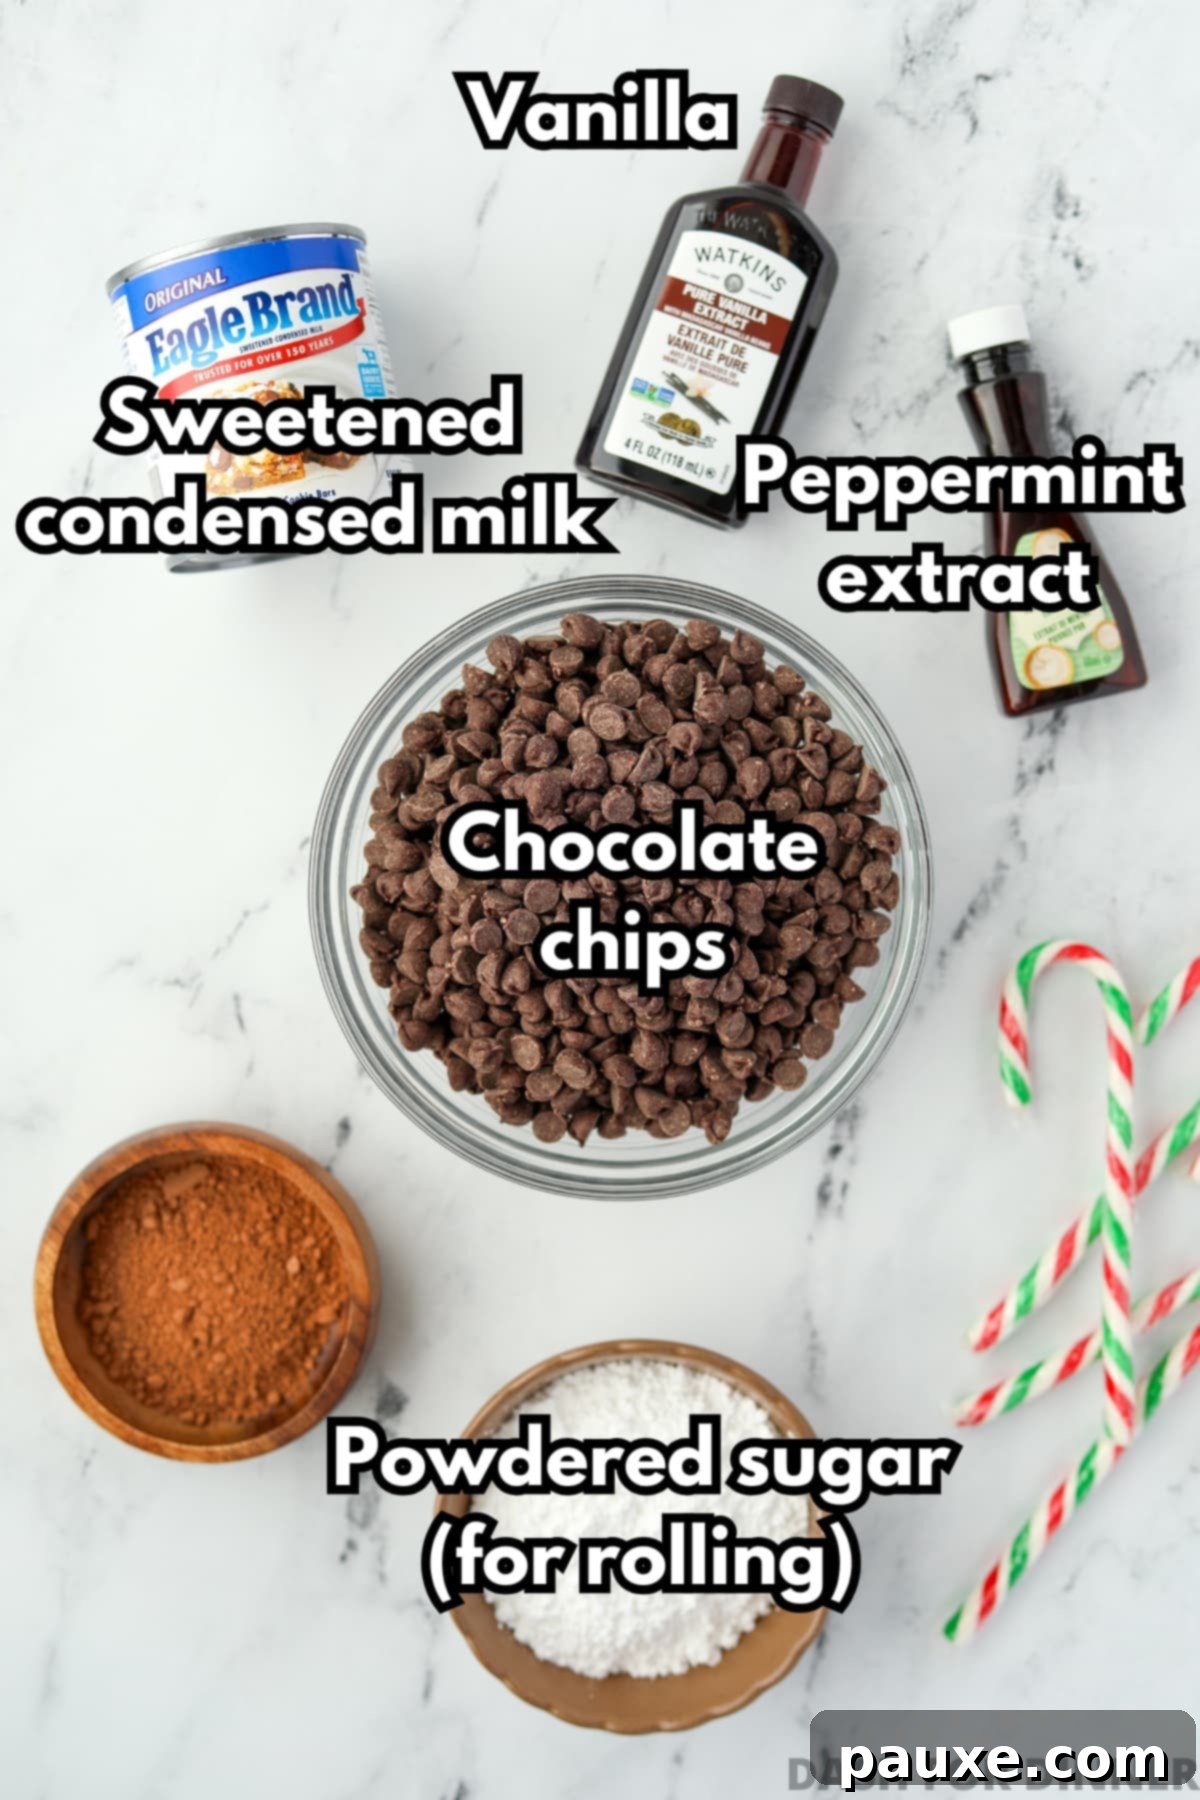
- Semi-Sweet Chocolate Chips: For a balanced sweetness that complements the mint without being overly sugary, semi-sweet chocolate chips are your best choice. They provide that classic rich chocolate flavor and melt beautifully. While many brands work well, be aware that some, like Nestle Tollhouse, tend to harden more quickly during chilling. This isn’t a problem, just something to keep in mind for scooping time. You can also experiment with dark chocolate for a more intense cocoa flavor, or even milk chocolate for a sweeter, creamier truffle.
- Sweetened Condensed Milk: This is the undeniable “secret weapon” for achieving that smooth, creamy, no-fuss truffle consistency. Sweetened condensed milk is a thick, syrupy milk product with added sugar, found in the baking aisle. It’s crucial not to confuse it with “evaporated milk,” which is unsweetened and will not yield the same results. The sugar content and thick texture of condensed milk are vital for binding the truffles and providing their characteristic soft bite.
- Peppermint Extract: The star of the show! This powerful extract delivers that invigorating, cool mint flavor that defines these truffles. While it can sometimes be a bit tricky to locate outside of the holiday season, most larger grocery chains will stock it year-round. If pure peppermint extract is unavailable, a general “mint” extract will work perfectly fine, though the flavor profile might be slightly less intense. Be sure to use a high-quality extract for the best taste.
- Vanilla Extract: A touch of vanilla extract works wonders in enhancing and rounding out the vibrant peppermint flavor. It adds a subtle warmth and depth that prevents the mint from being too sharp, creating a more harmonious and complex flavor profile. Don’t skip it!
- Powdered Sugar (for Rolling): While powdered sugar (also known as confectioners’ sugar or icing sugar) is my personal favorite for its elegant finish and delicate sweetness, it’s just one of many fantastic coating options. This fine sugar creates a beautiful, soft exterior that contrasts wonderfully with the rich chocolate interior.
Recommended Equipment for Flawless Truffles
Having the right tools can make the truffle-making process even smoother and more enjoyable. Here’s what we recommend:
- Medium Saucepan (for stovetop method): Essential for gently melting the chocolate and condensed milk. Choose one with a heavy bottom to ensure even heat distribution and prevent scorching.
- Heatproof Bowl (for chilling): A sturdy glass or ceramic bowl is ideal for transferring the truffle mixture to chill.
- Plastic Wrap: Crucial for covering the truffle mixture tightly to prevent a “skin” from forming.
- Cookie Scoop (or heaping tablespoon): A #40 cookie scoop (yielding approximately 1.5 to 2 tablespoons per truffle) is perfect for creating uniform, perfectly sized truffles. If you don’t have one, a standard heaping tablespoon works just as well. Consistency in size ensures even chilling and a professional look.
- Baking Sheet (lined with parchment paper): For placing your scooped and rolled truffles. The parchment paper prevents sticking and makes cleanup a breeze.
- Shallow Bowl (or rimmed tray; for rolling): A wide, shallow container is best for easily coating your truffles in powdered sugar or other garnishes. This allows for thorough and even coverage without too much mess.
Crafting Your Delicious Homemade Peppermint Truffles: Step-by-Step Guide
Get ready to create some magic in your kitchen! This recipe is incredibly forgiving and yields absolutely delicious results. Follow these simple steps for perfectly smooth and flavorful peppermint truffles.
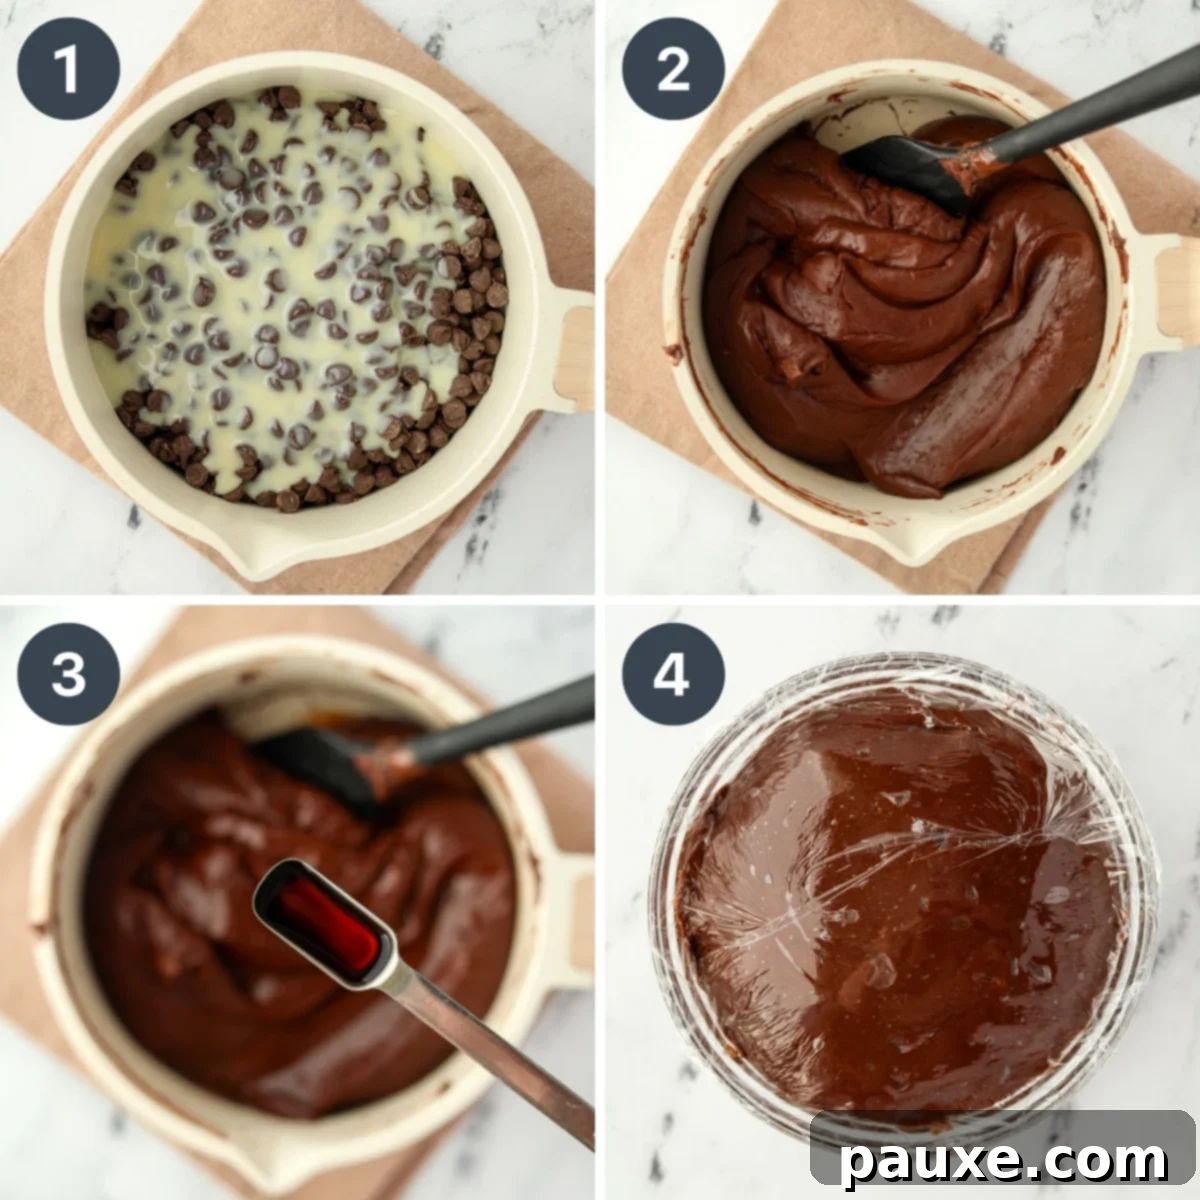
- Combine Ingredients: Begin by adding 3 cups of your chosen semi-sweet chocolate chips and the entire 14oz can of sweetened condensed milk to a medium-sized, heavy-bottomed saucepan. Give it a preliminary stir to combine the ingredients slightly.
- Melt Gently: Place the saucepan over low heat. The key here is patience and gentle heat. Stir the mixture frequently and continuously with a silicone spatula or wooden spoon. This constant stirring ensures the chocolate melts evenly and prevents it from sticking to the bottom or scorching. Continue heating and stirring until the chocolate chips have completely melted and the mixture transforms into a luxuriously smooth, uniform, and glossy consistency, free of any lumps. This process typically takes about 5-8 minutes.
- Infuse with Flavor: Once your chocolate mixture is perfectly smooth, immediately remove the saucepan from the heat. Stir in 1 tablespoon of peppermint extract and 1 teaspoon of vanilla extract. Fold these extracts gently into the warm chocolate until they are thoroughly incorporated and the aromatic mint scent fills your kitchen.
- Prepare for Chilling: Transfer the warm truffle mixture from the saucepan into a medium heatproof bowl. This helps it cool more efficiently. Now, tightly cover the bowl with plastic wrap.
- Top Tip for Perfection: To prevent a discolored, dry “skin” from forming on the surface as the mixture cools, press the plastic wrap directly against the surface of the chocolate mixture, ensuring there are no air bubbles between the chocolate and the wrap. This creates an airtight seal that locks in moisture and freshness.
The Crucial Chilling Period: Two Hours for Optimal Texture
Once your bowl is securely wrapped, place it into the refrigerator. Allow the truffle mixture to chill for approximately 2 hours. This chilling time is essential, as it allows the chocolate to firm up to the perfect consistency – firm enough to scoop and roll, yet still pliable and delicious. Resist the urge to rush this step, as proper chilling ensures the truffles hold their shape beautifully and have that desirable melt-in-your-mouth texture.
The Microwave Method: A Faster (But Fickle) Alternative
While the stovetop method is highly recommended for its control and consistent results, you can certainly make these easy truffles using a microwave if you’re short on time. However, a word of caution: it’s much easier to accidentally overheat chocolate in the microwave, which can cause it to “seize” and become a hard, unworkable mess. If you choose this path, extreme care and vigilance are paramount.
That being said, if you opt for the microwave method, be absolutely certain to use very short intervals and stir diligently after each heating session. This gentle approach will help prevent overheating and ensure your chocolate melts smoothly.
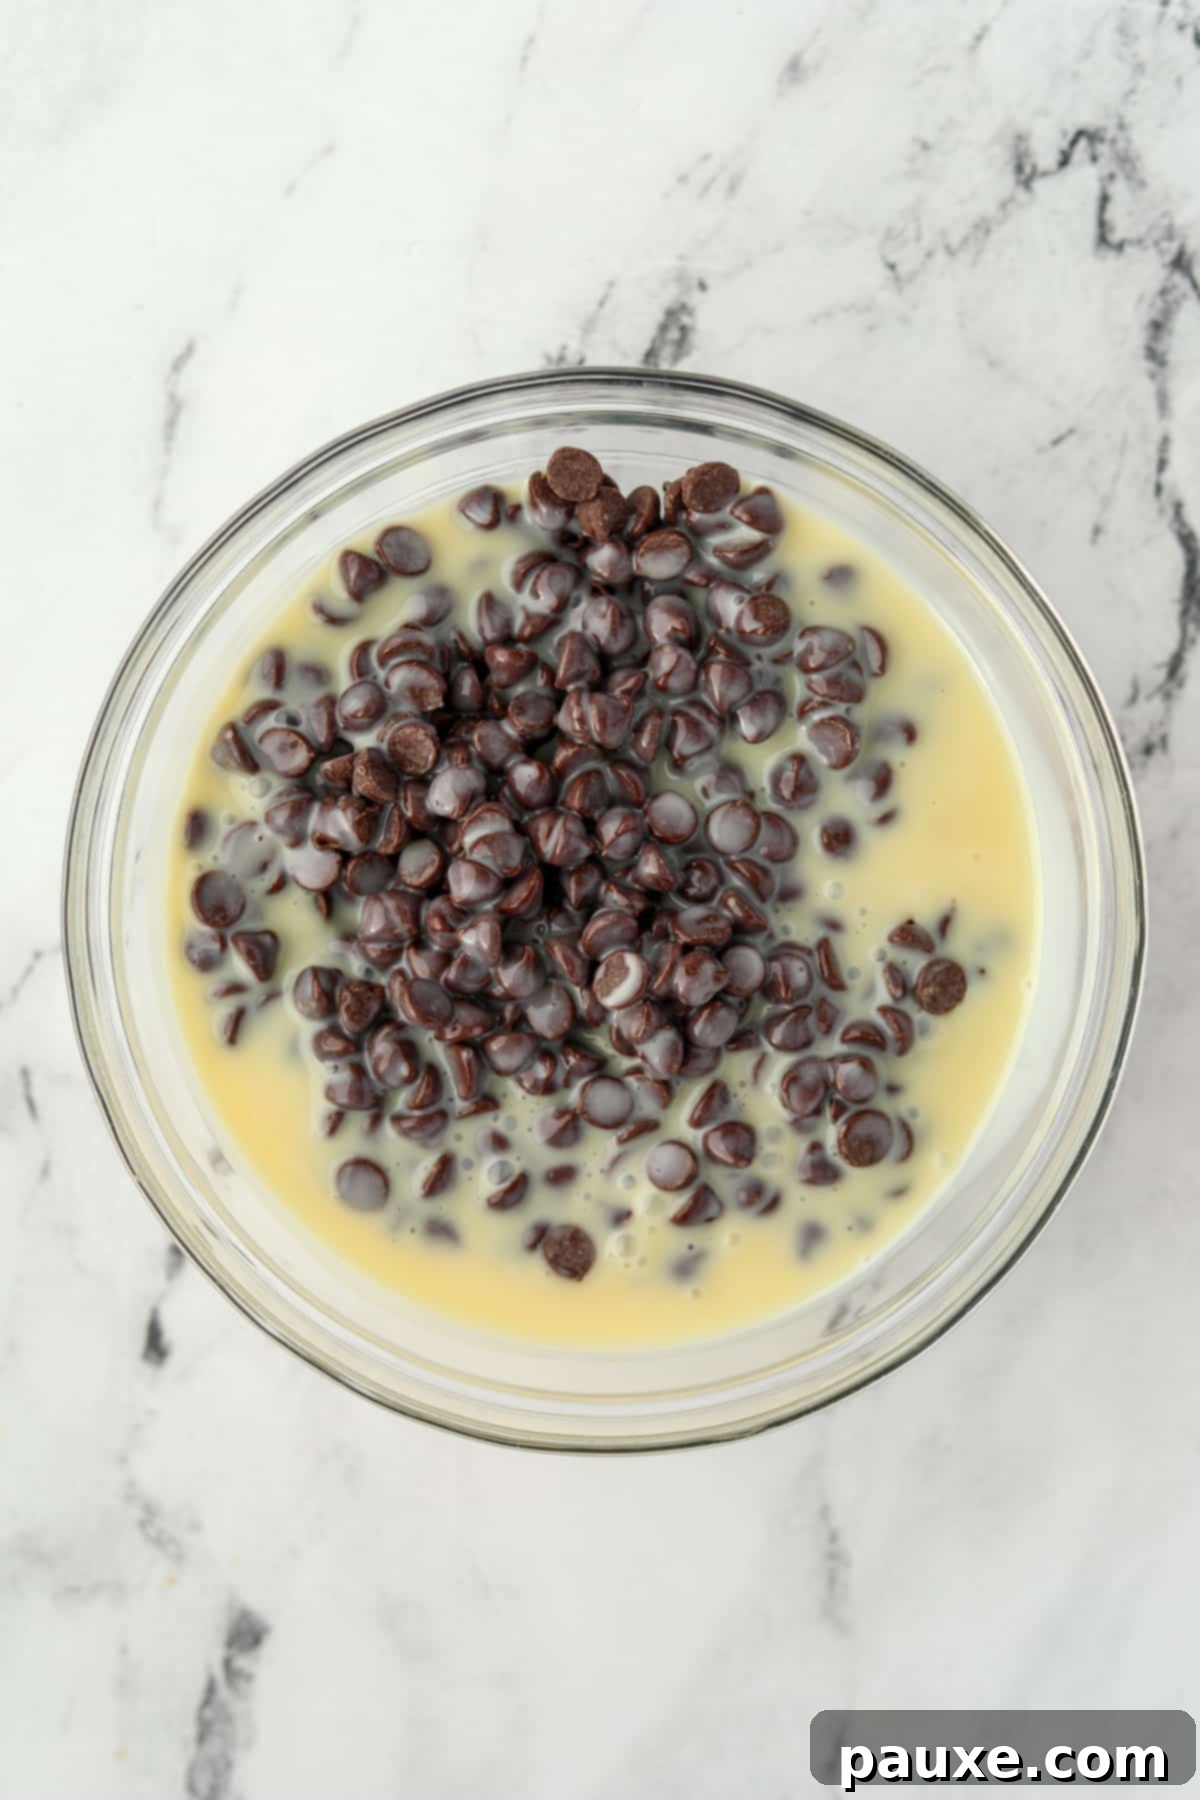
- Combine in Microwave-Safe Bowl: Add the chocolate chips and sweetened condensed milk to a large, microwave-safe bowl. Stir them together well to distribute the ingredients as evenly as possible.
- Gentle Microwave Intervals: Heat the chocolate mixture in the microwave using short, controlled bursts of 30 seconds at a time. After each 30-second interval, remove the bowl and stir the chocolate thoroughly. Even if it doesn’t look like much has melted, stirring helps to distribute the heat and encourages the chips to melt from residual warmth.
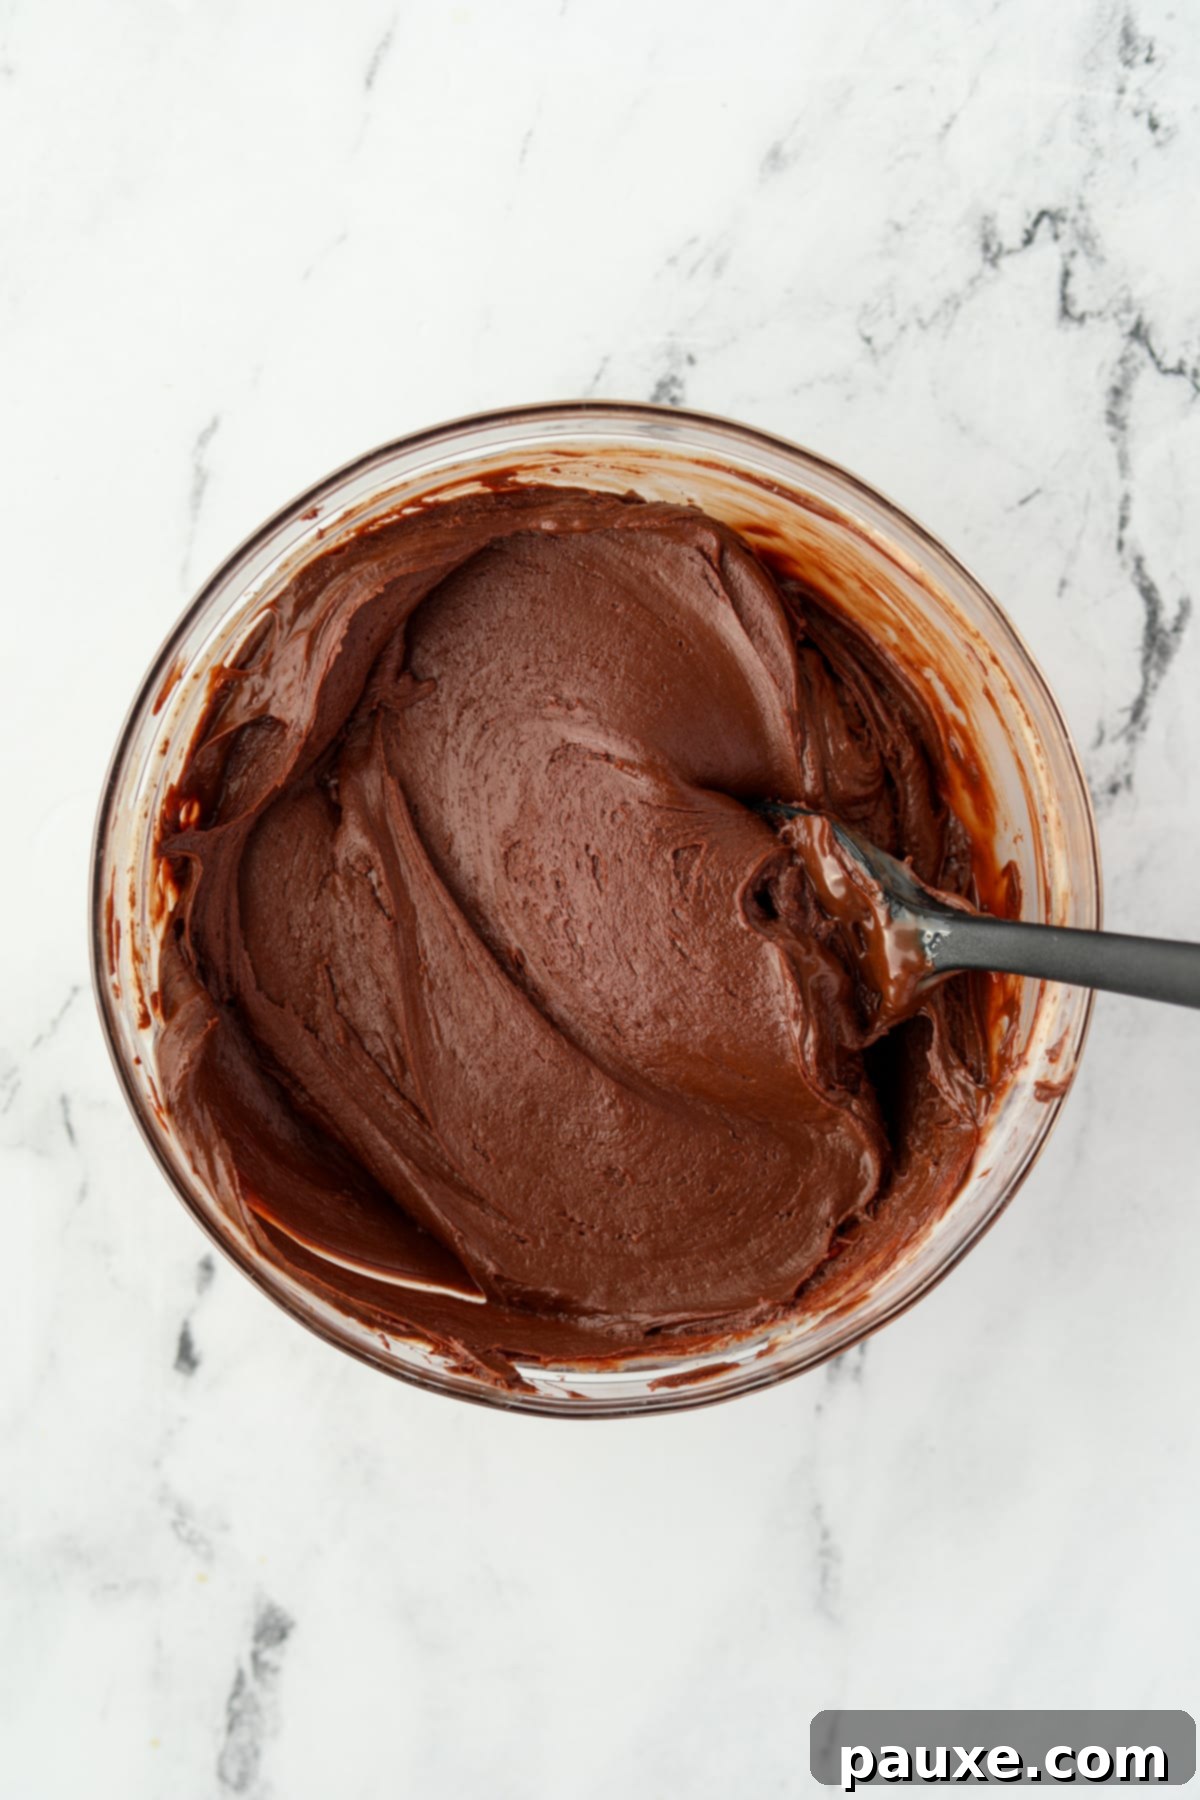
- Flavor and Final Stir: After 3-4 intervals (this can vary depending on your microwave’s power), the chocolate should melt into a beautifully smooth, glossy consistency after stirring. Once you reach this point, add 1 tablespoon of peppermint extract and 1 teaspoon of vanilla extract. Stir vigorously until the extracts are fully integrated into the chocolate.
- Chill, Portion, and Shape: Proceed with chilling, portioning, and shaping the truffles exactly as outlined in the main stovetop recipe. Remember, careful chilling is key regardless of your melting method!
Perfecting Your Peppermint Truffles: Shaping and Rolling for Presentation
Once your truffle mixture is perfectly chilled and scoopable, the real fun begins: transforming it into beautiful, bite-sized spheres and coating them in delicious garnishes. This step is where your truffles truly come to life!
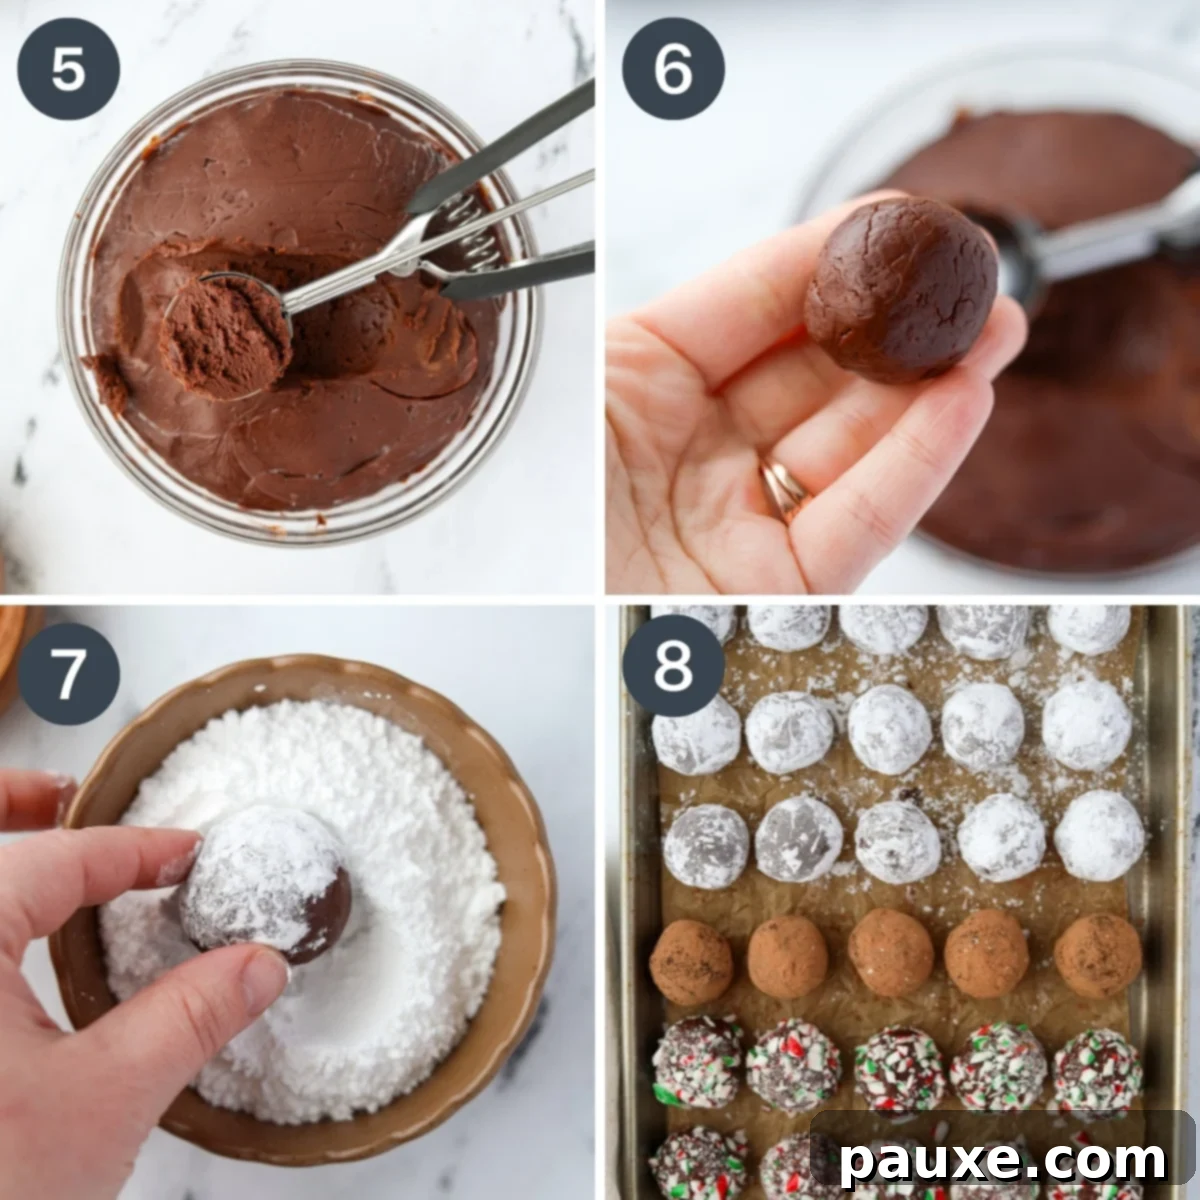
- Scoop the Mixture: After the chocolate has chilled in the refrigerator for approximately two hours, it should be firm enough to hold its shape but still pliable enough to scoop easily. Use a #40 cookie scoop (which measures about 1 ½ to 2 tablespoons) or a standard heaping tablespoon to portion out the truffle mixture. Aim for consistent sizes for a professional and uniform appearance.
- Roll into Smooth Spheres: Gently roll each scooped portion of chocolate between the palms of your hands. Apply light, even pressure to form a smooth, round ball. If the mixture is a bit sticky, you can lightly dust your hands with a small amount of powdered sugar or cocoa powder. This process should be quick to prevent the truffles from melting from the heat of your hands.
- Prepare Your Coating Station: Pour your chosen coating (powdered sugar, cocoa powder, crushed candy canes, etc. – see more options below!) into a shallow bowl or a rimmed tray. This setup makes it easy to roll and coat the truffles without making a mess.
- Coat the Truffles: Drop a rolled truffle into the coating. Gently toss or roll it around in the bowl until it is completely and evenly coated. You may need to use your fingers to gently press the coating onto the truffle, especially with crushed candy canes, to ensure good adhesion.
- Arrange and Repeat: Place the finished, coated peppermint truffles on a baking sheet lined with parchment paper, directly into a parchment-lined cookie tin, or an airtight container. Continue this process with the remaining truffle mixture until all of the chocolate has been scooped, rolled, and coated.
Endless Possibilities: Creative Options for Rolling and Garnishing Your Truffles
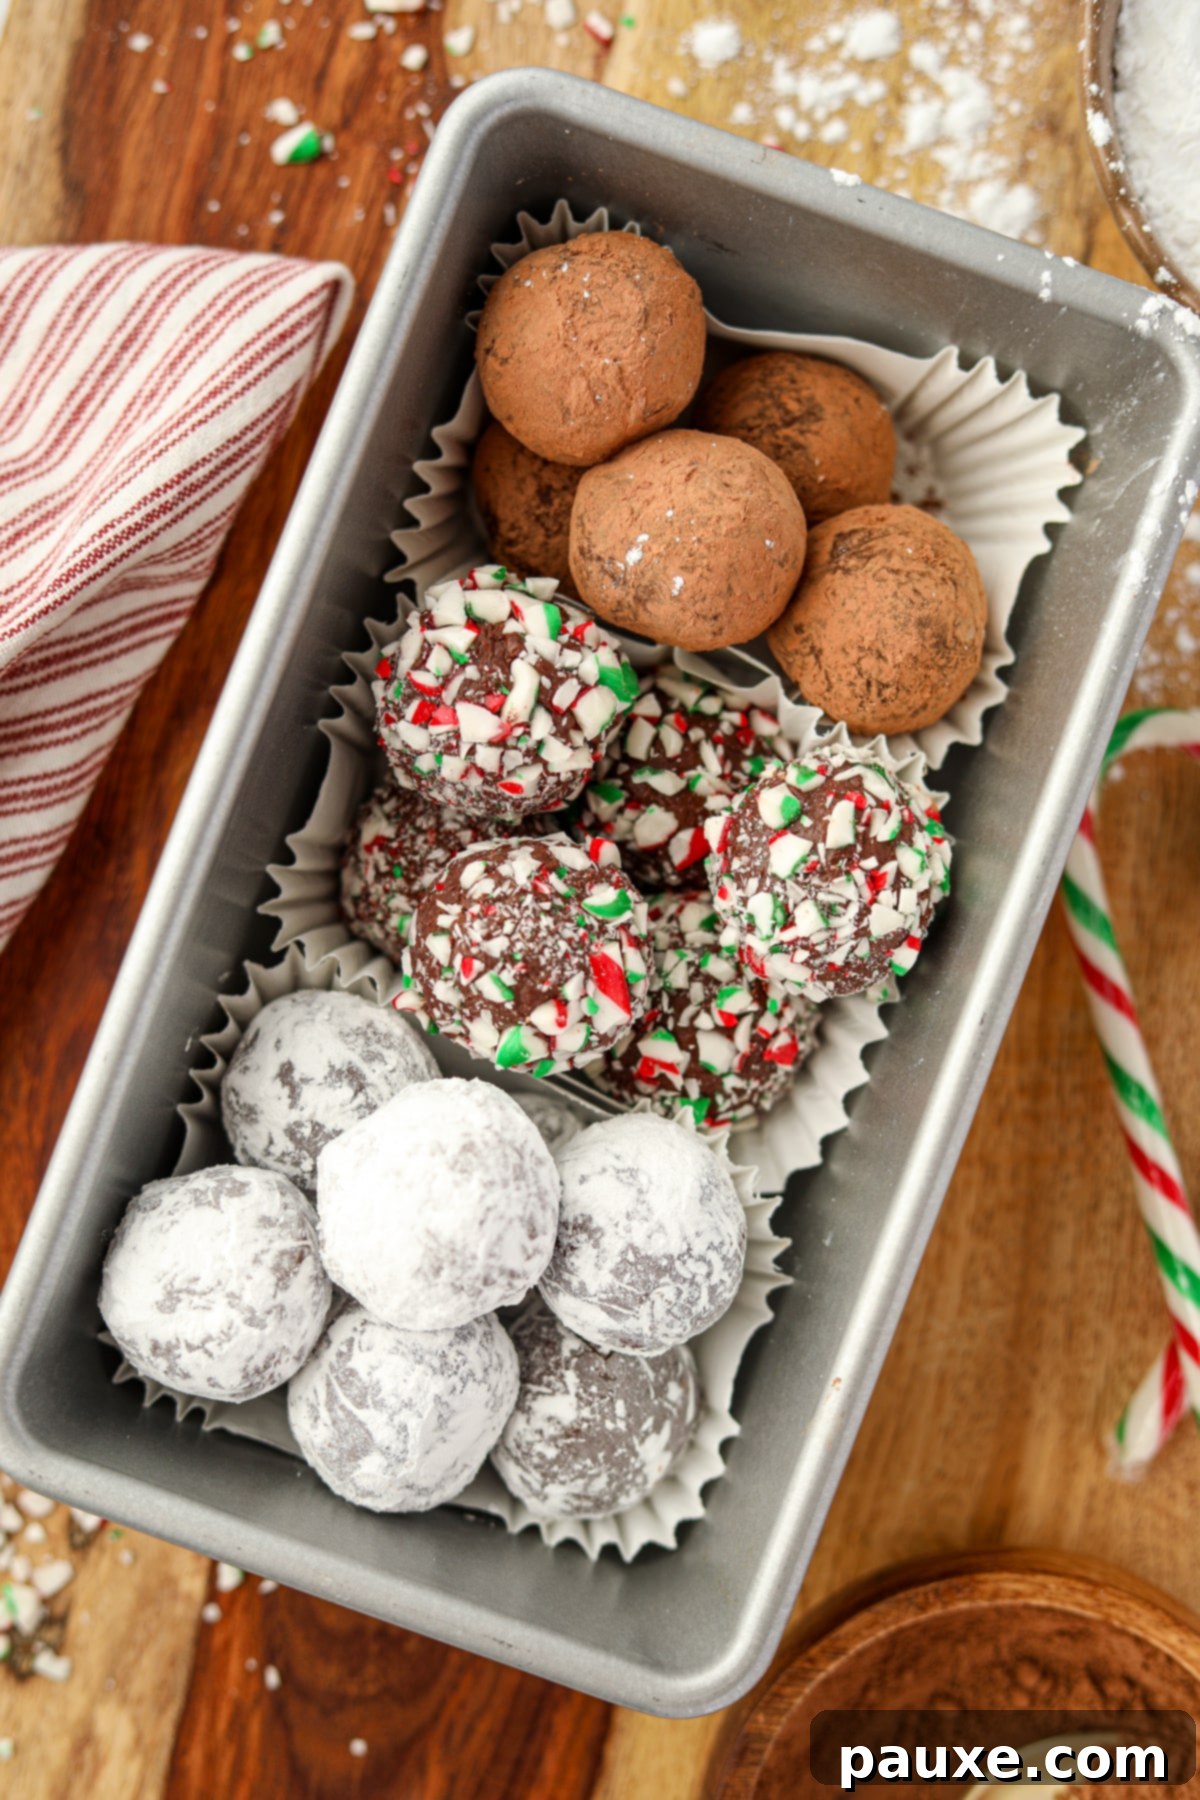
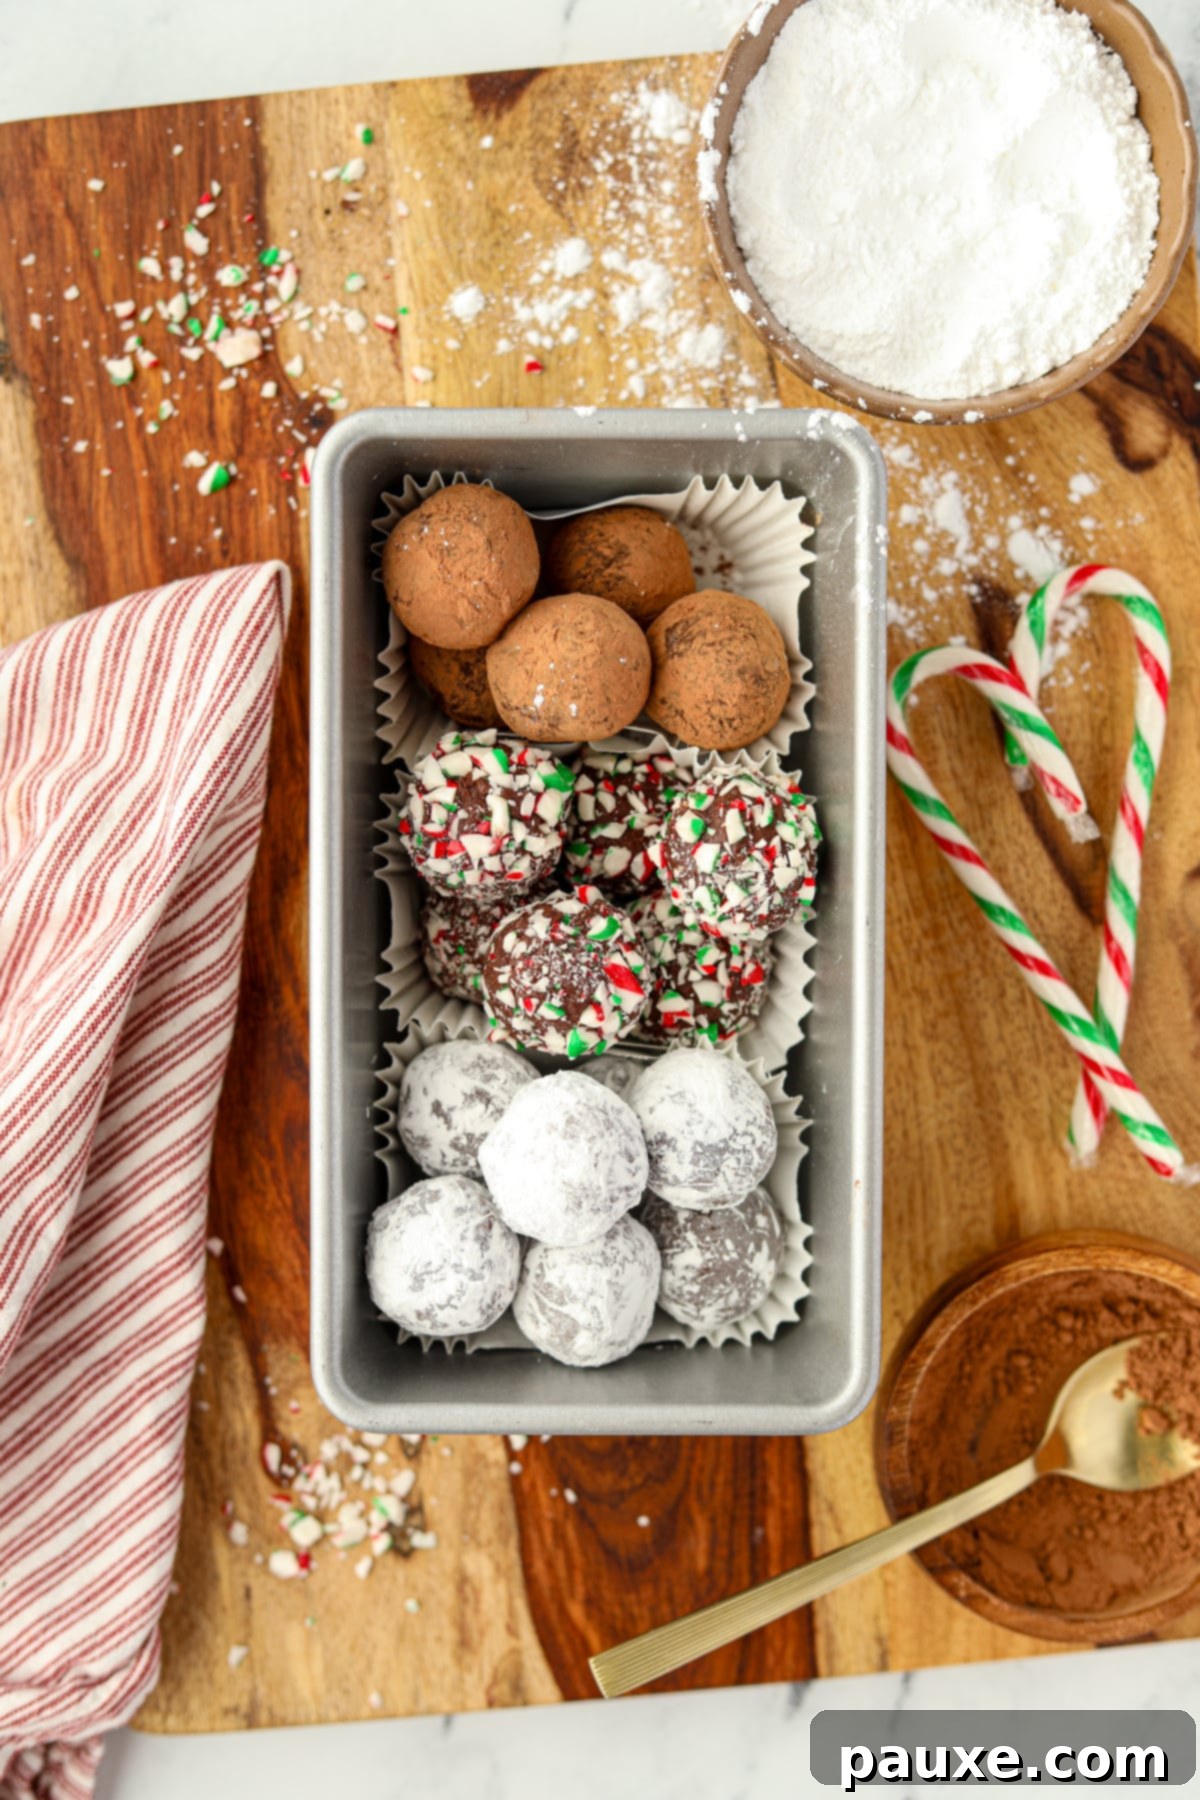
The beauty of these peppermint truffles lies not only in their exquisite taste but also in the myriad ways you can customize their appearance. While powdered sugar offers a classic, elegant finish, don’t shy away from experimenting! My husband, for example, is a devoted fan of the festive crunch of crushed candy canes. For gifting purposes, I love creating a visually stunning assortment with a variety of coatings, which looks absolutely gorgeous in any decorative tin or jar.
- Classic Powdered Sugar: Also known as confectioners’ sugar or icing sugar, this finely ground sugar provides a soft, snow-like appearance and a delicate sweetness that beautifully complements the rich chocolate and vibrant mint. It’s a timeless choice.
- Rich Cocoa Powder: For a more sophisticated and slightly bitter contrast, roll your truffles in unsweetened cocoa powder. This creates a deep, dark exterior that hints at the intense chocolate flavor within. Consider using Dutch-processed cocoa for a smoother, less acidic taste.
- Festive Crushed Candy Canes: This is a holiday favorite! The vibrant red and white flecks of crushed candy canes (or crushed peppermint candies) add a delightful crunch and an extra burst of minty flavor. The visual appeal is undeniable, making them perfect for Christmas.
- Smooth Candy Melts Coating: For a harder, glossy shell, melt candy melts (available in various colors like green, white, or red) or a good quality chocolate bark. Dip each truffle into the melted coating, allowing any excess to drip off before placing it on parchment paper to set. You can then drizzle with contrasting colors or sprinkle with more crushed candy canes before the coating fully hardens.
- Shredded Coconut: For a tropical twist on a festive favorite, try rolling some truffles in finely shredded coconut, either plain or lightly toasted for added flavor and texture.
- Finely Chopped Nuts: Almonds, pecans, or walnuts, finely chopped, can add a wonderful textural contrast and nutty flavor. Toasting them beforehand will enhance their aroma and taste.
Special Variation: Irresistible Candy Cane Truffles
To truly capture the essence of the holiday season and add an extra touch of festive sparkle, garnishing your peppermint truffles with vibrant crushed candy canes (or a generous dusting of crushed peppermint candies) is an absolute must. The crisp texture and burst of mint make these a standout treat.
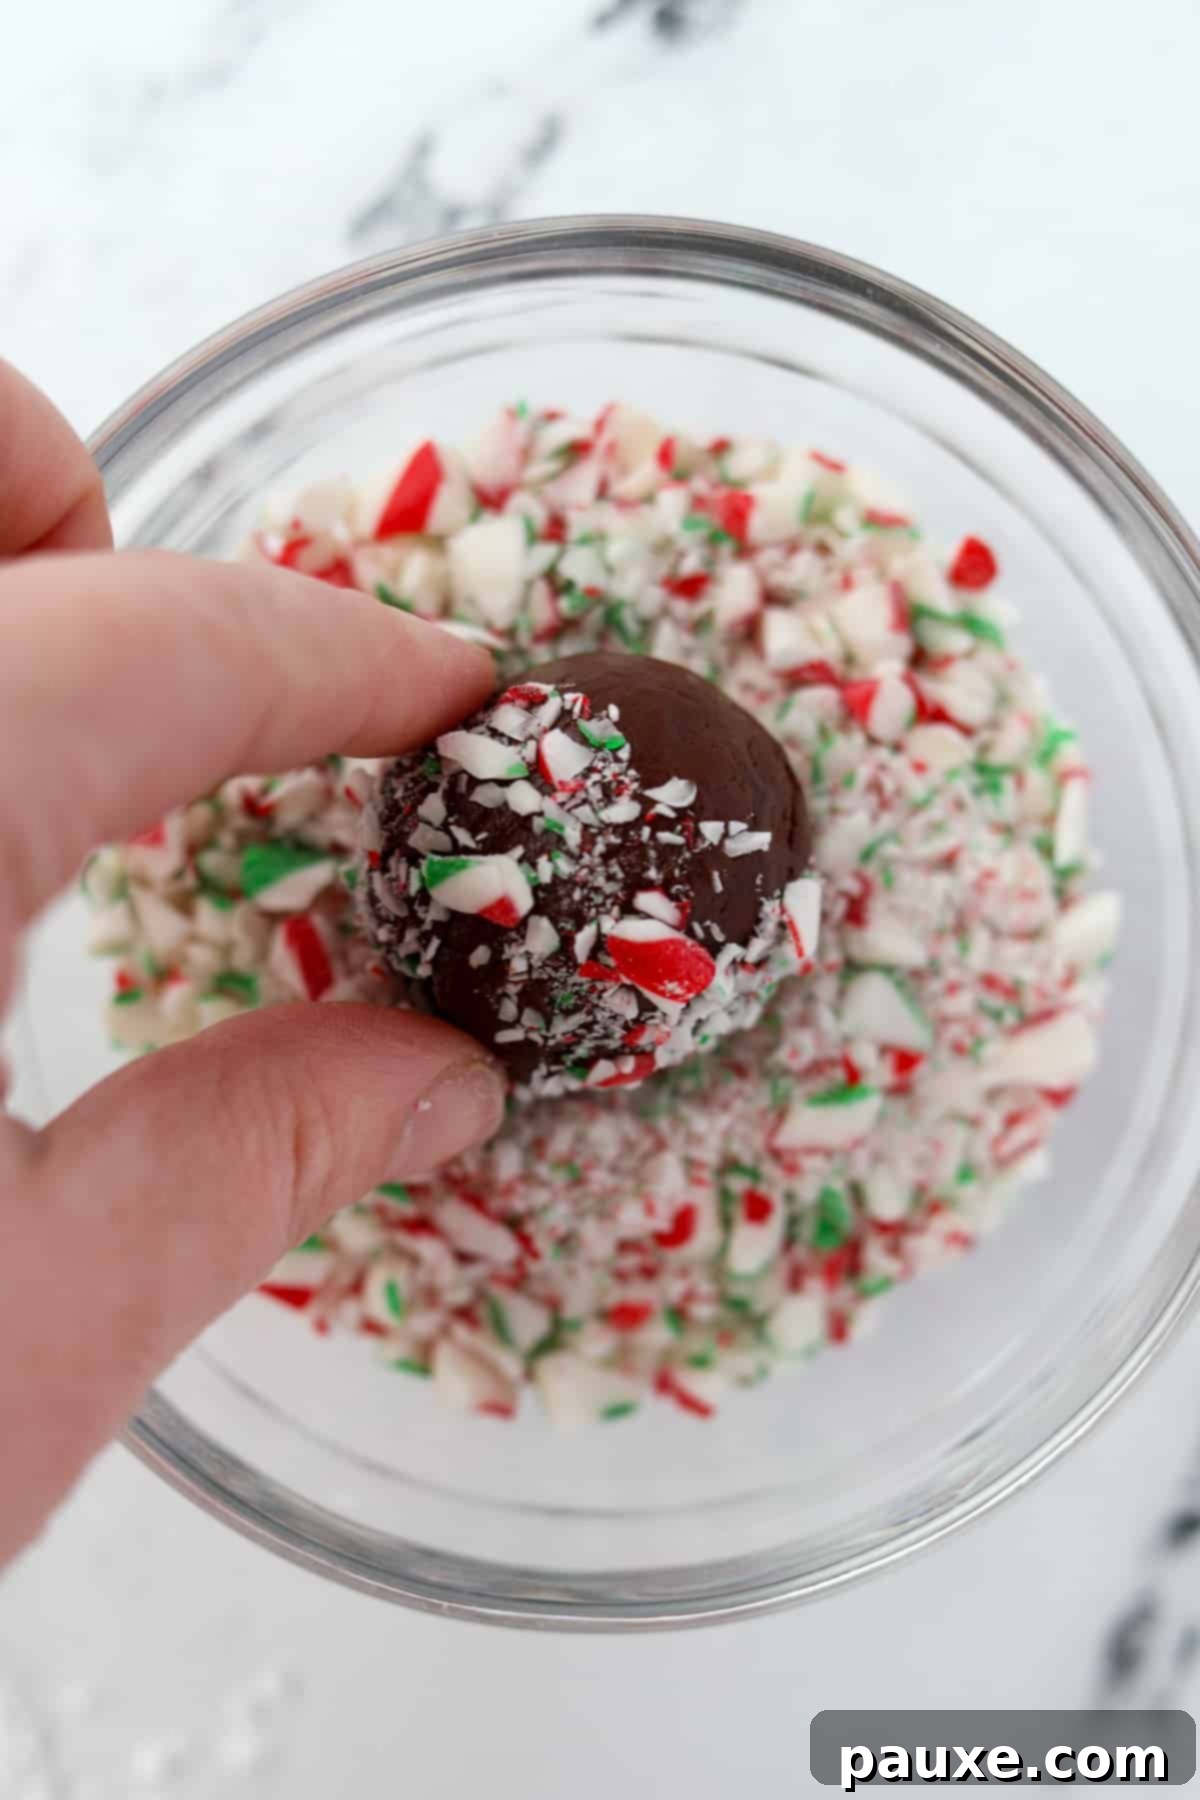
- Prepare Your Candy Canes: Gather 5-6 standard-sized candy canes (or an equivalent amount of peppermint candies). Place them into a heavy-duty zippered freezer bag. Alternatively, for speed and consistency, a food processor works wonders. If using a bag, use a rolling pin or a meat tenderizer to vigorously crush the candy canes until they form fine crumbs and small pieces. If using a food processor, pulse until you achieve your desired texture – a mix of fine dust and tiny shards works best for visual appeal and crunch.
- Coat the Truffles: Once your chocolate balls are formed (as per steps 5 and 6 above), gently roll each one in the prepared crushed candy. For better adhesion, you can lightly press the candy crumbs into the truffle with your fingers, ensuring an even and generous coating.
- Store for Setting: Transfer the coated truffles to a parchment-lined cookie tin or a baking tray. Repeat this process until all of your delicious peppermint truffles are beautifully adorned with their festive candy cane exterior. These are truly eye-catching!
Storing Your Homemade Peppermint Truffles for Lasting Freshness
Proper storage is key to maintaining the delicious taste and perfect texture of your homemade peppermint truffles. These treats are designed to be enjoyed chilled, and with the right care, they can last for weeks, or even months!
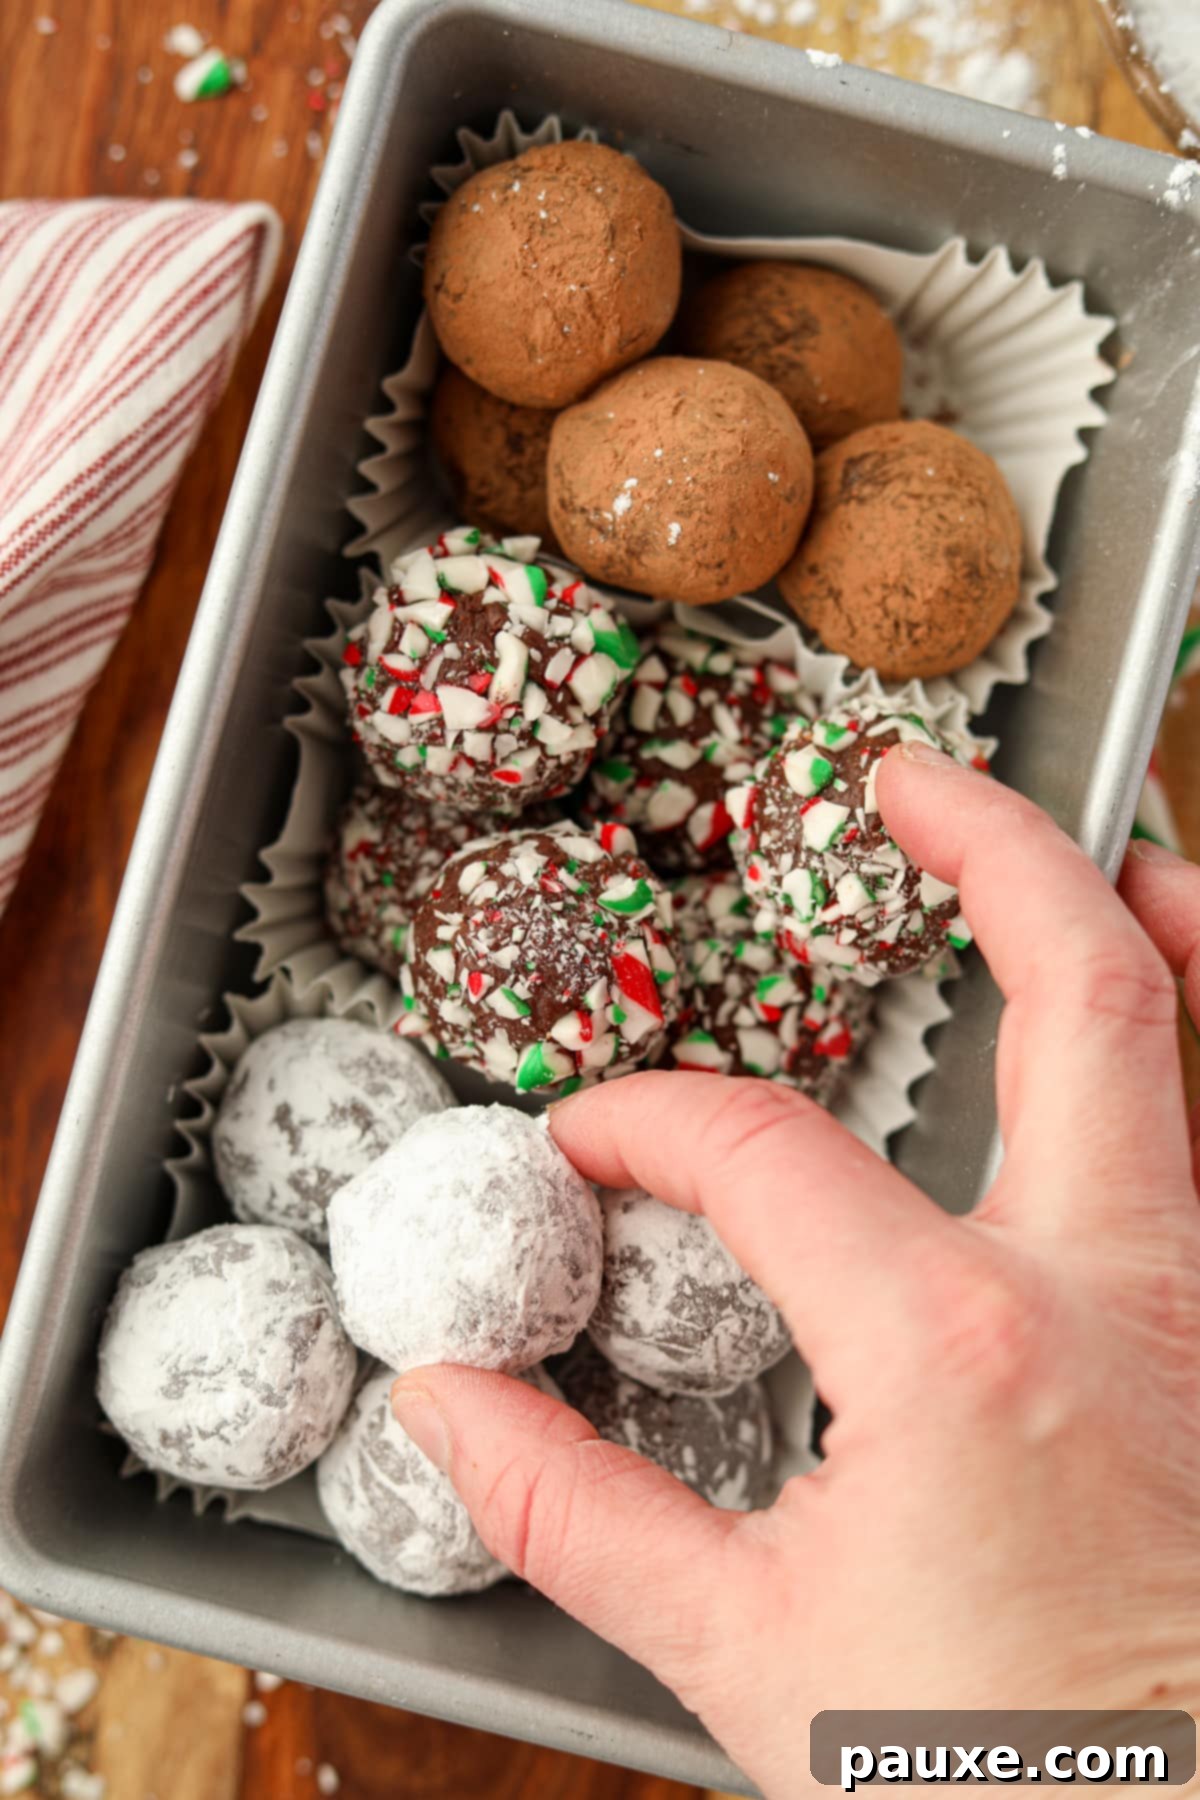
To store, arrange your finished peppermint truffles in a single layer (or separated by parchment paper) within a parchment-lined cookie tin or an airtight container. This prevents them from sticking together and helps maintain their shape. Store these containers in the refrigerator, where your truffles will remain fresh and firm for up to 2 weeks. The cool environment of the fridge helps preserve their texture and prevents them from becoming too soft.
Freezing for Long-Term Enjoyment: Did you know these truffles freeze exceptionally well? This makes them an ideal make-ahead treat for the busy holiday season. For freezing, place the truffles in an airtight freezer container or a tightly sealed freezer bag. When stored correctly, they can last for a good 2-3 months in the freezer. To enjoy, simply transfer them from the freezer to the refrigerator for a few hours to thaw before serving. They will be just as delicious as the day you made them!
Keep Chilled is Crucial: It is vitally important to keep your truffles refrigerated in between servings. If they are left at room temperature for an extended period, especially in a warm environment, they will begin to soften significantly and lose their beautiful spherical shape. Beyond the aesthetic, prolonged exposure to room temperature can also affect their flavor and reduce their shelf life. Always return them to the fridge promptly after serving to ensure they remain perfectly firm, delicious, and last as long as possible.
Tips and Tricks for Gifting Homemade Truffles
Homemade truffles make incredibly thoughtful and impressive gifts. Elevate your gifting game with these expert tips:
- Offer a Variety: Create a stunning assortment by preparing several batches with different flavors (like the orange, raspberry, or coconut variations mentioned below) and a variety of coatings. A mix of powdered sugar, cocoa, and crushed candy cane truffles in one box is visually appealing and caters to different tastes.
- Choose Beautiful Packaging: Present your truffles in a decorative cookie tin, a charming gift box, or even a glass jar tied with a festive ribbon. The presentation adds significantly to the gift’s appeal.
- Line with Festive Paper: Enhance the unboxing experience by lining your gift box or tin with festive parchment paper, colorful tissue paper, or wax paper. This not only looks nice but also helps prevent the truffles from sticking to the container.
- Batch Prep for Multiple Recipients: If you have many people on your holiday gift list, consider making several large batches of truffles at once. This streamlines the process and allows you to divide them efficiently among multiple recipients.
- Prepare Ahead and Freeze: Alleviate holiday stress by preparing your truffles weeks or even months in advance. Store them securely in an airtight freezer container or a vacuum-sealed bag until you’re ready to gift them. Thaw in the refrigerator overnight before packaging.
- Include Care Instructions: Don’t forget to include a small recipe card or a note with instructions to keep the truffles refrigerated in between serving. This ensures your recipients enjoy the truffles at their best.
Creative Substitutions and Flavorful Variations
One of the many joys of this peppermint truffle recipe is its incredible versatility. It serves as a fantastic base for a wide array of flavors and dietary adjustments. Don’t be afraid to get creative and make it your own!
Explore Other Flavors: The peppermint extract can easily be swapped out for other delicious extract flavors. I’ve personally experimented with many, and the results are almost always absolutely divine! While Chocolate Orange Truffles are a firm family favorite, you could also try:
- Raspberry Chocolate Truffles: Use 1 tablespoon of raspberry extract or bakery emulsion for a fruity, sweet twist.
- Chocolate Coconut Truffles: Substitute with 2 teaspoons of coconut extract. For an extra touch, roll the finished truffles in shredded toasted coconut.
- Almond Chocolate Truffles: Replace peppermint with 1 tablespoon of almond extract for a rich, nutty flavor.
- Espresso or Coffee Truffles: Add 1-2 teaspoons of instant espresso powder (dissolved in a tiny bit of hot water) or coffee extract for a sophisticated coffee-chocolate flavor.
- Maple Truffles: For a cozy, warm flavor, try substituting with maple extract.
Dairy-Free Option: For those with dietary restrictions or preferences, it’s entirely possible to create equally delicious dairy-free truffles. Simply swap the traditional sweetened condensed milk for sweetened condensedcoconutmilk. Pair this with your favorite brand of high-quality dairy-free chocolate chips, and you’ll have a wonderfully rich and creamy vegan treat.
Chocolate Chip Choices: While semi-sweet chocolate chips are recommended for their balanced flavor, this recipe is adaptable to various types of chocolate:
- Good-Quality Milk Chocolate Chips: For a sweeter, creamier, and milder chocolate flavor that pairs well with peppermint.
- Dark Chocolate Chips: If you prefer a more intense, less sweet chocolate experience, dark chocolate chips (60-70% cacao) will create a sophisticated truffle with a deeper cocoa note.
- White Chocolate: Although I haven’t personally tried white chocolate for this specific recipe yet, I believe it would work beautifully. However, white chocolate is notoriously finicky to melt. If you choose this option, melt it very carefully, possibly in a double boiler, and consider adding 1 teaspoon of coconut oil during the melting process. The coconut oil can help stabilize the white chocolate and prevent it from seizing.
Expert Tips for Truffle Success Every Time
Achieving perfect truffles is simpler than you might think, but a few expert insights can make all the difference, ensuring your homemade treats are always a triumph.
- The Art of Heating Chocolate: This is arguably the most critical step. It’s paramount to heat your chocolate carefully and slowly. Chocolate is delicate, and rapid, high heat is its enemy. If you overheat the chocolate, it will “seize” – meaning it will transform from a smooth, liquid state into a thick, gritty, unworkable paste. Once chocolate seizes, it’s incredibly difficult, if not impossible, to fully rescue. Therefore, adopt a “slow and low” approach to heating. Constant, gentle stirring on low heat is your best friend. If you’re particularly nervous about scorching or seizing, using a double boiler is an excellent method as it provides indirect, gentle heat.
- Don’t Over-Chill Your Chocolate: While chilling is essential for the truffles to firm up, there’s a sweet spot. I’ve certainly made the mistake of leaving the chocolate mixture in the refrigerator for too long, completely forgetting about it! If you exceed the recommended 2-2 ½ hours, the chocolate may become too hard, making it challenging to scoop and roll smoothly. But don’t despair if this happens! You have two options:
- Allow the bowl to sit at room temperature for 2-4 hours, letting the chocolate soften gradually until it reaches a scoopable consistency.
- Carefully rewarm the mixture in a saucepan over very low heat (avoid the microwave for this; it’s too easy to overheat already-chilled chocolate). Stir constantly until it becomes pliable again, then re-cover and return it to the refrigerator for another 2 hours, or until it’s perfectly firm yet scoopable.
- Stovetop Reigns Supreme: After extensive testing with both stovetop and microwave methods, the stovetop method consistently delivers superior results for me. The stovetop allows for much greater control over the heat, enabling a gradual and even melting process that minimizes the risk of overheating and seizing. When using the intense and sometimes unpredictable heat of the microwave, things can go awry very quickly. So, when it comes to crafting flawless chocolate truffles, I wholeheartedly recommend opting for the stovetop method if at all possible. It’s a small investment of time that pays off in perfect texture and flavor.
Discover More Festive Dessert Delights
If you’ve fallen in love with these easy peppermint truffles, you’re sure to enjoy these other festive and delicious dessert recipes, perfect for any celebration or a sweet indulgence:
- Cranberry Bliss Bars
- Cinnamon Roll Casserole
- Christmas Rice Krispie Treat Recipe
- Cranberry Pretzel Salad
If you found this easy recipe for peppermint truffles helpful and delicious, please let me know by leaving a 5-star review in the comments below! Your feedback means the world. You can also share your delightful creations and tag me on Instagram @dashfordinner. Happy baking (or rather, no-baking)!

Easy Peppermint Truffles (5 Ingredients!)
This easy recipe for Peppermint Truffles is made with just 5 simple ingredients and is perfect for gifting! These no-bake chocolate mint treats are ideal for holidays, parties, or a delightful sweet craving.
Print Recipe |
Pin Recipe |
Rate this Recipe
Course: Dessert, Desserts
Cuisine: American
Prep Time: 30 minutes
Chilling time: 2 hours
Total Time: 2 hours 30 minutes
Servings: 30 truffles
Calories: 93 kcal per truffle
Author: Dorothy Bigelow
Equipment
- #40 cookie scoop (or heaping tablespoon)
Ingredients
- 3 cups chocolate chips (semi-sweet recommended)
- 1 (14oz) can sweetened condensed milk
- 1 tablespoon peppermint extract
- 1 teaspoon vanilla extract
For rolling:
- Powdered sugar (or cocoa powder, crushed candy canes, candy melts, etc.)
Instructions
- To a medium, heavy-bottomed saucepan, add the chocolate chips and a full can of sweetened condensed milk. Stir well to combine.
- Warm over low heat (or just slightly higher than low), stirring constantly. Continue melting the chocolate chips and sweetened condensed milk together until the mixture is completely smooth, uniform, and glossy, without any lumps.
- Once the chocolate is fully melted and smooth, immediately remove the saucepan from the heat. Stir in the peppermint extract and vanilla extract. Fold gently until both extracts are well incorporated into the chocolate mixture.
- Transfer the truffle mixture to a medium heatproof bowl. Cover the bowl tightly with plastic wrap, pressing the plastic wrap directly onto the surface of the chocolate. This creates a seal that prevents a “skin” from forming on the top layer as it cools.
- Place the bowl in the refrigerator and chill for approximately 2 hours, or until the chocolate is firm enough to scoop, yet still pliable.
- Once the chocolate is set, remove it from the refrigerator. Use a #40 cookie scoop (which measures about 1 ½ – 2 tablespoons) or a heaping standard tablespoon to portion out balls of chocolate.
- Roll each portion between your palms until it forms a smooth, round ball. Work quickly to prevent melting from the heat of your hands.
- Add your chosen coating (powdered sugar, cocoa powder, crushed candy canes, etc.) to a shallow bowl or rimmed tray.
- Drop each chocolate ball into the coating, tossing it gently with your hands (or using a spoon) until it is thoroughly and evenly coated.
- Once coated, place the finished truffles on a parchment-lined baking tray, in a cookie tin, or in an airtight container.
- Repeat this process until all of the chocolate mixture has been shaped and rolled in the coating(s) of your choice.
- Keep the truffles refrigerated until they are ready to serve. For the best texture and to help them hold their shape, truffles should always be served chilled and stored in the refrigerator. This also significantly extends their shelf life.
Did you try this recipe?
Tag me at @dashfordinner and share your photos! I love seeing your creations!
Notes
Microwave method: For a quicker method, combine chocolate chips and sweetened condensed milk in a microwave-safe bowl. Heat in 30-second intervals, stirring vigorously after each interval to encourage melting. This usually takes 3-4 sessions. Once smooth and melted, stir in vanilla and peppermint extracts. Then proceed to chill, shape, and roll as outlined in the main recipe.
Important Note: Exercise extreme caution not to overheat the chocolate, as overheating can cause it to “seize” and become hard and unworkable, which is not suitable for truffles.
If you chill for too long or your chocolate is too hard: If you accidentally leave the chocolate in the refrigerator for an extended period, or if it becomes too firm to scoop (this can occur depending on the brand of chocolate chips, the microwave method used, or if chilled for over 2 hours), you can still salvage the batch! You have two options:
- Leave the bowl at room temperature for 2-4 hours to allow the chocolate to gradually soften to a scoopable consistency.
- Alternatively, gently reheat the mixture in a saucepan over very low heat (avoid the microwave for reheating, as it’s prone to overheating at this stage). Stir constantly until it becomes pliable again, then cover and chill once more for 2 hours (or until it is firm but scoopable).
Variations:
- Orange chocolate truffles: Replace the peppermint extract with 1 tablespoon of orange extract.
- Raspberry chocolate truffles: Substitute the peppermint extract for 1 tablespoon of raspberry extract (or bakery emulsion).
- Chocolate coconut truffles: Swap the peppermint extract for 2 teaspoons of coconut extract. For extra flavor and texture, roll the finished truffles in shredded toasted coconut.
Nutrition Information (per truffle, approximate)
Calories: 93kcal | Carbohydrates: 12g | Protein: 0.03g | Fat: 5g | Saturated Fat: 3g | Polyunsaturated Fat: 0.001g | Monounsaturated Fat: 0.01g | Cholesterol: 0.1mg | Sodium: 0.5mg | Potassium: 54mg | Sugar: 11g | Vitamin A: 1IU | Vitamin C: 0.01mg | Calcium: 14mg | Iron: 0.001mg
Please note that some of my blog posts here at Dash for Dinner may contain affiliate links. If you make a purchase through these links, I will get a small commission at no additional cost to you. Please see my Disclaimer for more information.
