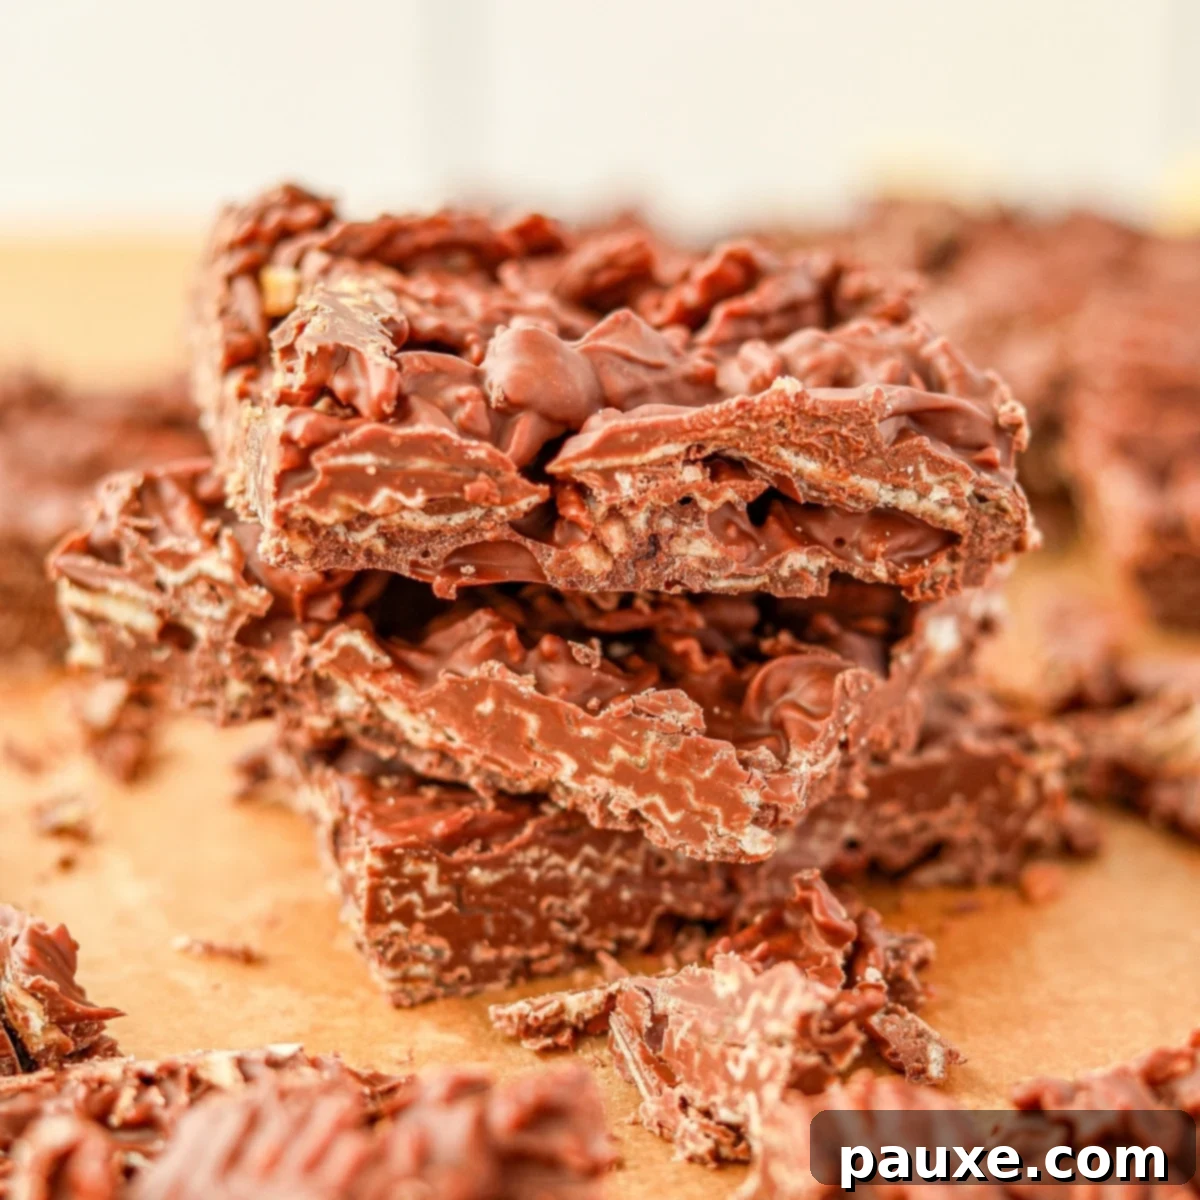
Prepare for an irresistible indulgence with this incredibly easy recipe for Chocolate Potato Chip Bark! This delightful treat combines the perfect balance of sweet and salty, delivering a unique texture and flavor explosion that will captivate your taste buds. With just two simple ingredients – crispy potato chips and smooth, melted chocolate – you can create a decadent dessert that’s perfect for any occasion, especially for thoughtful holiday gifting.
If you adore this combination, you’ll also love exploring my easy recipe for chocolate potato chip clusters!
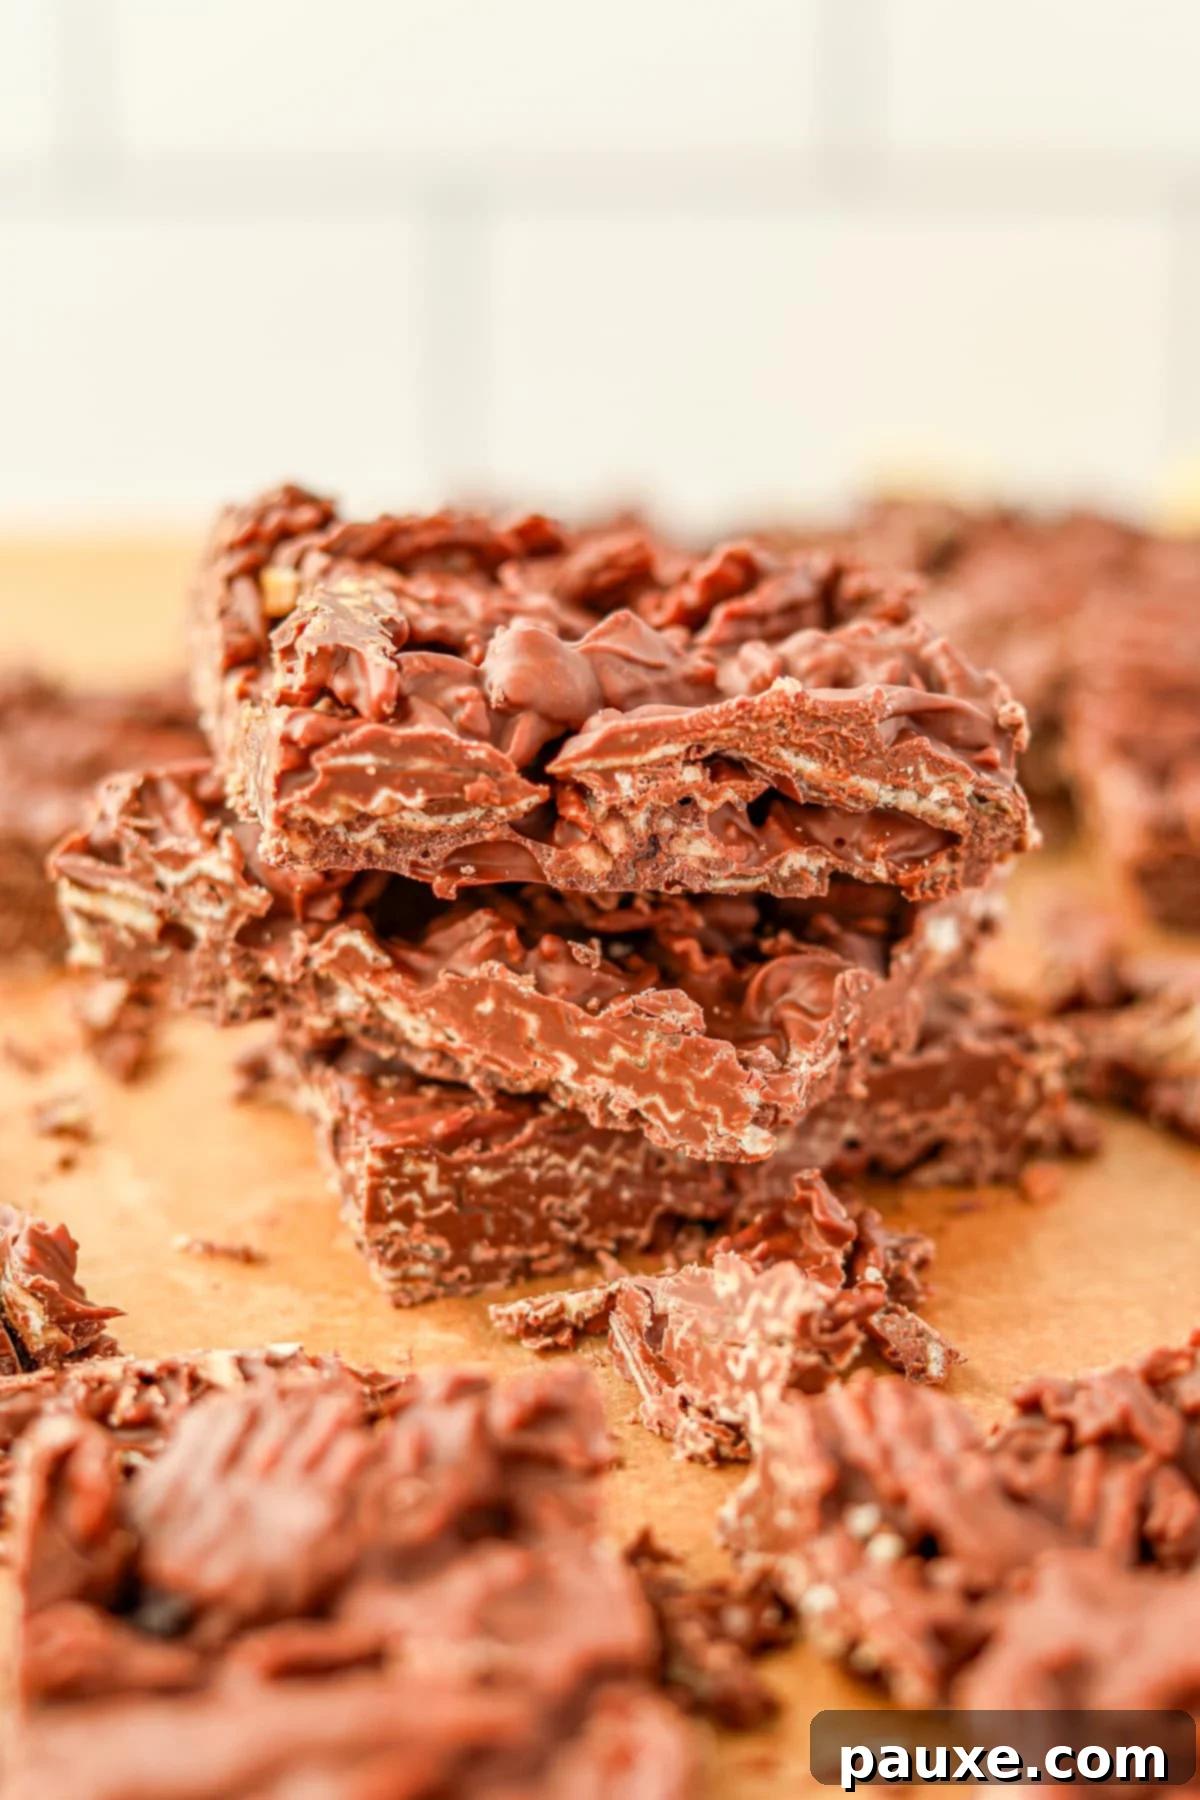
Are you a fan of that magical sweet and salty combination? Then get ready to fall head over heels for this incredible Chocolate Potato Chip Bark! It’s a treat that promises to become a new favorite in your recipe collection, offering a surprising twist on traditional chocolate desserts.
Luxurious milk chocolate is gently folded into perfectly crushed potato chips, culminating in an effortless yet profoundly decadent sweet treat. The resulting bark boasts an unparalleled sensory experience: crunchy, creamy, savory, and sweet, all rolled into one supremely delicious bite. Its captivating contrast makes it an immediate crowd-pleaser and a memorable homemade gift.
Imagine presenting this delightful bark in a charming decorative tin, perhaps alongside other festive goodies. It makes for an incredibly thoughtful, yet surprisingly inexpensive, holiday gift for friends, family, and colleagues. And trust us, they’re going to adore it so much, you’ll want to include a handwritten recipe card – because they will definitely ask for it!
Why You’ll Adore This Chocolate Potato Chip Bark
This Chocolate Potato Chip Bark isn’t just another dessert; it’s a culinary revelation that brings joy with every bite. Here’s why this simple, no-bake recipe is destined to become a staple in your kitchen, especially during the busy holiday season:
- The Perfect Sweet and Salty Harmony: This bark masterfully marries the best of both worlds. The delicate crunch and savory notes of crispy potato chips provide an exhilarating counterpoint to the rich, smooth sweetness of melted chocolate. It’s a flavor profile that tantalizes the palate, offering an experience far more complex than its humble ingredients suggest. If you’ve never tried this pairing, prepare to be amazed by how perfectly they complement each other.
- Effortlessly Simple, No Fancy Equipment Needed: Forget about complicated techniques or specialized kitchen gadgets. This recipe is designed for ease and accessibility. You can melt the chocolate quickly and efficiently using either a microwave or a simple stovetop method, completely eliminating the need for a double boiler. This means less cleanup, less fuss, and more time to enjoy your delicious creation. It’s truly a beginner-friendly recipe that yields impressive results.
- Remarkably Quick with Just 2 Ingredients: You read that correctly! This entire recipe requires only two core ingredients, making it ideal for last-minute cravings or when you need a quick dessert without a trip to the grocery store. Beyond its minimal ingredient list, it’s also a no-bake wonder, meaning you won’t even need to turn on your oven. This makes it a fantastic option for warmer climates or when you simply want to avoid heating up your kitchen.
- Versatile for Gifting and Entertaining: Whether you’re assembling holiday cookie tins, preparing a potluck dish, or simply want a unique treat for a family gathering, this bark is incredibly versatile. Its festive appearance and universally appealing flavor make it a perfect candidate for edible gifts, while its ease of preparation means you can whip up multiple batches without stress.
Essential Ingredients & Recommended Equipment for Your Bark
While the beauty of this chocolate potato chip bark lies in its simplicity, selecting the right ingredients can elevate your results from good to absolutely phenomenal. Here’s what you’ll need to create this irresistible sweet and salty confection, along with a few helpful tools.
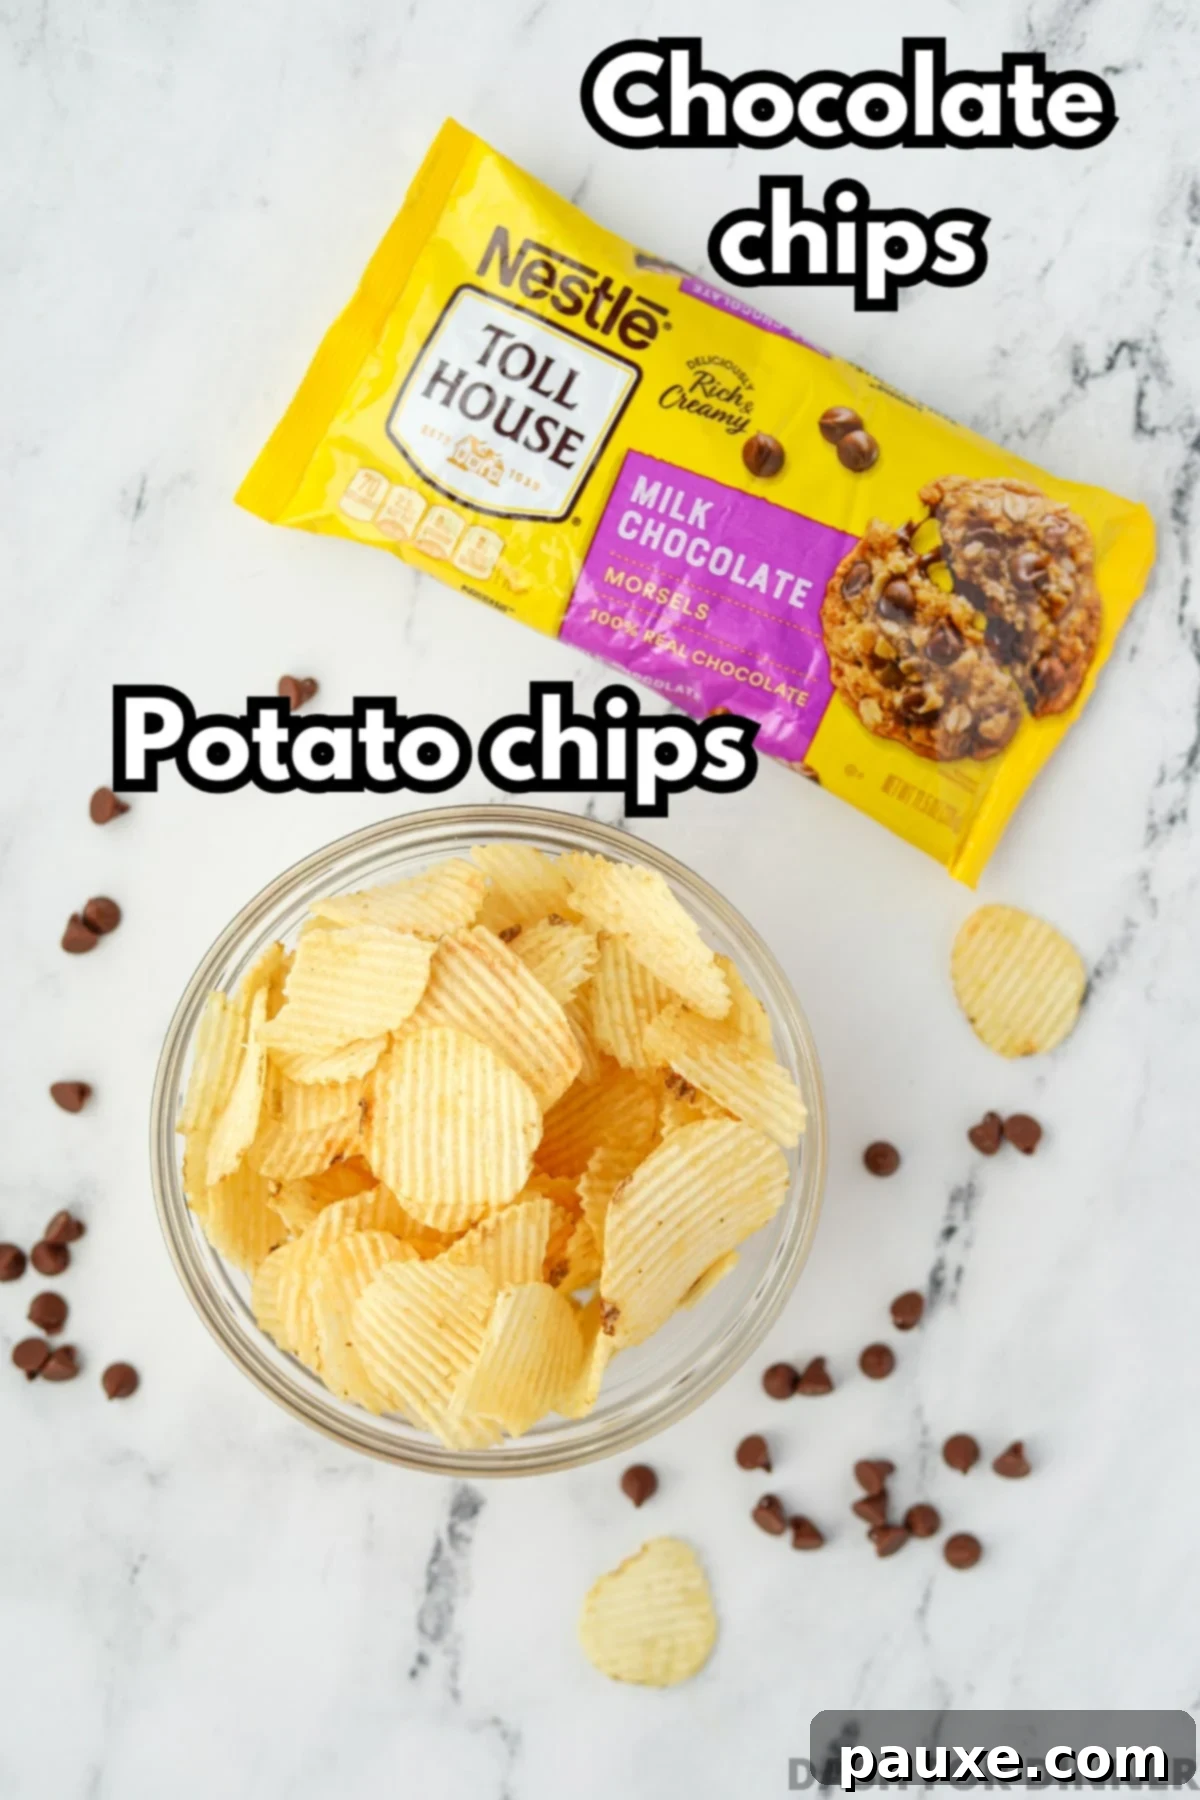
The Simple Ingredients:
- Potato Chips: The star of the savory show! Through extensive testing with various chip types and chocolate combinations, I’ve found that wavy chips, specifically Ruffles Original, yield the absolute best results. Their robust texture and deeper ridges hold up beautifully against the melted chocolate, providing a satisfying crunch that thinner chips simply can’t match. While I don’t typically advocate for specific brands, the structural integrity and salt distribution of Ruffles truly shine here. However, don’t let this deter you; generic wavy chips or other brands will still produce a wonderfully delicious bark! Aim for a good quality, original salted chip to ensure the classic sweet and salty contrast.
- Chocolate Chips: The sweet foundation of our bark. My top recommendation is Nestle Tollhouse Milk Chocolate Chips. They consistently outperform other brands and types, offering a creamy, rich flavor and an ideal sweetness level. Semi-sweet chocolate chips, while delicious in their own right, tend to be too assertive and don’t provide the perfect balance needed to complement the salty potato chips effectively. The milder, creamier profile of milk chocolate creates a more harmonious and addictive pairing. You’ll need approximately two standard bags to get the right ratio for a generous batch of bark.
Recommended Equipment to Simplify the Process:
- Baking Sheet: A standard rimmed baking sheet is crucial for containing your bark mixture and making it easy to transfer to the refrigerator.
- Parchment Paper (or Silicone Baking Mat): This is your secret weapon for effortless cleanup and easy removal of the hardened bark. Lining your baking sheet with parchment paper ensures no sticking and simplifies breaking the bark into pieces.
- Microwave-Safe Bowl (or Medium Saucepan): For melting your chocolate. Choose a bowl large enough to comfortably stir in the potato chips later.
- Silicone Spatula: Ideal for gently folding the chips into the melted chocolate and spreading the mixture evenly on your baking sheet. Its flexible nature prevents sticking and allows for thorough coating.
- Large Plastic Storage Bag: Perfect for crushing your potato chips without making a mess.
- Rolling Pin or Measuring Cup: For gently breaking down the chips into ideal bite-sized pieces.
- Sharp Knife: Essential for cleanly slicing your hardened bark into uniform pieces.
- Cutting Board: Provides a stable surface for slicing the chilled bark.
Gathering these simple tools and ingredients will ensure a smooth and enjoyable bark-making experience, leading to a perfectly textured and flavored final product.
Crafting Your Delicious Milk Chocolate Potato Chip Bark: A Step-by-Step Guide
This milk chocolate potato chip bark is so delightfully simple and utterly delicious, it’s destined to become a cherished holiday tradition! It serves as the perfect last-minute sweet treat or a delightful addition to festive Christmas cookie tins. Follow these easy steps to create your own batch of this addictive sweet and salty sensation.
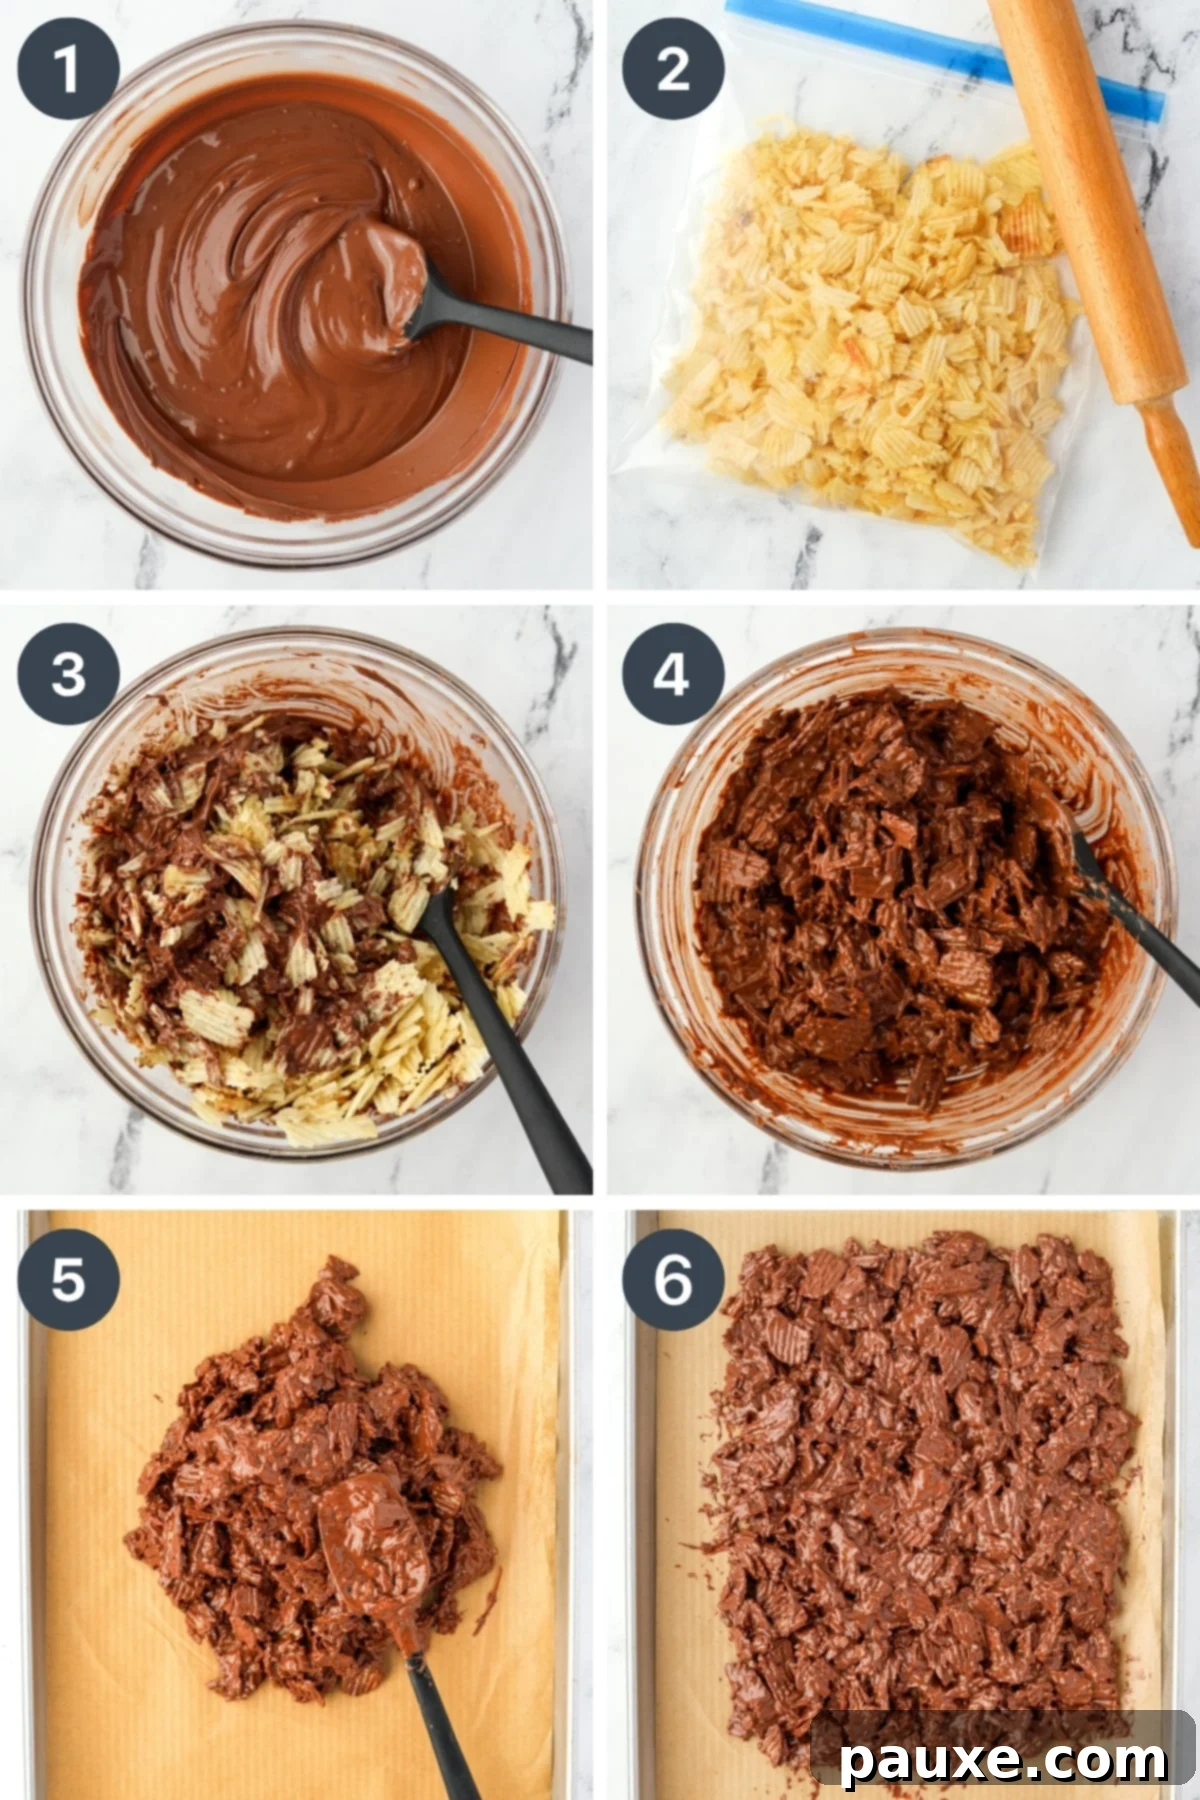
- Prepare Your Workspace and Ingredients: Before you begin, line a rimmed baking sheet with parchment paper or a silicone baking mat. This crucial step prevents sticking and makes for easy removal and cleanup. Have your potato chips and chocolate chips ready to go.
- Gently Crush the Potato Chips: Place your chosen potato chips into a large plastic storage bag. Using a rolling pin, the back of a sturdy measuring cup, or even your hands, gently whack and press the chips until they break down into bite-sized pieces. You don’t want a fine powder, but rather a good mix of smaller crumbles and slightly larger chunks to ensure texture in every bite. Once crushed, measure out 5 cups (approximately 210g or 7.4oz) for optimal chip-to-chocolate ratio.
- Melt the Chocolate to Perfection: Transfer your milk chocolate chips to a microwave-safe bowl. Heat them in the microwave in short, 30-second intervals. After each interval, remove the bowl and stir the chocolate vigorously with a silicone spatula. Continue this process (typically 4-5 sessions) until the chocolate is mostly melted and smooth when stirred. Alternatively, you can melt the chocolate in a medium saucepan over very low heat on the stovetop, stirring constantly to prevent scorching.
- Essential Melting Tip: The key to beautifully melted chocolate is patience and consistent stirring. Chocolate can easily overheat in the microwave, causing it to “seize” and become hard and clumpy. Stirring helps distribute the heat evenly and melts residual chips. The chocolate is ready when it’s fluid and smooth, with only a few tiny unmelted lumps that will disappear with continued stirring from residual heat.
- Combine Chips and Chocolate: Once your chocolate is perfectly smooth and melted, add the crushed potato chips directly into the bowl.
- Gently Fold for Even Coating: Using your silicone spatula, gently fold the potato chips into the melted chocolate. The goal is to coat all the chip pieces thoroughly without crushing them further or breaking them into a fine dust. Continue folding until every chip is enveloped in the rich chocolatey goodness, ensuring a harmonious blend of flavors and textures in every piece of bark.
- Spread Onto the Prepared Baking Sheet: Carefully transfer the chocolate-coated potato chip mixture to the center of your parchment-lined baking sheet.
- Create an Even Layer and Chill: Use your silicone spatula to spread the mixture into a uniform layer, aiming for approximately ¾-inch thickness. Pay close attention to filling any gaps with chocolate and chips from the edges to ensure a cohesive bark that holds together well when broken. Remember, you won’t be filling the entire baking sheet; instead, you’re looking to form a neat rectangle, roughly 8 inches by 12-15 inches in size. This ensures the bark isn’t too thin or too thick for easy handling and optimal texture.
Now that your bark is assembled, the waiting game begins! The chilling process is crucial for achieving that satisfying snap.
The Art of Chilling and Slicing Your Potato Chip Bark
Once your delectable chocolate potato chip mixture is spread into an even layer, the next critical step is allowing it to properly harden. Due to the substantial mass of chocolate and chips, I highly recommend chilling the baking sheet in the refrigerator rather than attempting to firm it up at room temperature. Refrigeration ensures a quicker, more consistent set, leading to a firmer, snappier bark.
Chill the bark in the refrigerator for 2-3 hours, or until it is completely firm and solid to the touch. This waiting period is essential for the chocolate to fully set and the chips to maintain their crunch. Once thoroughly firm, carefully transfer the parchment paper (along with the hardened bark) to a sturdy cutting board. Using a sharp, heavy knife, press down firmly to divide the bark into approximately 16 individual pieces. You can aim for perfect squares, or embrace a more rustic, broken-shard appearance – both are equally charming!
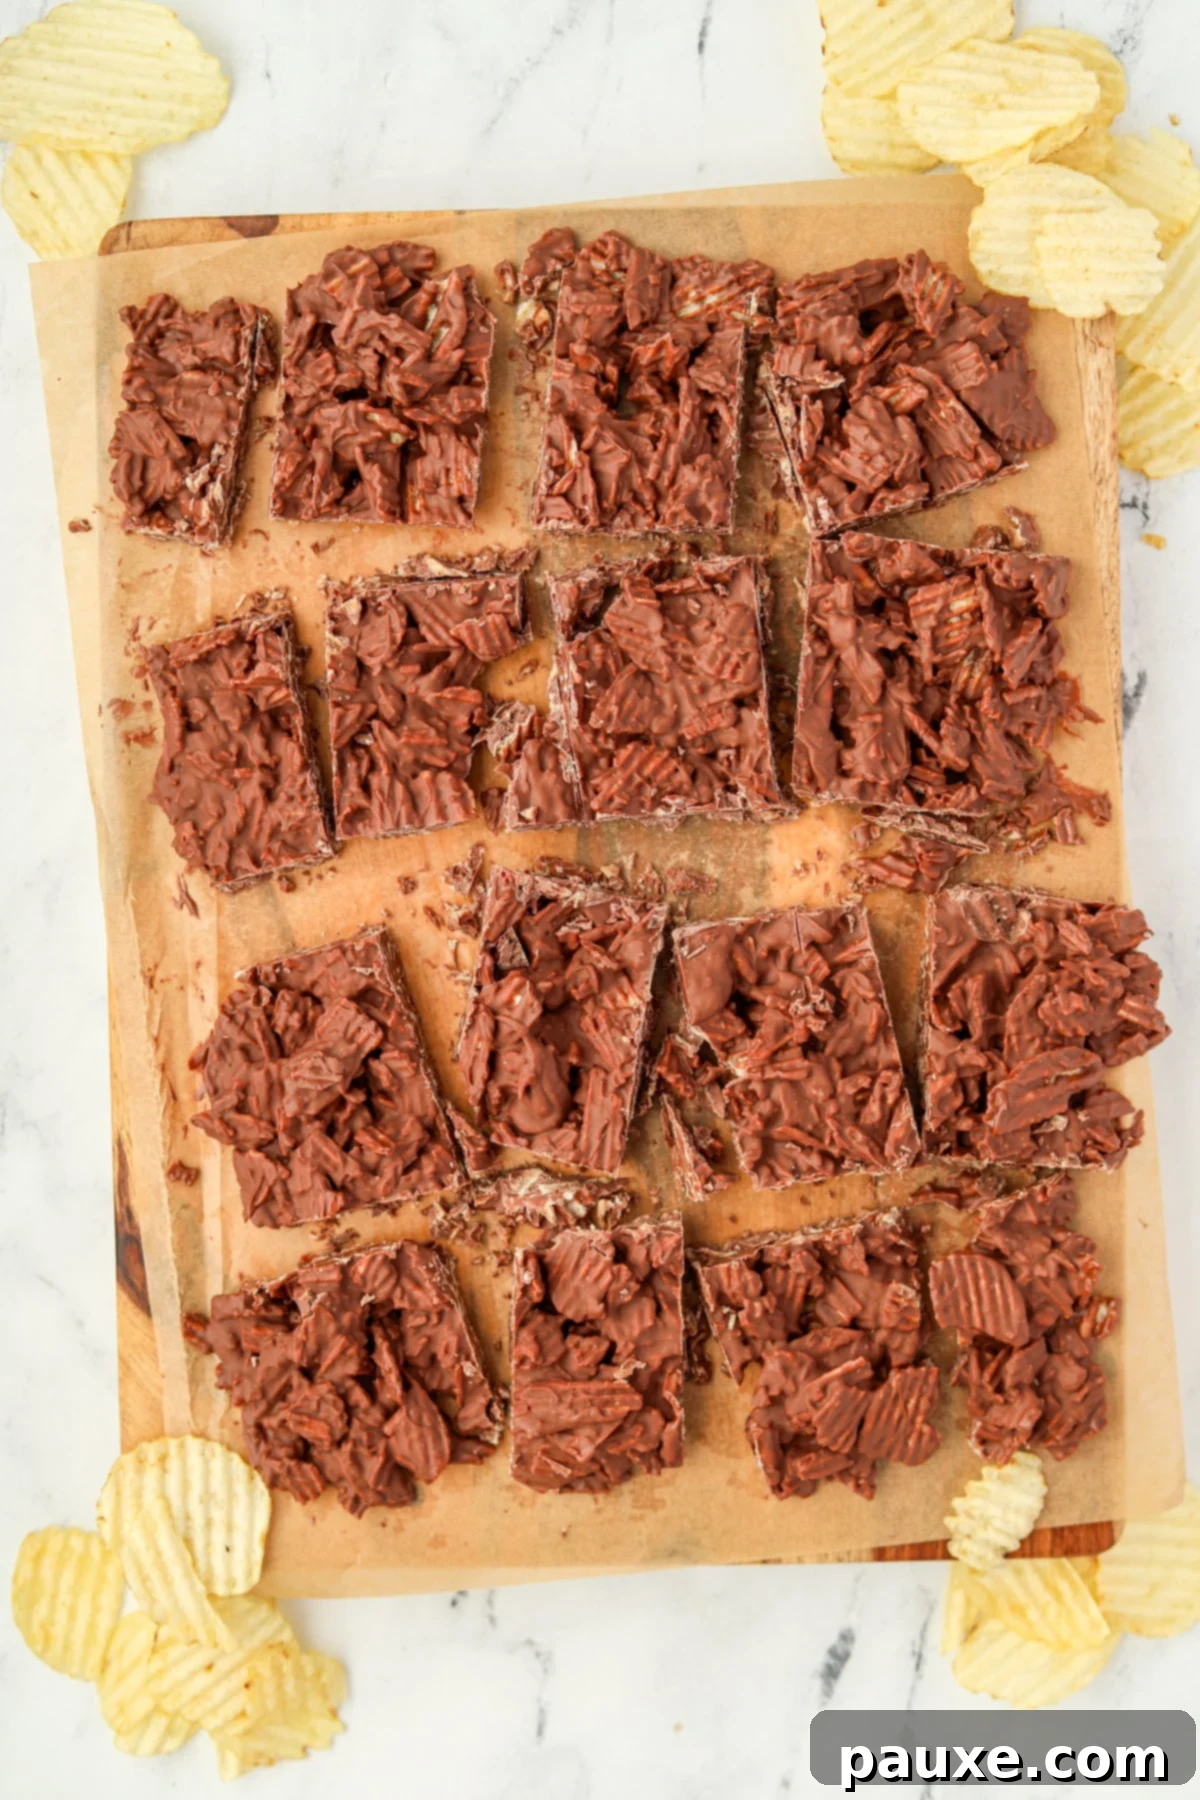
Storing Your Potato Chip Bark for Maximum Freshness
To keep your Chocolate Potato Chip Bark tasting fresh and maintaining its delightful crunch, proper storage is key. Once you’ve broken or sliced your bark into individual pieces, transfer them to a parchment-lined airtight container or a festive cookie tin. The parchment paper helps prevent sticking and preserves freshness.
For short-term storage: Keep the bark in the refrigerator for 1-2 weeks. The cool temperature helps maintain the chocolate’s firm texture and prevents it from softening, especially if your home is warm.
For longer-term enjoyment: This bark is surprisingly freezer-friendly! Tightly wrap the pieces in plastic wrap, then place them in a freezer-safe bag or container, ensuring it’s sealed completely to prevent freezer burn. Stored this way, the bark can last for up to 2 months. When you’re ready to enjoy, simply remove it from the freezer and let it thaw slightly at room temperature for a few minutes before serving. The texture remains wonderfully intact.
Thoughtful Tips and Creative Ideas for Gifting
This Chocolate Potato Chip Bark isn’t just a treat; it’s a perfect homemade gift that shows you care. Here are some ideas to make your gifted bark extra special:
- Choose a Festive Container: Present your bark in a beautiful decorative tin, a holiday-themed box, or a cello bag tied with a pretty ribbon. The presentation truly enhances the gifting experience.
- Create an Assortment: Elevate your gift by including other homemade Christmas treats! Think alongside classic cookies, decadent truffles, or creamy peanut butter balls. A variety always delights.
- Elegant Lining: Line your chosen tin or container with decorative parchment paper or food-safe wax paper. This not only looks appealing but also provides an extra layer of protection for the bark.
- Share the Secret (Optional): If you wish, include the recipe on a charming recipe card. Your friends and family will surely appreciate being able to recreate this addictive treat themselves.
- Provide Storage Instructions: Thoughtfully advise your giftees to keep the bark refrigerated for optimal freshness and longevity. A small note can go a long way in ensuring they enjoy it at its best.
- Personalize It: Add a handwritten tag or a personalized message to make your gift truly unique and heartfelt.
Gifting homemade treats like this chocolate potato chip bark is a wonderful way to spread holiday cheer and show appreciation. It’s a gift from the heart that’s sure to be remembered!
Expert Tips for the Best Chocolate Potato Chip Bark
Achieving the perfect chocolate potato chip bark is easy, but a few expert tips can ensure your creation is absolutely flawless and delightful every time. Heed these pointers for optimal results:
- Monitor Chocolate Melting Carefully: When melting chocolate, whether in the microwave or on the stovetop, it is paramount that you do not *overheat* it. Overheated chocolate can “seize,” becoming a hard, unusable lump. To prevent this, stir the chocolate chips thoroughly between each 30-second interval in the microwave. Stirring evenly distributes the heat, melting the chips gradually and smoothly. The chocolate is perfectly melted when it’s glossy and smooth, with minimal (if any) unmelted pieces remaining after stirring. If you’re particularly nervous about melting, a double boiler method (placing a bowl over a pot of simmering water) offers a more gentle and controlled heat.
- Be Mindful of Sharp Edges: Given that this recipe uses potato chips, some pieces of bark might have surprisingly sharp edges. When breaking or biting into the bark, exercise a little caution. You might encounter a small, sharp poke from a chip shard! Breaking the bark into smaller, more manageable pieces can help mitigate this.
- Explore Different Flavor Variations: While classic milk chocolate bark is undeniably delicious, feel free to experiment!
- Dark Chocolate Enthusiasts: For a more intense, less sweet profile, try using high-quality dark chocolate chips to create a sophisticated dark chocolate potato chip bark.
- White Chocolate or Vanilla Almond Bark: For a non-chocolate version, consider melting vanilla almond bark (often found in the baking aisle of specialty shops or larger grocery chains). This creates a sweet, creamy base that still pairs wonderfully with the salty crunch of the chips. You can even tint it with food coloring for festive occasions!
- Add Extra Toppings: A sprinkle of sea salt flakes just after spreading the bark, before it chills, can enhance the salty aspect. Drizzle with a contrasting chocolate type (e.g., white chocolate over milk chocolate bark) for visual appeal.
- Spice It Up: A tiny pinch of cayenne pepper mixed into the chocolate can add a surprising, subtle heat that complements the sweet and salty notes beautifully.
- Use Fresh Chips: Stale chips will result in a less satisfying crunch. Always use fresh, crispy potato chips for the best texture.
- Don’t Overmix: When folding the chips into the chocolate, mix just enough to coat the chips. Overmixing can cause the chips to break down too much, leading to a less distinct crunchy texture.
By keeping these expert tips in mind, you’ll consistently create a chocolate potato chip bark that is a delightful balance of flavors and textures, perfect for sharing or savoring yourself.
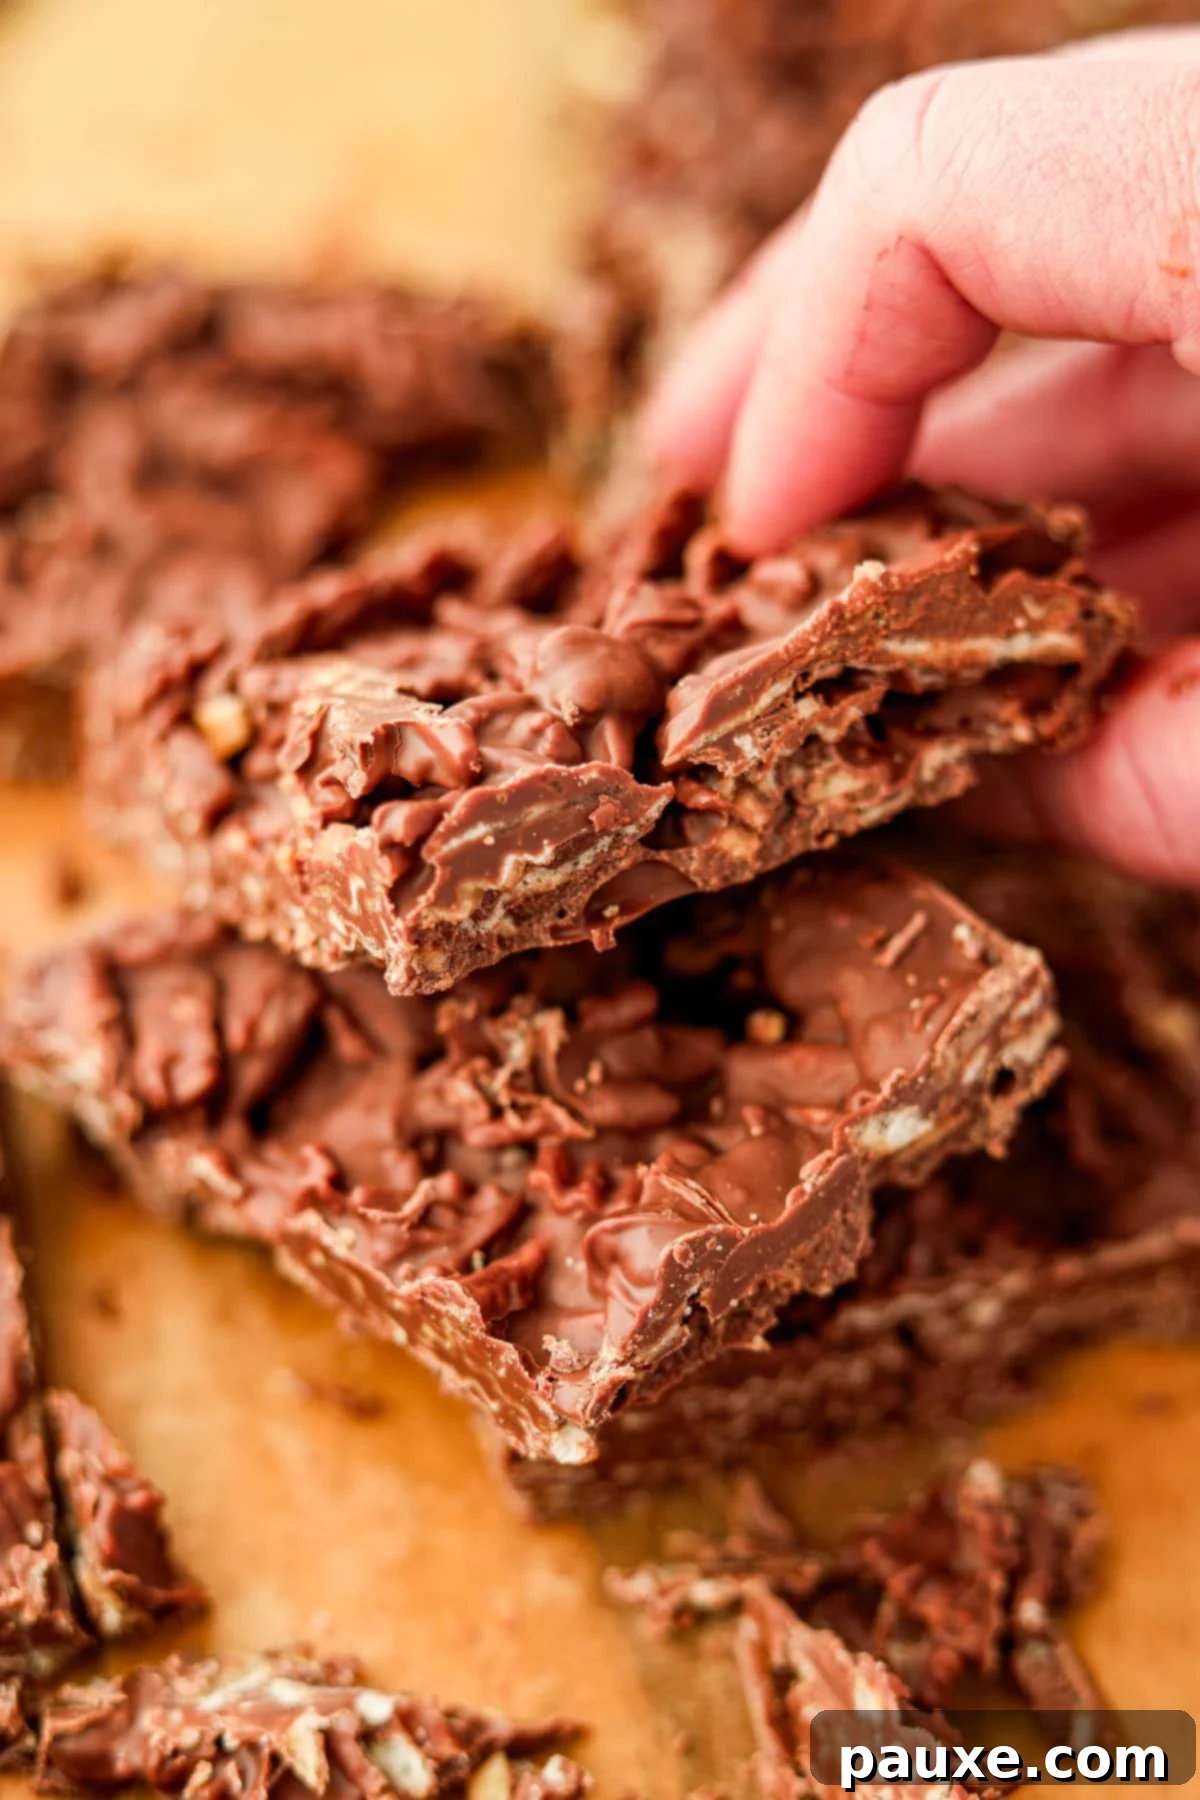
Discover More Festive Holiday Treats:
If you’ve enjoyed the delightful simplicity of this Chocolate Potato Chip Bark, you’ll love exploring these other easy-to-make and incredibly delicious holiday recipes. They’re perfect for expanding your festive dessert platter or finding more thoughtful edible gifts!
- Chocolate Orange Truffles
- Peppermint Truffles
- Cranberry Bliss Bars
- Cranberry Pretzel Salad
If you found this recipe for Chocolate Potato Chip Bark to be a delightful experience, I would be thrilled to hear about it! Please consider leaving a 5-star review below or tagging me on Instagram @dashfordinner to share your delicious creations. Your feedback helps other home bakers discover this amazing sweet and salty treat!
Chocolate Potato Chip Bark
This easy recipe for Chocolate Potato Chip Bark is the perfect sweet and salty treat. Made with just 2 ingredients, it’s ideal for quick preparation and wonderful for gifting during the holidays!
Course: Dessert
Cuisine: American
Prep Time: 10 minutes
Chilling Time: 2 hours
Total Time: 2 hours 10 minutes
Servings: 16 servings
Author: Dorothy Bigelow
Pin Recipe
Ingredients
- 5 cups lightly crushed potato chips (wavy preferred, e.g., Ruffles original) (210g/7.4oz)
- 3 ½ cups milk chocolate chips (approximately 2 bags, 326g or 11.5oz each)
Unit Conversion: US Customary – Metric
Instructions
- Crush your potato chips by placing them in a plastic storage bag and gently hitting them with the back of a measuring cup or rolling pin. Measure out 5 cups once crushed (or weigh out 210 grams).
- Add the chocolate chips to a large microwave-safe bowl.
- Heat the chocolate chips in 30-second intervals in the microwave, stirring well after each interval, until the chocolate easily melts and stirs into a smooth consistency (this typically takes 4-5 intervals).
- Note: If preferred, you can melt the chocolate on the stovetop over low-medium heat, stirring often to prevent scorching.
- Add the crushed potato chips to the melted chocolate and gently fold the two together using a silicone spatula until the chips are well coated.
- Line a rimmed baking sheet with parchment paper or a silicone baking mat.
- Spread the chocolate and potato chip mixture into a single, even layer (about ¾” thick) on the prepared baking sheet. Ensure there are minimal gaps; fill any gaps as you go using the potato and chocolate mixture. The rectangle should be about 12-15” x 8”, not filling the entire baking sheet.
- Transfer the baking sheet to the refrigerator to chill for 2-3 hours, or until completely firm.
- Once hardened, remove from the refrigerator and transfer the parchment (and bark) to a cutting board. Use a sharp knife to divide the bark into smaller pieces (aim for about 16 squares).
- Transfer to an airtight container lined with parchment paper and store in the refrigerator for up to 1 week. For longer storage, freeze for up to 2 months by placing it in a tightly sealed plastic freezer bag first.
Did you try this recipe? Tag me at @dashfordinner and share your photos!
Nutrition
Calories: 338kcal | Carbohydrates: 40g | Protein: 2g | Fat: 20g | Saturated Fat: 8g | Polyunsaturated Fat: 2g | Monounsaturated Fat: 5g | Trans Fat: 0.01g | Sodium: 140mg | Potassium: 431mg | Fiber: 1g | Sugar: 23g | Vitamin C: 6mg | Calcium: 34mg | Iron: 0.3mg
Please note that some of my blog posts here at Dash for Dinner may contain affiliate links. If you make a purchase through these links, I will get a small commission at no additional cost to you. Please see my Disclaimer for more information.
