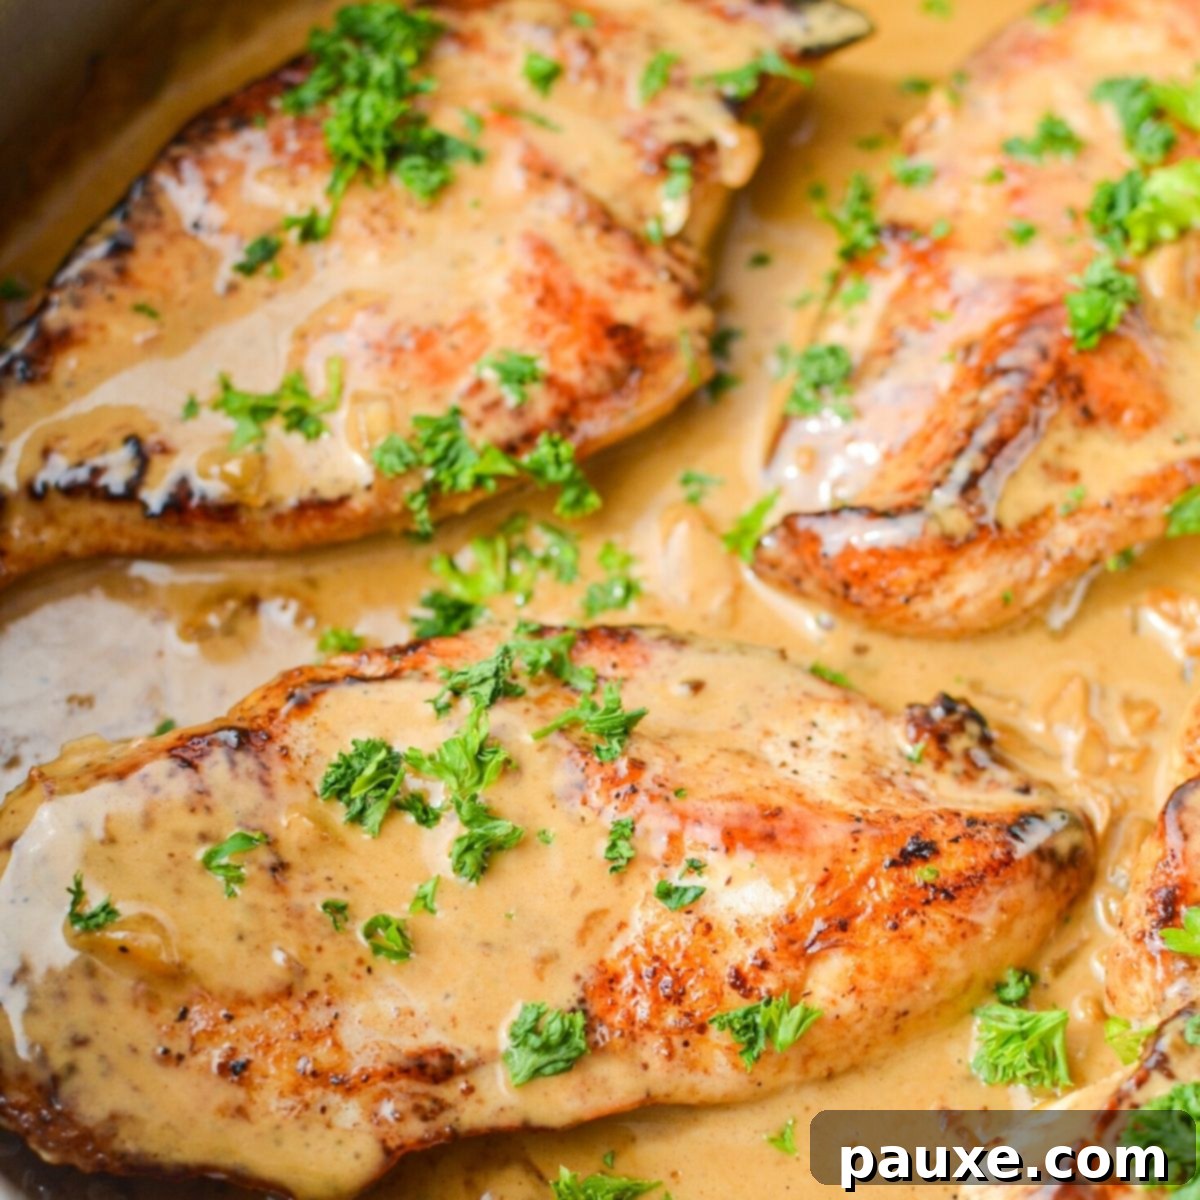
If you’re constantly on the hunt for delicious, hassle-free weeknight dinners that don’t compromise on flavor or health, then prepare to be absolutely captivated by this incredible one-pan creamy garlic chicken. Imagine a savory, rich, and utterly decadent meal that’s not only incredibly easy to prepare but also shockingly fast – ready on your table in under 15 minutes. This recipe isn’t just a time-saver; it’s a culinary revelation that’s completely gluten-free, low-carb, and perfectly suited for a keto lifestyle. It’s the kind of dish you’ll want to rotate into your weekly menu again and again, promising a restaurant-quality experience with minimal effort.
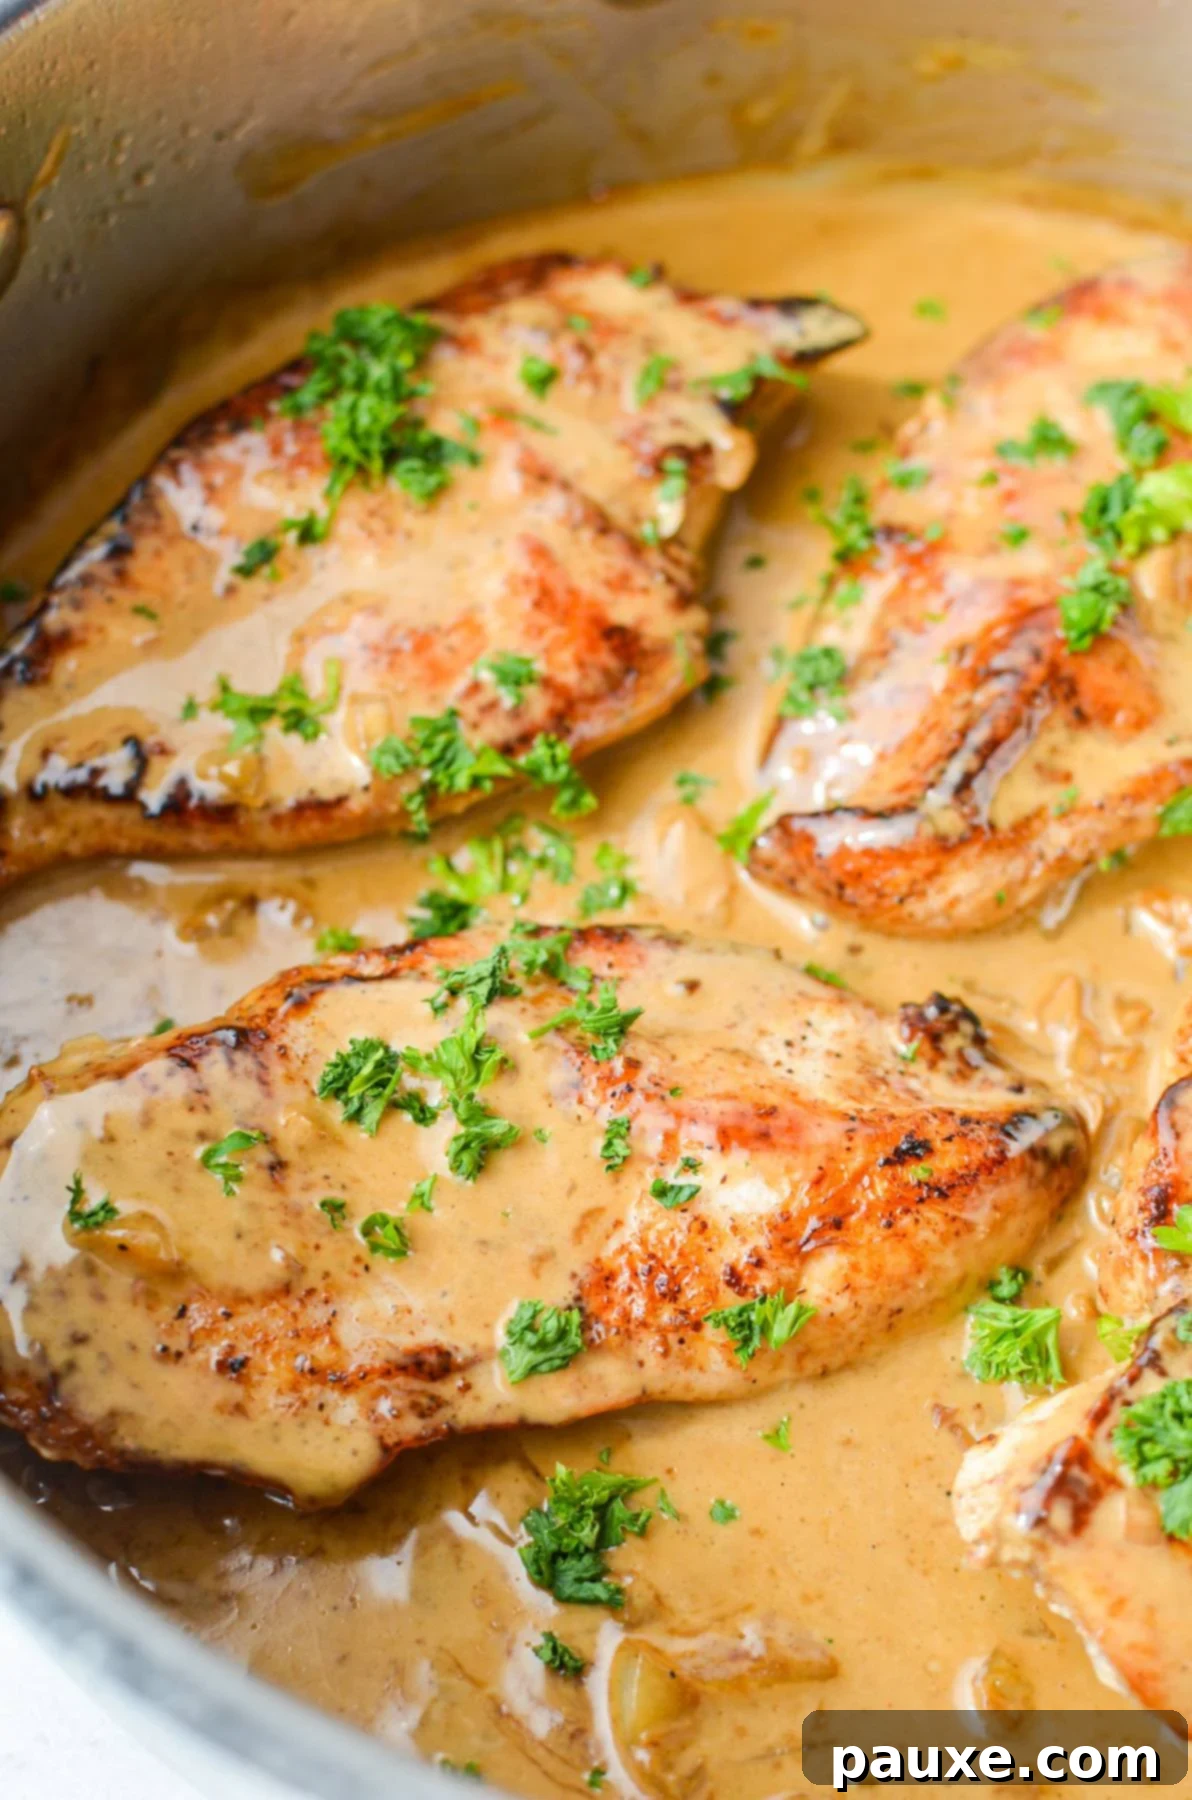
The daily challenge of preparing a homemade dinner often boils down to one critical factor: time. In our bustling lives, finding enough minutes to whip up something nutritious and satisfying can feel like an impossible task. We all aspire to eat better, to share meals at home, but the reality of demanding schedules often pushes us towards less healthy, quicker alternatives. What if I told you that a mouth-watering, gourmet-level dinner could be yours in the same amount of time it takes to order and pick up a pizza? It sounds too good to be true, but this one-pan creamy garlic chicken transforms that dream into a delectable reality.
This remarkable dish achieves its incredible speed and simplicity with just five core ingredients (yes, we’re counting salt and pepper as one!). The secret to its rapid cooking lies in a simple yet effective technique: slicing the chicken breasts into thinner cutlets. This small step takes literally a minute or two of prep time but dramatically reduces cooking time, ensuring your chicken is perfectly cooked, juicy, and tender in a flash. We’re talking about just 5 minutes on the first side and 3-5 minutes on the second, and your main protein is ready to go. No complicated pre-made sauces, no heavily processed components – just a few fresh, staple ingredients come together to create this keto-friendly, creamy garlic masterpiece.
While your chicken is cooking to perfection, you’ll have ample time to prepare a quick and complementary side dish. Consider a batch of Instant Pot frozen broccoli for an effortless green vegetable, or perhaps a crisp, easy tossed salad. Even a simple platter of raw crudités with your favorite dip would make a wonderful accompaniment. The beauty of this recipe is its versatility and minimal hands-on time, making it truly ideal for busy weeknights.
Why You’ll Fall in Love with This One-Pan Creamy Garlic Chicken
- Unbelievably Fast: From start to finish, this meal is on your table in under 15 minutes. Perfect for those nights when you thought takeout was your only option.
- Simple Ingredients: You only need 5 basic ingredients, most of which you likely already have in your pantry or fridge.
- Dietary Friendly: Naturally gluten-free, low-carb, and keto-compliant, making it a fantastic option for a variety of dietary needs.
- Irresistible Flavor: Rich, creamy, and packed with savory garlic goodness, this chicken is bursting with flavor that will satisfy everyone at the table.
- Minimal Cleanup: As the name suggests, it’s a one-pan wonder, meaning fewer dishes and less time spent scrubbing!
- Versatile Serving Options: Easily paired with a multitude of side dishes, both traditional and low-carb, to suit any preference.
Essential Ingredients for Your Creamy Garlic Chicken
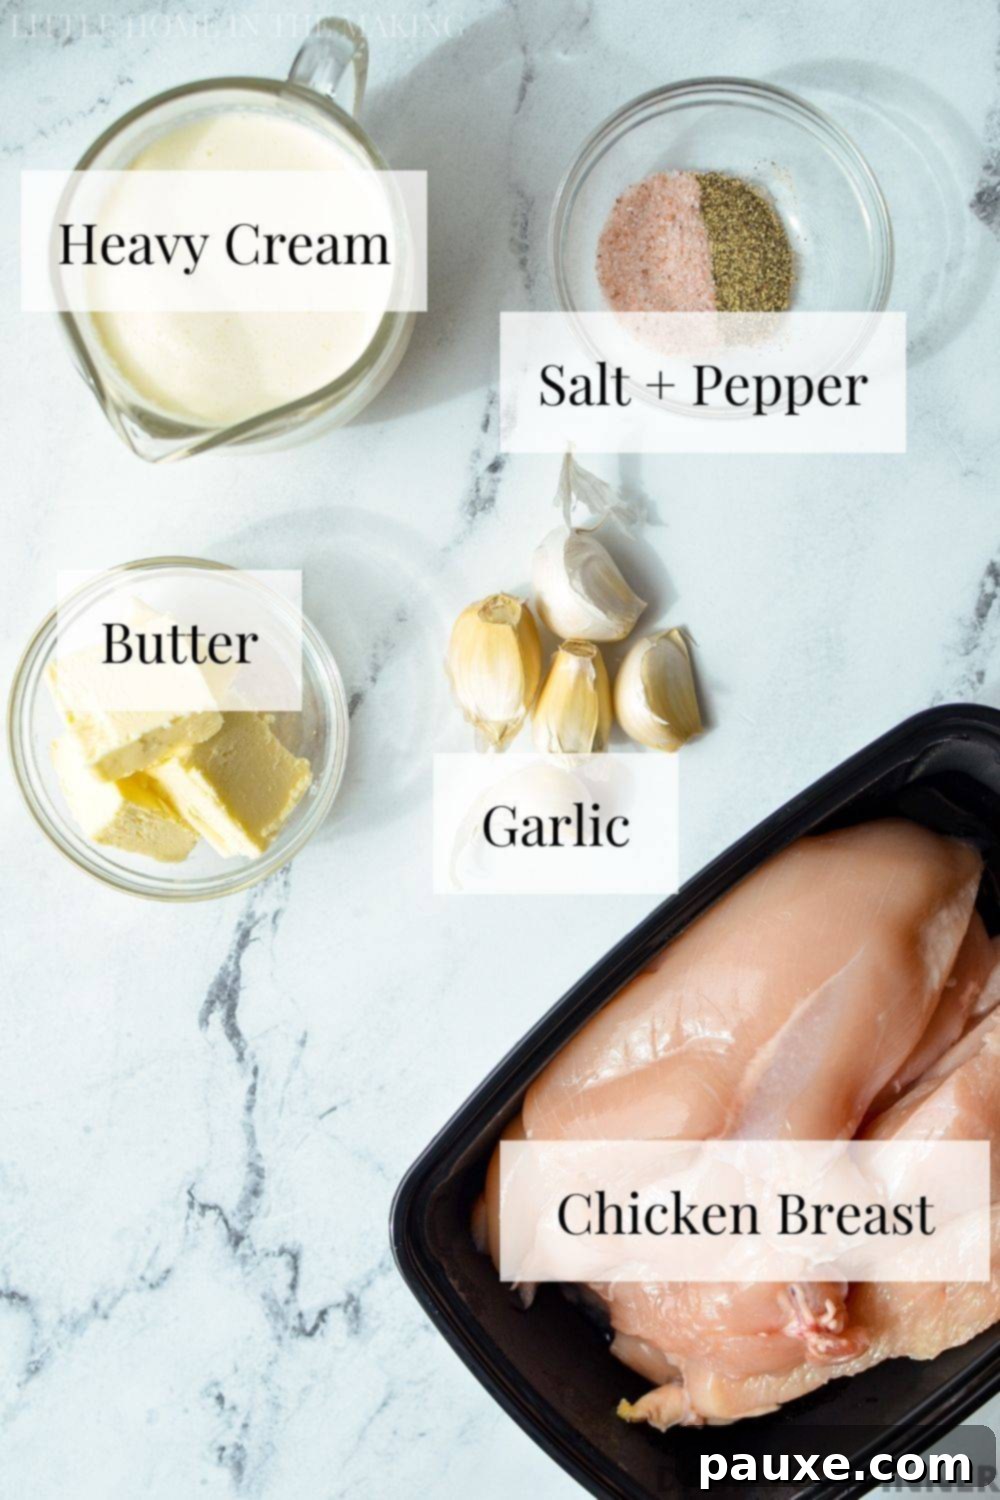
- Chicken Breast: For this recipe, about 2 large boneless, skinless chicken breasts are ideal. The key is to slice them in half lengthwise to create thinner cutlets. This ensures rapid and even cooking, yielding tender results. If you prefer, you can also use pre-packaged chicken cutlets or even boneless, skinless chicken thighs for a slightly richer flavor and quicker cooking time (though cook times might vary slightly).
- Fresh Garlic: The star of our creamy sauce! You’ll need about 4-5 cloves of fresh garlic, minced. Using fresh garlic is crucial here; it provides that robust, aromatic flavor that jarred minced garlic or garlic powder simply cannot replicate. Its potent flavor is central to the dish’s appeal.
- Butter: Essential for both browning the chicken and enriching the sauce. Butter adds an unparalleled savory depth and helps achieve that golden-brown crust on your chicken. We’ll be using salted butter for an extra layer of flavor.
- Heavy Cream: This is what gives our sauce its luxurious, velvety texture without the need for a flour-based roux. Heavy cream is naturally low-carb and gluten-free, making it the perfect base for our rich sauce. It creates a beautiful consistency that clings perfectly to the chicken.
- Salt and Pepper: Simple yet vital seasonings. A generous sprinkle of salt and freshly ground black pepper on the chicken before cooking enhances its natural flavor and ensures the dish is well-balanced. Seasoning adequately is key to a truly delicious meal.
Step-by-Step Guide: Crafting Your Creamy Garlic Chicken
Let’s dive into the simple steps to create this incredible one-pan meal. Follow these instructions carefully for the best results, ensuring a flavorful and perfectly cooked dish every time.
1. Prepare the Chicken Cutlets
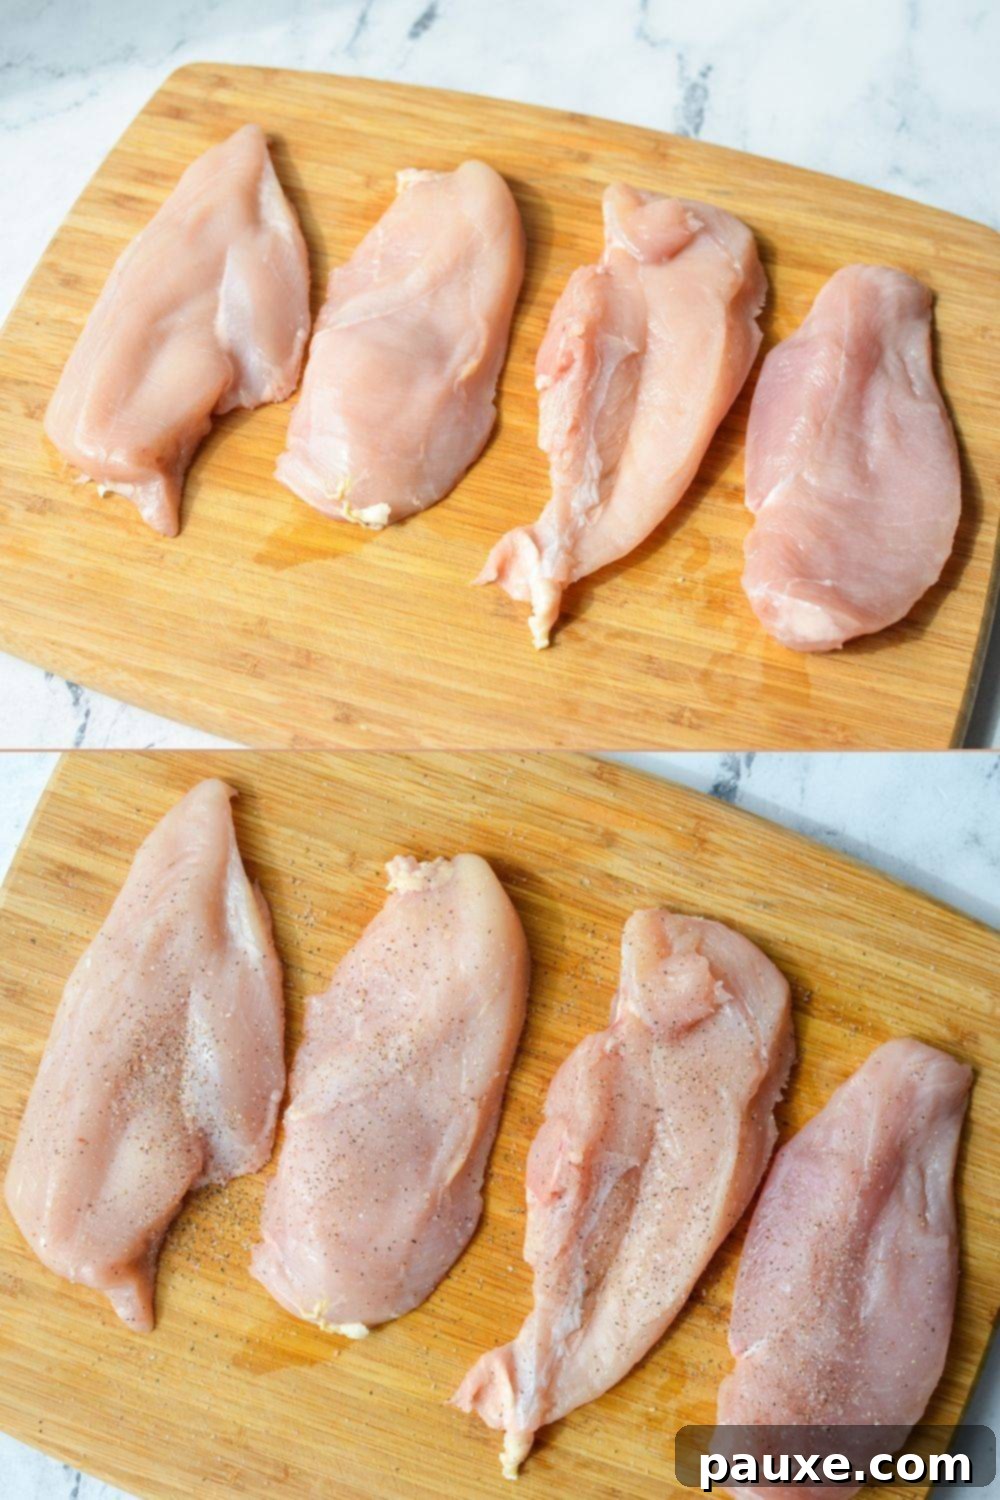
Begin by preparing your chicken breasts. The first step is to slice each chicken breast into cutlets. To do this, lay a chicken breast flat on a cutting board, place your hand firmly on top, and carefully run a sharp knife horizontally through the thickest part of the breast, slicing it in half to create two thinner pieces. This technique dramatically reduces cooking time and helps the chicken cook more evenly. Once sliced, lightly sprinkle both sides of each chicken cutlet with salt and freshly ground black pepper. Set the seasoned chicken aside while you prepare your skillet and mince the garlic cloves.
2. Perfectly Sear the Chicken Breast
Place a heavy-bottomed skillet or Dutch oven (I highly recommend this one for its excellent heat retention) over medium heat. Allow the pan to heat thoroughly until it’s hot but not smoking – this is crucial for achieving a beautiful sear. Add 3 tablespoons of the butter to the hot skillet, allowing it to melt completely. Swirl the butter around to coat the bottom of the pan evenly.
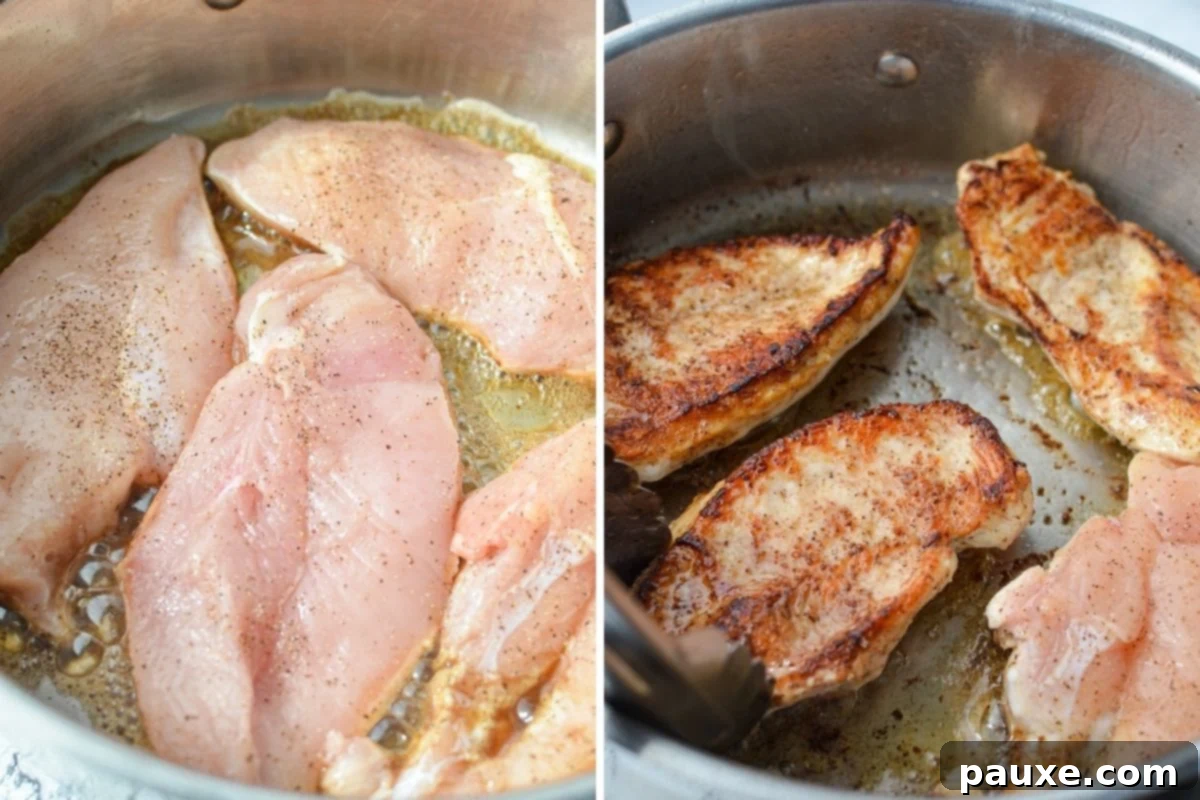
Carefully place the seasoned chicken cutlets into the hot skillet in a single layer, ensuring not to overcrowd the pan. If necessary, cook the chicken in batches to maintain proper pan temperature and ensure a good sear. Sear the chicken for 4-5 minutes on the first side until it develops a beautiful golden-brown crust. Then, using tongs, flip the chicken cutlets and cook for an additional 3-5 minutes on the second side, or until each chicken breast reaches a minimum internal temperature of 165ºF (74ºC) at its thickest point. It’s always best to use a meat thermometer for accuracy. Once cooked through, remove the chicken breasts from the skillet and transfer them to a clean plate. Tent them loosely with foil to keep warm while you prepare the sauce.
3. Create the Luscious Creamy Garlic Sauce
With the chicken removed, take the skillet off the heat source. Add the remaining 1 tablespoon of butter to the warm pan and swirl it around with a wooden spoon until it melts. Immediately add the minced garlic cloves to the skillet. With the pan still removed from direct heat, sauté the garlic for only about 30 seconds to 1 minute, just until it becomes fragrant. Watch it closely, as garlic burns very quickly and can turn bitter if overcooked.
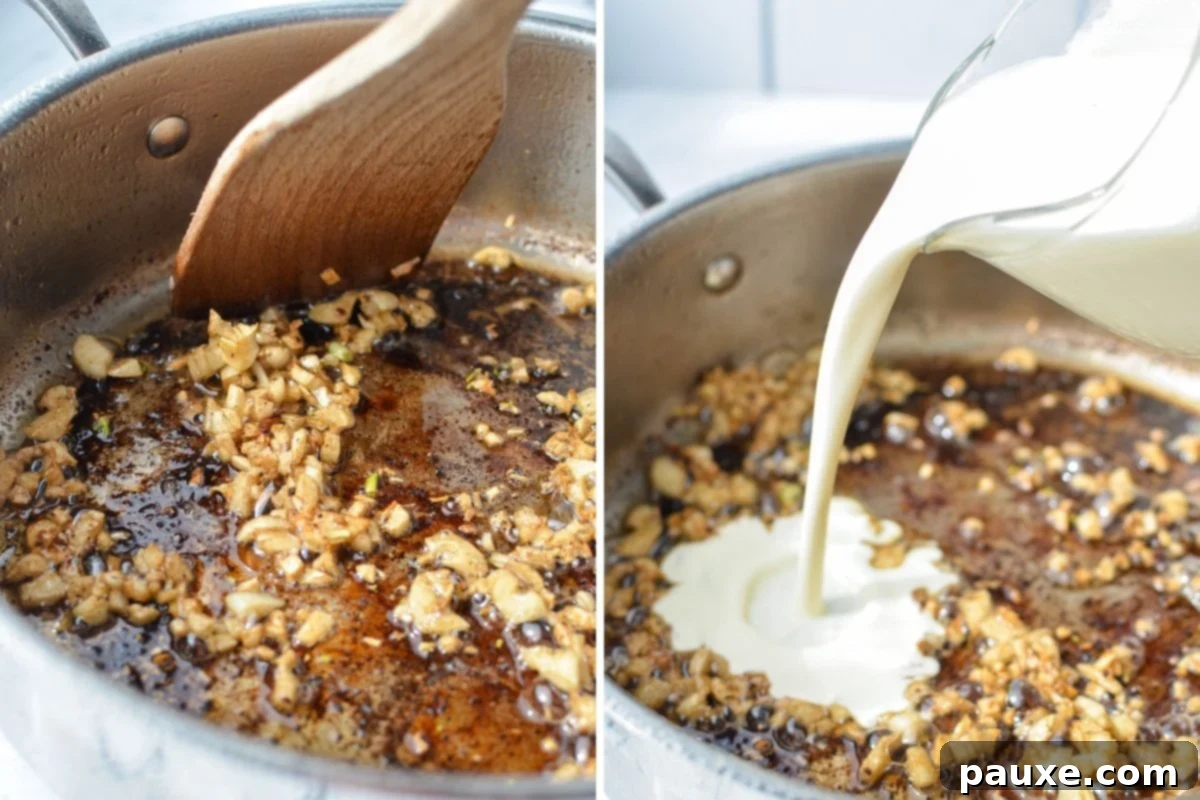
Without delay, pour the heavy cream into the skillet. Immediately use the bottom of your wooden spoon to scrape up any browned bits (fond) that have accumulated on the bottom of the pan during chicken searing. This process, known as deglazing, is crucial as these caramelized bits are packed with incredible flavor and will infuse into your cream sauce, making it even more delicious and complex. Once most of the browned bits are incorporated, return the skillet to medium-low heat.
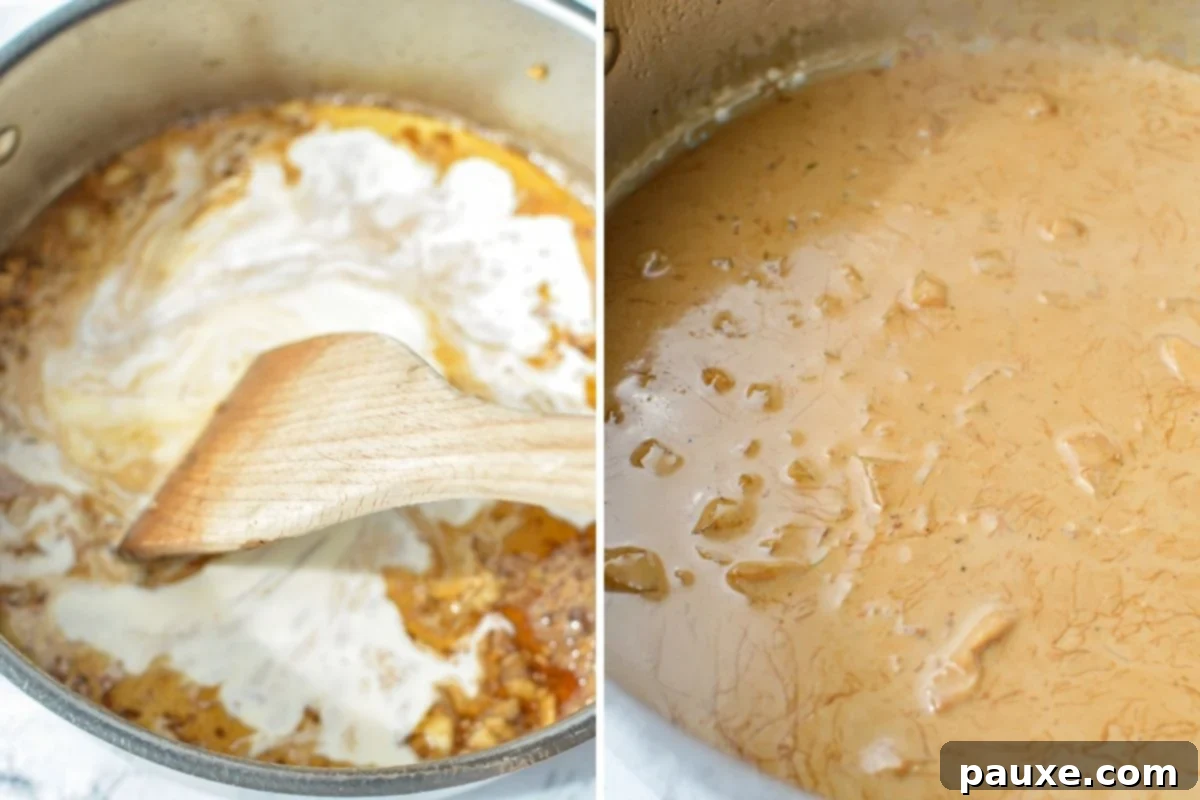
Allow the sauce to simmer gently for 1-2 minutes, stirring occasionally and continuing to scrape the bottom of the skillet, until the sauce has thickened slightly to your desired consistency. The thickness will depend on your stove’s temperature, so keep an eye on it. It should become rich and coats the back of a spoon.
4. Combine and Serve
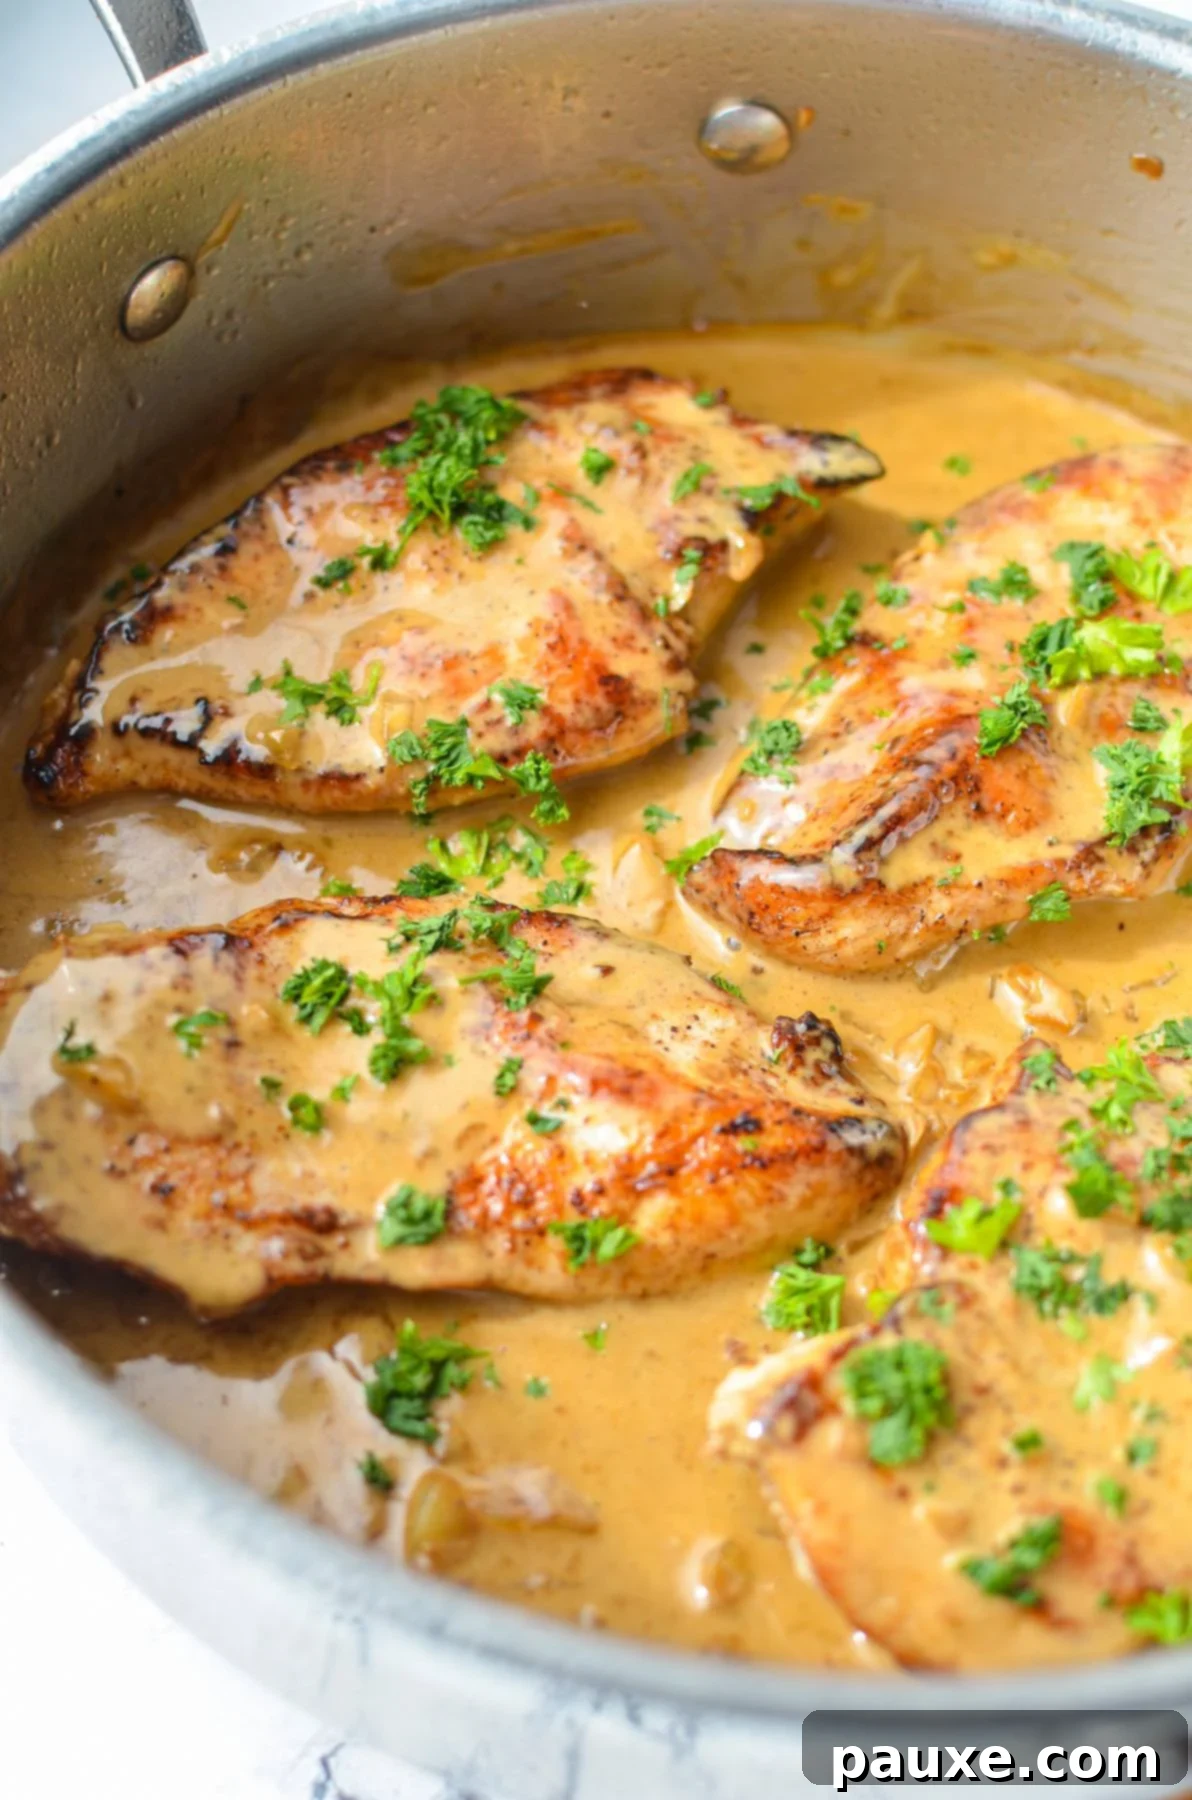
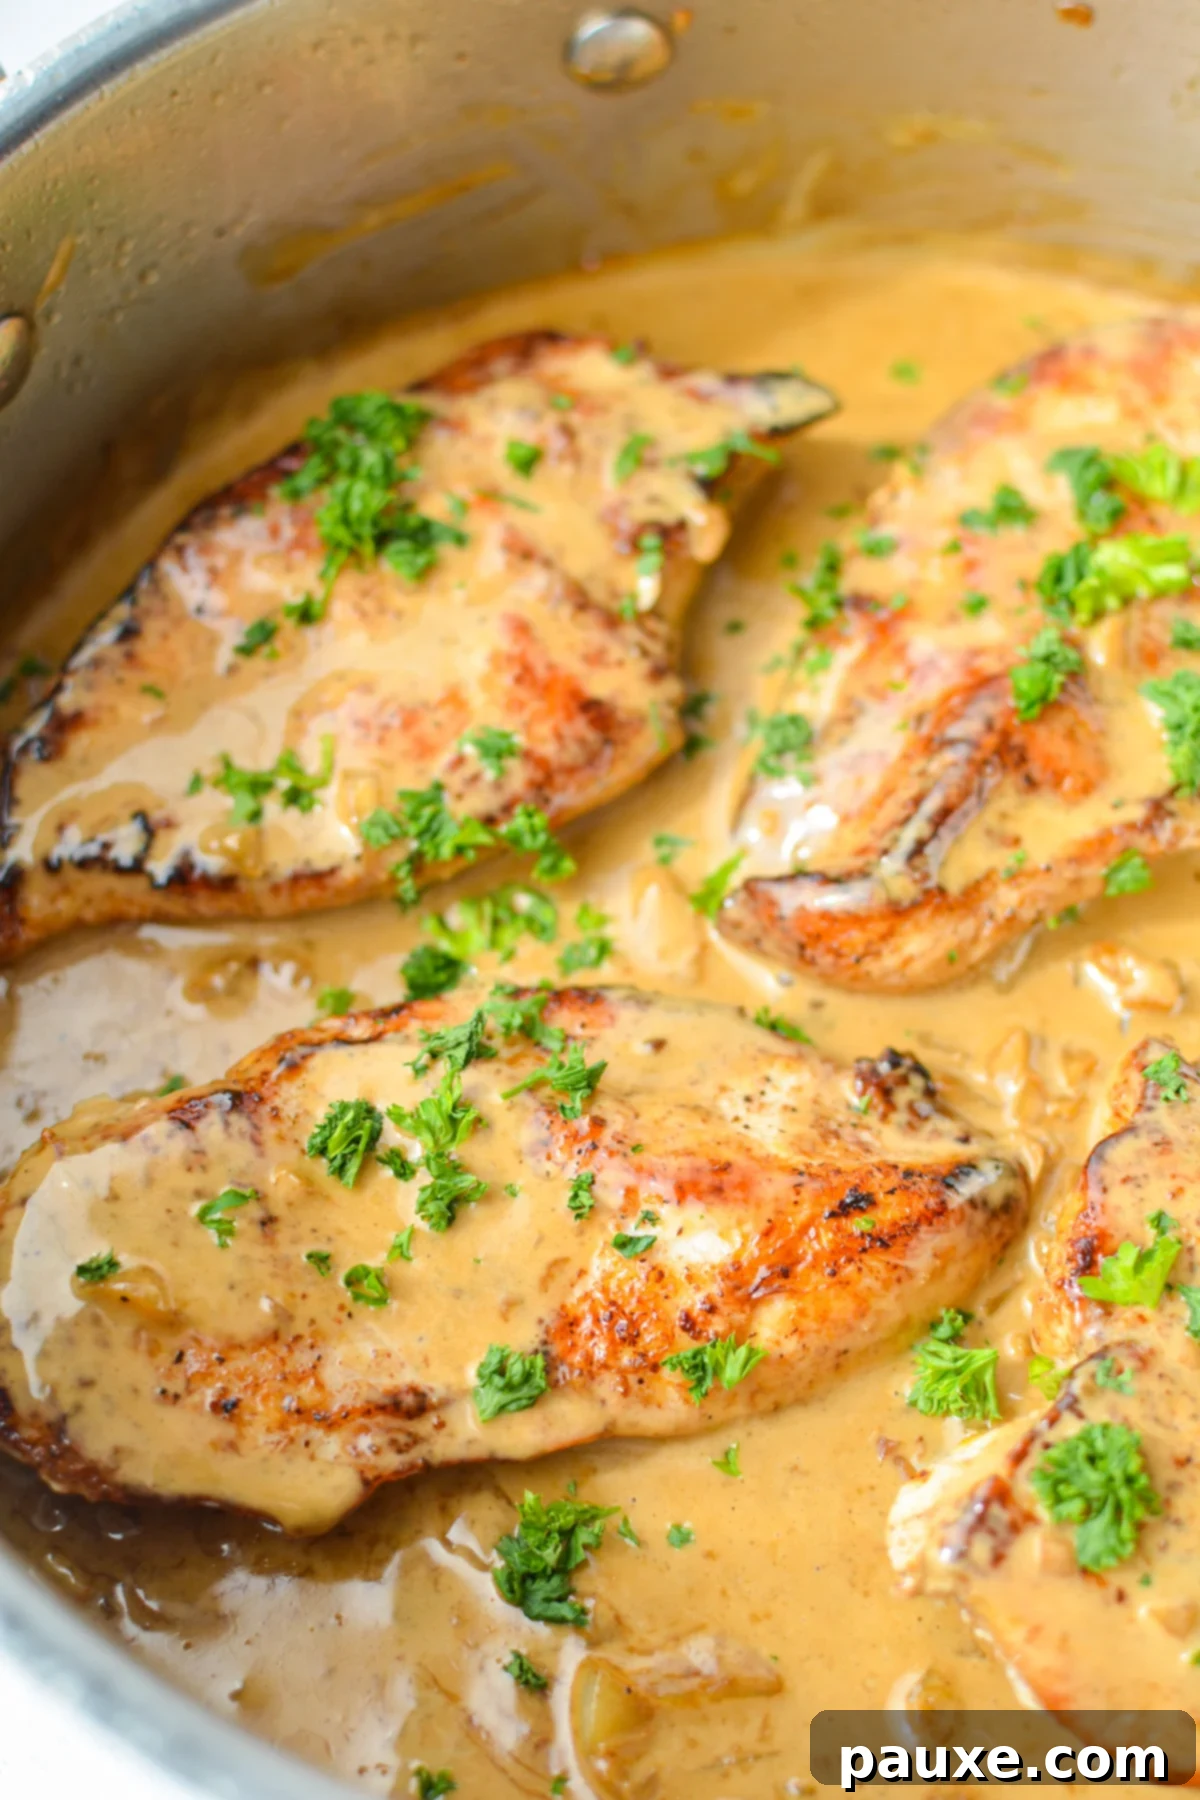
Once the sauce has thickened, remove the skillet from the heat. Return the cooked chicken breasts to the skillet, nestling them into the creamy garlic sauce. Spoon the luscious sauce generously over the chicken, or gently toss the chicken to ensure each piece is thoroughly coated. For an elegant finishing touch and a pop of color, garnish with fresh chopped parsley, if desired.
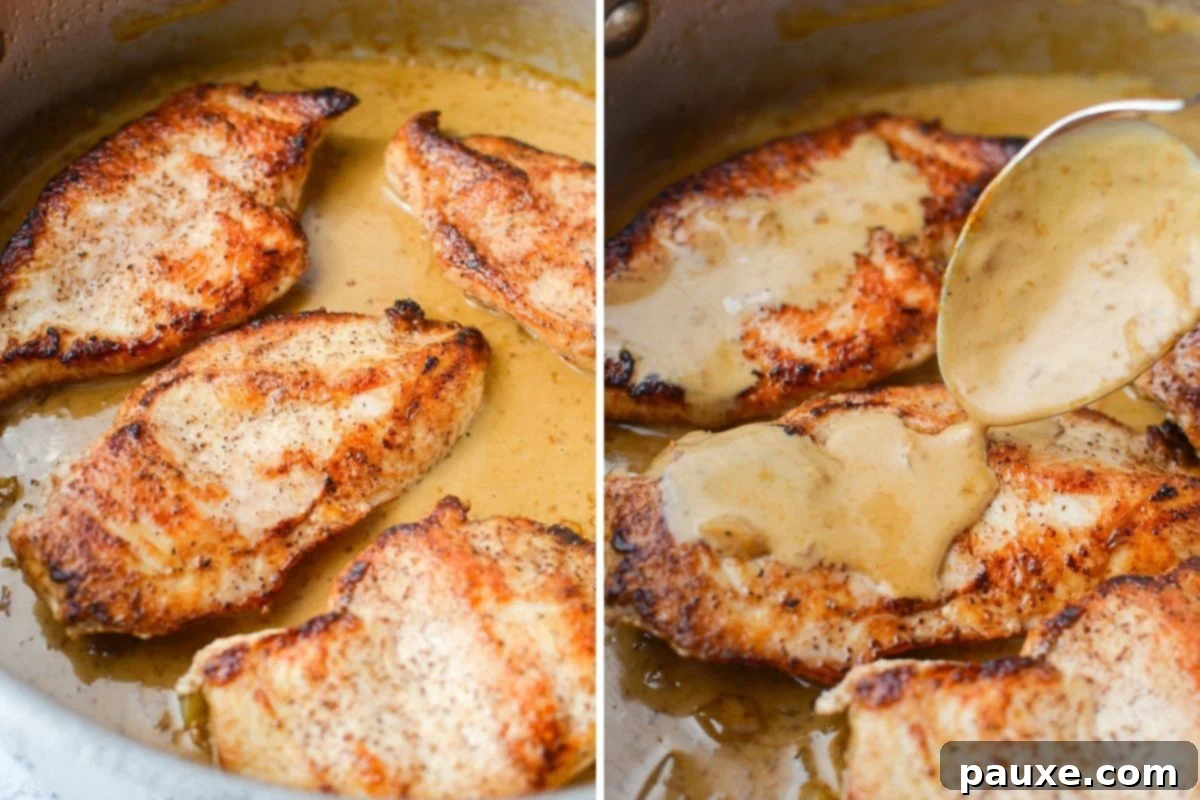
Serve your one-pan creamy garlic chicken immediately while it’s warm and fresh, alongside your favorite sides. Enjoy the rich, comforting flavors of this effortlessly prepared meal!
Expert Tips and Tricks for Perfection
- Embrace Fresh Garlic Cloves: This recipe truly shines when you use fresh garlic. While jarred pre-minced garlic offers convenience, its flavor is often muted or even slightly metallic compared to freshly minced cloves. Since garlic is the primary flavor profile here, taking the extra minute to mince fresh garlic will make a significant difference in the final taste of your creamy garlic chicken. Garlic powder is also not a suitable substitute for this particular dish.
- Be Prepared with Heavy Cream: The timing for adding the heavy cream after sautéing the garlic is critical. Garlic can go from perfectly fragrant to burned and bitter in mere seconds. Have your heavy cream measured out and ready right next to your stovetop. As soon as the garlic becomes aromatic (typically within 30-60 seconds), pour in the cream immediately. There won’t be enough time to retrieve it from the refrigerator.
- The Advantage of Slicing Chicken into Cutlets: As highlighted, cutting thicker chicken breasts in half lengthwise into thinner cutlets is a game-changer for speed and even cooking. This simple preparation ensures the chicken cooks through quickly and uniformly, preventing dry spots. An added bonus is that it effectively doubles your serving size from two large breasts to four smaller cutlets, making your dinner stretch further. If you’re new to this technique, refer to this helpful tutorial from Serious Eats.
- Mastering Deglazing with Cream: Traditional deglazing often involves wine or broth, but for this recipe, we use heavy cream. This method serves two purposes: it incorporates all the incredibly flavorful browned bits (fond) from the bottom of the pan into your sauce, and it simultaneously helps to thicken the sauce without the need for flour or a roux. Simply use a wooden spoon to gently scrape the bottom of the pan as you stir in the heavy cream, ensuring all that delicious fond is released and mixed into your silky sauce.
- Vigilantly Watch the Garlic: I cannot stress this enough – garlic burns incredibly fast. It truly only needs to cook for a very short window (30 seconds to a maximum of 1 minute) before the heavy cream must be added. Do not step away from your pan during this crucial moment. If your garlic overcooks, it will impart a harsh, bitter flavor to your entire dish, which can be quite unpleasant. If you notice a bitter taste, it’s a strong indication that the garlic was cooked for too long.
- Avoid Overcrowding the Skillet: When searing the chicken, ensure you place the cutlets in a single layer with enough space between each piece. Overcrowding the pan will lower the skillet’s temperature, causing the chicken to steam rather than sear. This results in less browning and a less flavorful crust. If necessary, cook the chicken in two batches to achieve that perfect golden-brown exterior.
- The Importance of a Heavy-Bottomed Skillet: Investing in a good quality heavy-bottomed skillet or Dutch oven is key for consistent results. These pans distribute heat more evenly and retain heat better than lighter pans, which prevents hot spots and helps ensure your chicken cooks uniformly without burning. This consistency is vital for both searing the chicken and simmering the delicate cream sauce.
Delicious Variations and Simple Substitutions
One of the many wonderful aspects of this creamy garlic chicken recipe is its adaptability. The core recipe is already fantastic, and as written, it’s completely keto, low carb, and gluten-free, requiring no adjustments for these dietary preferences!
Explore More Flavorful Twists
I’ve experimented with numerous iterations of this easy skillet chicken, and I’m excited to share some of our favorites. These variations introduce new flavor dimensions while maintaining the simplicity and speed of the original recipe:
- Mushroom Chicken: For mushroom lovers, this variation is a must-try. Reduce the garlic to just 1 minced clove. After browning and removing the chicken, add ½ pound of sliced mushrooms to the pan. Sauté the mushrooms until they are tender and have released their liquid. Then, stir in the garlic and continue with the heavy cream deglazing and simmering steps as usual. Return the chicken to the pan and serve.
- Rosé Chicken: Add a vibrant, tangy note with a rosé-style sauce. Use 2 garlic cloves. When you add the minced garlic, also stir in 2-3 tablespoons of good quality tomato paste. Sauté briefly until fragrant, then proceed by stirring in the heavy cream and allowing it to thicken. Finish by sprinkling with fresh Parmesan cheese and a generous amount of minced fresh parsley for color and extra flavor.
- Red Pepper Chicken: Infuse your dish with the sweet, smoky flavor of roasted red peppers. Reduce the garlic to 2-3 cloves. Once the sauce has thickened, stir in about ½ cup of chopped roasted red peppers (from a jar, drained and patted dry). The peppers add a lovely sweetness and a beautiful color. For a full detailed recipe, check out my Creamy Roasted Red Pepper Chicken.
- Spinach & Sun-Dried Tomato Variation: For a burst of Mediterranean-inspired flavor and added nutrition, try adding fresh spinach and sun-dried tomatoes. After the cream sauce has thickened, stir in 2 cups of fresh spinach until wilted and ¼ cup of oil-packed sun-dried tomatoes (drained and chopped). The spinach adds a fresh, earthy note, while the sun-dried tomatoes provide a concentrated burst of sweet and savory flavor.
Serving Suggestions for Creamy Garlic Chicken
This versatile creamy garlic chicken pairs beautifully with a wide array of side dishes. Whether you’re adhering to a specific diet or simply craving classic comfort, there’s a perfect accompaniment for everyone.
- Traditional Pairings:
- Fluffy cooked rice (white or brown)
- Hot, al dente pasta (fettuccine, linguine, or penne are excellent choices)
- Creamy mashed potatoes or roasted potato wedges
- Crusty dinner rolls or warm, flaky biscuits to soak up every last drop of sauce
- Steamed or roasted vegetables such as asparagus, green beans, or carrots.
- Keto and Low Carb Options:
- Cauliflower rice, a fantastic low-carb alternative to traditional rice
- Creamy mashed cauliflower, offering a similar texture to mashed potatoes without the carbs
- Steamed or sautéed broccoli florets
- Roasted or sautéed green beans with a hint of garlic
- Other steamed or roasted non-starchy vegetables like zucchini, bell peppers, or Brussels sprouts
- A simple, fresh garden salad with a light vinaigrette.
Frequently Asked Questions (FAQs)
Here are answers to some common questions about making this one-pan creamy garlic chicken:
- Can I use chicken thighs instead of breasts?
Yes, absolutely! Boneless, skinless chicken thighs can be used as a delicious alternative. They tend to be more forgiving and stay juicier. The cooking time might be slightly longer, around 6-8 minutes per side, depending on their thickness. Ensure they reach an internal temperature of 165°F (74°C). - Can I make this recipe dairy-free?
While the richness of heavy cream is central to this dish, you can attempt a dairy-free version using full-fat canned coconut cream (the thick part from the top of a chilled can). Be aware that it will impart a subtle coconut flavor, which some may enjoy. Ensure your butter substitute is also dairy-free. - Can I freeze leftover creamy garlic chicken?
Cream-based sauces can sometimes separate or become grainy when frozen and reheated, especially if the cream is very high in fat. However, you can freeze leftovers in an airtight container for up to 2-3 months. Thaw overnight in the refrigerator and gently reheat on the stovetop over low heat, stirring frequently, adding a splash of chicken broth or extra cream if needed to restore consistency. - What kind of skillet is best for this recipe?
A heavy-bottomed skillet or Dutch oven is highly recommended. Cast iron, stainless steel, or enameled cast iron work wonderfully. These materials provide even heat distribution and retention, which are essential for achieving a good sear on the chicken and preventing the sauce from burning. Non-stick pans can also work, but heavy-bottomed options generally offer superior browning. - Can I add herbs to the sauce?
Certainly! Fresh herbs like thyme, rosemary, or Italian parsley would be lovely additions. Stir them into the sauce during the last minute of simmering or as a fresh garnish. Dried herbs can also be used, but in smaller quantities, added with the garlic.
More Quick & Easy Low Carb Dinner Ideas
- Creamy Red Pepper Chicken
- Air Fryer Rotisserie Style Whole Chicken
- Air Fryer Sausage and Peppers
- Instant Pot Unstuffed Cabbage Rolls
- Low Carb Chicken Parmesan – Cafe Delights

One Pan Creamy Garlic Chicken
Skillet Meals
American
3 minutes
12 minutes
14 minutes
4 Servings
387kcal
Dorothy Bigelow
Equipment
- Heavy-Bottomed Skillet
Ingredients
-
2
chicken breasts
split in half widthwise (approximately 1 pound) -
Salt and pepper
to taste -
4
tablespoons
salted butter
divided -
5
cloves
garlic
peeled and minced -
¾
cup
heavy cream -
Fresh chopped parsley
for garnish (optional)
Instructions
- Cut your chicken breasts in half widthwise, making two thinner pieces with each breast. Sprinkle both sides with salt and pepper to your taste.
- Heat a heavy bottomed skillet or Dutch oven over medium heat until the pan is hot.
- Add 3 tablespoons of the butter, and swirl with a wooden spoon or a pair of tongs until completely melted.
- Add the chicken breasts in a single layer, and cook for 4-5 minutes.
- Flip the chicken breasts, and cook for another 3-5 minutes, or until each chicken breast reaches a minimum internal temperature of 165F.
- Remove the chicken breasts from the skillet and place them on a plate. Set aside.
- Remove the skillet from the heat and add in the remaining 1 tablespoon of butter. Swirl to melt.
- Add in the garlic cloves, and sauté just until fragrant; 30 seconds to 1 minute.
- Pour in the heavy cream and use the bottom of the wooden spoon to scrape up any browned bits on the bottom of the pan. Once most of the browned bits are scraped up, return the skillet to the heat.
- Simmer for 1-2 minutes, scraping the bottom of the skillet and stirring the sauce, until it has thickened.
- Remove the sauce from the heat and add the chicken breasts back into the skillet. Spoon the sauce over them, or toss to coat with the sauce.
- Garnish with parsley, if desired, and serve immediately.
Did you try this recipe?
Tag me at @dashfordinner and share your photos!
Notes
Nutrition
Serving:
1
g
|
Calories:
387
kcal
|
Carbohydrates:
3
g
|
Protein:
26
g
|
Fat:
30
g
|
Saturated Fat:
18
g
|
Polyunsaturated Fat:
2
g
|
Monounsaturated Fat:
8
g
|
Trans Fat:
0.5
g
|
Cholesterol:
153
mg
|
Sodium:
234
mg
|
Potassium:
479
mg
|
Fiber:
0.1
g
|
Sugar:
1
g
|
Vitamin A:
1040
IU
|
Vitamin C:
3
mg
|
Calcium:
45
mg
|
Iron:
1
mg
Please note that some of my blog posts here at Dash for Dinner may contain affiliate links. If you make a purchase through these links, I will get a small commission at no additional cost to you. Please see my Disclaimer for more information.
