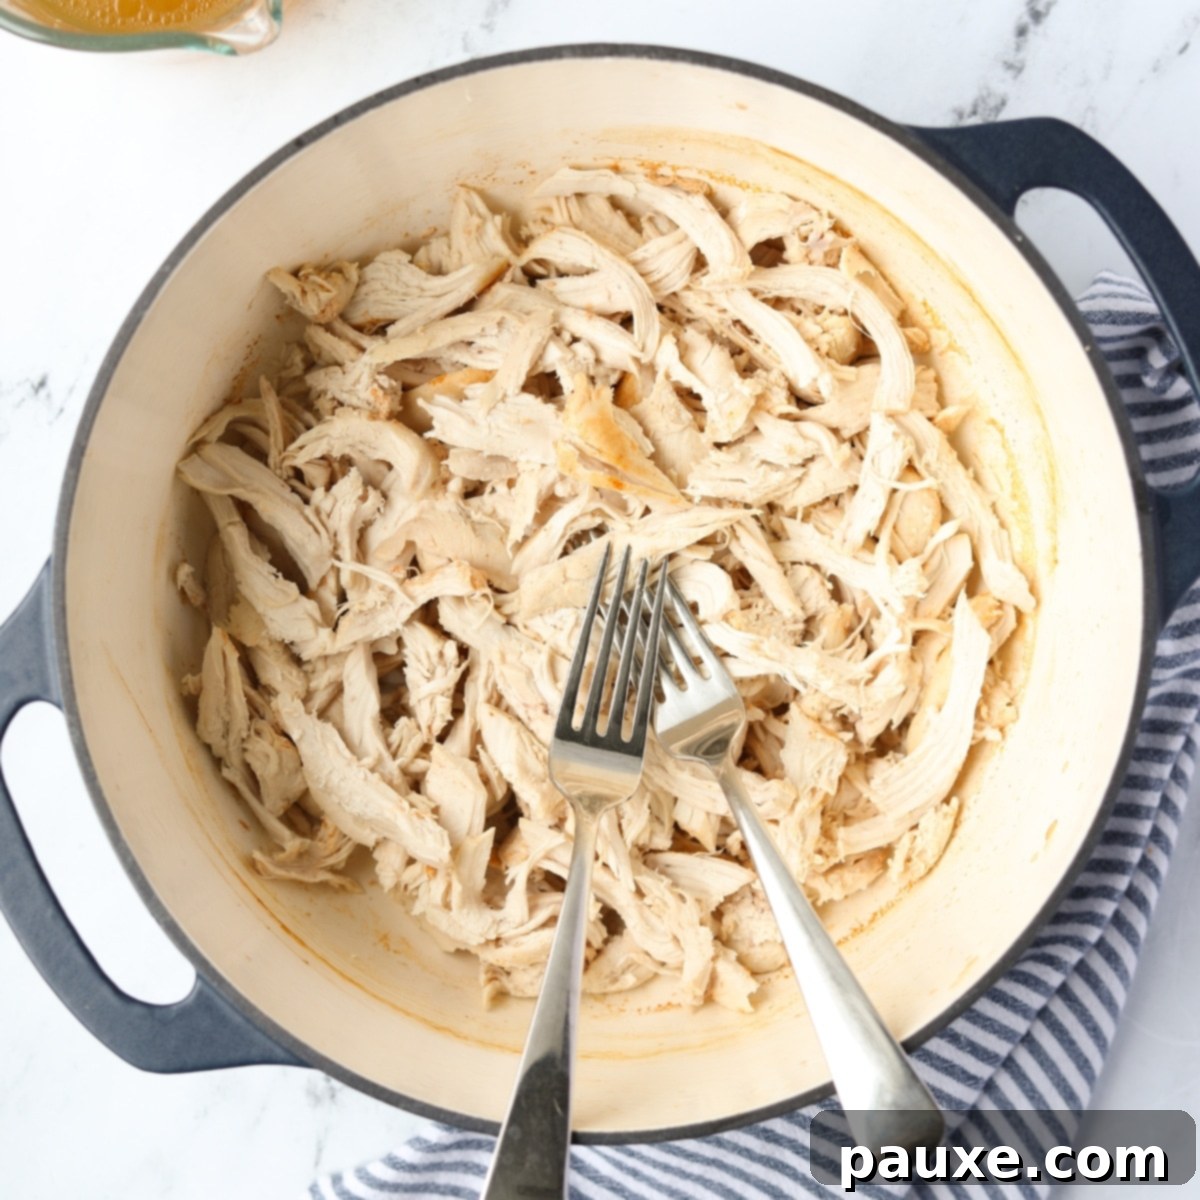
Unlock the secret to consistently perfect, tender, and incredibly juicy shredded chicken with this effortless method using your trusty Dutch Oven. Whether you’re a seasoned home cook or just starting your culinary journey, this recipe is designed to simplify your meal prep and elevate your favorite dishes. Prepare to create perfectly cooked chicken every single time, ready to transform into a myriad of delicious meals.
This foolproof technique works beautifully with both chicken breasts and chicken thighs, offering unparalleled versatility. Say goodbye to dry, overcooked chicken and embrace the succulent results that only a Dutch oven can deliver.
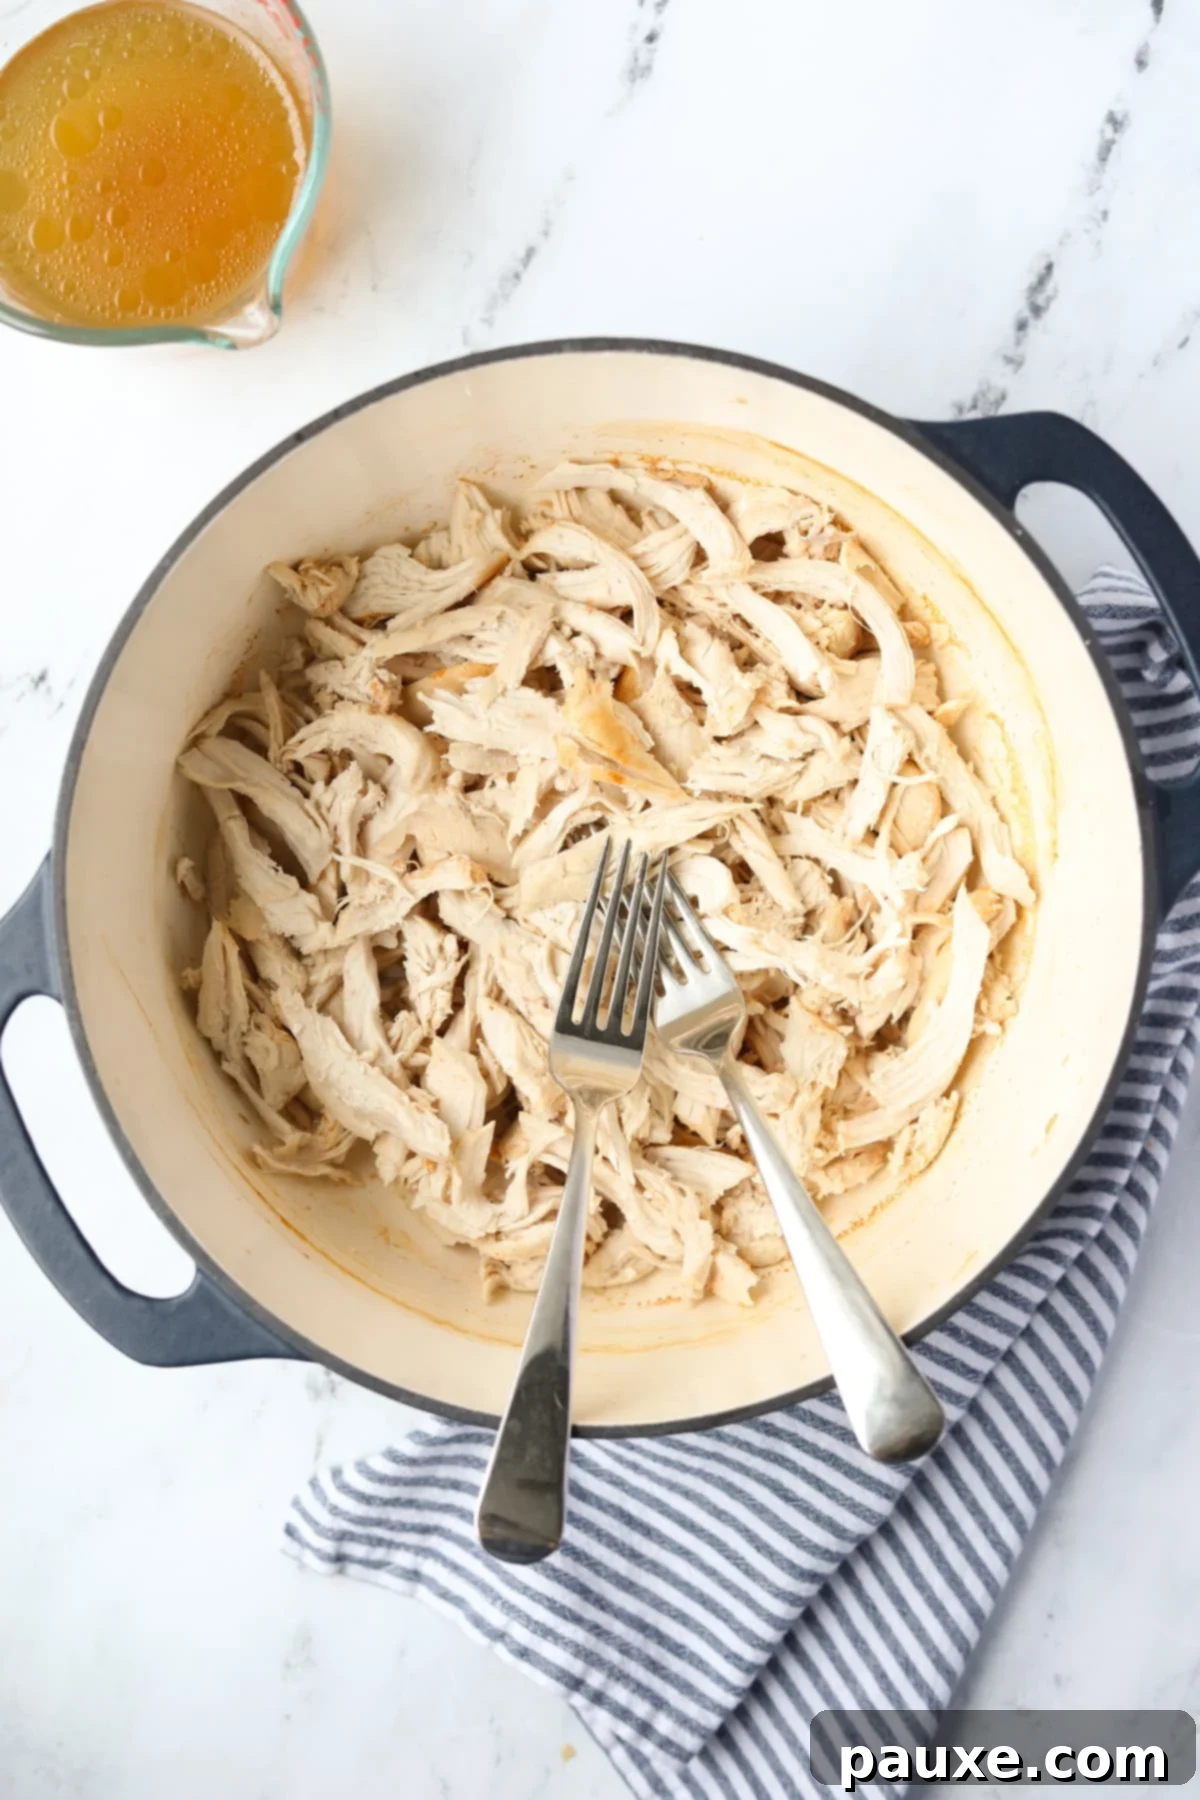
For me, when it comes to preparing batches of shredded chicken that are destined for my most beloved recipes, this Dutch oven method stands out as my undisputed go-to. The magic lies in the Dutch oven itself – its heavy construction and snug-fitting lid create an insulated environment that gently poaches the chicken, effectively shielding it from the harsh, direct heat of the oven. This means minimal risk of overcooking and maximum retention of moisture, resulting in chicken that’s unbelievably tender and bursting with natural juices.
In my experience, there’s simply no better way to cook chicken for versatile applications like vibrant salads, comforting casseroles, hearty baked dips, or even quick weeknight tacos. This recipe keeps it wonderfully simple: just chicken, a touch of broth or water, and your chosen seasonings. That’s right – no need for additional olive oil or excessive fats. The chicken is delicately poached, then easily shredded, providing a clean, flavorful, and incredibly adaptable foundation for countless culinary creations.
Why You’ll Love This Dutch Oven Shredded Chicken
Discover the compelling reasons why this Dutch Oven Shredded Chicken recipe will quickly become a staple in your kitchen:
- Effortlessly Easy: This method for cooking chicken in a Dutch oven is incredibly straightforward and largely hands-off. Once the chicken is in the oven, you’re free to tackle other tasks or simply relax. It’s perfect for busy weeknights or when you need a simple, yet satisfying, protein source without constant attention.
- Remarkably Freezer-Friendly: If you appreciate having ready-to-go meal starters stashed away, this recipe is a dream come true. Cook a large batch, let it cool, and then portion it into freezer bags for future meals. It thaws beautifully, retaining its tender texture and flavor, making last-minute meal preparation a breeze.
- The Ultimate Meal Prep Solution: Whether you’re planning your meals for the week or just need a versatile protein option on standby, this Dutch oven shredded chicken is ideal. It can be added to salads, stirred into rice bowls, layered into casseroles, or incorporated into sandwiches, providing a healthy and delicious base for diverse dishes throughout the week.
- Incredibly Versatile: The beauty of this neutrally seasoned shredded chicken lies in its adaptability. It serves as a blank canvas, allowing you to infuse it with flavors specific to your desired recipe. I frequently use it to prepare creamy chicken salad, or as a quick protein boost for beloved dinner recipes like Poppyseed Chicken or Chicken Divan. The possibilities are truly endless!
- Consistently Tender & Juicy: The heavy cast iron construction of a Dutch oven, combined with the gentle poaching liquid, ensures even heat distribution and locks in moisture. This cooking environment prevents the chicken from drying out, guaranteeing perfectly juicy and tender results every single time, a feat often challenging with other methods.
- Healthy and Lean: By poaching the chicken in broth or water, you eliminate the need for added oils or fats, making this a lean and healthy protein option. It’s a clean base that supports a balanced diet without sacrificing flavor or texture.
Essential Ingredients for Perfect Shredded Chicken
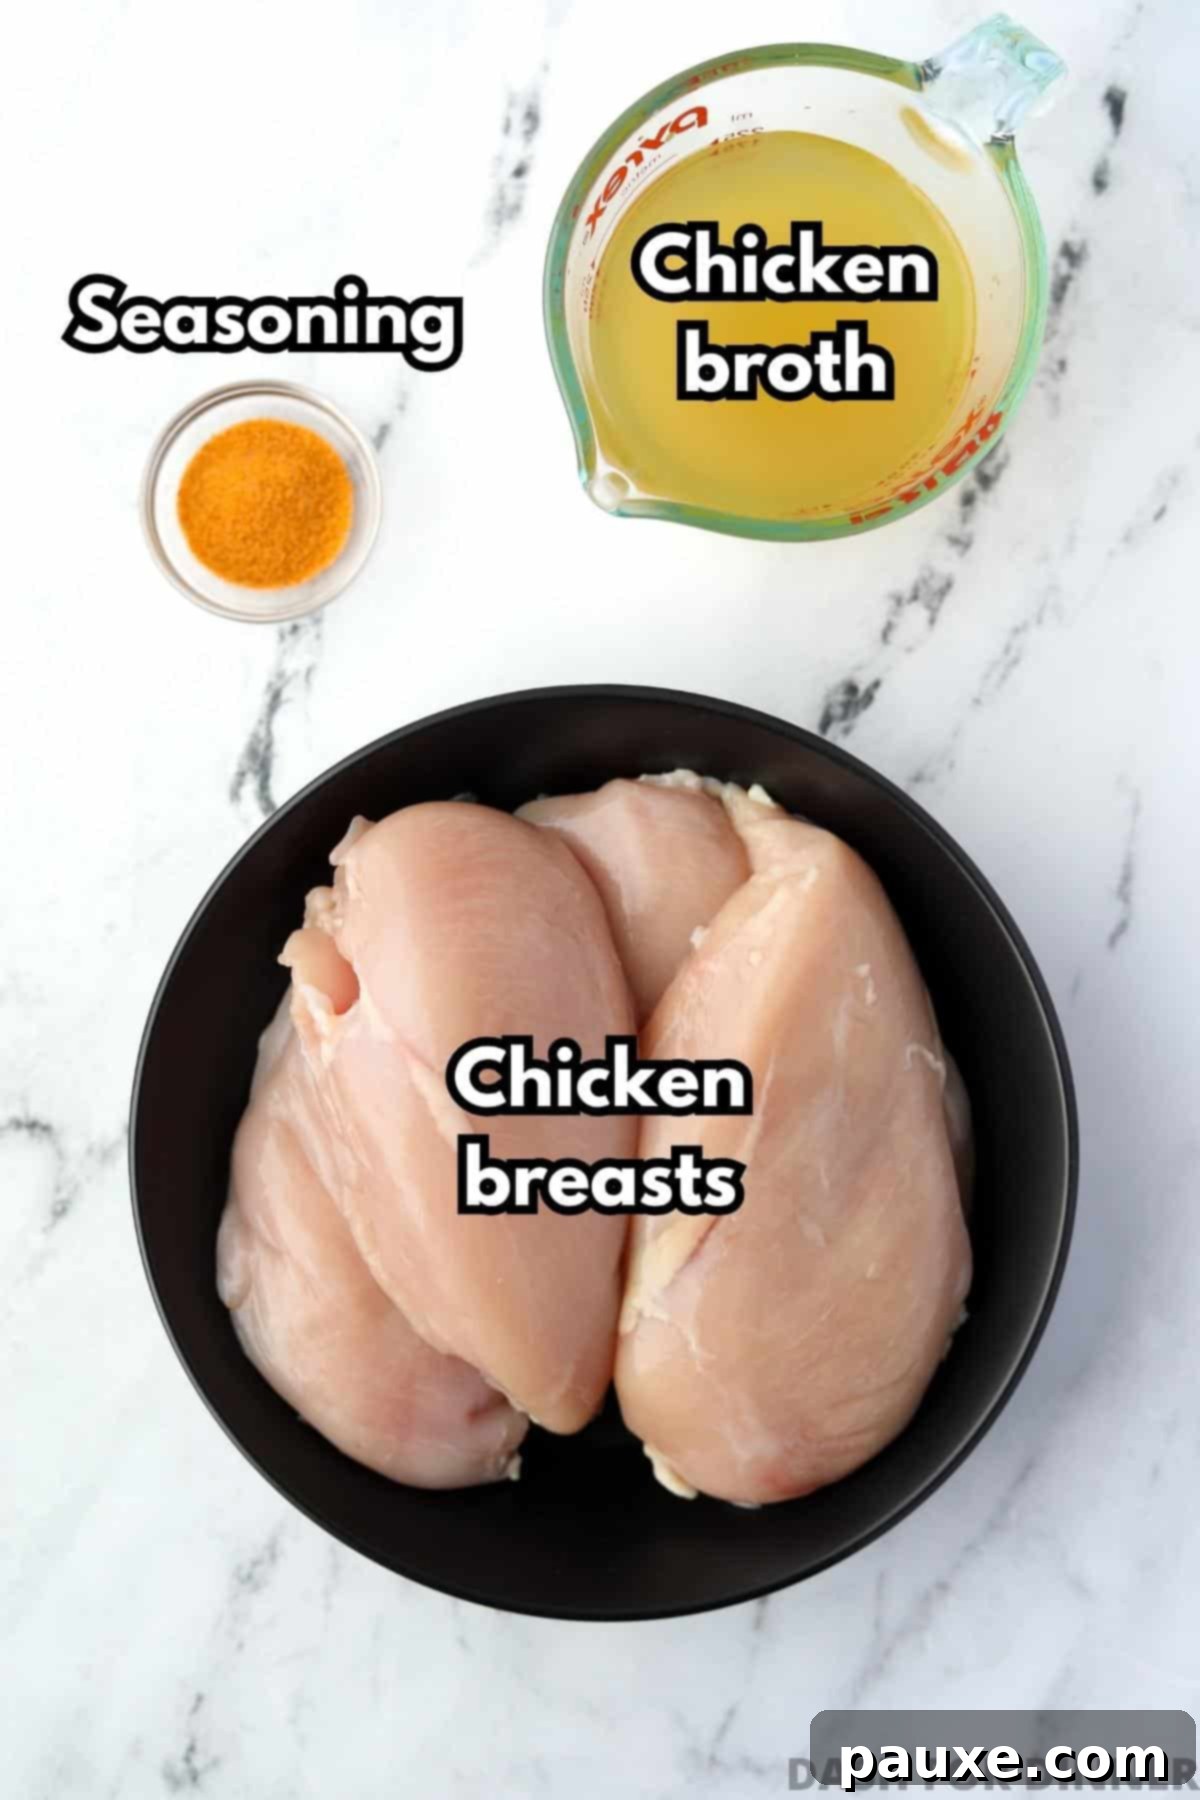
Creating delicious shredded chicken requires just a few simple ingredients. Here’s a closer look at what you’ll need and some tips for choosing the best options:
- Chicken: For optimal results and ease of shredding, I highly recommend using boneless, skinless chicken breasts. They cook evenly and shred into beautiful, consistent pieces. However, if you prefer the richer flavor and slightly higher fat content of dark meat, boneless, skinless chicken thighs are an excellent alternative. For a more varied texture, similar to a rotisserie chicken, you could even combine both breasts and thighs. Feel free to use what best suits your preference and recipe needs.
- Broth (or Water): A good quality liquid is crucial for moisture and flavor. My preferred choice is low-sodium chicken broth (also known as chicken stock), as it infuses the chicken with a delicate savory note without adding excessive salt. If you prefer to use water, that’s perfectly fine! Just remember to be more generous with your seasonings and salt to compensate for the broth’s inherent flavor. You could also experiment with vegetable broth or even a splash of white wine for added depth.
- Seasoning: The goal for this all-purpose shredded chicken is to keep the seasoning relatively neutral, allowing it to integrate seamlessly into a wide range of future recipes. A simple seasoned salt works wonderfully for this. However, don’t hesitate to customize! Consider adding garlic powder, onion powder, paprika, a pinch of black pepper, or your favorite all-purpose blend. If you know exactly how you’ll be using the chicken (e.g., for tacos), you can tailor the seasoning from the start with specific spices like cumin, chili powder, or oregano.
For precise measurements and a comprehensive ingredient list, please refer to the recipe card below.
Essential Equipment for Dutch Oven Shredded Chicken
Having the right tools can make all the difference in achieving perfect shredded chicken. Here’s what you’ll need:
- Dutch Oven: A high-quality cast iron Dutch oven with a tight-fitting lid is the star of this recipe. Its heavy construction provides exceptional insulation, distributing heat evenly and maintaining a consistent temperature. This gentle, consistent heat prevents the chicken from overcooking, keeping it moist and tender. Think of it as an original slow cooker, utilizing the steady heat of your oven. A 5-7 quart Dutch oven is typically ideal for 1.5-2 pounds of chicken.
- For Shredding: The simplest and most traditional way to shred your cooked chicken breasts is by using two ordinary forks, pulling the meat apart against each other. For a significantly faster and less labor-intensive method, especially when dealing with larger batches, a stand mixer fitted with a paddle attachment can shred a full pot of chicken in mere seconds. Just ensure the chicken has cooled slightly before using the mixer.
- Digital Meat Thermometer: For absolute precision and food safety, a reliable digital thermometer is indispensable. It’s the most foolproof way to ensure your chicken is cooked through to a safe internal temperature (165ºF or 75ºC) without being overcooked and dry. This magnetic model is fantastic for keeping handy on your fridge or oven.
How to Make Tender Shredded Chicken in a Dutch Oven
Follow these simple steps to achieve perfectly shredded chicken:
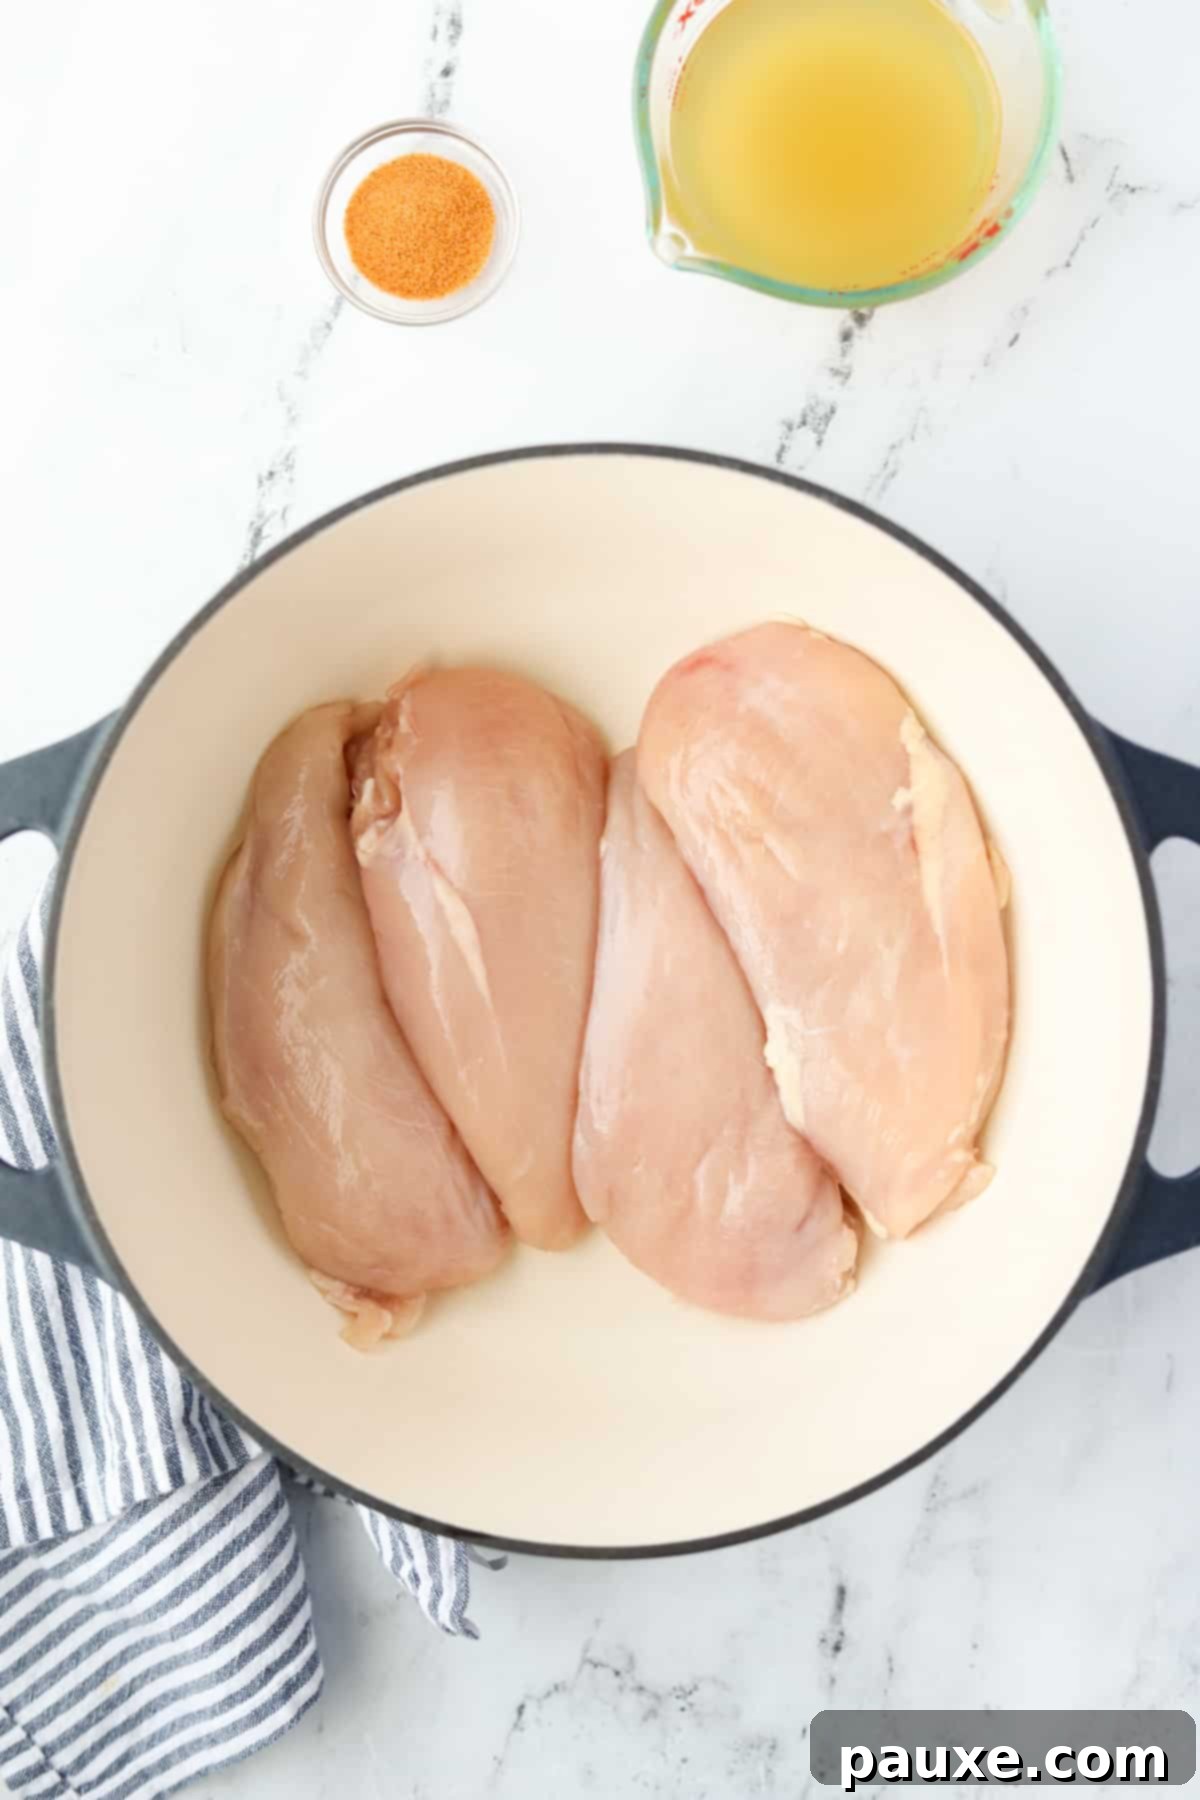
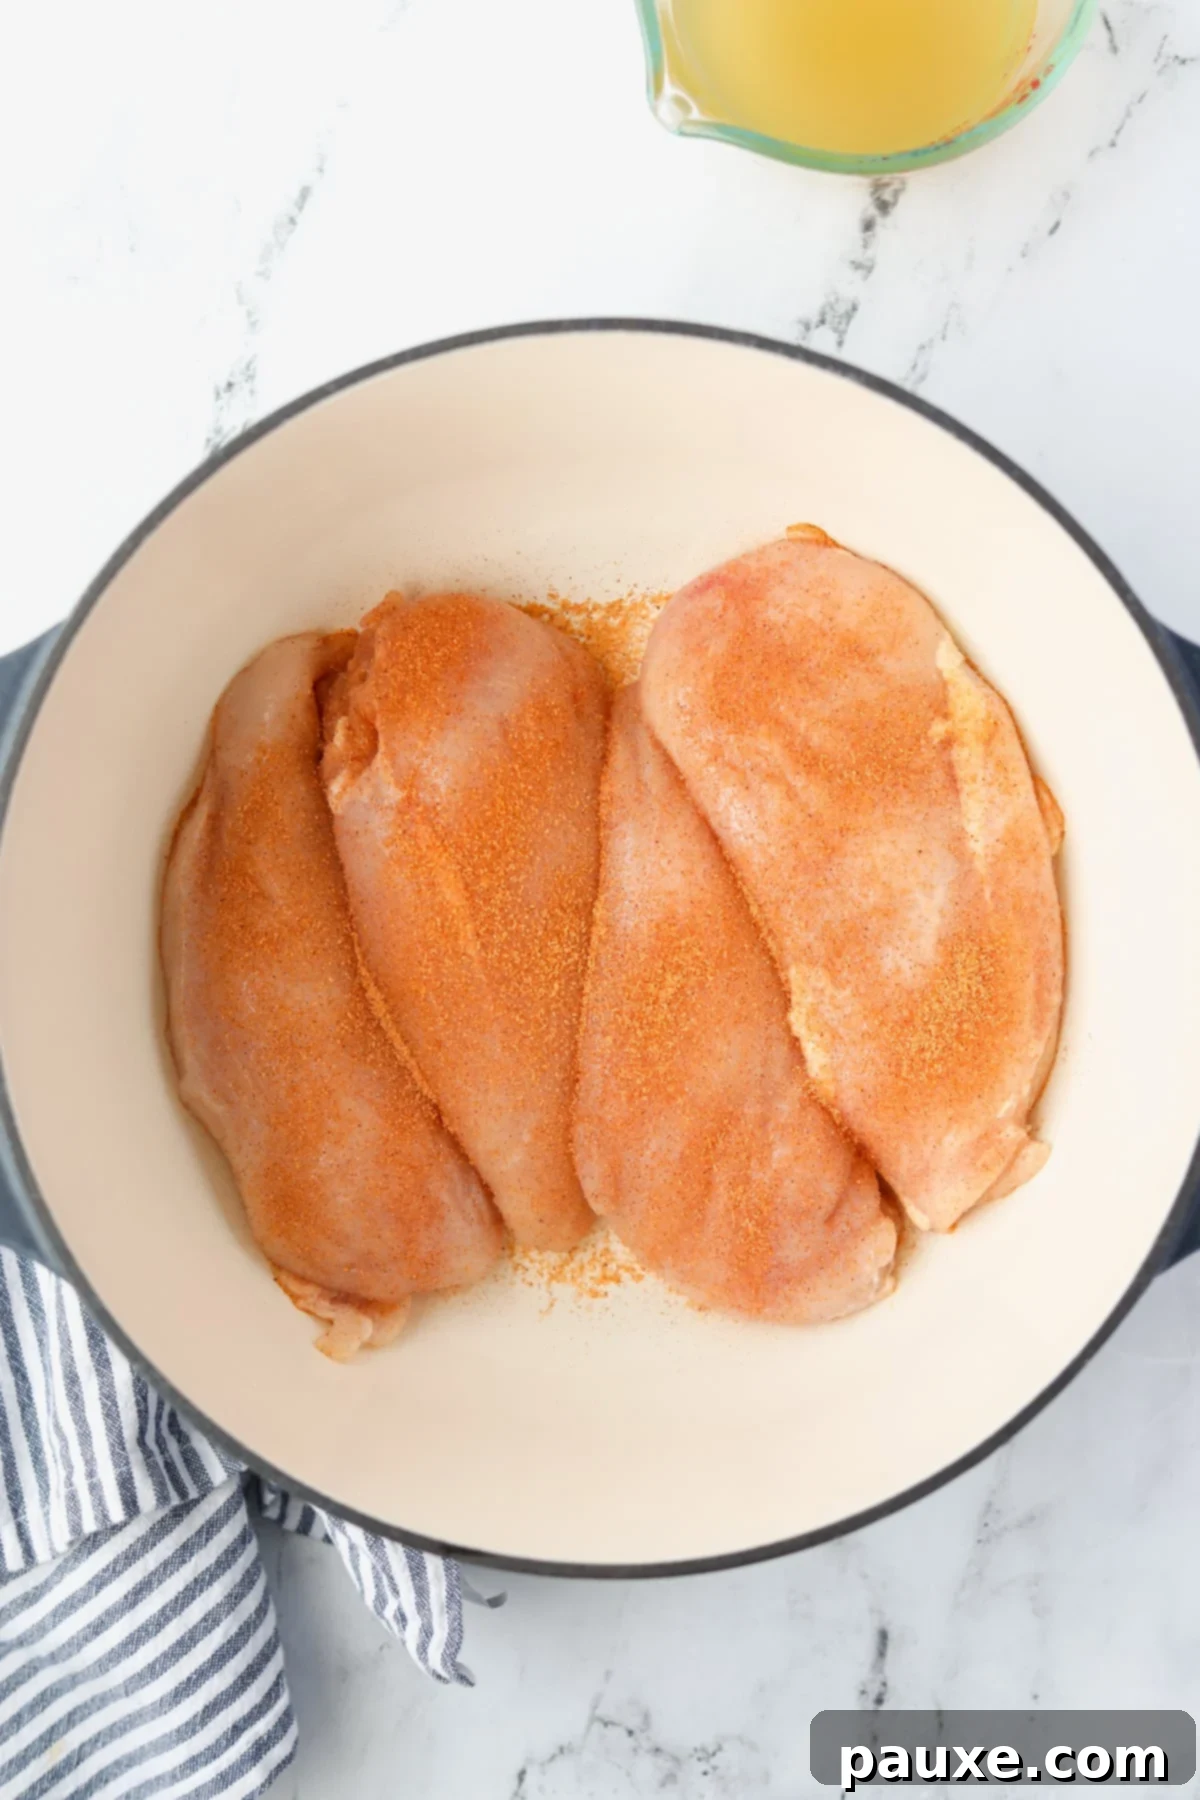
Step One: Prepare the Chicken. Begin by preheating your oven to 400ºF (205ºC). Arrange your boneless, skinless chicken breasts (or thighs) in a single, even layer at the bottom of your heavy-bottomed Dutch oven. Ensure not to overcrowd the pot, allowing for even cooking. For about 1.5 to 2 pounds of chicken, a 5-6 quart Dutch oven is usually perfect.
Step Two: Season Generously. Evenly sprinkle your chosen seasonings over the surface of the chicken. As mentioned, a simple seasoned salt is great for versatility, but feel free to add garlic powder, onion powder, paprika, or any blend that complements your intended use for the shredded chicken. Don’t be shy – this is where the base flavor begins!
Cooking the Chicken to Perfection
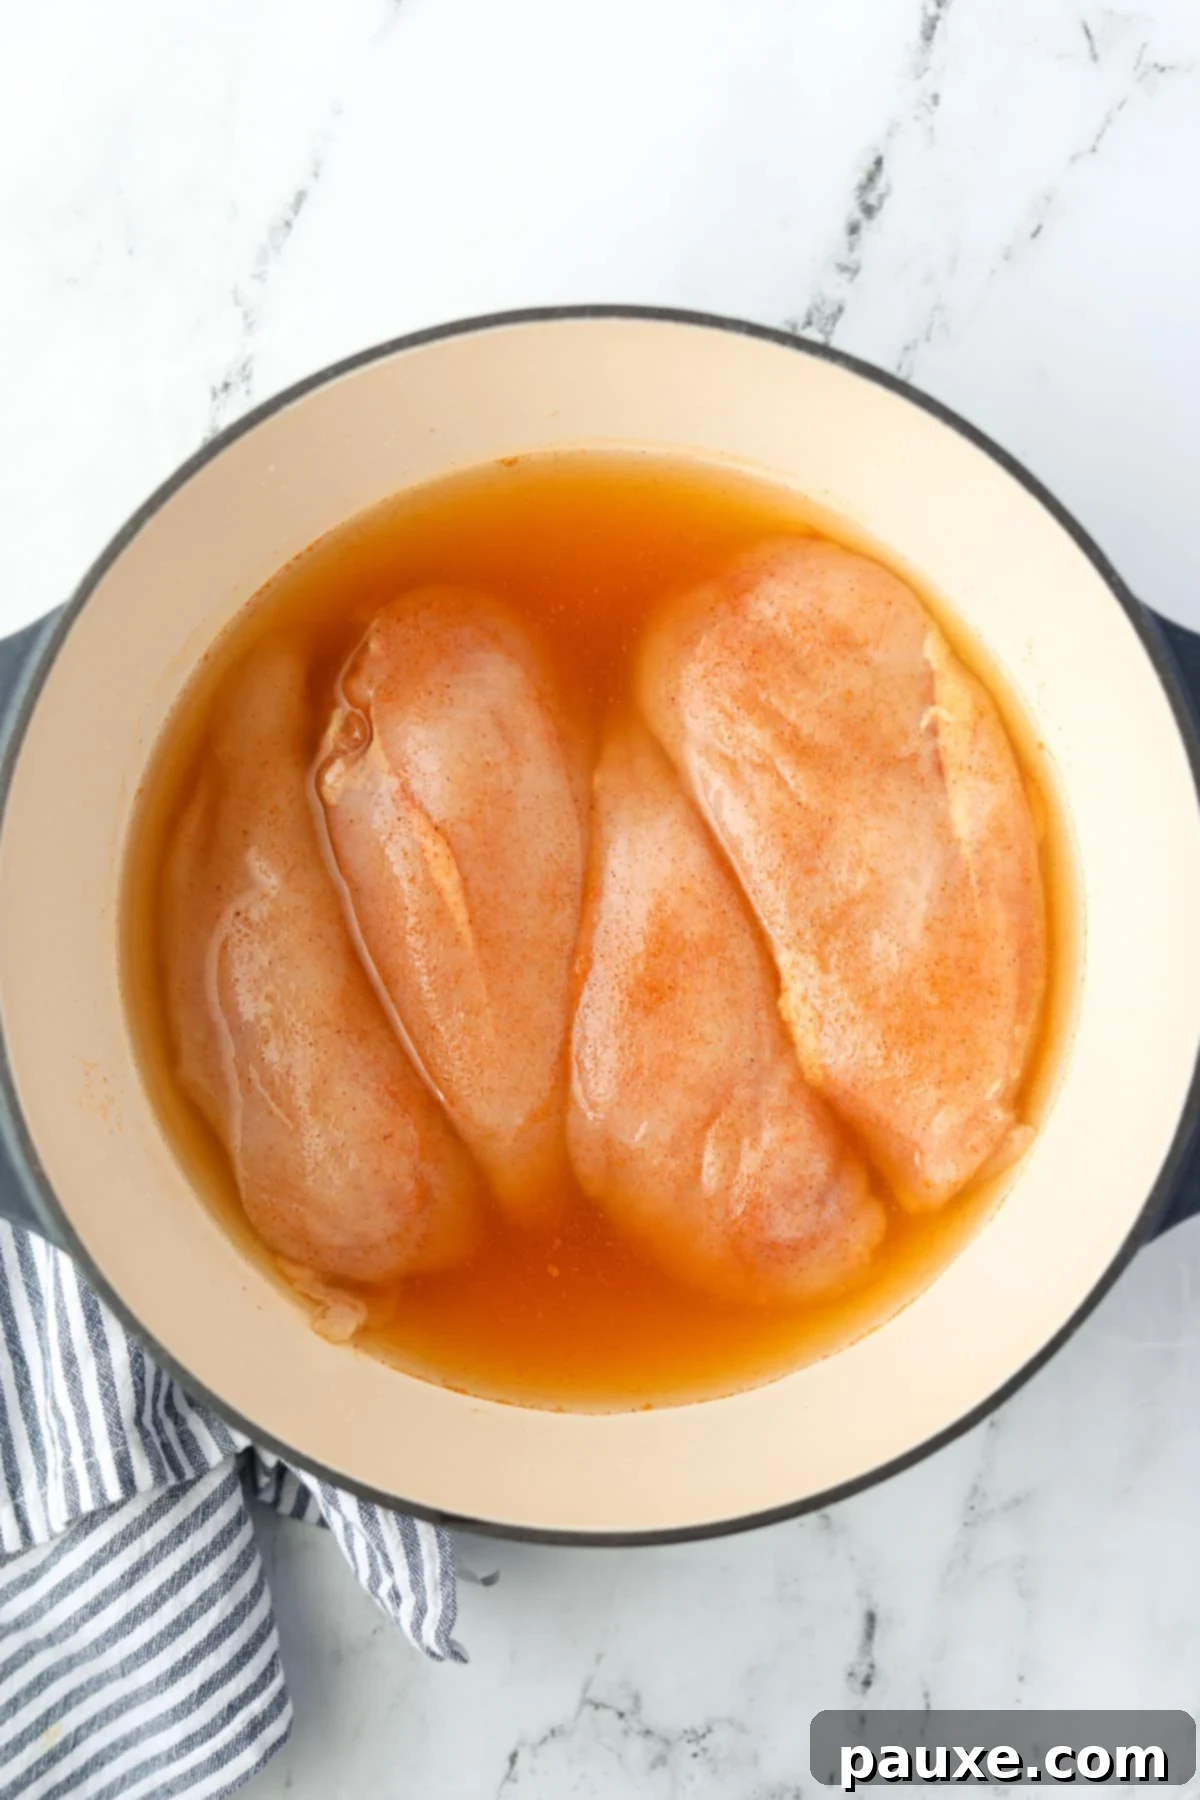
Step Three: Add the Liquid. Carefully pour in 1 cup of low-sodium chicken broth, beef broth, or water. The liquid should cover about one-third to half of the chicken pieces. This liquid is essential for poaching the chicken gently and creating that incredibly moist texture. If using water, remember to increase your overall seasoning to ensure a flavorful result.
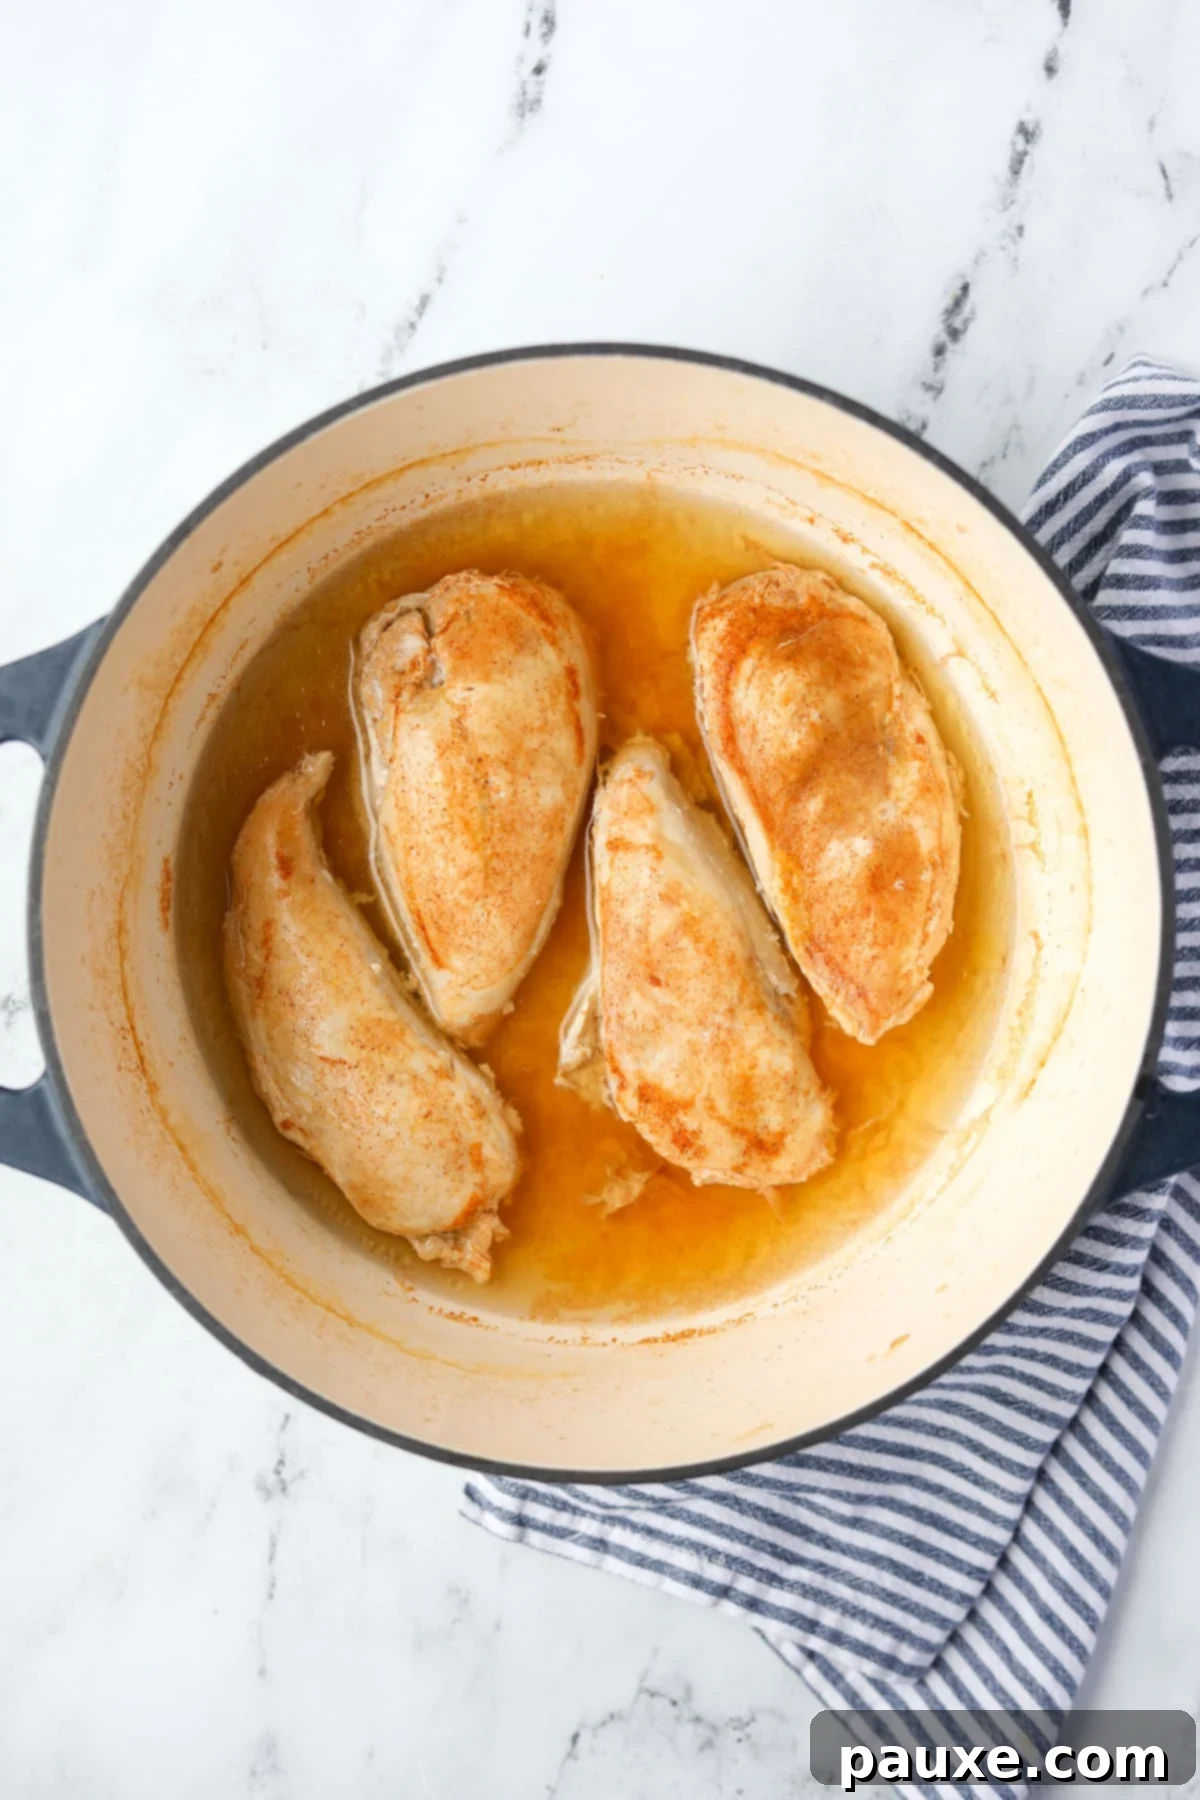
Step Four: Bake Until Done. Securely place the lid on your Dutch oven and transfer it to the preheated 400ºF (205ºC) oven. Bake for approximately 30-40 minutes. The exact cooking time will depend on the thickness of your chicken pieces. To ensure proper doneness and prevent overcooking, always verify that the thickest portion of each piece of chicken reaches a minimum internal temperature of 165ºF (75ºC) using your digital meat thermometer.
Shredding the Cooked Chicken
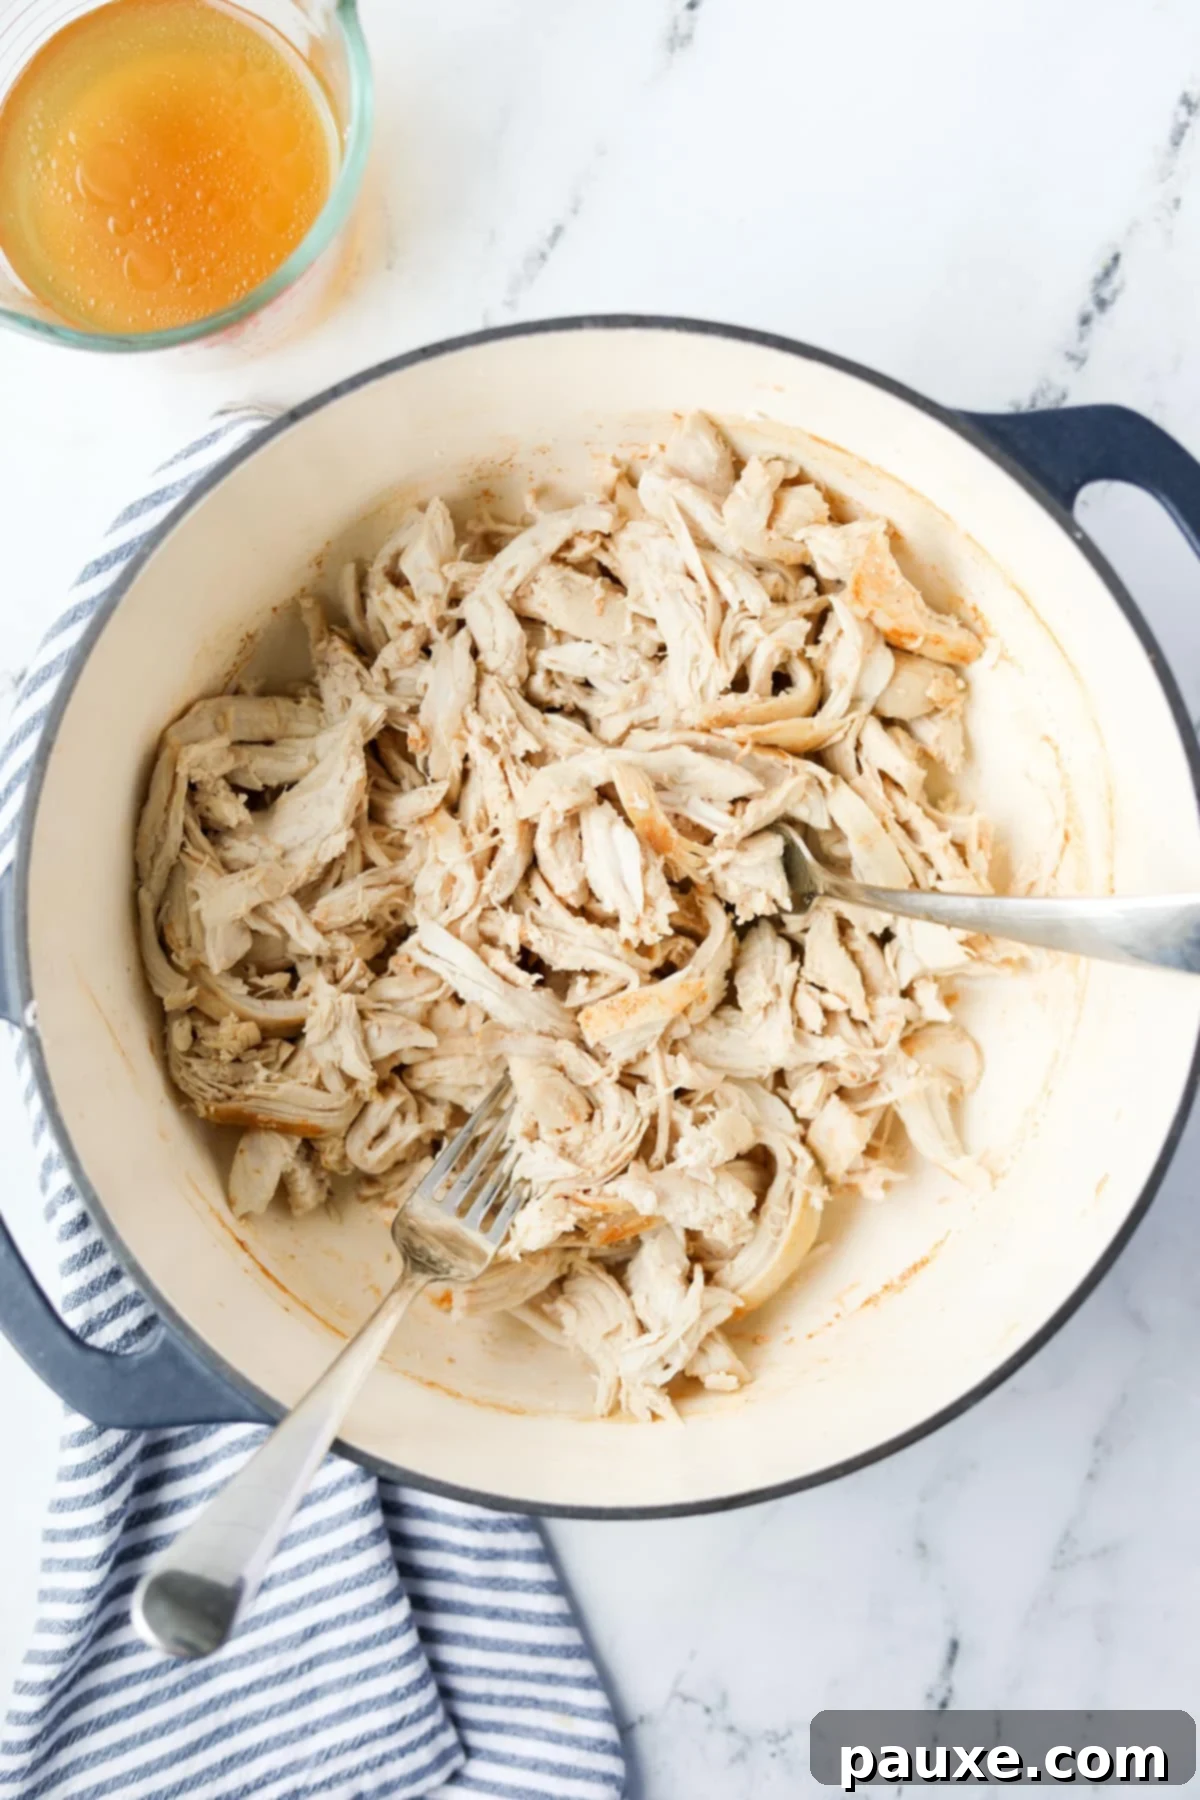
Step Five: Cool and Shred. Once the chicken is cooked through, carefully remove the Dutch oven from the oven. Using tongs, transfer the chicken breasts to a plate or shallow bowl and allow them to cool down until they are no longer steaming hot but still comfortably warm to handle. This resting period allows the juices to redistribute throughout the meat, resulting in even juicier chicken. Drain off the cooking liquid into a separate container (don’t discard it – it’s full of flavor!).
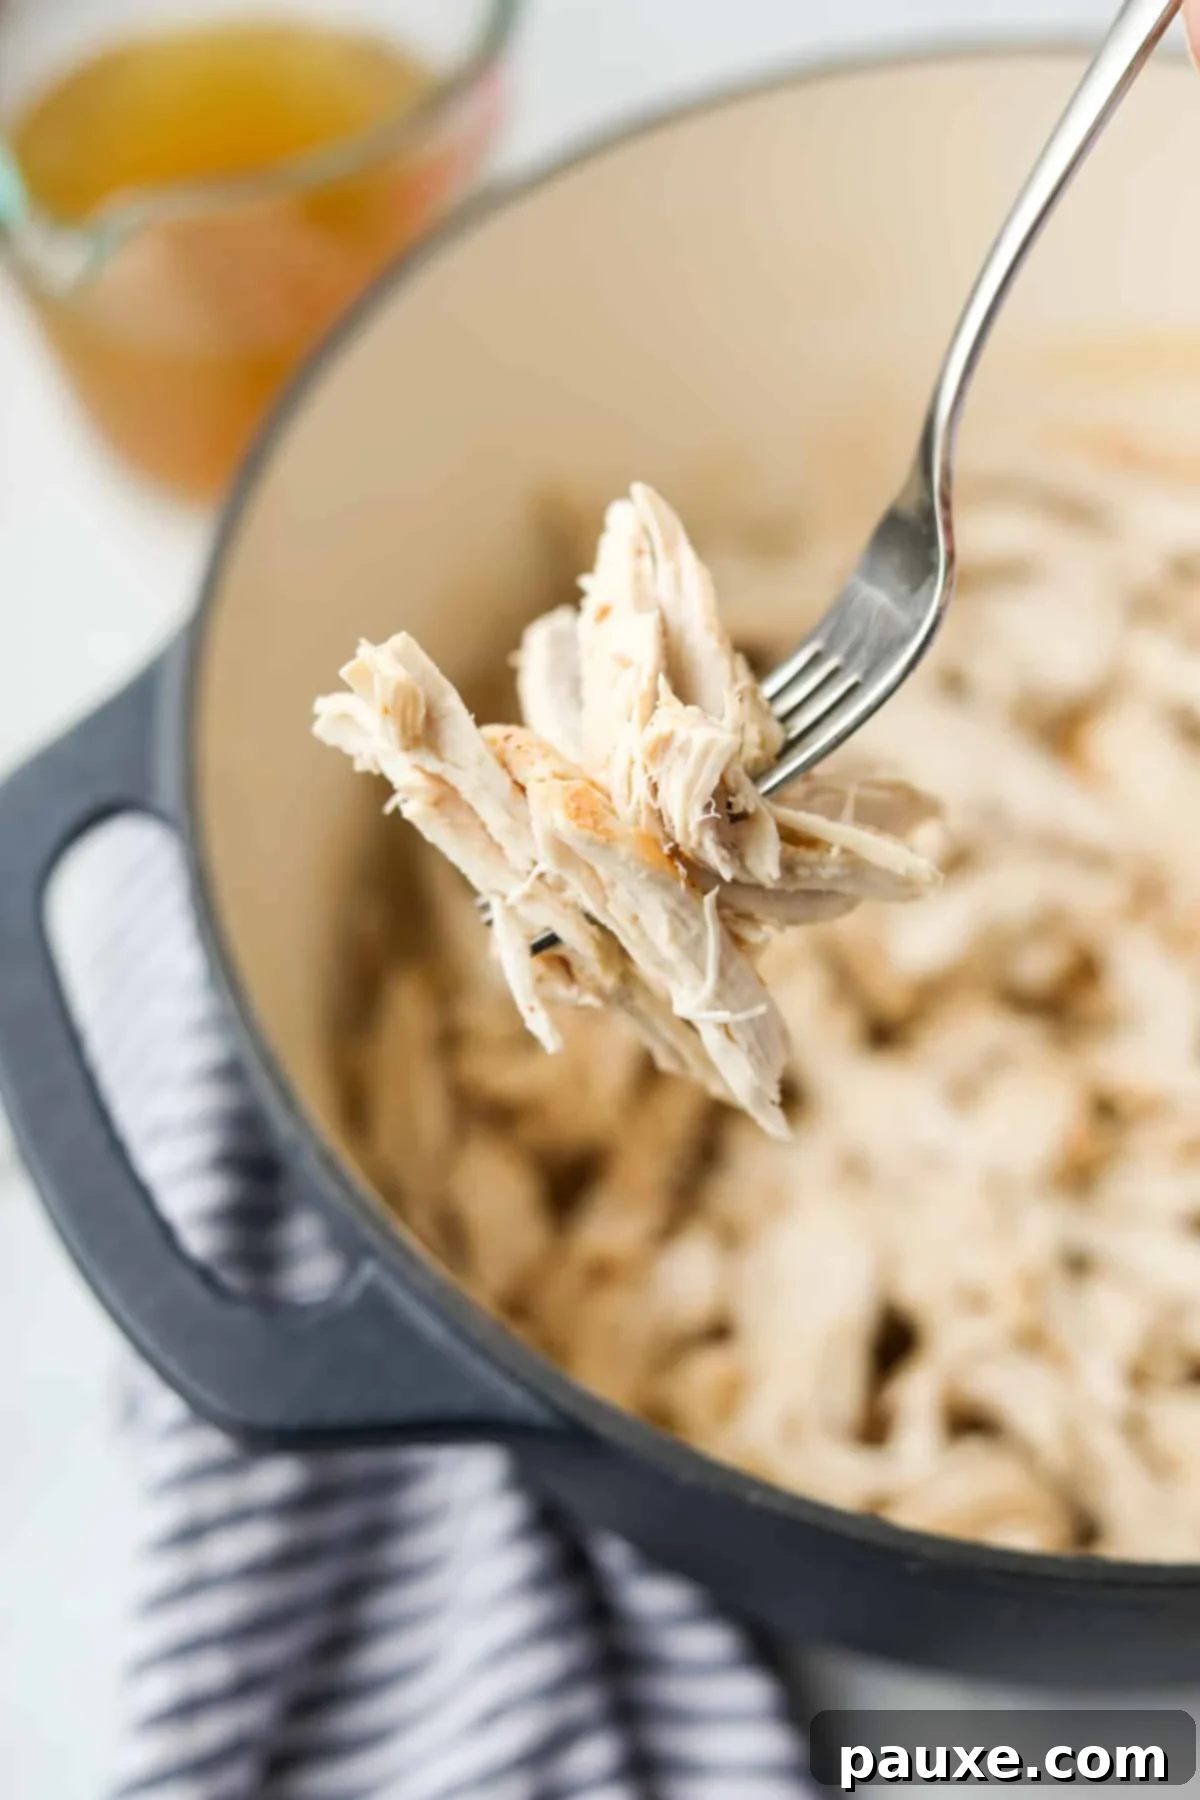
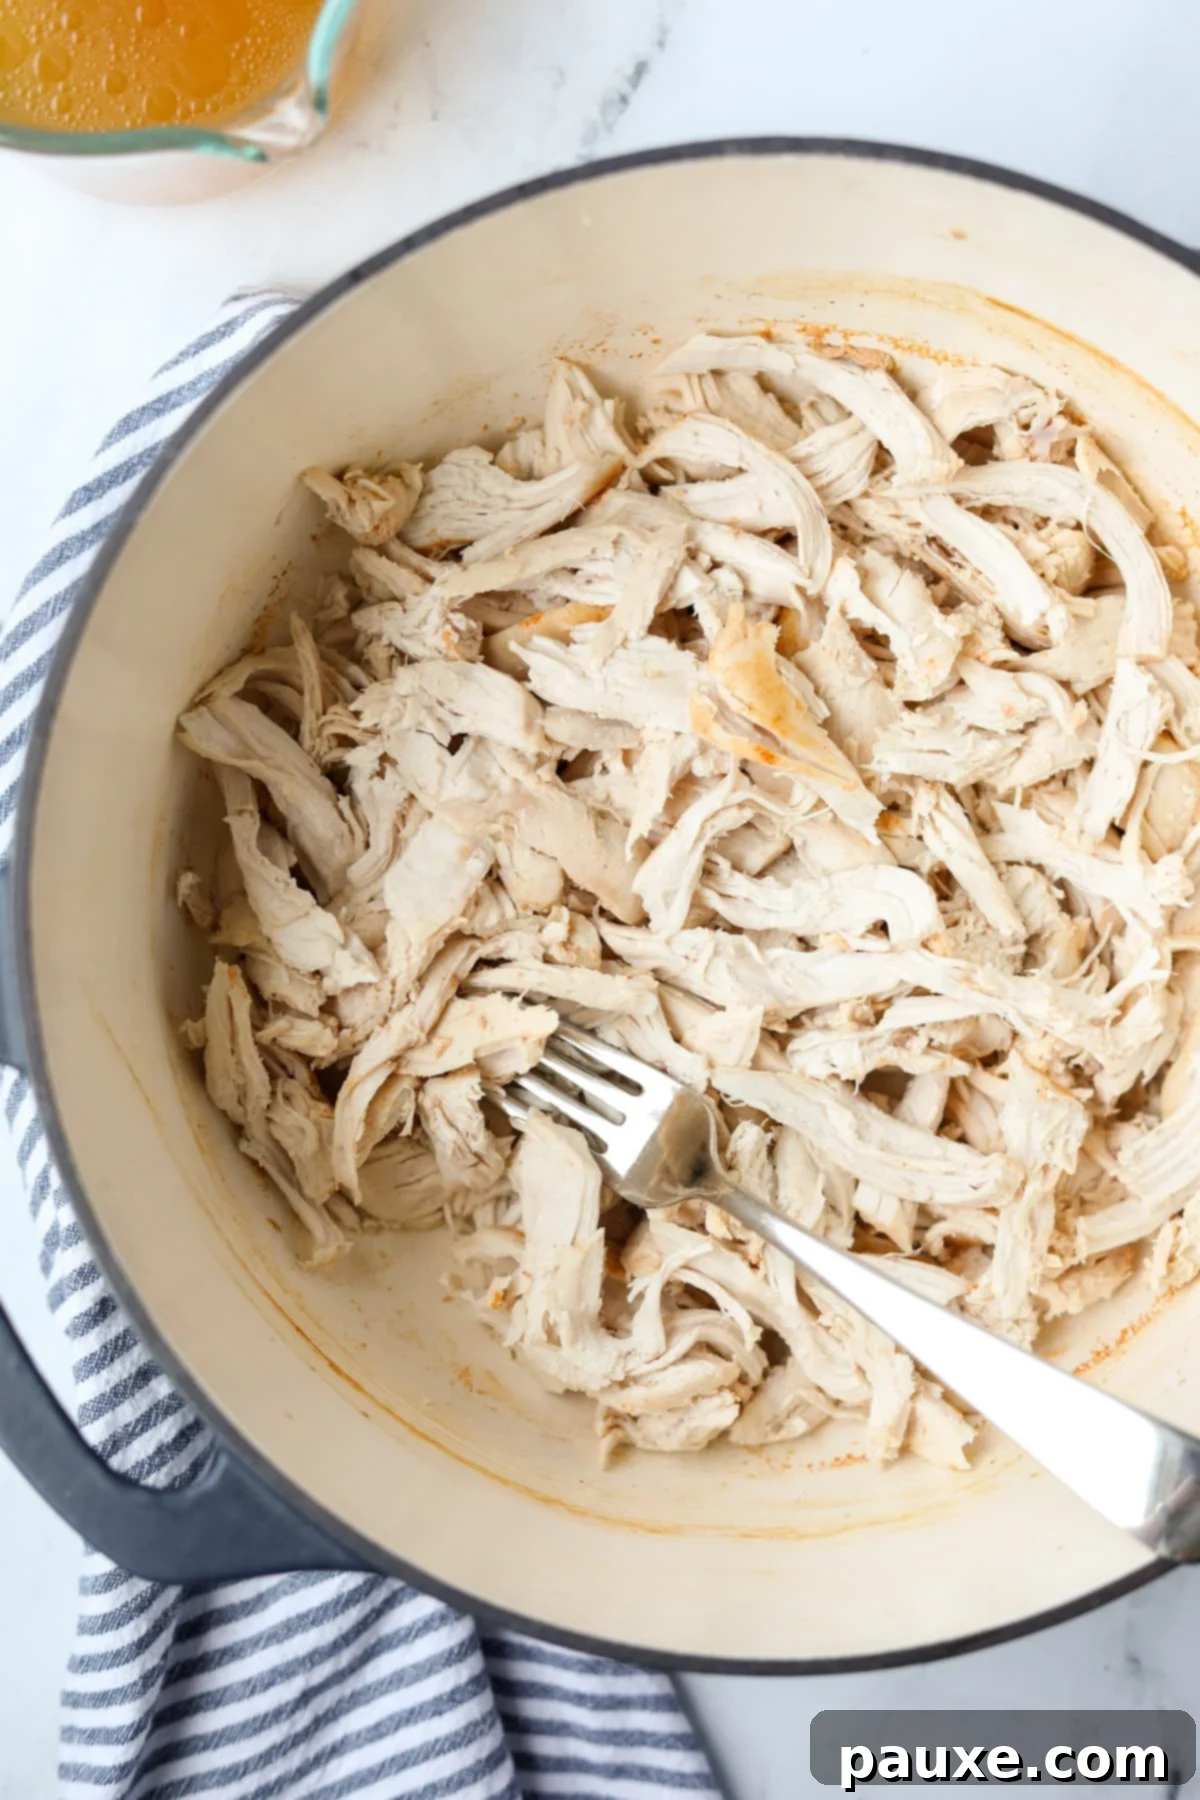
Now it’s time to shred! You can easily shred the chicken using two forks, pulling the meat apart. For a quicker option, especially with a larger batch, place the slightly cooled chicken into a stand mixer fitted with the paddle attachment and mix on low speed for just 20-30 seconds until perfectly shredded.
After shredding, if the chicken appears a bit dry for your liking, add a small amount of the reserved cooking liquid back to moisten it. Start with a tablespoon or two at a time, mixing it in until you reach your desired consistency. Be careful not to add too much, as you don’t want the chicken to become watery.
Storing and Freezing Shredded Chicken for Later
Proper storage is key to enjoying your delicious shredded chicken for days or even months:
Refrigeration: Transfer any leftover shredded chicken to an airtight container. It will keep well in the refrigerator for up to 3-4 days. This makes it incredibly convenient for quick meals throughout the week.
Freezing: To extend the shelf life significantly, allow the shredded chicken to cool completely to room temperature first. Then, portion it into freezer-safe bags (I particularly like these reusable ones) or containers. Press out as much air as possible from the bags to prevent freezer burn. Label with the date and freeze for up to 3 months. For best results, thaw frozen shredded chicken in the refrigerator overnight before using it in your favorite recipes.
Alternative Cooking Methods: Slow Cooker Shredded Chicken
While the Dutch oven provides superb results, you can also make tender shredded chicken using a slow cooker, a fantastic option for even more hands-off cooking:
- Place your boneless, skinless chicken breasts or thighs in a single layer at the bottom of your slow cooker crock.
- Sprinkle generously with seasoned salt or your preferred blend of seasonings, ensuring each piece is well-coated.
- Pour in 1 cup of chicken broth, beef broth, or water. The liquid should partially cover the chicken.
- Secure the lid on the slow cooker.
- Cook on “HIGH” for 2-3 hours, or on “LOW” for 3-5 hours. The chicken is ready when it can be easily shredded with a fork and reaches an internal temperature of 165ºF (75ºC) in its thickest part.
- Carefully remove the cooked chicken breasts and place them on a plate or in a bowl to cool slightly.
- Shred the chicken using two forks or a stand mixer with a paddle attachment.
- If needed, add a small amount of the reserved cooking liquid back to the shredded chicken to keep it moist.
- Use immediately in your favorite recipes, or cool and store for later use in the fridge or freezer.
Alternative Cooking Methods: Instant Pot Shredded Chicken
For a super-fast approach to shredded chicken, the Instant Pot is an excellent choice:
- Place your boneless, skinless chicken breasts or thighs in an even layer at the bottom of the Instant Pot’s inner insert (suitable for 6 or 8-quart models).
- Season the chicken generously with seasoned salt or your desired blend of herbs and spices.
- Pour in 1 cup of chicken broth (if using an 8-quart Instant Pot, you might want to use 1 ½ cups for optimal liquid coverage).
- Secure the lid on the Instant Pot and ensure the steam release valve is set to the “sealing” position.
- Cook on manual pressure (or ‘Pressure Cook’) for 10 minutes.
- Once the cooking time is complete, allow the Instant Pot to perform a 5-minute natural pressure release (NPR). This means simply letting the pot sit undisturbed for 5 minutes after it beeps.
- After the 5-minute NPR, carefully flip the steam release valve to the “venting” position to perform a quick pressure release (QPR). Stand back from the valve as steam will rapidly escape.
- Once the float valve drops, indicating all pressure has been released, carefully remove the lid.
- Use tongs to transfer the cooked chicken from the Instant Pot to a bowl. Shred it immediately using two forks or a stand mixer.
- Add a small amount of the flavorful cooking liquid back to the shredded chicken as needed to keep it moist and tender.
- Your Instant Pot shredded chicken is now ready to be used in any recipe or stored for later.
Favorite Ways to Use Versatile Shredded Chicken
The beauty of this Dutch oven shredded chicken lies in its incredible versatility. Here are just a few ideas to get you started:
- Classic Chicken Salad: This is a superb base for a creamy and satisfying chicken salad. Simply mix your shredded chicken with mayonnaise, finely chopped celery, red onion, a dash of Dijon mustard, and your favorite seasonings. Serve it on fresh bread for sandwiches, stuffed into lettuce cups for a low-carb option, or with crackers. For a delightful twist, add some halved green or red grapes for a burst of sweetness.
- Tangy BBQ Chicken: Transform your shredded chicken by tossing it generously with your favorite BBQ sauce. Add a touch of chili powder or smoked paprika for extra depth. Serve this smoky, sweet chicken on soft hamburger buns with a side of creamy coleslaw for a casual yet delicious meal. It’s also fantastic over rice or baked potatoes.
- Flavorful Chicken Tacos: Season the chicken with your preferred taco seasoning blend (try my homemade taco seasoning for authentic flavor), a little water or broth, and a few dashes of hot sauce for a kick. Pile it into warm tortillas with fresh salsa, sour cream, shredded cheese, chopped lettuce, and all your favorite taco fixings. Perfect for a fun taco night!
- Irresistible Baked Dips: Shredded chicken is the star of many warm, cheesy baked dips. I often freeze my cooked chicken in convenient 2-cup portions, making it quick and easy to thaw and assemble our favorite creamy buffalo chicken dip for parties or a cozy night in. Consider it for artichoke chicken dip or other hot appetizer recipes.
- Comforting Casseroles: This tender chicken is a must-have for classic comfort food casseroles. I always ensure I have at least one bag of shredded chicken readily available in the freezer to whip up a quick batch of family favorites like Chicken Divan, Poppyseed Chicken casserole, or a creamy chicken and rice bake.
- Hearty Soups and Stews: Add shredded chicken directly to simmering soups or stews for an instant protein boost. It’s excellent in chicken noodle soup, chicken tortilla soup, or a creamy chicken and vegetable stew.
- Quick Pizzas and Quesadillas: Sprinkle shredded chicken over homemade pizzas, flatbreads, or quesadillas for a filling and flavorful meal. Pair it with your favorite cheese, vegetables, and sauces.
Pro Tips & Flavor Enhancers for Shredded Chicken
Take your shredded chicken to the next level with these expert tips:
Customize with Herbs and Spices: While this recipe is intentionally designed for a neutral base, don’t hesitate to infuse it with specific flavors if you know the final dish. For Italian-inspired meals, add dried oregano, basil, and a pinch of red pepper flakes. For a Mediterranean touch, incorporate dill, lemon zest, and a hint of sumac. Cajun seasoning, ranch seasoning, or even curry powder can completely change the profile.
Boost Flavor with Aromatics: To truly elevate the chicken and enrich the cooking liquid, consider adding aromatic vegetables directly to the Dutch oven with the chicken. A quartered white onion, a few stalks of celery, some carrots, or even a couple of bay leaves will impart wonderful depth and complexity. Garlic cloves, smashed and added to the pot, are also a fantastic addition.
Repurpose the Leftover Liquid: This is a crucial tip! The broth left in the Dutch oven after cooking the chicken is liquid gold. It’s infused with chicken flavor and any seasonings you added. Do not throw it out! Strain it and use this flavorful broth as a base for soups, gravies, sauces, risottos, or as a flavorful liquid for cooking grains like rice or quinoa. Store it in an airtight container in the fridge or freeze it for later use.
Don’t Overcook: The Dutch oven method helps prevent overcooking, but still rely on your thermometer. Chicken breasts can go from juicy to dry very quickly once they pass 165°F (75°C). Remove the chicken as soon as it reaches the target temperature.
Resting is Key: Allowing the chicken to rest for 5-10 minutes after cooking (before shredding) is vital. This allows the juices to redistribute throughout the meat, ensuring every bite is moist and flavorful.
If you loved this recipe for Dutch Oven Shredded Chicken, I would be thrilled to hear about it! Please consider leaving a 5-star review in the recipe card below or sharing your feedback in the comments. You can also tag me on Instagram @dashfordinner to show off your delicious creations!

Dutch Oven Shredded Chicken
Print Recipe
Pin Recipe
Dinner
American
5 minutes
40 minutes
15 minutes
1 hour
4
267
kcal
Dorothy Bigelow
Equipment
- Dutch oven
- Digital Meat Thermometer
- Two forks or Stand Mixer with Paddle Attachment
Ingredients
-
4
boneless, skinless chicken breasts
(approx. 1 ½ – 2 pounds) -
1 cup
low-sodium chicken broth
(or water, see notes*) -
Seasonings
(to taste**, e.g., seasoned salt, garlic powder, onion powder)
Instructions
- Preheat the oven to 400 °F (205ºC).
- Place the chicken breasts in the bottom of an enameled Dutch oven in an even layer. Season to taste with your chosen spices.

- Pour in the chicken broth (or water with additional seasoning*) over the chicken. Place the lid securely on the pot.

- Transfer the Dutch oven to the preheated oven and bake for 30-40 minutes. Cook until the chicken reaches a minimum internal temperature of 165ºF (75ºC) in its thickest parts, verified with a digital meat thermometer.

- Once cooked, carefully remove the chicken breasts from the Dutch oven using tongs and place them on a clean plate to cool. Reserve the cooking liquid.
- Allow the chicken to cool for about 10-15 minutes, or until it’s comfortable to handle. Then, shred the chicken using two forks or a stand mixer with a paddle attachment.

- If the shredded chicken appears dry, gradually add a small amount of the reserved broth back, mixing until it reaches your desired moistness.
- Use your freshly shredded chicken in your favorite recipes immediately, or cool completely before storing for later use.
Did you try this recipe?
Tag me at @dashfordinner and share your photos!
Notes
*If using water: You’ll definitely want to make sure to season the chicken breast well. I recommend adding extra seasoned salt, garlic powder, onion powder, paprika, etc., to flavor the chicken breasts, as water does not impart flavor like broth.
**Seasoning: This recipe is kept simple to allow the shredded chicken to be versatile. If you know what recipe you’ll be using the chicken in, season it to complement that dish. Taco seasoning, Cajun seasoning, ranch seasoning, etc., are all great options, as well as standards like garlic powder, onion powder, paprika, cumin, and black pepper. I typically use 1 ½ teaspoons of seasoned salt for a neutral base.
Leftover broth: Use this extra flavorful broth as an addition to soups, gravies, sauces, or anywhere you would typically use chicken broth. It adds a delicious depth of flavor.
Slow cooker: Cook on “HIGH” for 2-3 hours, or on “LOW” for 3-4 hours, until the chicken shreds easily.
Instant Pot: Cook on manual pressure for 10 minutes, followed by a 5-minute natural pressure release. After 5 minutes, quick pressure release any remaining pressure by flipping the valve to “venting.”
Nutrition
Calories:
267
kcal
|
Carbohydrates:
1
g
|
Protein:
49
g
|
Fat:
6
g
|
Saturated Fat:
1
g
|
Polyunsaturated Fat:
1
g
|
Monounsaturated Fat:
2
g
|
Trans Fat:
0.03
g
|
Cholesterol:
145
mg
|
Sodium:
280
mg
|
Potassium:
887
mg
|
Sugar:
0.1
g
|
Vitamin A:
68
IU
|
Vitamin C:
3
mg
|
Calcium:
14
mg
|
Iron:
1
mg
Please note that some of my blog posts here at Dash for Dinner may contain affiliate links. If you make a purchase through these links, I will get a small commission at no additional cost to you. Please see my Disclaimer for more information.
