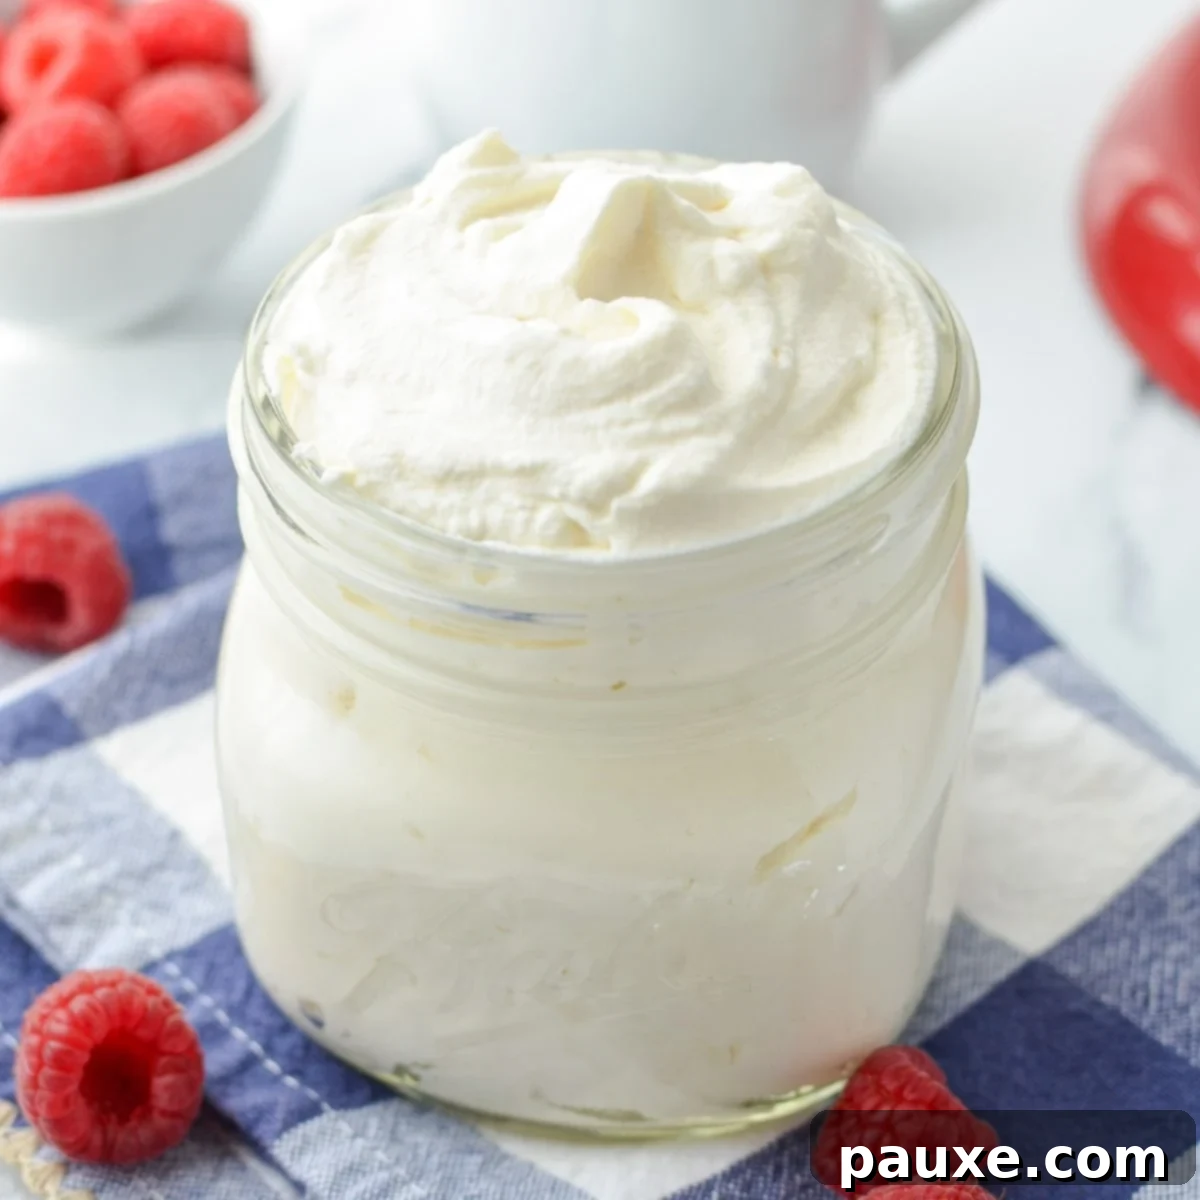
The Ultimate Guide to Homemade Whipped Cream: Easy, Fluffy & Flavorful
Discover the simple secret to creating unbelievably light, airy, and luscious homemade whipped cream right in your own kitchen. Whether you’re a seasoned baker or just starting your culinary journey, this foolproof recipe will transform just three basic ingredients into a pillowy topping perfect for an endless array of desserts and beverages. Imagine dolloping rich, vanilla-scented clouds onto your hot chocolate, fresh fruit, strawberry shortcake, pies, and so much more!
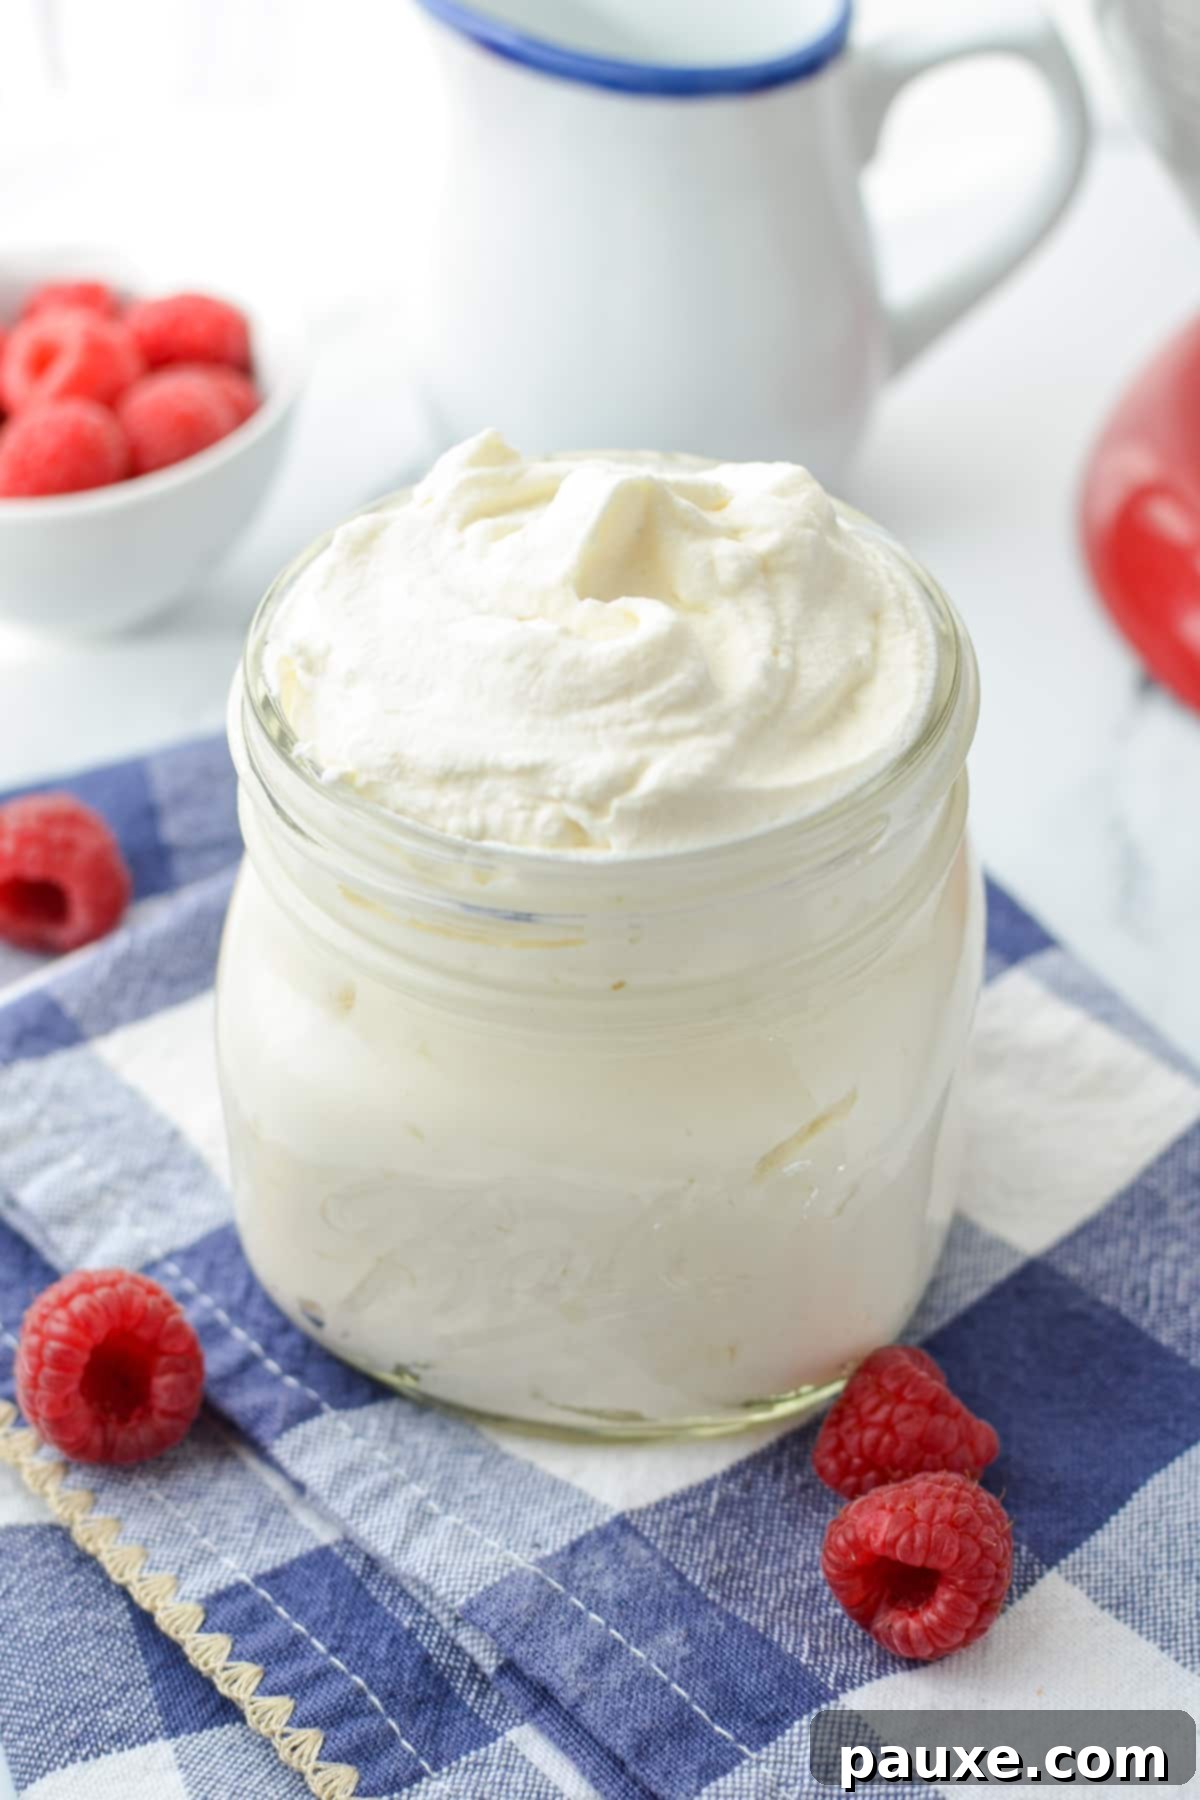
Many years ago, when I first ventured into the exciting world of baking, one of the earliest and most impactful lessons I learned was the art of making whipped cream from scratch. Before that moment, my experience with whipped cream was limited to store-bought tubs or aerosol cans. I had no idea how incredibly simple it was to achieve such a luxurious result with minimal effort and ingredients.
It was a truly eye-opening experience to witness the magical transformation of cold, liquid heavy cream into a sweet, exquisitely textured, vanilla-scented cloud. This simple act sparked a deeper love for cooking and baking in me. I used to believe that truly delicious food had to be complex, demanding a long list of ingredients and intricate steps. But this journey taught me otherwise. Often, the finest culinary delights are born from simplicity – like a perfectly ripe tomato paired with fresh basil and a delicate drizzle of balsamic vinegar. Pure, unadulterated deliciousness!
This homemade whipped cream recipe is designed to be effortlessly followed by anyone, from absolute beginners to experienced home cooks. It’s the ideal accompaniment for your most cherished desserts or a warm, steaming mug of hot chocolate. It’s quick, immensely satisfying, and once you try it, it will undoubtedly become a staple in your kitchen.
Why Choose Homemade Whipped Cream?
If you’ve ever wondered why you should bother making whipped cream when store shelves are stocked with alternatives, here are compelling reasons that will convince you to go the homemade route:
- Unmatched Freshness and Flavor: Quite simply, homemade whipped cream tastes infinitely better than anything you can buy in a store. The fresh dairy flavor, combined with your chosen sweetener and vanilla, creates a nuanced taste and superior texture that no processed product can replicate. It’s vibrant, pure, and truly enhances any dish it accompanies.
- Minimal Ingredients, Maximum Impact: You only need three humble ingredients to create this culinary marvel: heavy cream, sugar, and vanilla extract. That’s it! No strange stabilizers or artificial flavors, just wholesome goodness.
- Elevates Every Dessert to “Next Level”: Once you experience the difference homemade whipped cream makes, you’ll find yourself reaching for it again and again. It adds an incomparable richness, lightness, and elegance to desserts, turning ordinary treats into extraordinary indulgences.
- Effortless and Convenient: Don’t let the name “homemade” intimidate you. This recipe is incredibly easy to make. With the basic ingredients on hand, you can whip up a batch in just minutes, providing a quick and easy dessert topping whenever the craving strikes.
And let’s be honest, it absolutely blows commercial options like Cool Whip out of the water!
Essential Ingredients for Perfect Whipped Cream
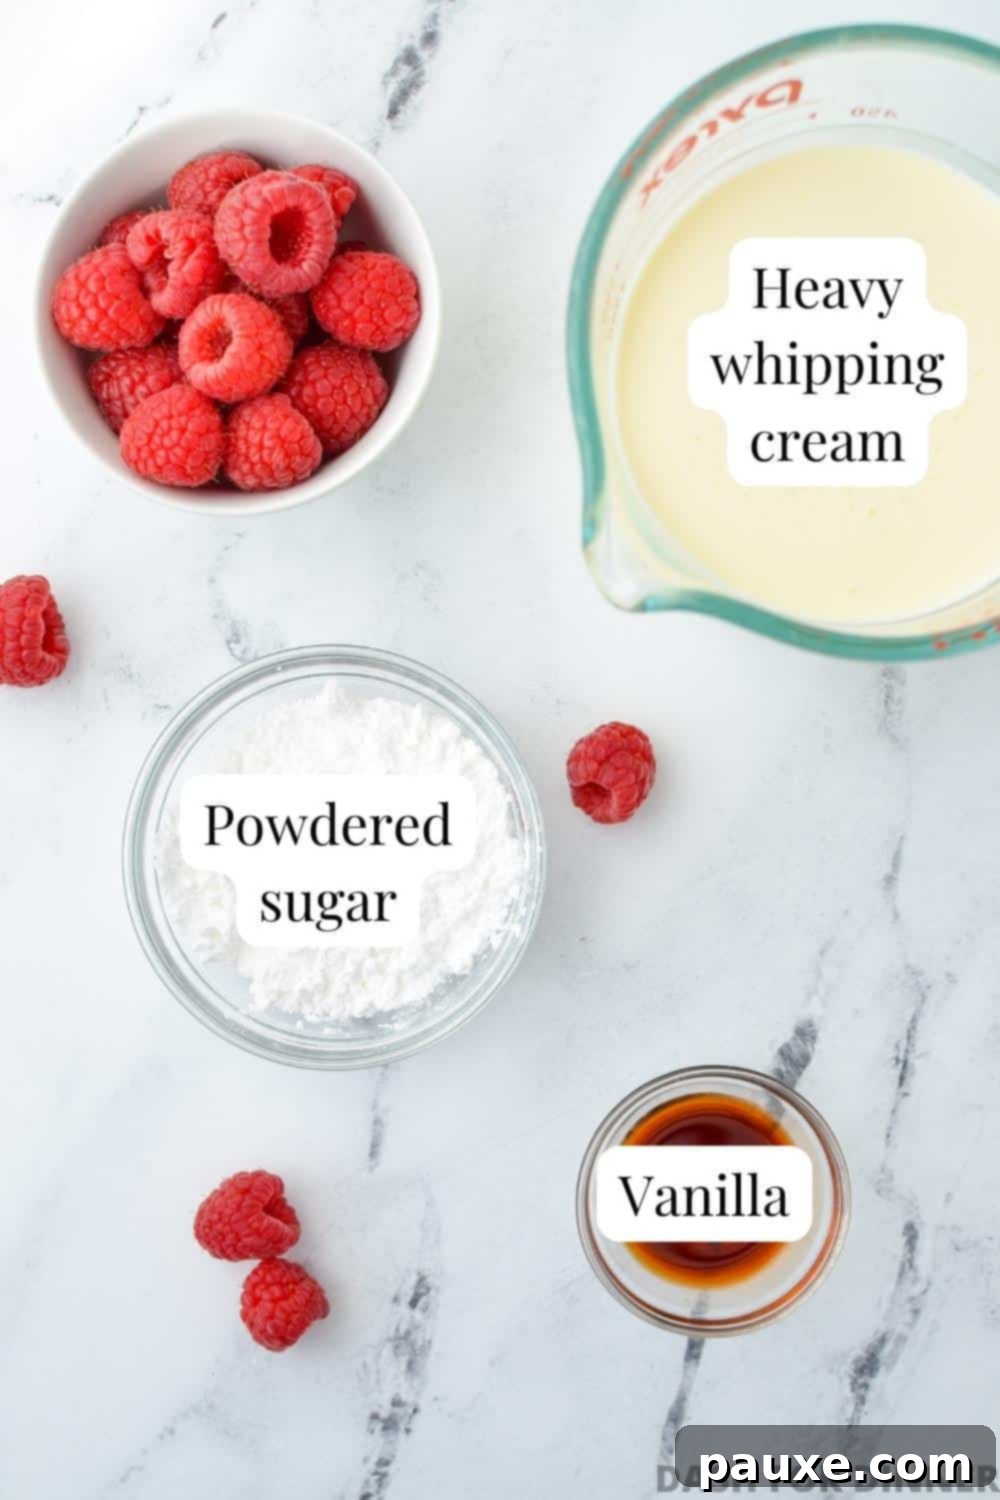
Creating perfect whipped cream is all about understanding the role of each key ingredient:
- Heavy Cream (or Heavy Whipping Cream): This is the star of our show. To achieve those beautiful, pillowy clouds, you absolutely must use heavy cream or heavy whipping cream. Look for a product with a milk fat percentage between 35-40%. Lighter creams or half-and-half simply do not have enough fat content to properly whip and hold their structure. The high fat content is what allows air to be incorporated, creating that luscious, creamy texture and satisfying mouthfeel we all adore. For the best results, ensure your heavy cream is thoroughly chilled in the refrigerator until you’re ready to whip it.
- Powdered Sugar (Confectioners’ Sugar): While granulated sugar can be used, I highly recommend powdered sugar for homemade whipped cream. The finely milled sugar dissolves instantly, ensuring the smoothest texture without any grainy residue. More importantly, powdered sugar typically contains a small amount of cornstarch, which acts as a minor stabilizer. This subtle addition helps the whipped cream maintain its shape longer and significantly reduces the chances of it weeping or separating, giving you a more stable and professional-looking topping.
- Vanilla Extract (Optional, but Highly Recommended): Adding vanilla extract technically transforms plain whipped cream into “Chantilly cream.” However, the addition of vanilla is so common and beloved that the terms are often used interchangeably in modern recipes. Pure vanilla extract imparts a warm, aromatic depth that perfectly complements the rich creaminess. Feel free to adjust the amount to your taste, or experiment with other extracts like almond or mint for different flavor profiles.
Alternative Sweeteners for Dietary Needs
If you follow a keto or low-carb diet, you can easily adapt this recipe. Simply substitute regular powdered sugar with a low-carb sweetener that measures 1:1 with sugar. Excellent options include monk fruit blends, erythritol blends, or stevia blends. Ensure the alternative sweetener is finely powdered to achieve the desired smooth texture.
The Importance of Chilled Ingredients and Equipment
For truly superior whipped cream, temperature is your best friend. Always keep your heavy cream well-chilled in the refrigerator until the very last moment before you begin whipping. Cold cream whips up faster, achieves greater volume, and results in a more stable finished product. For an extra boost, consider chilling your mixing bowl (especially if it’s metal or freezer-safe) and your whisk attachment in the freezer for about 15-20 minutes beforehand. The cold surfaces help maintain the cream’s low temperature throughout the whipping process, making it much easier to achieve stiff peaks.
Step-by-Step Guide: How to Make Homemade Whipped Cream
Creating perfect whipped cream is a straightforward process when you follow these simple steps:
Step One: Prepare Your Ingredients and Equipment
Ensure your heavy cream is thoroughly chilled. If you’re going for “bonus points,” place a large mixing bowl (preferably metal or glass) and your whisk attachment in the freezer for 15-20 minutes. This pre-chilling step makes a noticeable difference, especially on warm days or if you’re new to whipping cream.
Step Two: Combine Ingredients in a Chilled Bowl
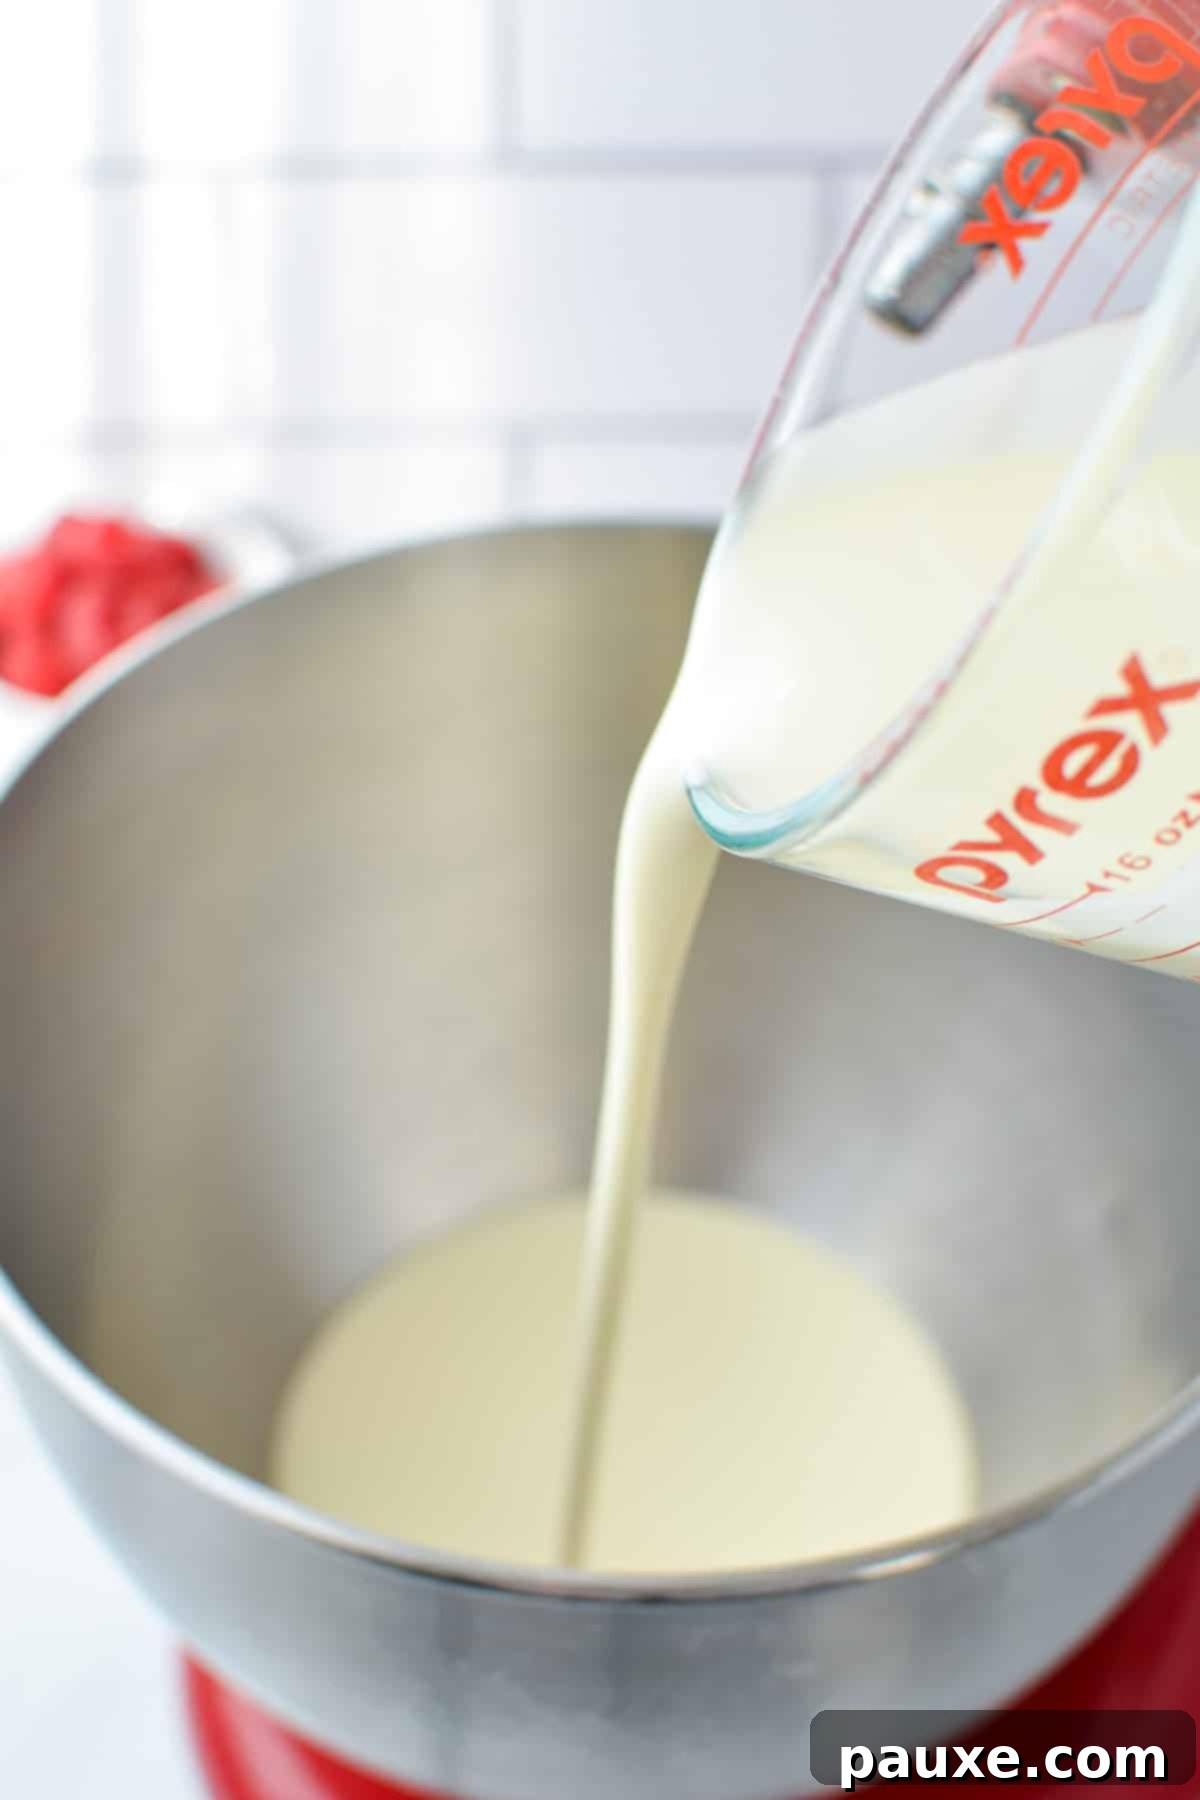
Pour the cold heavy cream into your large, chilled mixing bowl. Add the powdered sugar and pure vanilla extract (if using). If you’re using a stand mixer, ensure it’s fitted with the whisk attachment. For an electric hand mixer, select the appropriate beaters.
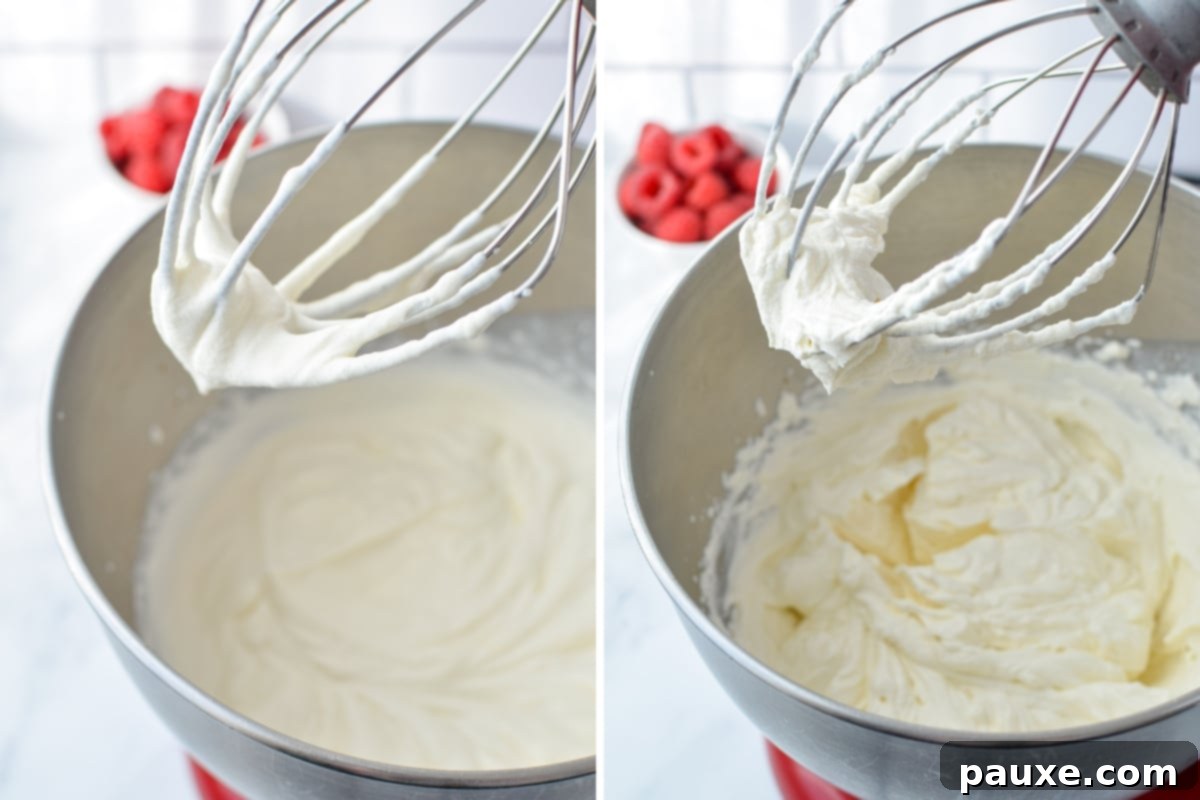
Step Three: Begin Whipping to Soft Peaks
Start beating the mixture on medium-high speed. Initially, the cream will look foamy and bubbly. As you continue to whip, it will begin to thicken. Keep a close eye on it. After a few minutes, when you lift the whisk, you’ll see “soft peaks” forming. These peaks will hold their shape for a moment before gently slumping back into the cream. This stage is crucial for ensuring proper air incorporation.
Step Four: Continue Whipping to Medium Peaks
Continue beating on medium-high speed. As the cream thickens further, periodically stop the mixer and scrape down the sides of the bowl with a spatula to ensure all the cream is evenly whipped. This prevents any un-whipped liquid cream from remaining at the bottom. The peaks will become more defined and will hold their shape a bit longer before slowly collapsing.
Step Five: Achieve Stiff Peaks – The Perfect Consistency
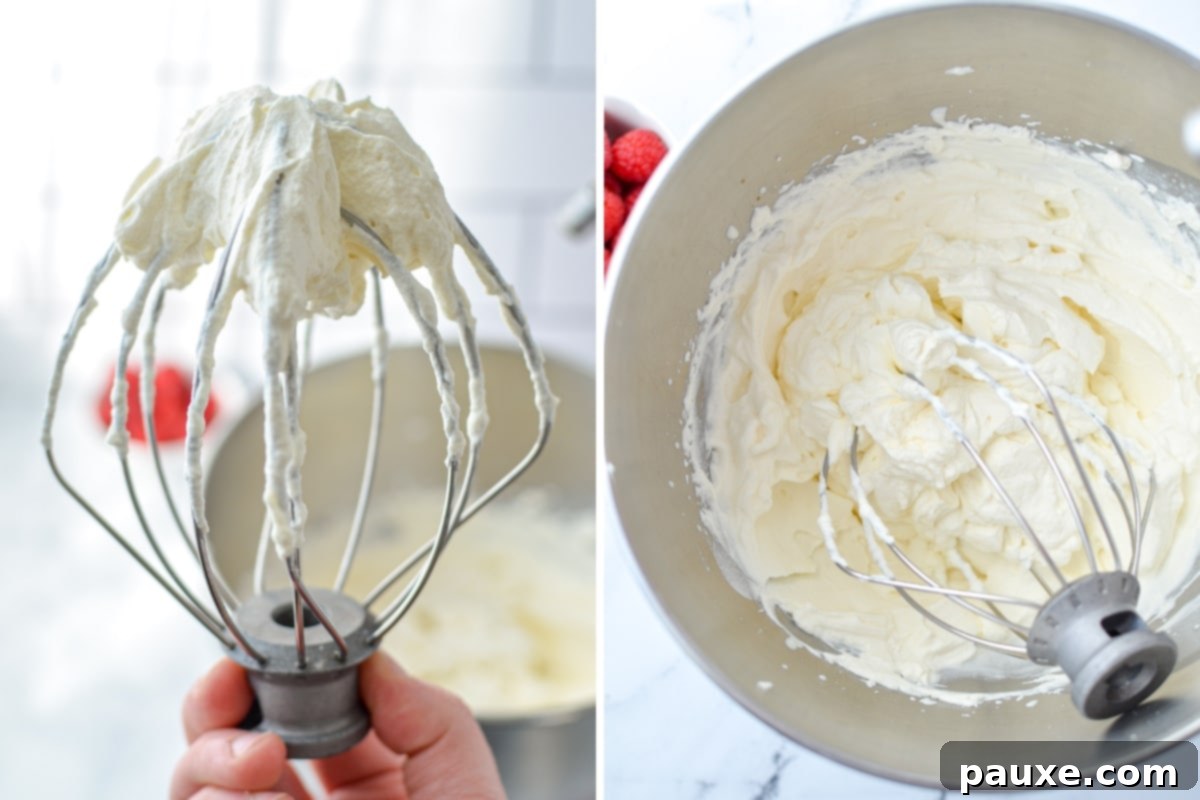
Maintain medium-high speed, constantly monitoring the cream’s consistency. The goal is to reach “stiff peaks.” This is when the cream is thick, opaque, and holds its shape firmly. When you pull the whisk out of the cream, a peak (like a small mountain) will form and remain standing without collapsing. Be careful not to over-whip, as the cream can quickly turn grainy or even into butter if beaten for too long.
Step Six: Serve Immediately or Store Properly
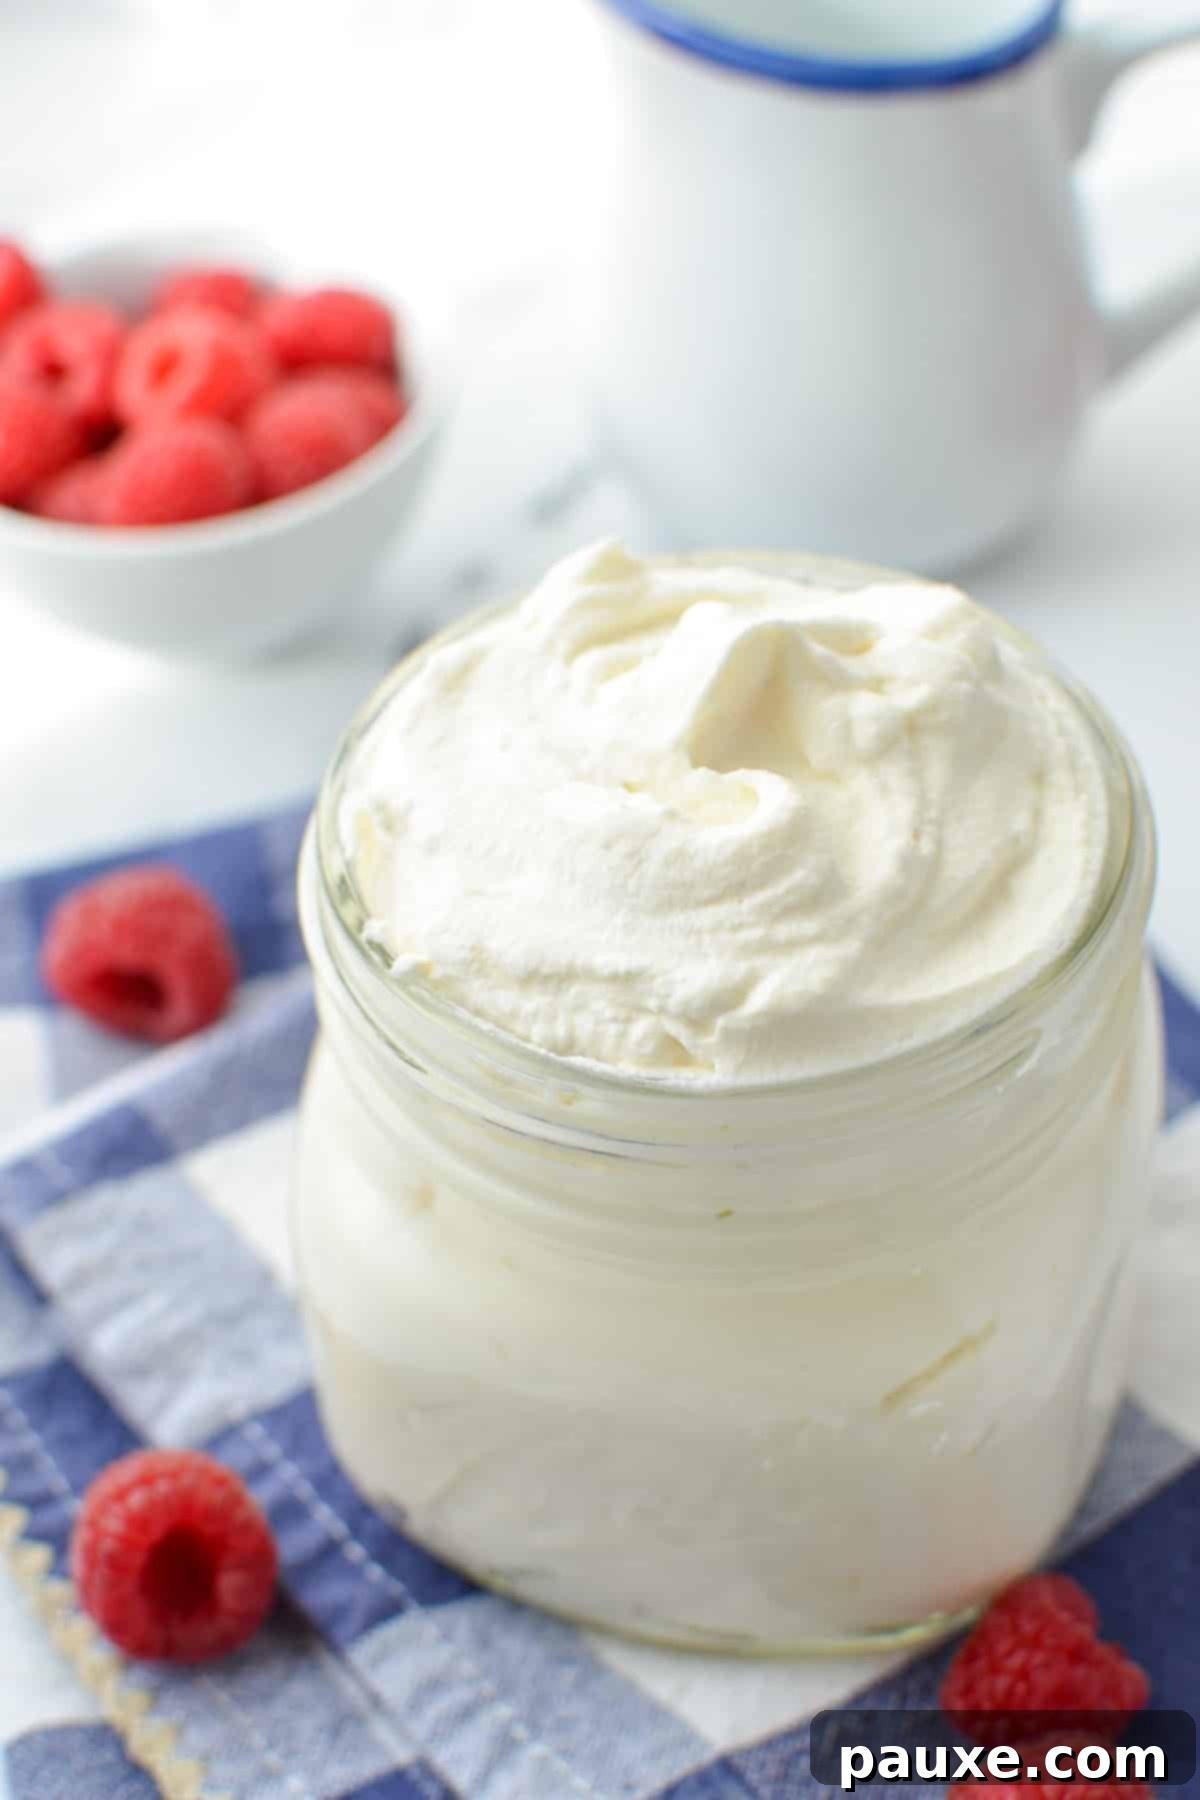
Once stiff peaks are achieved, your homemade whipped cream is ready! Transfer it to a serving bowl or use it immediately as a topping. For optimal freshness and texture, whipped cream is best enjoyed within a few hours of preparation. If you need to store it, transfer the whipped cream to an airtight container or cover it tightly with plastic wrap and refrigerate. It will generally hold well for 12-24 hours with minimal weeping or separation, thanks to the powdered sugar. It can last up to 3 days, though some slight separation may occur over time.
Understanding the Three Stages of Whipped Cream
Mastering whipped cream means recognizing these crucial stages:
- Soft Peaks: This is the initial thickening phase. When you lift your whisk, the cream will form gentle peaks that quickly melt back into soft mounds. It has a light, airy texture, perfect for folding into mousses or as a very delicate topping.
- Medium Peaks: Continuing to whip from soft peaks, you’ll reach medium peaks. Here, the cream forms more defined peaks that hold their shape for a moment before slowly collapsing slightly. This consistency is excellent for dolloping onto desserts or for fillings that require a bit more structure.
- Stiff Peaks (Firm Peaks): This is the final and most desired stage for most applications. When the whisk is removed, the cream forms sharp, distinct peaks that stand tall and hold their shape firmly. The cream will be thick, smooth, and opaque. This is ideal for piping, layering in cakes, or as a stable topping.
A Crucial Warning: Be extremely vigilant once stiff peaks begin to form. If you continue whipping past this point, the cream will start to thicken excessively, become grainy, and eventually separate into butter and buttermilk. Over-whipping is a common mistake, so always keep a close watch on your mixer!
Creative Ways to Enjoy Your Homemade Whipped Cream
The versatility of homemade whipped cream knows no bounds. Here are just a few ideas to inspire you:
- Pies: The quintessential topping for any pie, from classic pumpkin and apple to decadent chocolate silk. Its lightness perfectly balances rich pie fillings.
- Strawberry Shortcake: Layer it generously with fluffy biscuits and fresh strawberries for a truly iconic summer dessert.
- Hot Chocolate & Coffee: Transform a simple hot beverage into a luxurious treat. A generous dollop melts into a creamy, dreamy froth.
- Fresh Fruit Dip: Serve it alongside a platter of vibrant berries, sliced peaches, or melon for a light and elegant dessert or snack.
- Berries and Fruit Salads: A simple bowl of fresh berries (strawberries, blueberries, raspberries) is elevated with a cloud of whipped cream. It’s also a delightful addition to any fruit salad.
- Dessert Topping: Enhance virtually any dessert – brownies, cakes, sundaes, crepes, waffles, pancakes, and fruit crisps.
- Recipe Substitute: Use it in any recipe that calls for store-bought whipped topping or Cool Whip for a superior flavor and texture.
- Stewed Fruit: Spoon a dollop onto warm, stewed apples, pears, or berries for a comforting and simple dessert.
And absolutely, you are granted full permission to eat it straight from the bowl with a spoon! No judgment here – it’s that good.
Expert Tips for Achieving Perfect Whipped Cream Every Time
- Always Start with Cold Ingredients: This cannot be stressed enough. Cold heavy cream is essential for successful whipping. It emulsifies and aerates much more effectively than room-temperature cream, leading to greater volume and stability.
- Choose the Right Equipment: While you can make whipped cream by hand with a whisk (and it’s a great arm workout!), using a stand mixer with a whisk attachment or an electric hand mixer is highly recommended. These tools make the process quicker, easier, and ensure more consistent results.
- Opt for Powdered Sugar: As mentioned, powdered sugar contains a small amount of cornstarch which acts as a natural stabilizer. This helps prevent the whipped cream from separating or “weeping” liquid, especially if you need to store it for a few hours. It also contributes to a smoother, more refined texture.
- Chill Your Bowl and Whisk: For an extra edge, especially if your kitchen is warm, place your mixing bowl (metal bowls work best for this) and whisk attachment in the freezer for 15-20 minutes before you start. This helps keep the cream cold throughout the whipping process, leading to a faster, fluffier, and more stable whipped cream.
- Watch It Closely: Whipped cream can go from perfect stiff peaks to over-whipped butter very quickly. Never walk away from your mixer once the cream starts to thicken. Observe the changes closely and stop as soon as you reach your desired consistency.
Troubleshooting Common Whipped Cream Problems
Don’t despair if your whipped cream doesn’t turn out perfectly on the first try. Here are solutions to common issues:
- Whipped Cream is Too Thick/Grainy: This means you’ve likely over-whipped it, pushing it past the stiff peak stage towards butter. Don’t worry, it’s often salvageable! Simply add a tablespoon or two of fresh, cold heavy cream to the mixture and gently fold it in with a spatula until the desired consistency returns. Be careful not to overmix again.
- Whipped Cream Isn’t Thickening:
- Was your heavy cream cold enough? Ensure it has been properly chilled in the refrigerator for at least 6-8 hours. Room-temperature cream will struggle to whip.
- Are you using the right type of cream? Only heavy cream or heavy whipping cream with a minimum of 35% milk fat will whip correctly. Lighter creams, half-and-half, or milk will not work.
- Is your bowl/equipment cold? Warm equipment can hinder the whipping process.
- Whipped Cream Separates After Chilling (Weeping): Homemade whipped cream, especially without stabilizers, has a limited shelf life.
- If you used powdered sugar, it should hold up well for 12-24 hours.
- If you used granulated sugar, it might weep sooner.
- For longer storage, consider adding a commercial whipped cream stabilizer (like a small amount of unflavored gelatin or cream of tartar) or investing in a whipped cream dispenser (siphon) which keeps it fresh and aerated under pressure for several days.
Delicious Dessert Recipes to Pair with Whipped Cream
Now that you’re a whipped cream expert, try it with these fantastic dessert recipes:
- Chocolate Wafer Icebox Cake (Zebra Cake)
- Berry Cheesecake Salad
- No Bake Peanut Butter Bars
- Nutella Pie
- Lazy Cheesecake Salad
We hope this comprehensive guide inspires you to whip up your own batch of homemade goodness! If you try this recipe, please let us know how it turned out by leaving a comment below or sharing your photos on Instagram and tagging @dashfordinner. Your feedback means the world to us!
Homemade Whipped Cream Recipe
Whether you’re an expert or a first-timer, you’re going to love this easy homemade whipped cream! In just minutes, you’ll have fresh, fluffy, and flavorful whipped cream ready to top your favorite desserts.
Rating: 5 out of 5 stars (based on 3 votes)
Print Recipe | Pin Recipe
Course: Dessert | Cuisine: American
Prep Time: 5 minutes | Total Time: 8 minutes
Servings: 6 servings | Calories: 220kcal
Author: Dorothy Bigelow
Equipment
- Stand mixer or electric hand mixer
- Large mixing bowl (preferably chilled)
- Whisk attachment or beaters (preferably chilled)
Ingredients
- 1 ½ cups heavy whipping cream, chilled
- 3 tablespoons powdered sugar (or granulated sugar)
- 1 teaspoon vanilla extract (optional)
Instructions
- Add the thoroughly chilled heavy cream, powdered sugar, and vanilla extract (if using) to a large, ideally chilled mixing bowl or the bowl of a stand mixer fitted with the whisk attachment.
- Using an electric hand mixer or the whisk attachment of a stand mixer, begin whipping the cream mixture on medium-high speed. Continue to whip for approximately 3-4 minutes, stopping occasionally to scrape down the sides of the bowl with a spatula, until moderate peaks form.
- You’ll know the whipped cream is ready when you can lift the whisk out of the cream, and the peaks hold their shape firmly for at least 30 seconds without collapsing.
- Serve immediately, or store the whipped cream in an airtight container in the refrigerator for up to 24 hours for best results.
Did you try this recipe? Tag me at @dashfordinner and share your photos!
Notes
- The vanilla extract is optional. Technically, whipped cream made with vanilla extract is called Chantilly cream, but it’s a very common and delicious addition in modern whipped cream recipes.
- Chilling is Key: Always ensure your heavy cream is well-chilled. For optimal results, chilling your mixing bowl and whisk beforehand greatly assists in achieving fluffy, stable whipped cream.
- Granulated vs. Powdered Sugar: While granulated sugar can be used, powdered sugar is highly recommended. The cornstarch in powdered sugar acts as a subtle stabilizer, helping the cream hold its shape longer and preventing it from weeping liquid too quickly.
- Too Thick?: If you accidentally over-whip the cream and it becomes too stiff or slightly grainy, you can often rescue it. Gently fold in a small amount (1-2 tablespoons) of additional cold heavy cream using a silicone spatula until the desired smooth consistency is restored.
Nutrition
Calories: 220kcal | Carbohydrates: 6g | Protein: 2g | Fat: 21g | Saturated Fat: 14g | Polyunsaturated Fat: 1g | Monounsaturated Fat: 5g | Cholesterol: 67mg | Sodium: 16mg | Potassium: 58mg | Sugar: 6g | Vitamin A: 875IU | Vitamin C: 0.4mg | Calcium: 39mg | Iron: 0.1mg
Please note that some of my blog posts here at Dash for Dinner may contain affiliate links. If you make a purchase through these links, I will get a small commission at no additional cost to you. Please see my Disclaimer for more information.
Whether you’re an expert or a first-timer, you’re going to love this easy homemade whipped cream! In just minutes, you’ll have fresh, fluffy, and flavorful whipped cream ready to top your favorite desserts.
Rating: 5 out of 5 stars (based on 3 votes)
Print Recipe | Pin Recipe
Course: Dessert | Cuisine: American
Prep Time: 5 minutes | Total Time: 8 minutes
Servings: 6 servings | Calories: 220kcal
Author: Dorothy Bigelow
Equipment
- Stand mixer or electric hand mixer
- Large mixing bowl (preferably chilled)
- Whisk attachment or beaters (preferably chilled)
Ingredients
- 1 ½ cups heavy whipping cream, chilled
- 3 tablespoons powdered sugar (or granulated sugar)
- 1 teaspoon vanilla extract (optional)
Instructions
- Add the thoroughly chilled heavy cream, powdered sugar, and vanilla extract (if using) to a large, ideally chilled mixing bowl or the bowl of a stand mixer fitted with the whisk attachment.
- Using an electric hand mixer or the whisk attachment of a stand mixer, begin whipping the cream mixture on medium-high speed. Continue to whip for approximately 3-4 minutes, stopping occasionally to scrape down the sides of the bowl with a spatula, until moderate peaks form.
- You’ll know the whipped cream is ready when you can lift the whisk out of the cream, and the peaks hold their shape firmly for at least 30 seconds without collapsing.
- Serve immediately, or store the whipped cream in an airtight container in the refrigerator for up to 24 hours for best results.
Did you try this recipe? Tag me at @dashfordinner and share your photos!
Notes
- The vanilla extract is optional. Technically, whipped cream made with vanilla extract is called Chantilly cream, but it’s a very common and delicious addition in modern whipped cream recipes.
- Chilling is Key: Always ensure your heavy cream is well-chilled. For optimal results, chilling your mixing bowl and whisk beforehand greatly assists in achieving fluffy, stable whipped cream.
- Granulated vs. Powdered Sugar: While granulated sugar can be used, powdered sugar is highly recommended. The cornstarch in powdered sugar acts as a subtle stabilizer, helping the cream hold its shape longer and preventing it from weeping liquid too quickly.
- Too Thick?: If you accidentally over-whip the cream and it becomes too stiff or slightly grainy, you can often rescue it. Gently fold in a small amount (1-2 tablespoons) of additional cold heavy cream using a silicone spatula until the desired smooth consistency is restored.
Nutrition
Calories: 220kcal | Carbohydrates: 6g | Protein: 2g | Fat: 21g | Saturated Fat: 14g | Polyunsaturated Fat: 1g | Monounsaturated Fat: 5g | Cholesterol: 67mg | Sodium: 16mg | Potassium: 58mg | Sugar: 6g | Vitamin A: 875IU | Vitamin C: 0.4mg | Calcium: 39mg | Iron: 0.1mg
