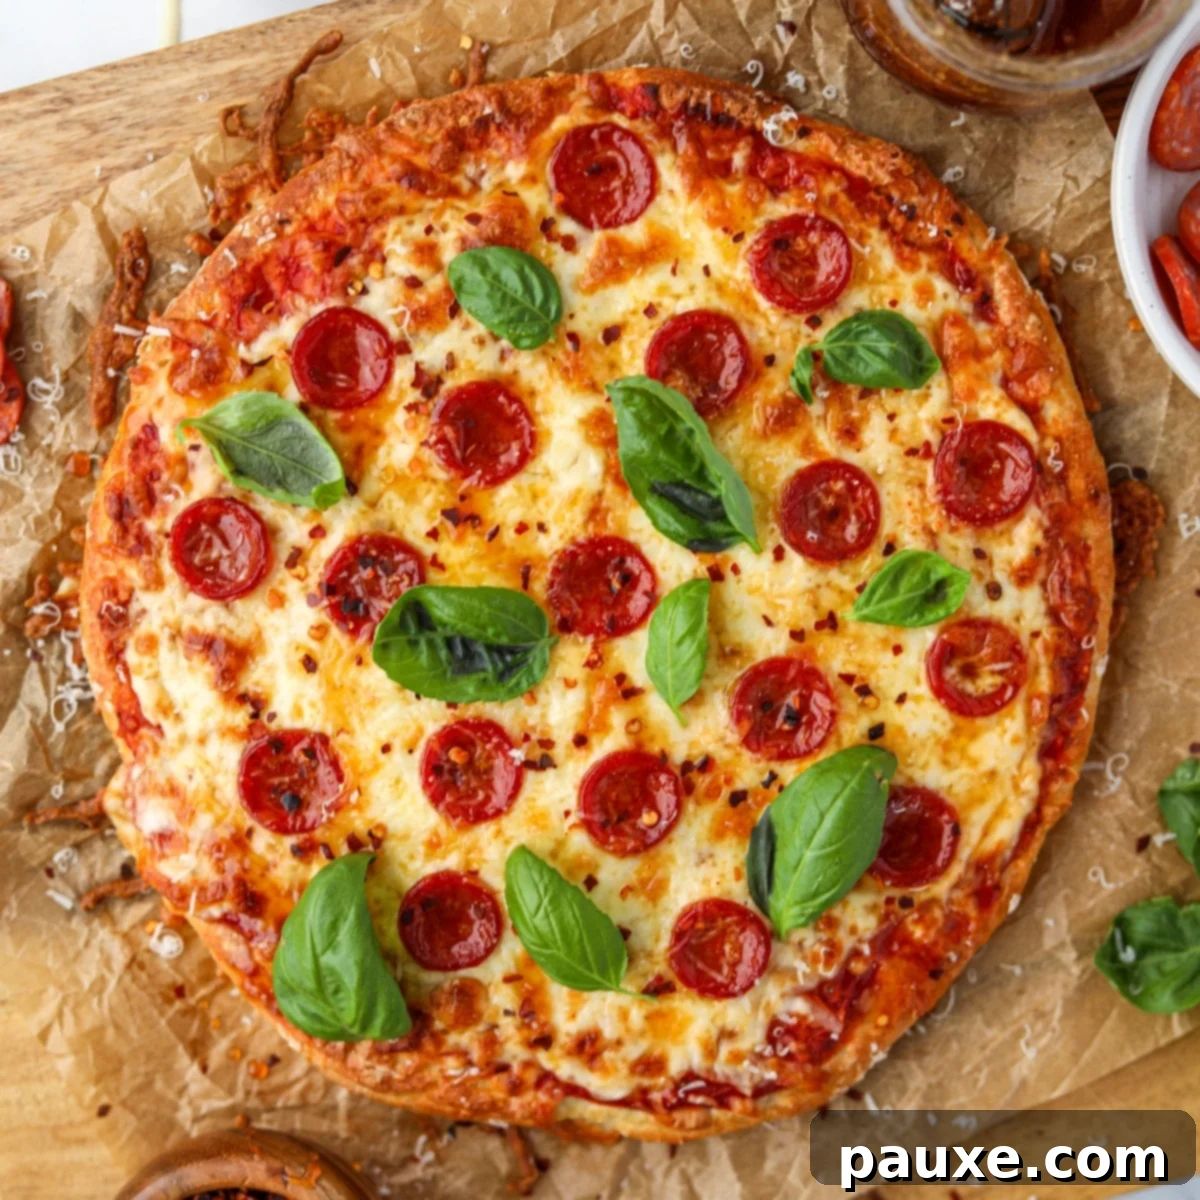
High-Protein Greek Yogurt Pizza Dough: Your Quick & Easy Homemade Solution
Transform your weekly pizza night with this incredibly simple and delicious Greek yogurt pizza dough recipe. It’s quickly become a household favorite, especially for busy Friday evenings, offering a fantastic blend of convenience and nutrition. Not only is this dough remarkably high in protein, thanks to the star ingredient, but it’s also designed for ease – requiring no stand mixer or lengthy rising times.
This versatile recipe yields one perfectly medium-sized pizza or two convenient smaller, personal pizzas, ideal for tailoring to individual preferences. For those with dietary considerations, it can even be adapted for a gluten-free version, and it’s perfectly suited for cooking in an air fryer for extra crispness and speed. If you’re searching for a way to enjoy homemade pizza guilt-free, while boosting your protein intake, you’ve found your new go-to recipe.

In our constant quest to incorporate more protein into beloved comfort foods, pizza seemed like the perfect candidate for a healthy makeover. The result? A surprisingly delightful and robust pizza crust that doesn’t compromise on flavor or texture. This recipe has undergone rigorous testing—countless iterations were made to ensure it was absolutely perfect before we felt ready to share it with you.
If the idea of a quick, protein-packed, and utterly satisfying pizza night excites you, then this easy Greek yogurt pizza recipe is about to become your new kitchen hero. Pair it with a fresh salad or some crisp crudités, and you’re all set for a wholesome and enjoyable meal.
Why You’ll Love This Greek Yogurt Pizza Dough
- Packed with Protein: Unlike traditional pizza dough, this recipe leverages the power of Greek yogurt, significantly increasing its protein content. This means a more filling and satisfying meal that keeps you energized longer, making it an excellent choice for fitness enthusiasts or anyone looking to boost their protein intake without sacrificing flavor.
- Simple, Wholesome Ingredients: You won’t need any obscure items for this recipe. If you have basic all-purpose flour, plain Greek yogurt, your preferred pizza sauce, cheese, and a few common pantry staples, you have everything required to create this culinary masterpiece. It’s a testament to how incredible meals can be made from everyday ingredients.
- No Yeast? No Problem! Zero Rise Time: Say goodbye to waiting hours for your dough to rise! This recipe is completely yeast-free, relying on baking powder for its lift. This makes it an ideal option for those spontaneous weeknight pizza cravings or when you need a quick, delicious meal on the table in under 40 minutes. It’s perfect for busy families and individuals who appreciate efficiency without compromising on homemade quality.
- Effortless Preparation: Forget complicated techniques or specialized kitchen equipment. This dough comes together beautifully with just your hands and a mixing bowl, eliminating the need for a stand mixer. It’s a truly hands-on, rewarding experience that’s accessible to even novice bakers.
- Unbeatable Flavor & Texture: Despite its healthy twist and speedy preparation, this Greek yogurt pizza dough delivers on taste and texture. Expect a crust that’s both tender and delightfully crisp, offering a robust flavor profile that genuinely rivals classic homemade pizza. The subtle tang from the Greek yogurt adds a unique depth that makes this pizza truly stand out.
- Highly Customizable: Whether you prefer a classic pepperoni, a vibrant veggie medley, or something more adventurous like fig jam and goat cheese, this dough provides the perfect canvas. It also adapts well to gluten-free alternatives and can be cooked in various ways, including in your oven or air fryer, making it suitable for almost any preference or kitchen setup.
Essential Ingredients for Your Healthy Pizza Dough
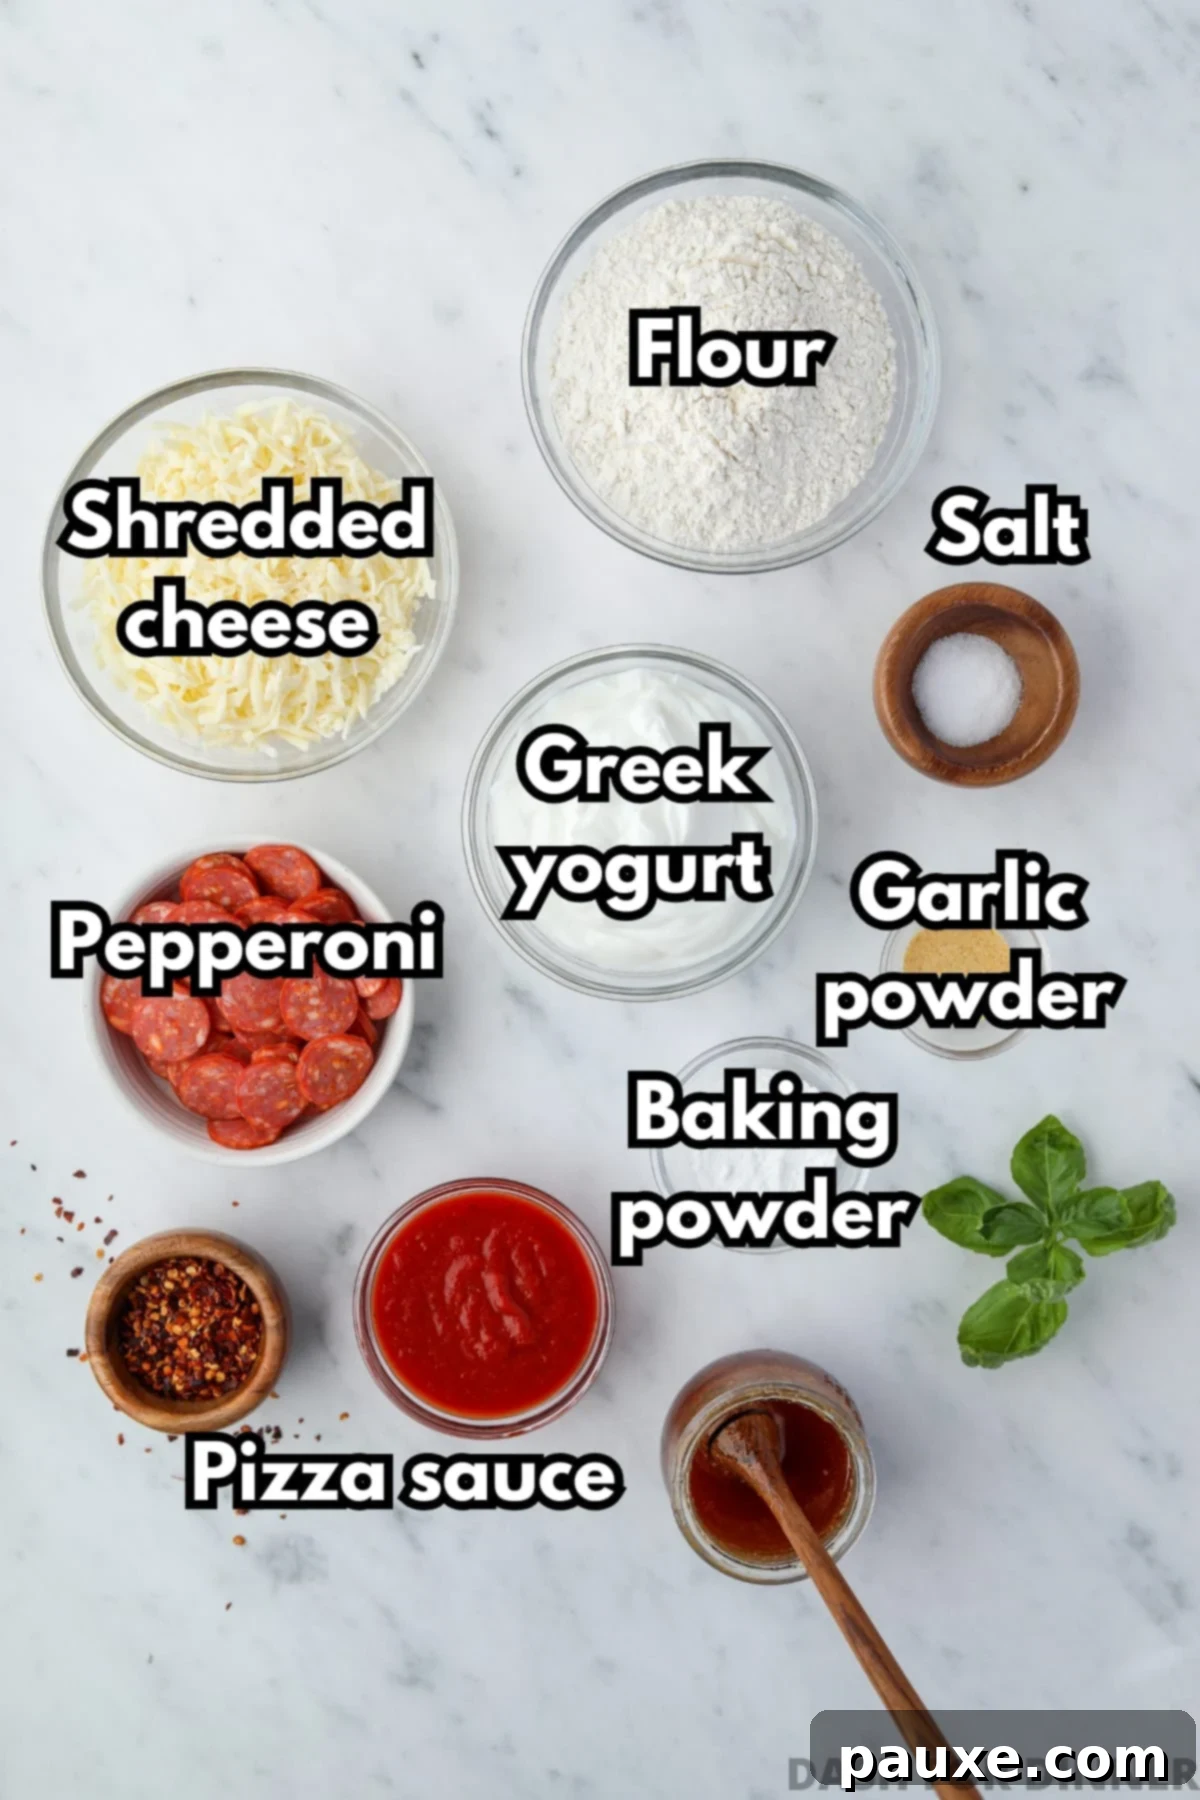
For the Greek Yogurt Pizza Dough:
- All-Purpose Flour: The foundation of our dough. Standard all-purpose flour works perfectly for a chewy yet crispy crust. If you happen to have self-rising flour on hand (or prefer to make homemade self-rising flour), you can easily substitute it by omitting the baking powder and salt listed in the recipe, as these leavening agents are already pre-mixed in self-rising flour.
- Greek Yogurt: The star ingredient that gives this dough its incredible protein boost and unique tang. Any plain Greek yogurt or Skyr yogurt will work. Through extensive testing, our tasters generally preferred yogurts with a small fat content (1%, 2%, or 5%) as they tend to yield a slightly richer texture and better browning. However, rest assured, 0% fat Greek yogurt performs excellently too, making it a flexible choice for various dietary needs.
- Baking Powder: This is our secret weapon for a no-rise dough. As a chemical leavening agent, baking powder reacts with moisture and heat to create carbon dioxide bubbles, giving the dough its necessary lift and airy texture in the oven, all without the need for yeast or extensive proofing time.
- Garlic Powder: While optional, we highly recommend including garlic powder. It infuses the dough with a subtle, aromatic flavor that significantly enhances the overall pizza experience. This small addition makes a remarkable difference, elevating your crust from basic to brilliantly flavorful.
- Salt: Essential for balancing the flavors and enhancing the taste of all other ingredients. Any fine salt, such as table salt or fine sea salt, will be suitable.
For Building Your Delicious Pizza:
- Pizza Sauce: Your favorite store-bought or homemade pizza sauce forms the base of flavor.
- Shredded Cheese: We typically opt for shredded mozzarella cheese or a pre-shredded pizza blend for that classic gooey, melted cheese experience. Feel free to experiment with other cheese varieties like provolone, cheddar, or a mix.
- Your Favorite Toppings: This is where you get creative! Popular choices include savory pepperoni, earthy mushrooms, a drizzle of sweet and spicy hot honey, or tangy feta cheese. The possibilities are endless – consider what truly makes a pizza *your* perfect pizza.
How to Make Greek Yogurt Pizza Crust: A Step-by-Step Guide
Get ready to enjoy a protein-packed pizza that tastes just like your favorite “real pizza,” but without the fuss of yeast or lengthy rising times. This incredible recipe comes together in less than 40 minutes, perfect for any night!
Part 1: Crafting the Dough
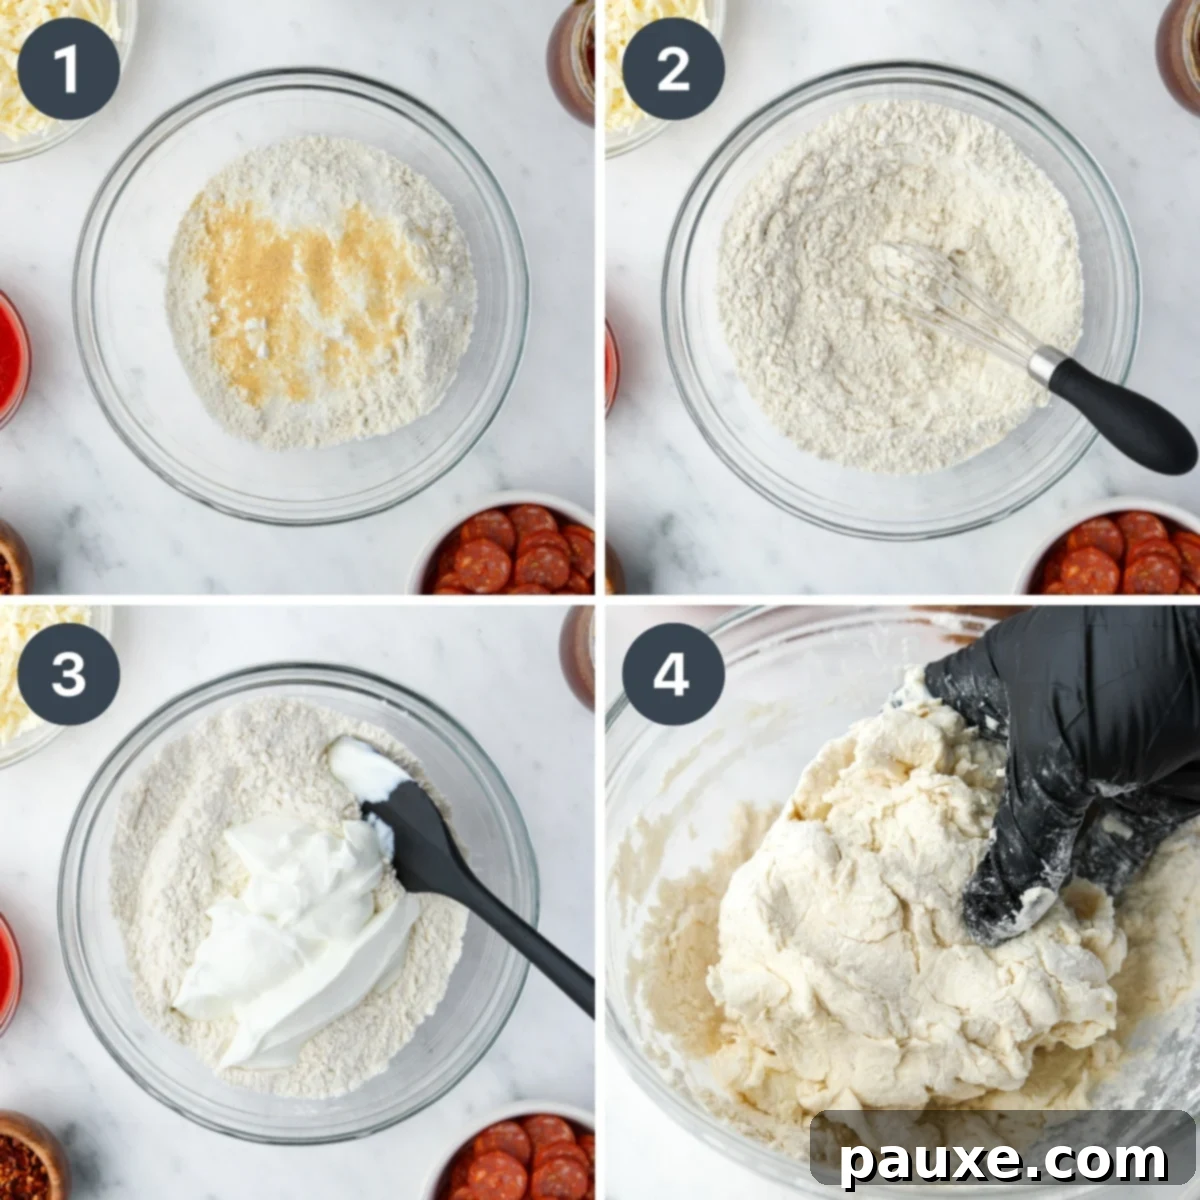
- Begin by preheating your oven to a blazing 425ºF (220ºC). While it heats, prepare a large broiler-safe baking pan or a pizza stone, lining it with parchment paper for easy transfer and cleanup. This ensures your crust bakes evenly and doesn’t stick.
- In a spacious medium bowl, combine your dry ingredients: the all-purpose flour, baking powder, salt, and garlic powder (if using). Take a whisk and mix them thoroughly. This step is crucial for ensuring the leavening agents and seasonings are evenly distributed throughout the dough, guaranteeing consistent texture and flavor.
- Next, precisely measure or weigh out your Greek yogurt and add it directly into the bowl with the whisked dry ingredients. Initially, use a sturdy silicone spatula to gently fold the wet into the dry. The mixture will start to come together in large, crumbly lumps. Don’t worry if it seems difficult to combine fully with the spatula.
- At this point, it’s time to get your hands a little dirty (or gloved!). Lightly dust your hands with a bit of extra flour or, even better, wear a pair of disposable food prep gloves. Gently knead the dough within the bowl. The warmth and pressure from your hands will help the lumps of flour and yogurt coalesce into a cohesive, smooth ball. Continue kneading just until all the dry flour is absorbed and the dough is uniform and pliable. Over-kneading is not necessary with this dough, so stop once it’s well-combined.
Part 2: Shaping and Baking Your Pizza Perfection
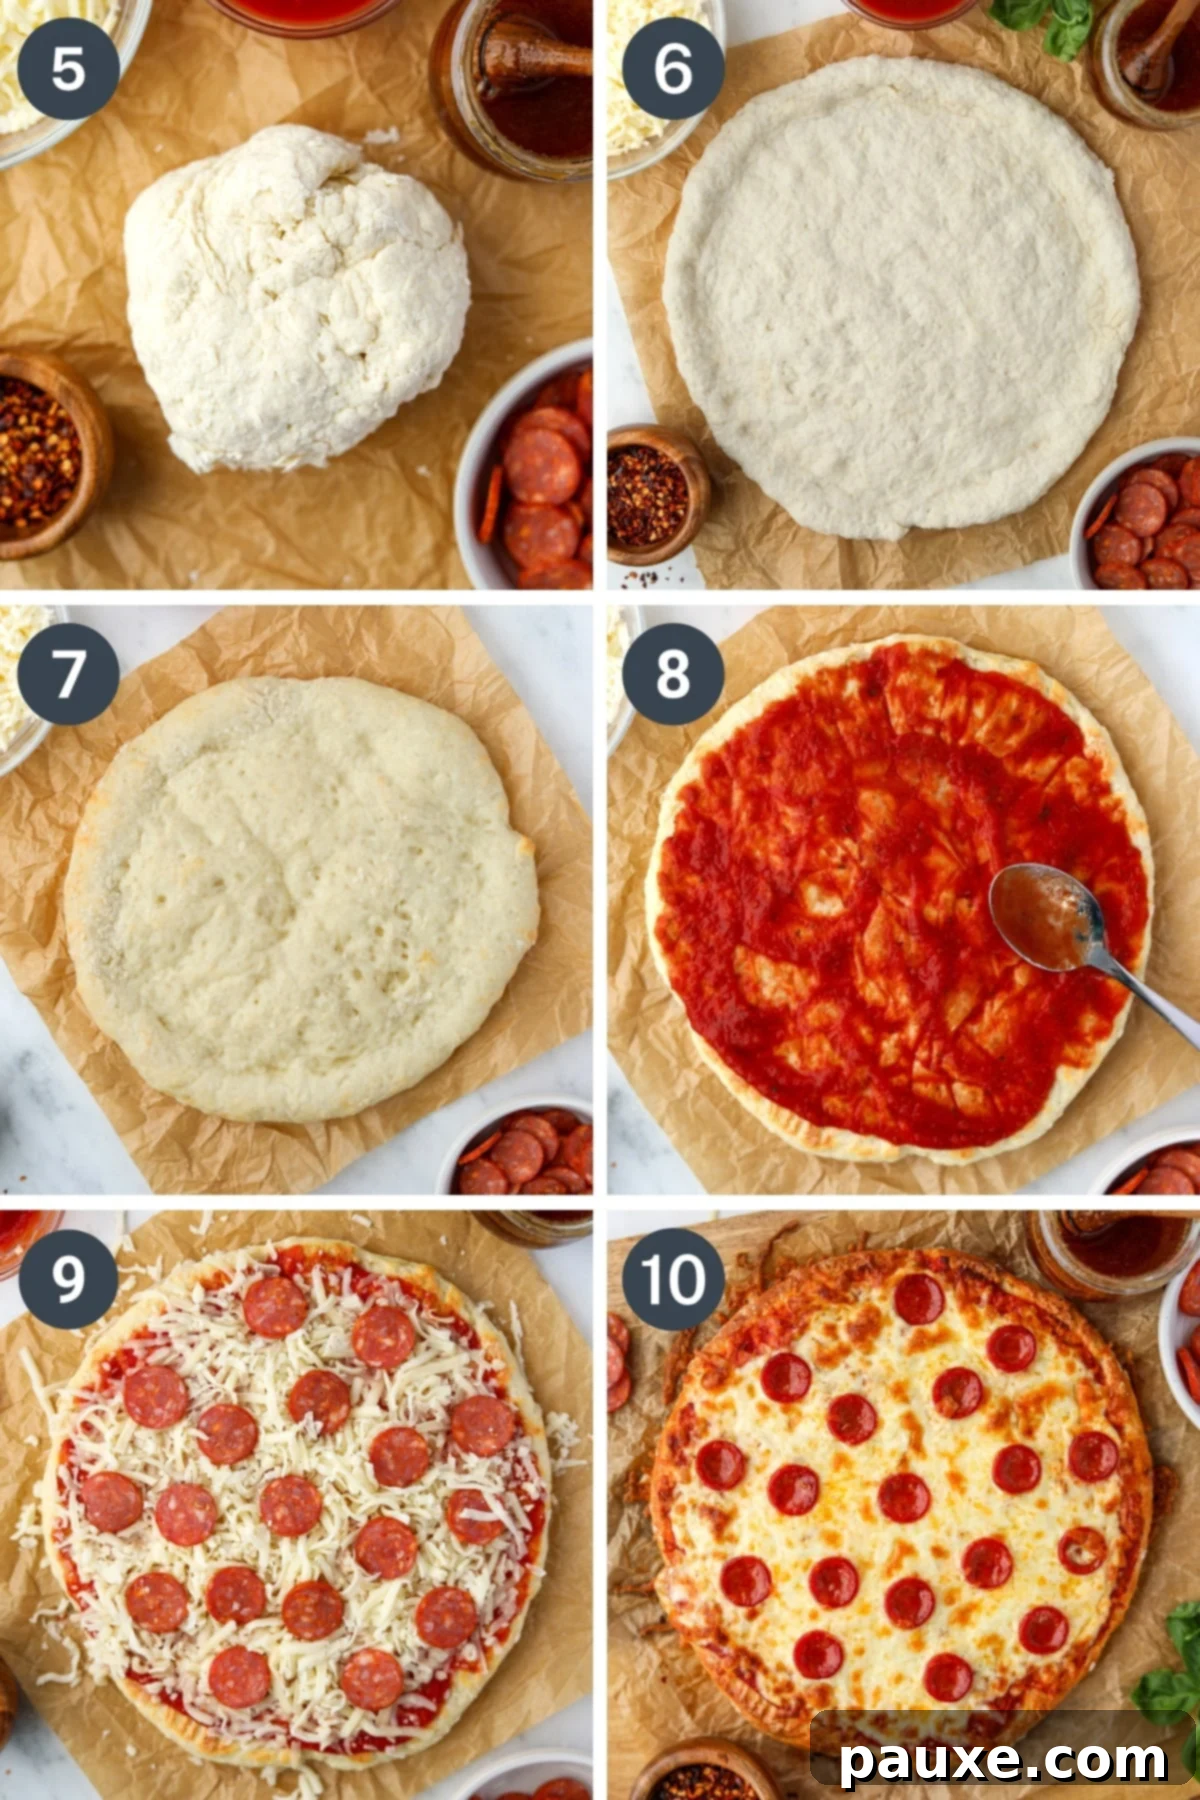
- Transfer your beautifully formed dough ball onto a fresh sheet of parchment paper. This will be your workspace for shaping and a convenient way to move the pizza to and from the oven.
- Shape the Crust with Care: Using the palms of your hands, begin to gently press and stretch the dough outwards into a circular shape, aiming for a diameter of approximately 9 ½ to 10 inches. The dough should be about ¼ to ⅓ inch thick. As you work, reshape and refine the edges by gently cupping your hands around the perimeter and pushing the dough inwards to create a slightly raised crust. Avoid using a rolling pin, as this dough tends to stick to it easily and can lead to frustration. Your hands are the best tools here. If the parchment paper wrinkles, gently lift the dough, smooth the paper, and set the dough back down.
- Pre-Bake and Flip for Optimal Texture: Carefully transfer the parchment paper with the shaped pizza crust onto your preheated pizza stone or dark-colored baking sheet. Bake it in the 425ºF (220ºC) oven for precisely 10 minutes. This crucial pre-bake step sets the crust and prevents it from becoming soggy later. After 10 minutes, remove the baking pan from the oven. Here’s a secret tip for the BEST texture: carefully pull up the parchment paper with the crust and gently flip the dough over. Yes, it might seem a bit unusual, but this technique ensures a perfectly crisp base! You can do this quickly with your hands, or use a silicone spatula for assistance if preferred.
- Spread the Sauce: On the newly flipped-over (and slightly crisped) pizza crust, evenly spread about ⅓ cup of your favorite pizza sauce. Use the back of a spoon to ensure a uniform layer, reaching almost to the edges of your formed crust.
- Add Your Toppings: Generously sprinkle your chosen shredded cheese over the sauce. Follow this with all your favorite toppings – whether it’s classic pepperoni, a medley of vegetables, or something unique. Ensure an even distribution for flavor in every bite.
- Final Bake to Golden Perfection: Return the loaded pizza to the oven for an additional 10-12 minutes. Continue baking until the cheese is beautifully melted, golden, and bubbling, and the edges of the crust have turned a pleasing golden brown.
- Optional Broil for Extra Crispness: For an exceptionally crispy crust and perfectly browned cheese, you can carefully switch your oven to the “BROIL” setting for an additional 1-3 minutes at the very end. Keep a vigilant eye on it, as broilers can brown very quickly! (Ensure your baking pan or pizza stone is broiler-safe before attempting this step).
- Cool and Serve: Once baked to perfection, carefully remove the pizza from the oven. Allow it to cool for 2-5 minutes on the parchment paper before slicing. This short resting period helps the cheese set and prevents toppings from sliding off. Garnish with fresh basil, grated Parmesan, a drizzle of hot honey, or a sprinkle of crushed red pepper flakes for an extra flourish. Enjoy your delicious, homemade, high-protein pizza!
Top Tip for an Irresistible Crust
For an even richer flavor and a truly professional-level crispy crust, brush the edges of your shaped pizza dough with a generous amount of olive oil (or a fragrant garlic-infused olive oil) just before placing it in the oven for its initial bake. This simple step adds depth and an amazing golden crunch!
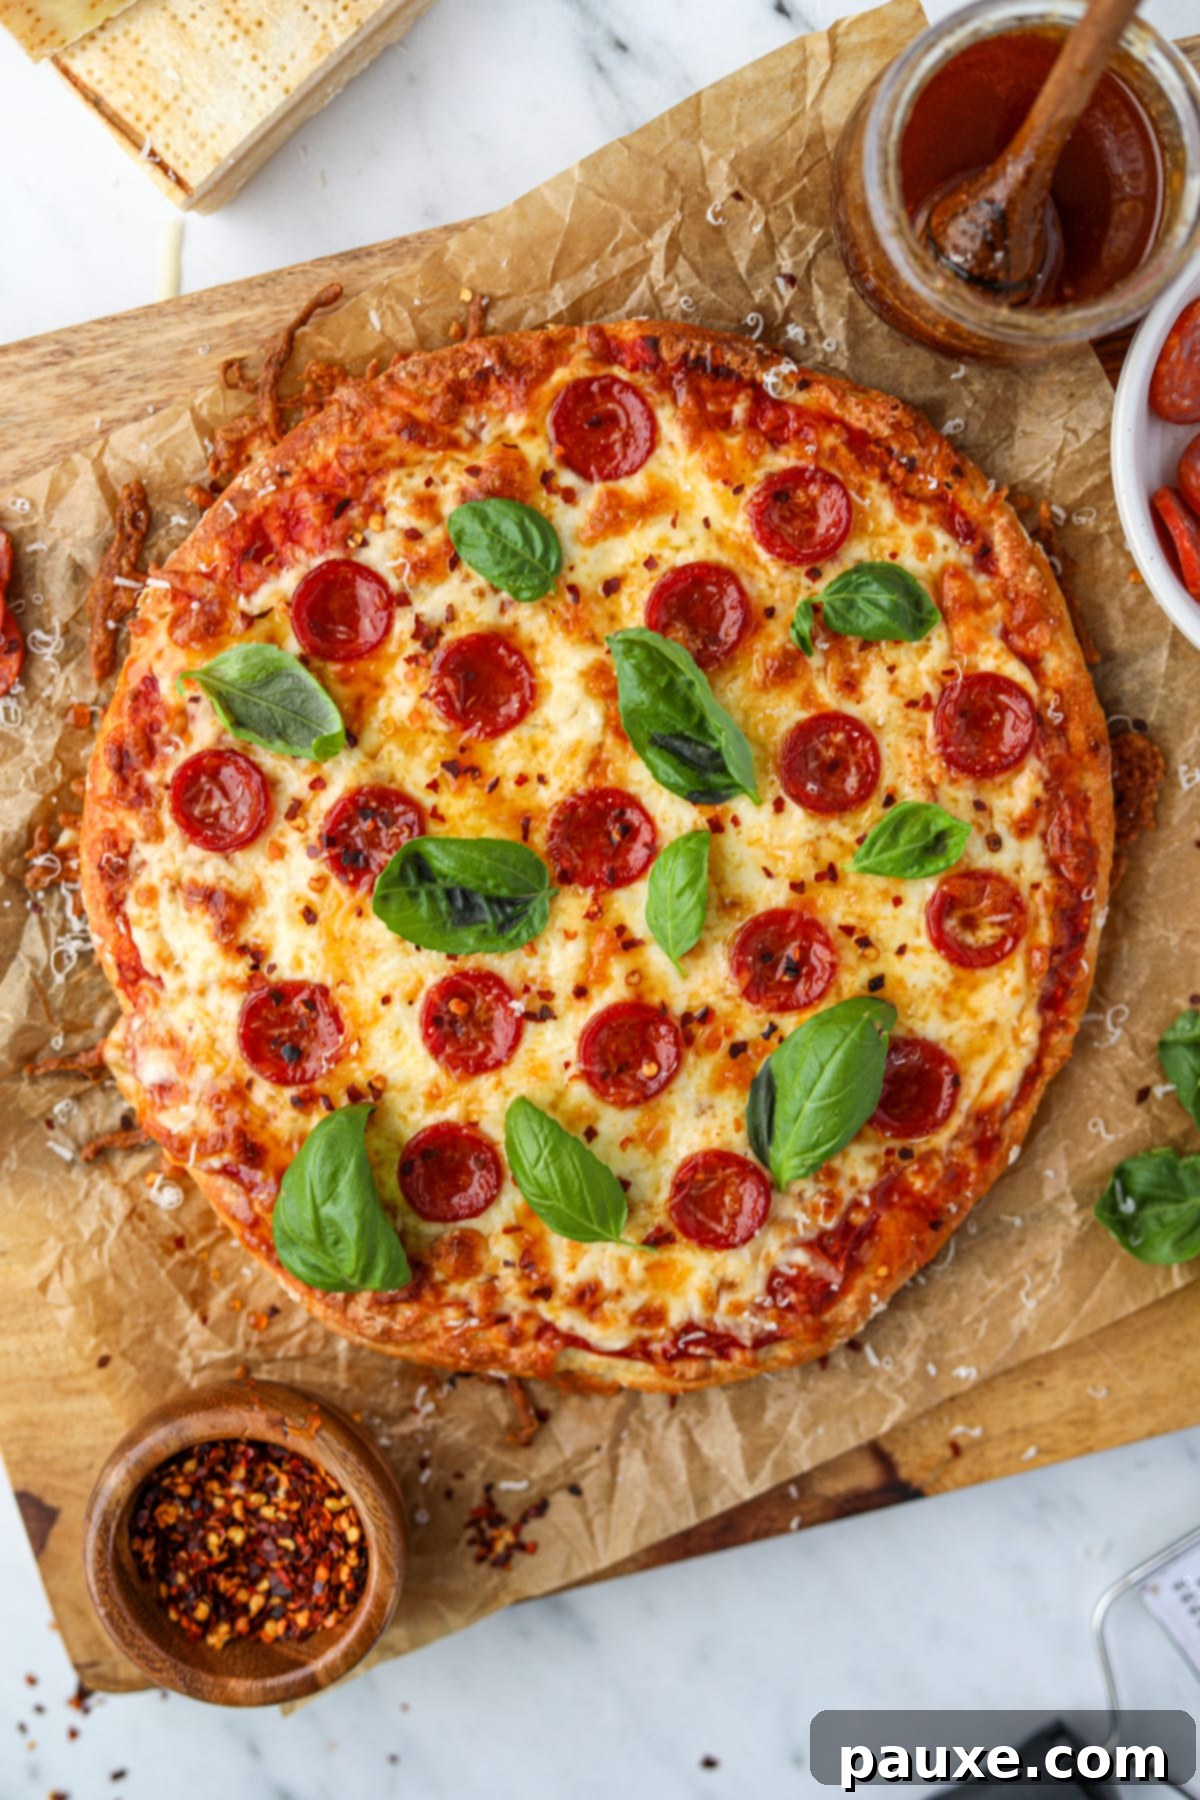
Unleash Your Creativity: Exciting Topping Ideas
The beauty of homemade pizza lies in its endless customization. With this versatile Greek yogurt crust, you can explore a world of flavors. Here are some topping ideas to inspire your next pizza night:
- Classic Meat Lovers: Pile on savory pepperoni slices, crumbled Italian sausage, crispy bacon bits (learn how to make them here!), or seasoned ground beef for a hearty and satisfying meal.
- Fresh Margherita Style: For a timeless, elegant pizza, layer fresh sliced mozzarella and vibrant basil leaves over a simple tomato sauce. The simplicity allows the quality of each ingredient to shine.
- Garden Fresh Veggie Delight: Load up on your favorite vegetables! Sliced mushrooms, crisp green peppers, thinly sliced red onion, or even roasted bell peppers and zucchini add color, texture, and nutrients.
- Mediterranean Inspired: Black, green, or kalamata olives bring a briny, salty punch. Combine them with feta cheese, sun-dried tomatoes, and a sprinkle of oregano for a taste of the Mediterranean.
- Sweet & Spicy Kick: Our absolute favorite combination! Drizzle hot honey over your finished pizza for an irresistible blend of sweetness and heat. Alternatively, a sprinkle of crushed red pepper flakes offers a classic spicy touch.
- Gourmet Fig & Goat Cheese: For a sophisticated and drool-worthy option, spread a layer of fig jam as your base, then crumble creamy goat cheese over the top. Arugula added after baking can complete this elegant pizza.
- BBQ Chicken: Use BBQ sauce as your base, add shredded cooked chicken, red onion, and a blend of mozzarella and cheddar cheese.
- Spinach & Artichoke: A creamy base (perhaps a light alfredo or ricotta) topped with cooked spinach, chopped artichoke hearts, and mozzarella.
Don’t be afraid to mix and match to find your perfect flavor combination! This high-protein crust serves as an excellent base for almost any topping you can imagine.
Making it Gluten-Free: Tips for Success
I’ve extensively tested a gluten-free version of this Greek yogurt pizza dough, and I’m happy to report that it works wonderfully with just a few mindful adjustments. You can absolutely enjoy a delicious gluten-free pizza with this recipe!
- Embrace the Brittleness: One important characteristic to note is that gluten-free Greek yogurt dough will naturally be more brittle and less elastic than dough made with traditional wheat flour. This is completely normal due to the absence of gluten.
- Gentle Hands are Key: When shaping your gluten-free dough, use exceptionally gentle hands. If you notice any cracks forming, don’t fret! Simply “heal” them by gently pressing the dough back together with your fingers as you continue to shape.
- Precision is Paramount: For the most consistent and successful results with gluten-free flours, which can be quite “thirsty” and absorb moisture differently, we highly recommend weighing your flour and Greek yogurt using a kitchen scale rather than relying solely on cup measurements.
- Adjusted Measurements: For the gluten-free version, you will typically need around 192 grams of a high-quality gluten-free baking mix (we’ve had great success with Bob’s Red Mill 1-to-1 Gluten-Free Baking Flour), which is approximately 1 cup plus 3 tablespoons. Pair this with 245 grams of plain Greek yogurt, which is roughly 1 cup. Always start with these measurements and adjust slightly if your dough feels too dry or too wet.
- Consider Smaller Pizzas: Due to its slightly more delicate nature, the gluten-free dough often works best when divided into two smaller, personal-sized pizzas (about 6-7 inches in diameter) rather than one large one. This makes them easier to handle and transfer.

Air Fryer Instructions for Personal-Sized Pizzas
For a super quick and perfectly crispy personal pizza, your air fryer is an excellent tool! To ensure this recipe works for the average air fryer basket, the dough needs to be made into smaller portions. You can either halve the entire recipe to make one small pizza or make the full recipe and divide the dough in half to create two individual pizzas.
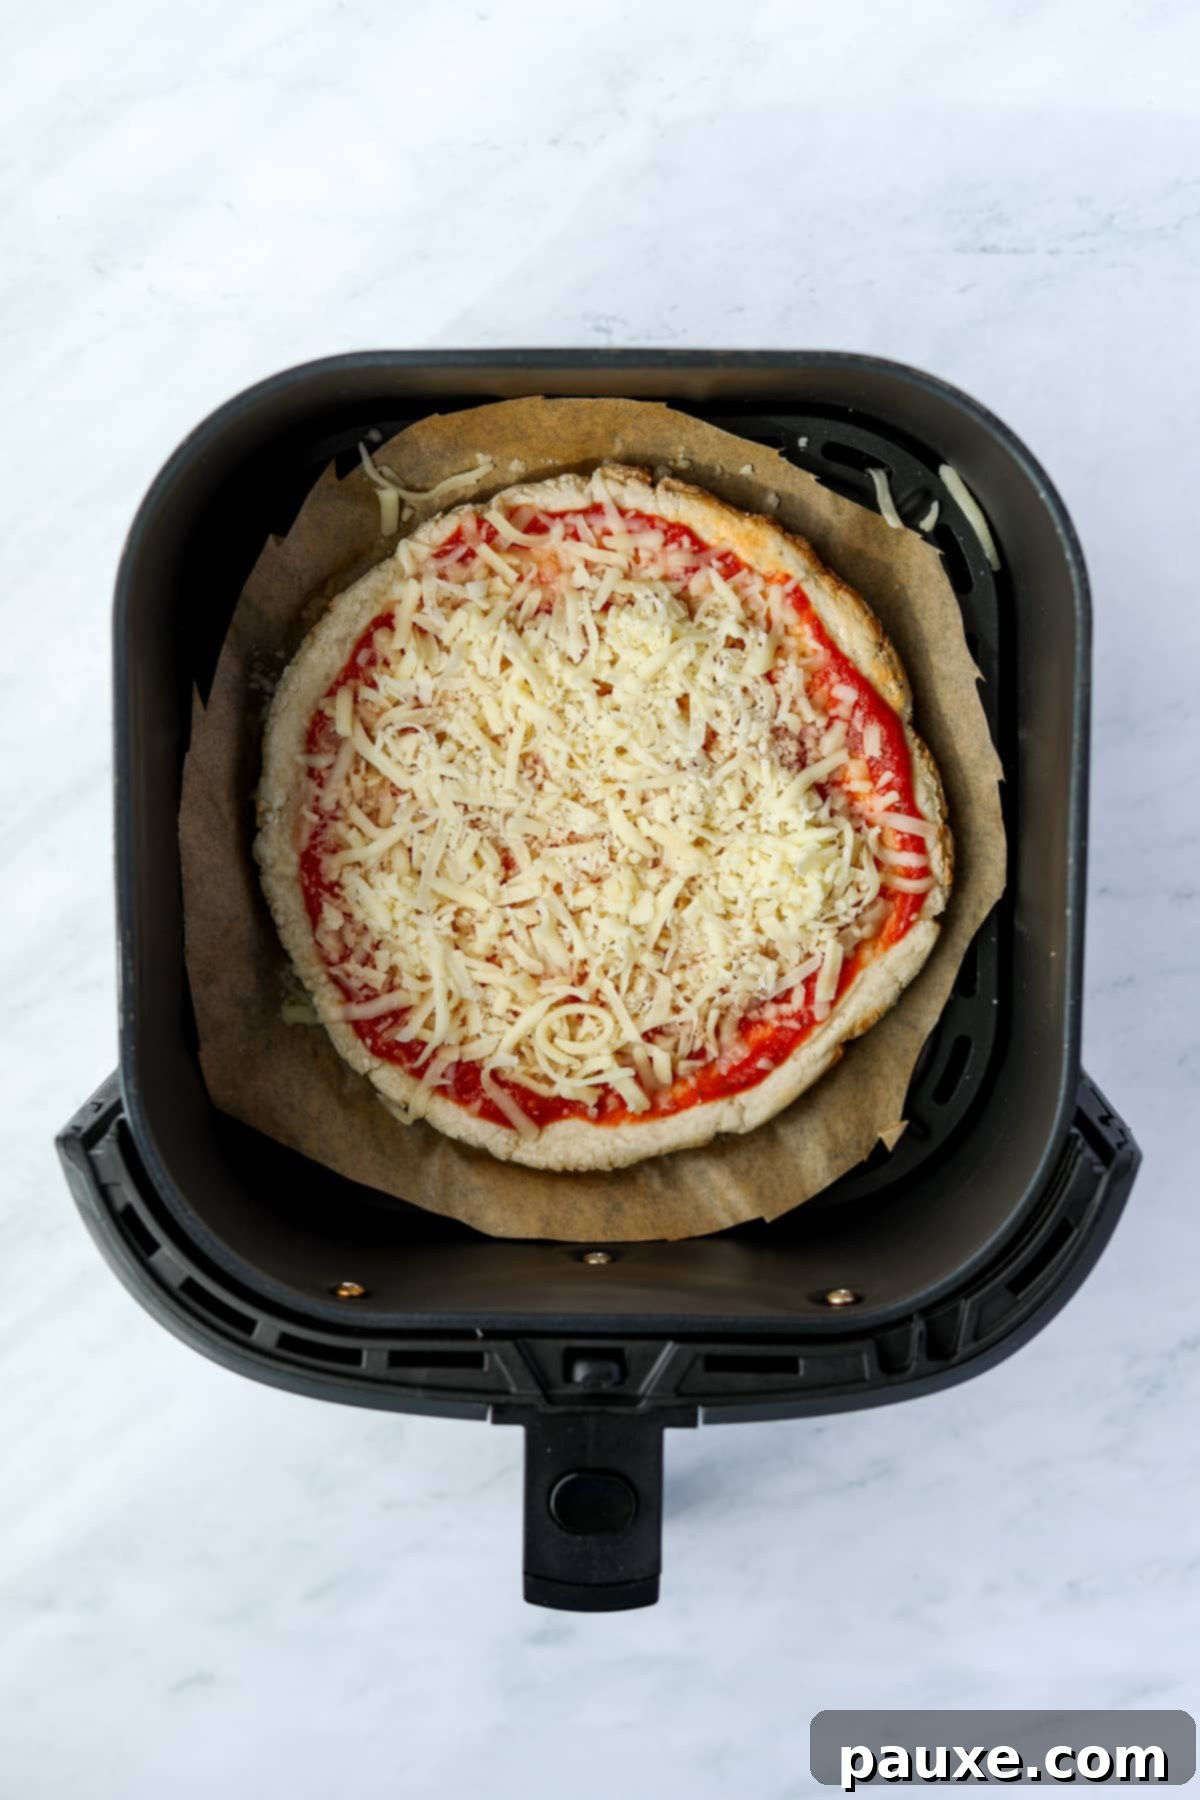
- Divide your Greek yogurt pizza dough into two equal halves. Shape one half into a small circle, approximately 6-7 inches in diameter, ensuring it fits comfortably in your air fryer basket. Line the basket with a piece of parchment paper cut to size underneath the dough.
- Preheat your air fryer to 370ºF (188ºC). Once hot, carefully place the shaped dough (on its parchment paper) into the basket. Cook for about 7 minutes to give the crust a good head start and develop some initial crispness.
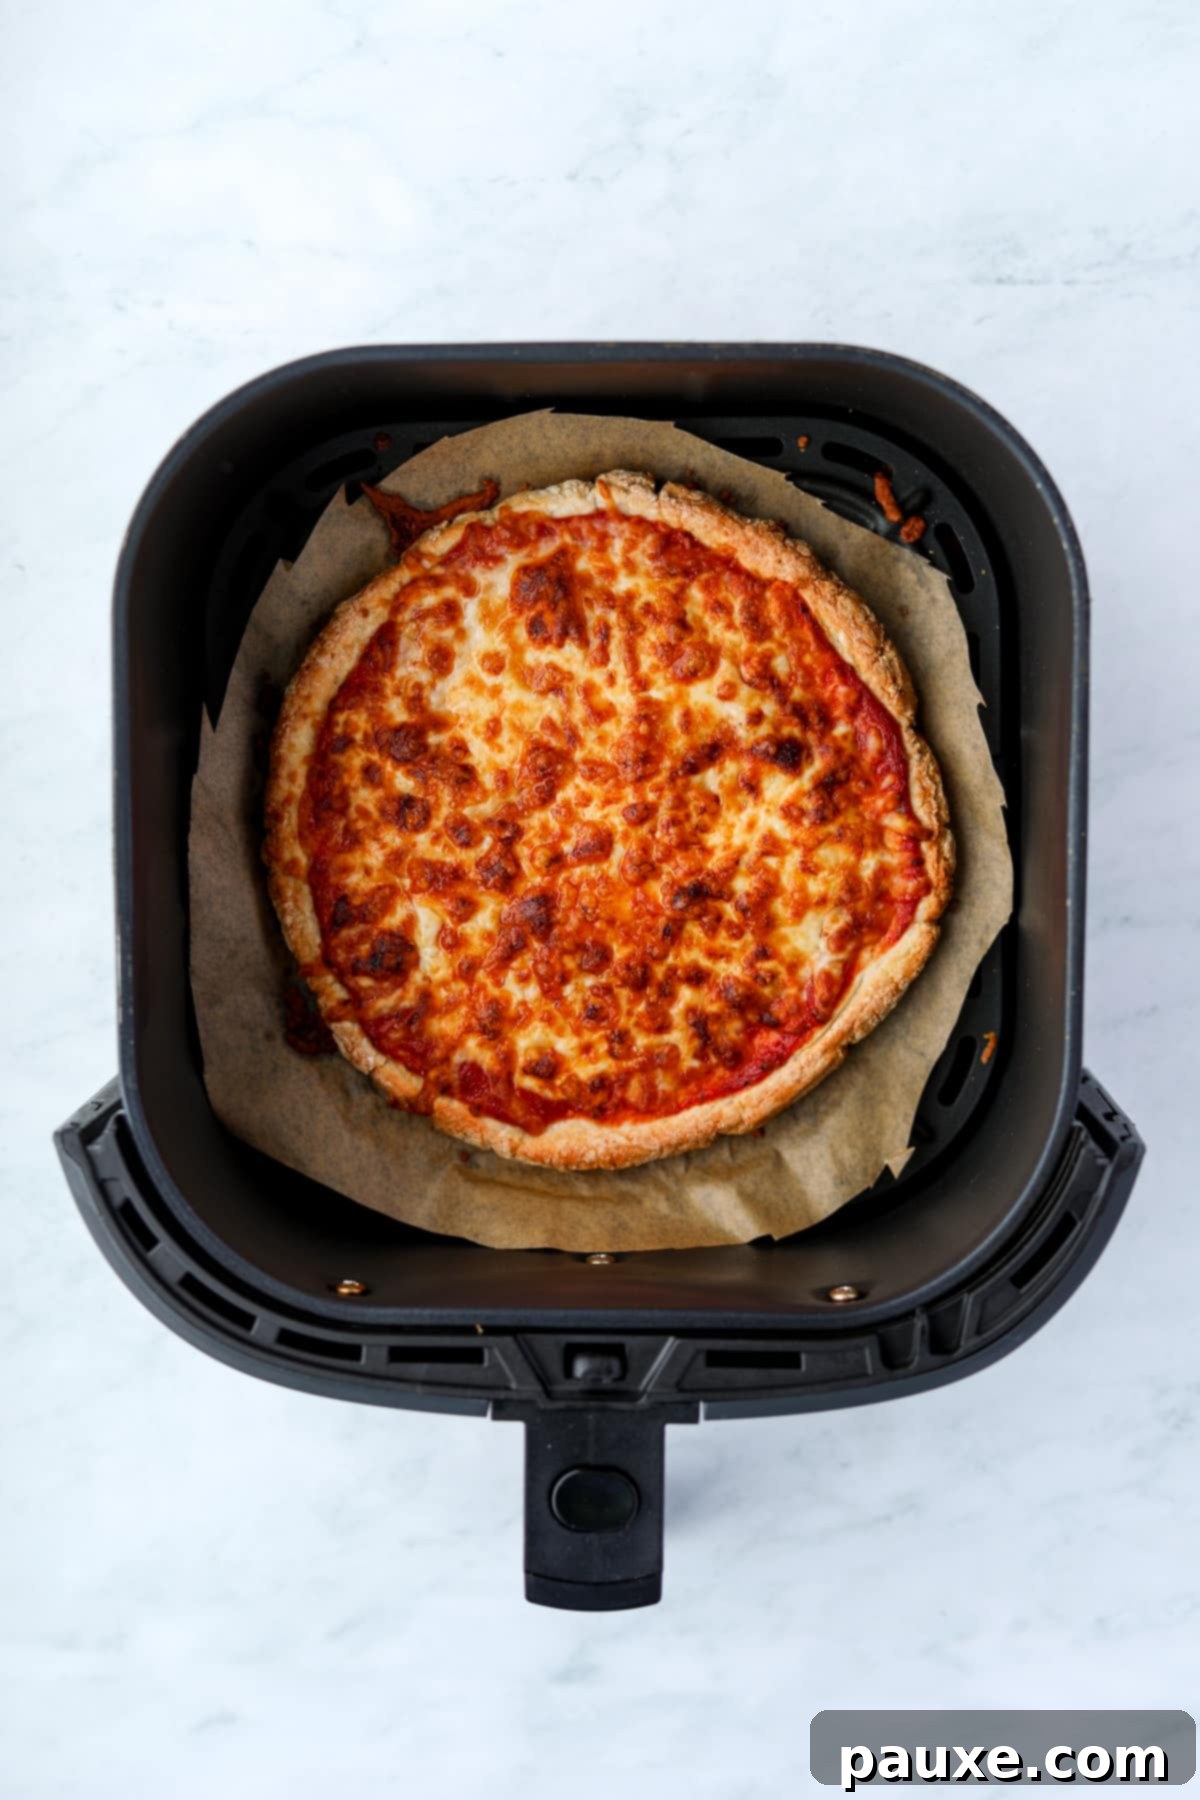
- After the initial 7 minutes, carefully remove the dough from the air fryer and flip it over. This ensures even cooking and crispness on both sides.
- Now, generously top your half-cooked crust with 2-3 tablespoons of your favorite pizza sauce, a good sprinkle of shredded cheese, and all your desired toppings.
- Return the loaded pizza to the 370ºF (188ºC) air fryer. Cook for an additional 6-8 minutes, or until the cheese is melted and bubbly, and the crust edges are beautifully browned and crispy.
- Carefully remove the pizza using the parchment paper. Allow it to cool for 3-5 minutes before slicing and serving. This resting period helps everything set. Repeat the process with the second half of your dough for another delicious personal pizza.
Expert Tips for Your Best Greek Yogurt Pizza
Achieving the perfect Greek yogurt pizza crust is easier than you think, especially with these insider tips:
- Weigh Your Flour and Yogurt for Precision: While cup measurements are provided in the recipe for convenience, you will consistently achieve the most accurate and reliable results by weighing your flour and Greek yogurt with a kitchen scale. Flour, especially, can vary significantly in density when measured by volume, impacting the dough’s consistency. Weighing ensures the ideal dough texture every time.
- Embrace Food Prep Gloves: Working with Greek yogurt dough can be a little sticky, particularly during the initial mixing and shaping phases. For a much cleaner and less frustrating experience, we highly recommend using a pair of disposable food prep gloves. They are a total lifesaver, making the kneading and shaping process smooth and enjoyable.
- Hands Over Rolling Pin: Resist the urge to reach for a rolling pin! This specific dough type works best when shaped directly with your hands. It tends to be quite sticky and can easily adhere to a rolling pin, leading to frustration and an uneven crust. Your hands allow for better control and less sticking.
- The Secret to a Perfect Crust: Flip It! This is perhaps our most important tip for an exceptional Greek yogurt pizza. Pre-baking the crust for 10 minutes and then flipping it over before adding toppings is a game-changer. This simple step creates a barrier that prevents the sauce from soaking into the crust, resulting in an incredibly crispy and structurally sound base that truly rivals the texture of classic, yeast-based homemade pizza dough. Don’t skip this step!
- Don’t Over-Knead: Unlike traditional yeast doughs that require significant kneading to develop gluten, this Greek yogurt dough needs only gentle kneading until the ingredients are just combined and smooth. Over-kneading can make the dough tough.
- High Heat is Your Friend: Baking at a high temperature (425ºF/220ºC) is essential for a crispy crust. It allows the dough to cook quickly and develop a beautiful golden-brown exterior.
- Rest Before Slicing: Allow your cooked pizza to rest for 2-5 minutes before slicing. This helps the cheese set and prevents all your delicious toppings from sliding off the moment you cut into it.
- Storage and Reheating: Leftover Greek yogurt pizza can be stored in an airtight container in the refrigerator for 2-3 days. To reheat, place slices in a preheated oven (around 350°F/175°C) for 5-10 minutes, or in an air fryer for 3-5 minutes, until warm and crispy again.
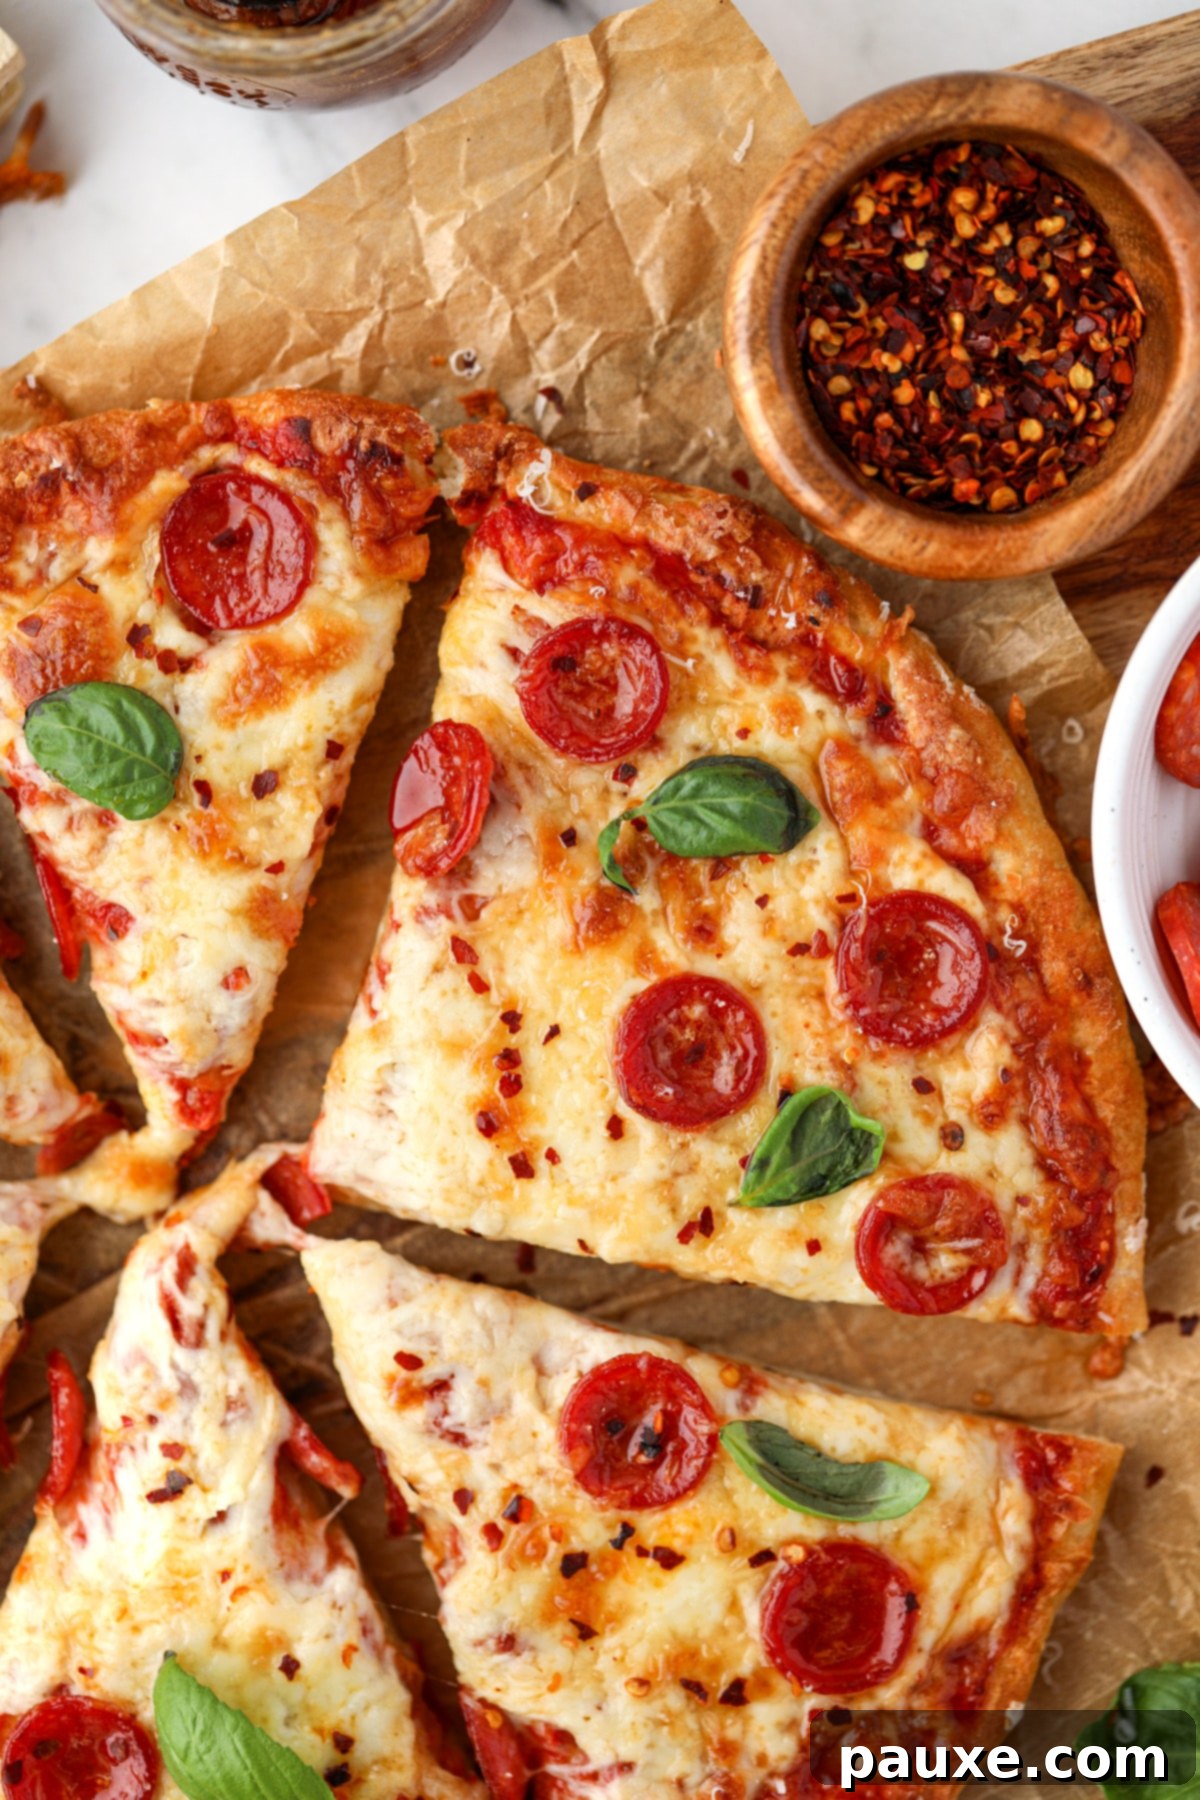
More Delicious Greek Yogurt Recipes to Explore
If you’ve fallen in love with the versatility and health benefits of Greek yogurt in this pizza recipe, you’ll be thrilled to discover how it can elevate other dishes. Greek yogurt is a powerhouse ingredient, perfect for adding creaminess, tang, and a significant protein boost to a wide array of recipes, from savory dips to sweet treats. Explore these other fantastic Greek yogurt creations:
- Creamy Greek Yogurt Ranch (Dip and Dressing)
- Flavorful Greek Yogurt Marinated Chicken
- Indulgent Strawberry Cheesecake Yogurt Bowl
- Satisfying Greek Yogurt Protein Dip
These recipes demonstrate the incredible versatility of Greek yogurt, proving it’s not just for breakfast. Incorporate it into your cooking to add healthy protein and a delightful texture to countless meals.
We hope you loved this groundbreaking recipe for Greek Yogurt Pizza! Your feedback means the world to us. Please consider leaving a 5-star review below or sharing your comments. You can also connect with us and tag your delicious creations on Instagram @dashfordinner. We love seeing what you make!

Greek Yogurt Pizza
Print Recipe
Pin Recipe
Rate This Recipe
Ingredients
Greek Yogurt Dough:
- 1 cup Greek yogurt* (245g)
- 1 ¼ cup all-purpose flour (189g, or gluten-free flour**)
- 2 teaspoons baking powder
- 1 teaspoon salt
- ½ teaspoon granulated garlic powder (optional)
For the Pizza:
- ⅓ cup pizza sauce
- 1 ½ cups shredded cheese (mozzarella or pre-shredded blend)
- Toppings of choice (pepperoni, mushrooms, etc)
Instructions
- Preheat the oven to 425ºF (220ºC) and prepare a large broiler-safe baking pan or baking stone, lined with parchment paper.
- Measure or weigh out the flour, baking powder, salt, and garlic powder (optional). Whisk well to combine thoroughly.
- Add the Greek yogurt to the bowl of dry ingredients.
- Slowly begin to combine the ingredients using a silicone spatula until large lumps form. It is challenging to fully combine with utensils, so we recommend using a clean or gloved hand to gently work the lumps and flour together into a solid, cohesive mass.
- Knead gently in the bowl until the dough ball is smooth and comes together, absorbing all the remaining flour. Do not over-knead.
- Form the dough into a round ball and place it on a large sheet of parchment paper.
- Press the dough into a flat circle using your hands (avoid a rolling pin), until a smooth circle about 9 ½ -10” in diameter and ¼-⅓” thick is formed. If the dough is very sticky, lightly dust with additional flour or place another sheet of parchment on top for pressing/rolling. Gently smooth any parchment wrinkles if needed.
- Transfer the parchment-lined pizza crust to your baking pan or pizza stone and bake in the preheated oven for 10 minutes.
- Once the 10 minutes are up, remove the baking pan and carefully flip the half-baked dough over completely using the parchment paper.
- Top the flipped pizza crust with pizza sauce, shredded cheese, and your chosen toppings.
- Return to the oven for an additional 10-12 minutes, or until the cheese is melted and bubbling and the edges of the crust are beginning to brown.
- Optional: For extra crispness and browning, switch the oven to “BROIL” and cook for an additional 1-3 minutes. Watch it carefully to prevent burning! (Ensure your baking pan or pizza stone is broiler-safe).
- Carefully remove the pizza from the oven and cool for 2-5 minutes before slicing. Garnish with grated parmesan cheese, fresh basil, hot honey, or other additions of your choice (optional).
Did you try this recipe?
Tag me at @dashfordinner and share your photos!
Notes
**Gluten-free: I’ve successfully tested this recipe using Bob’s Red Mill 1-to-1 Gluten-Free Baking Flour. The dough will be a little more brittle, requiring careful handling when rolling it out. For best results with gluten-free flour, I recommend making two smaller pizzas (divide the dough in half and roll each to about 6-7” in diameter). You’ll likely need slightly less flour: about 1 cup + 3 tablespoons (192g). Measuring the yogurt and flour by weight works best for consistency.
Air Fryer: Divide the dough into two smaller pizzas (or halve the recipe). Roll each circle to about 6-7 ½” and cut the parchment paper to fit your air fryer basket. Preheat your air fryer to 370ºF (188ºC) and cook for about 7 minutes. Then, flip the dough, add sauce, cheese, and toppings, and cook for another 6-8 minutes, or until browned and bubbly. Repeat for the second pizza if making two.
Personal pan size: The full recipe can be halved to make a single personal-sized pizza and prepared either in the oven or air fryer as directed.
Self-rising flour: If you have self-rising flour on hand, you can use it instead of all-purpose flour. Just omit the baking powder and salt listed in the recipe, as these are already included in self-rising flour.
Nutrition
Serving: 1slice
|
Calories: 204kcal
|
Carbohydrates: 23g
|
Protein: 13g
|
Fat: 7g
|
Saturated Fat: 4g
|
Polyunsaturated Fat: 0.3g
|
Monounsaturated Fat: 2g
|
Trans Fat: 0.002g
|
Cholesterol: 24mg
|
Sodium: 782mg
|
Potassium: 140mg
|
Fiber: 1g
|
Sugar: 2g
|
Vitamin A: 250IU
|
Vitamin C: 1mg
|
Calcium: 263mg
|
Iron: 2mg
Please note that some of my blog posts here at Dash for Dinner may contain affiliate links. If you make a purchase through these links, I will get a small commission at no additional cost to you. Please see my Disclaimer for more information.
